The use of databases is one of the most common ways to manage large amounts of data in an organization and therefore we must have applications that are reliable, secure, stable and give us comprehensive functions for each data that is entered into it . One of the most popular database platforms is phpMyAdmin which meets all expectations at the level of performance, architecture and functionality. phpMyAdmin is a utility written in PHP that will allow us to manage MySQL through the web. Among its most common tasks are permissions, user and permission management, database configuration, creation of tables or columns, etc. Thanks to the documentation included, users can share their ideas and information to make a common guide..
TechnoWikis will explain how we can install phpMyAdmin in Ubuntu 18.04 or 19.04 in a simple way and we will know how to protect access to that platform to avoid unauthorized changes.
What is phpMyAdmin
phpMyAdmin has been developed as a free PHP-based software tool, whose mission is the management of MySQL administration through the Web. phpMyAdmin supports a large number of operations in MySQL and MariaDB. There, frequently used operations such as database management, tables, columns, relationships, indexes, users, permissions, and so on, can be carried out through the user interface, but it is also in the ability to execute directly any SQL statement from console.
phpMyAdmin is available in 72 languages ​​and is compatible with the LTR and RTL languages..
PhpMyAdmin features
Among the most outstanding features of phpMyAdmin we have:
- It has a user friendly web interface.
- Ability to manage various servers.
- It generates graphics on the design of the database in multiple formats.
- You can create complex queries using Query-by-example (query, for example) (QBE).
- Executing a global search in a database or a subset of it.
- You can convert stored data to any format using a set of predefined functions.
- It allows you to export the data to various formats such as CSV, SQL, XML, PDF, ISO / IEC 26300 - text files and spreadsheet of OpenDocument, Word, LATEX and more.
- Support for much of MySQL features such as database management, tables, views, fields and index, create, copy, drop, rename and alter databases, tables, fields and indexes, execute, edit and mark any statement SQL, manage user accounts and MySQL privileges and more.
Now we will see how to install and secure phpMyAdmin in Ubuntu 18.04 or 19.04.
1. Install phpMyAdmin on Ubuntu 19.04
Step 1
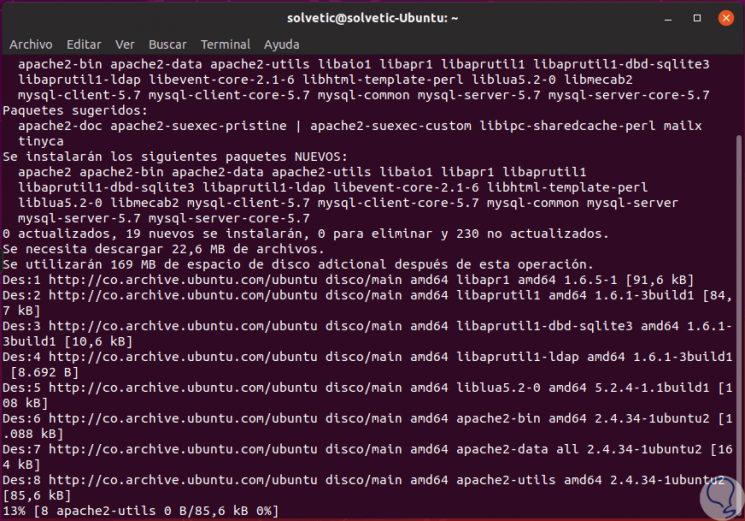
The first step to take will be to install Apache and MySQL on the system, this action can be executed with the following command:
sudo apt-get install apache2 mysql-server -y
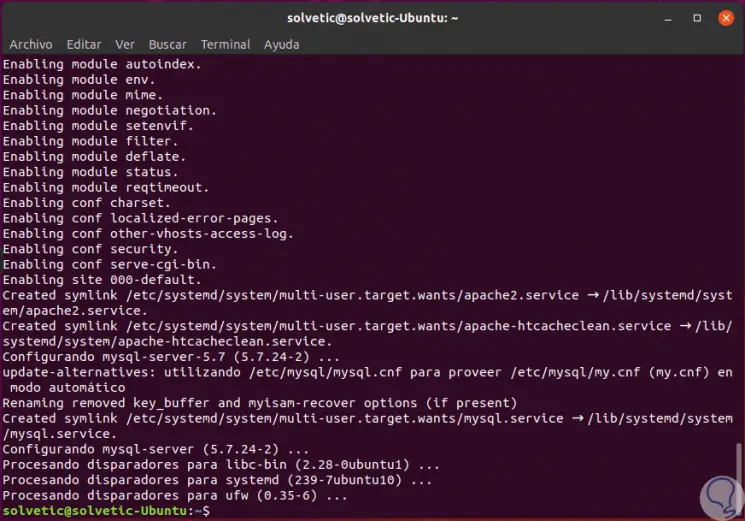
Step 2
Once this process concludes we will see the following:
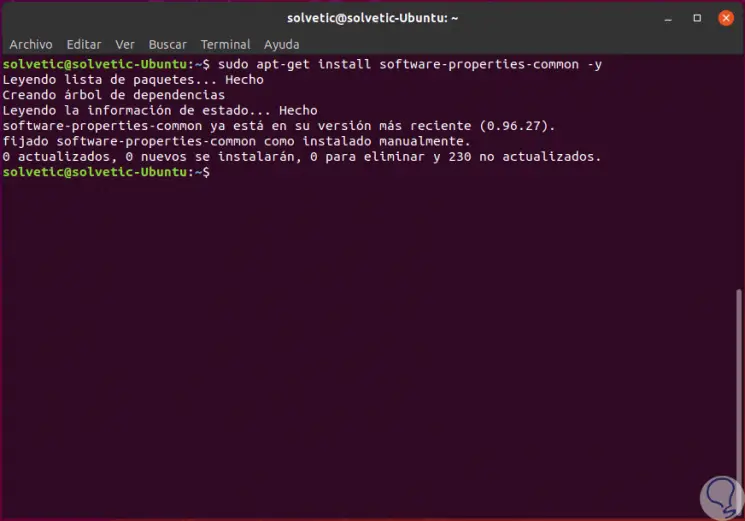
Step 3
By default, phpMyAdmin is not available in the default Ubuntu 18.04 or 19.04 repository, for this, we must add the third-party PHP repository to the system by first running the following line:
sudo apt-get install software-properties-common -y
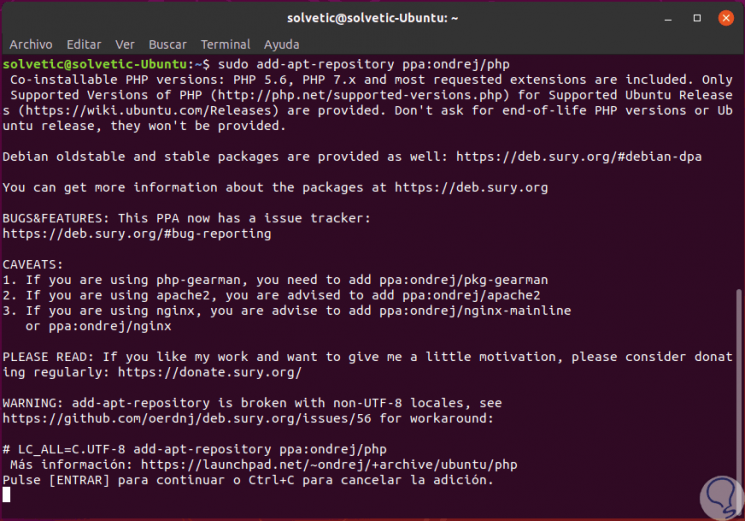
Step 4
Then we add the repository by running. There we press the Enter key and wait for the process to complete.
sudo add-apt-repository ppa: ondrej / php
Step 5
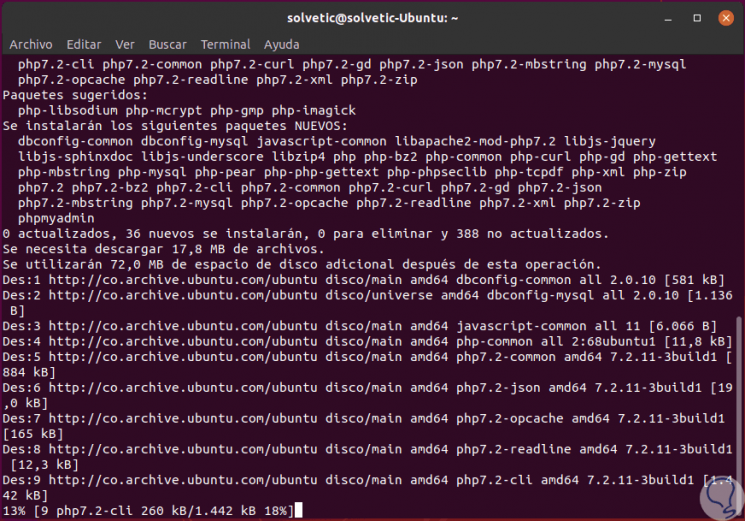
As soon as the repository is added, we will install phpMyAdmin by running the following command:
sudo apt-get install phpmyadmin php-mbstring php-gettext -y
Step 6
During the installation process, the following message will be displayed indicating that we select the web server to use automatically:
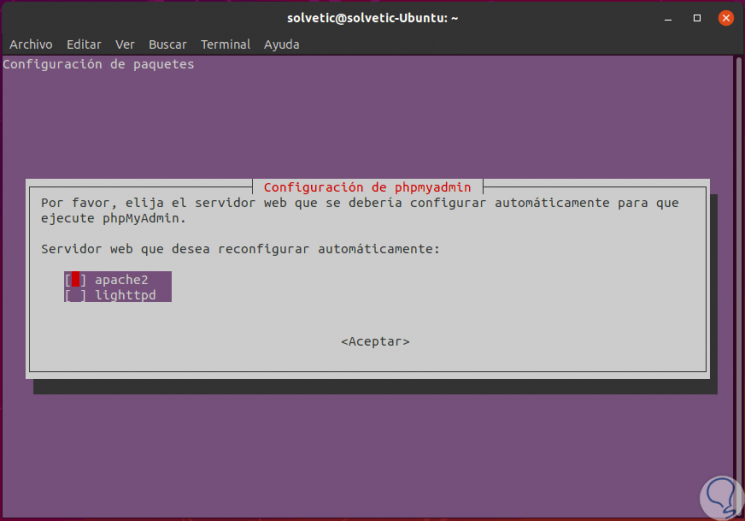
Step 7
There we select “Apache†by pressing the space bar and pressing Enter, now we will see the following message associated with the database for phpMyAdmin:
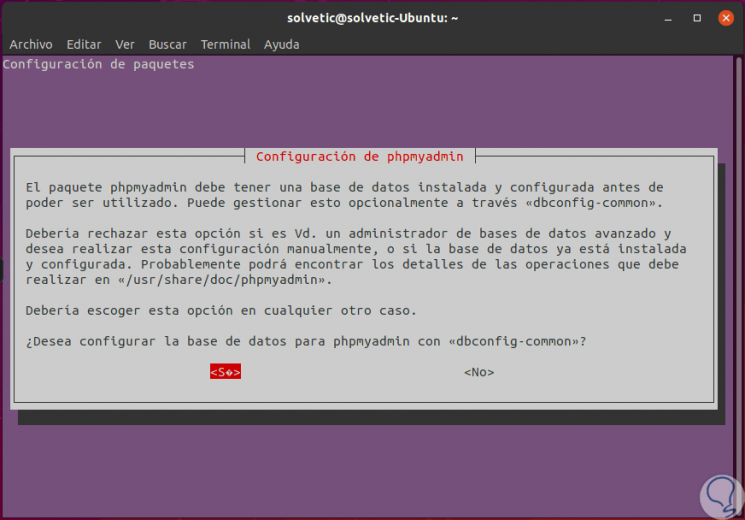
Step 8
Select "Yes" and press Enter, and later you will need to enter the application password:
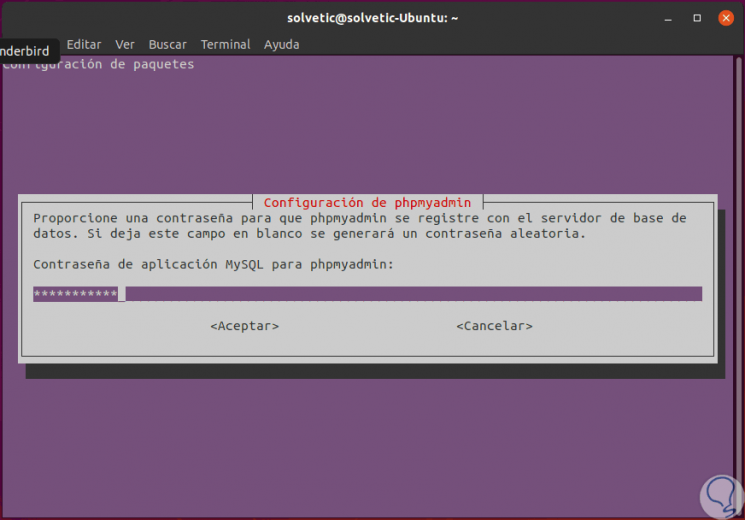
Step 9
Click on Accept and we must confirm it:
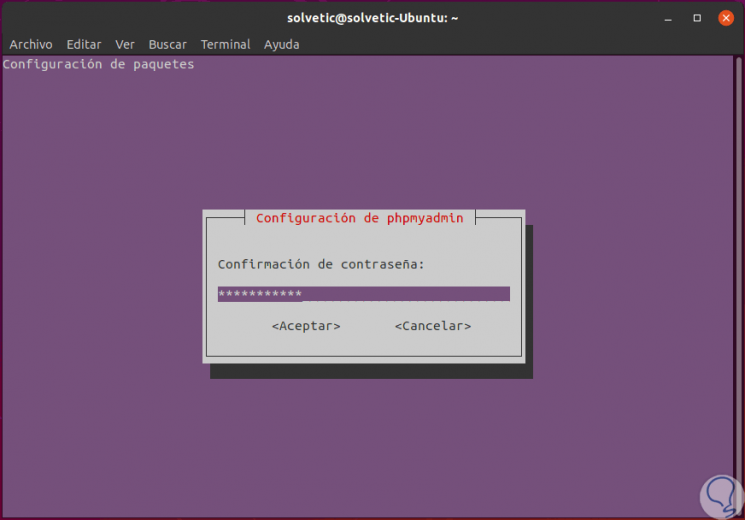
Step 10
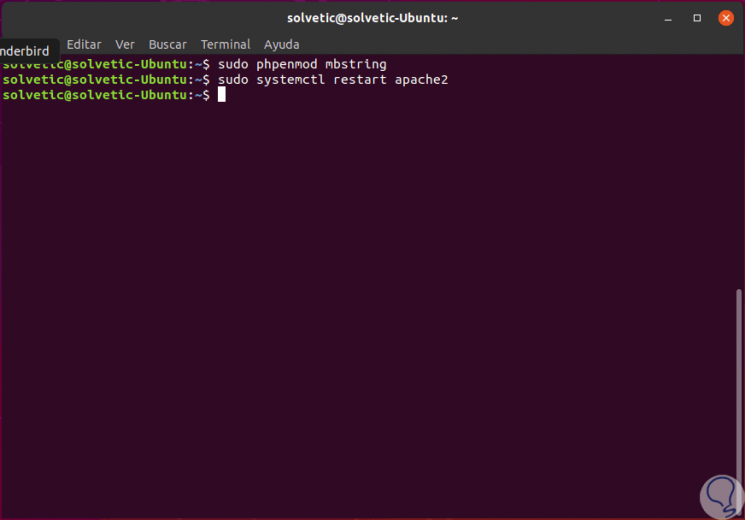
Once the phpMyAdmin installation process is complete, we must enable the PHP mbstring extension with the following command:
sudo phpenmod mbstring
Step 11
Then we restart Apache to apply the changes:
sudo systemctl restart apache2
2. Configure phpMyAdmin user authentication in Ubuntu 19.04
phpMyAdmin automatically creates a database user called phpmyadmin with the administrative password that we enter in the installation process, but for security it is advisable to create a separate user to manage the databases through the phpMyAdmin web interface.
In the latest version of MariaDB, the MySQL root user has been configured to authenticate using the auth_socket plug-in by default, so if you want to log in to phpMyAdmin as a MySQL root user, we must change the auth_socket authentication method to mysql_native_password..
Step 1
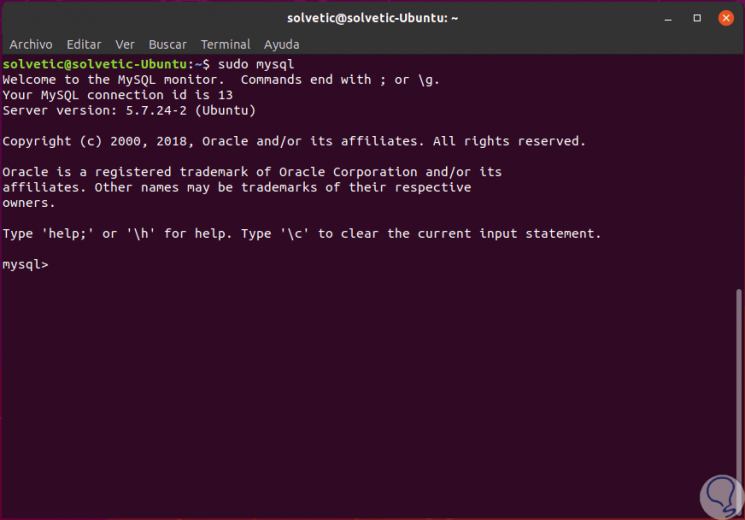
First, we are going to log in to the MySQL Shell with the following line:
sudo mysql
Step 2
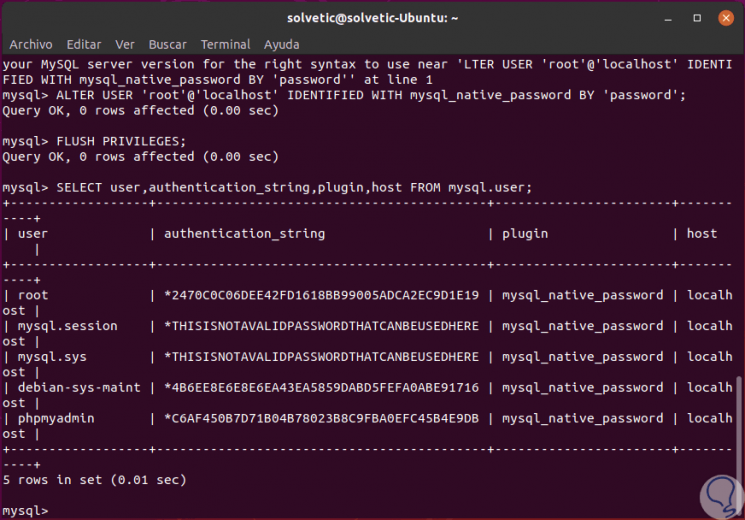
Now, let's verify the MySQL user authentication method with the following command:
SELECT user, authentication_string, plugin, host FROM mysql.user;

Step 3
We can see that the root user uses the auth_socket plugin. To configure the root user to authenticate with a password, we must execute the following command:
ALTER USER 'root' @ 'localhost' IDENTIFIED WITH mysql_native_password BY 'password';
Note
password can be replaced by the desired password.
Step 4
We apply the changes by executing:
FLUSH PRIVILEGES;
Step 5
We can check the authentication method by running:
SELECT user, authentication_string, plugin, host FROM mysql.user;
Step 6
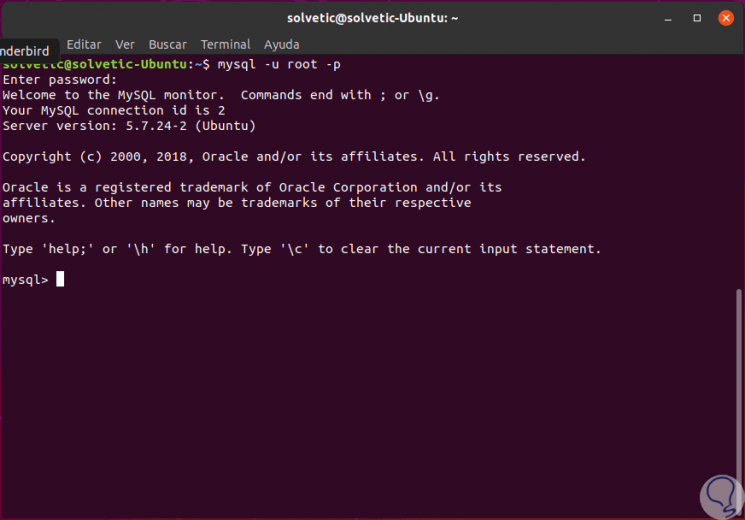
We see that the authentication method has been modified. Next, we will create a separate user which we will call "phpmyadminuser" in order to connect to phpMyAdmin. The first step is to log in to MySQL with the following command:
mysql -u root -p
Step 7
There we will enter the password set in the previous step:
Step 8
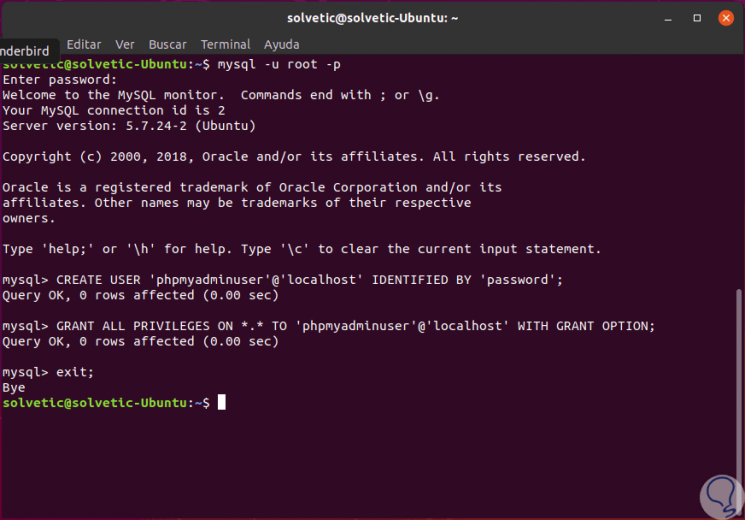
First, we will create the user and assign the password:
CREATE USER 'phpmyadminuser' @ 'localhost' IDENTIFIED BY 'password';
Step 9
Then we grant the correct privileges to phpmyadminuser with the following command:
GRANT ALL PRIVILEGES ON *. * TO 'phpmyadminuser' @ 'localhost' WITH GRANT OPTION;
Step 10
Finally we leave the Shell running:
exit;
3. Access phpMyAdmin in Ubuntu 19.04
Step 1
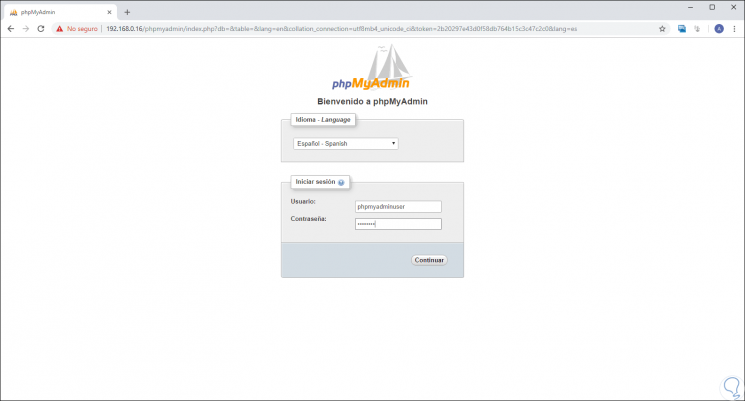
Now, we go to a browser and enter the following syntax:
http: // IP_address / phpmyadmin
Step 2
There we will use the desired language and enter the assigned username and password, then click on the "Continue" button to access phpMyAdmin:
4. Secure phpMyAdmin in Ubuntu 19.04
We can see that phpMyAdmin is installed and configured, but for security it is advisable to protect the instance of phpMyAdmin to prevent unauthorized access. It is possible to protect phpMyAdmin from using the authentication and authorization functions .htaccess integrated in Apache.
Step 1
For this method, we must first enable the use of .htaccess file overrides by editing the phpmyadmin.conf file like this:
sudo nano /etc/apache2/conf-available/phpmyadmin.conf
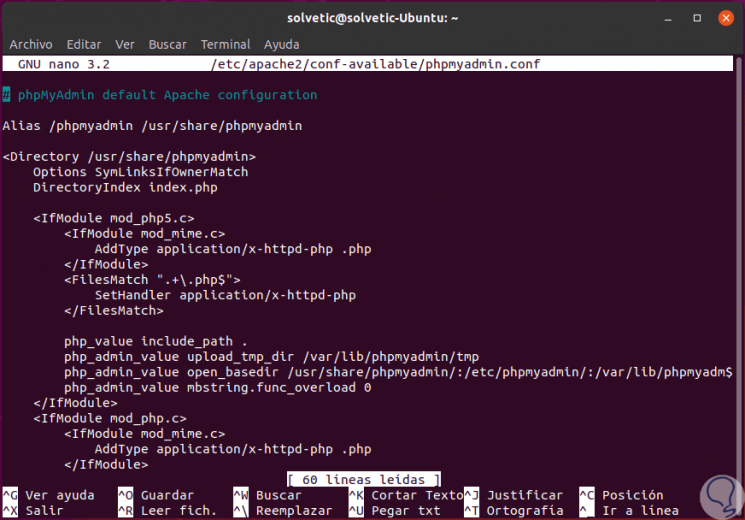
Step 2
There we will add the “AllowOverride All†line so that the structure is as follows:
<Directory / usr / share / phpmyadmin> Options SymLinksIfOwnerMatch DirectoryIndex index.php AllowOverride All
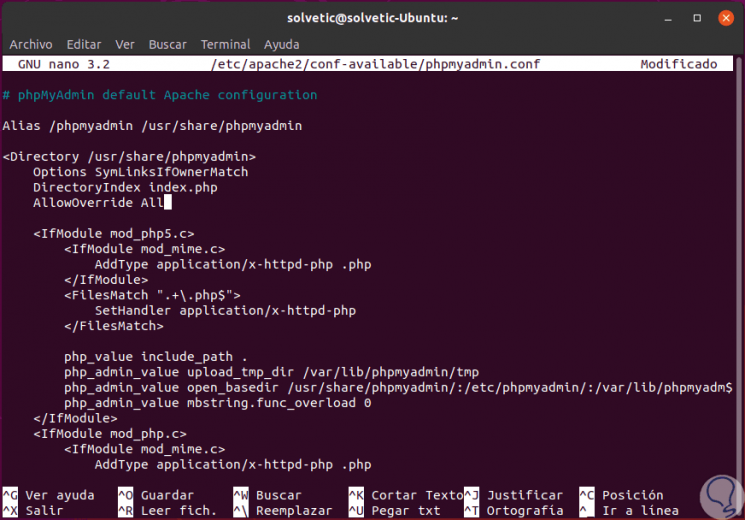
Step 3
We save the changes using the following key combination:
+ O Ctrl + O
We leave the editor using:
+ X Ctrl + X
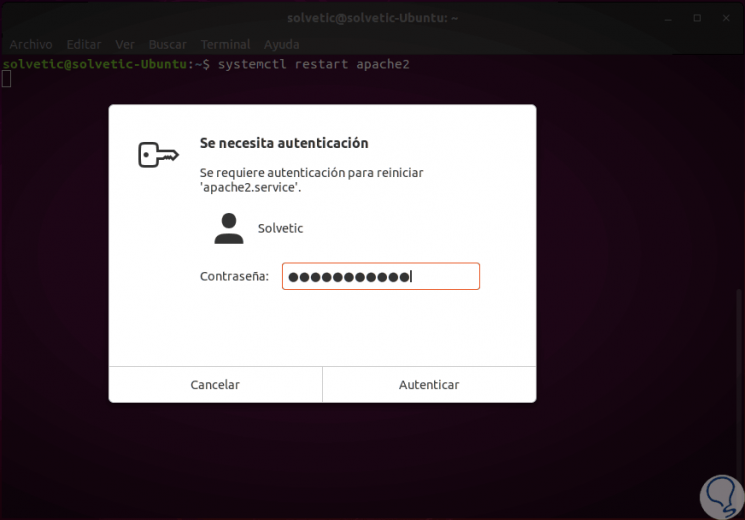
Step 4
Next, we must restart the Apache service by running:
sudo systemctl restart apache2
Step 5
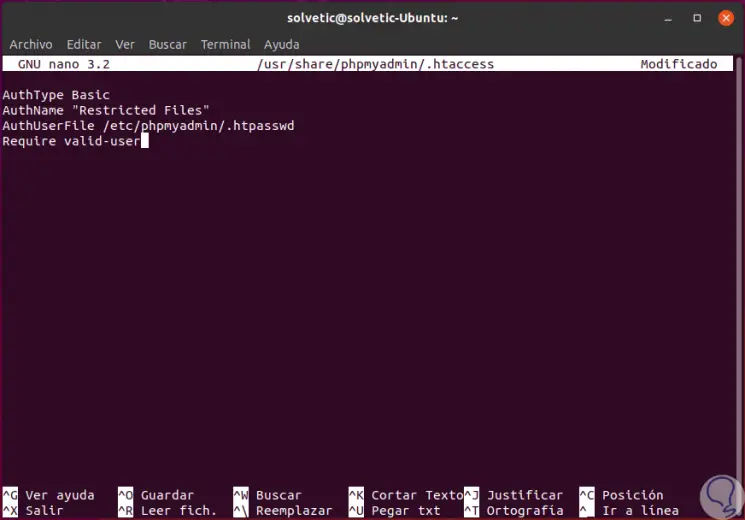
Now we are going to create an .htaccess file inside the phpmyadmin directory by running:
sudo nano /usr/share/phpmyadmin/.htaccess
Step 6
In this file we will add the following:
AuthType Basic AuthName "Restricted Files" AuthUserFile /etc/phpmyadmin/.htpasswd Require valid-user
Step 7
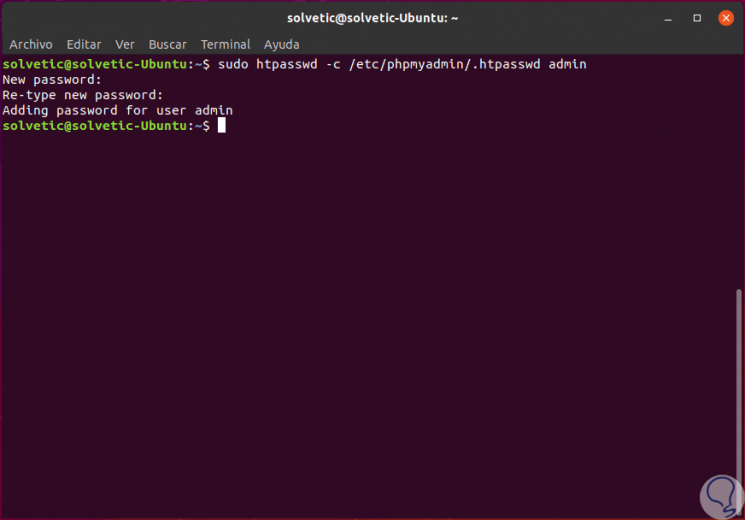
We save the changes and leave the editor. Now we are going to create a user called admin with the htpasswd utility:
sudo htpasswd -c /etc/phpmyadmin/.htpasswd admin
Step 8
There we must enter and confirm the password of this:
Step 9
Now, when we access again “the following pop-up window will be displayed where we will enter the credentials of the newly created admin user:
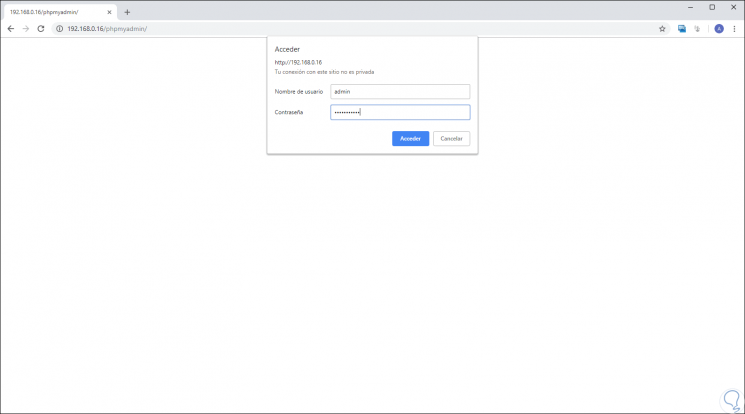
Step 10
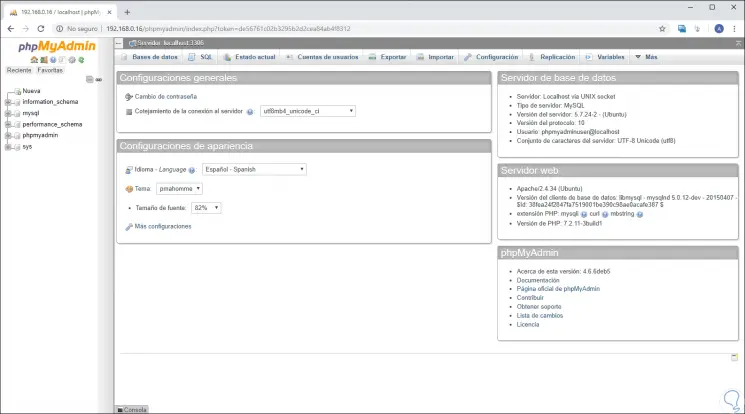
Once entered, click on "Access" and so we will be in the environment of phpMyAdmin:
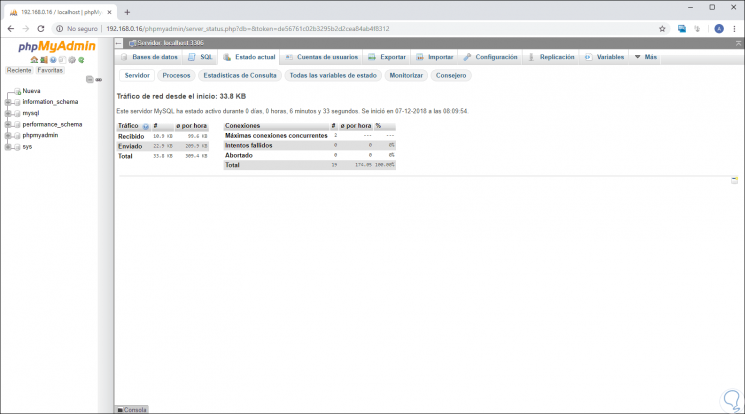
In this way, phpMyAdmin becomes an integral solution for all database work from the web on Linux Linux systems.