The Windows 10 operating system has been developed thinking of facilitating the management tasks by its millions of users both in aspects of security, accessibility, control and performance, without a doubt that files are one of the elements of Windows 10 to which we access constantly and for this reason Windows 10 has integrated a function called "Offline Files" which allows files and folders on the network to always be available offline even when we are not connected to the network..
Thanks to this function it will be possible to access the resources of the network while we are disconnected, for this we must mark a file or a folder as "always available offline" in order to keep that copy stored on the computer locally. Sometimes our network connections present problems and we must face them in order to have an adequate use of the Internet. If you encounter any type of error regarding your network connections, here you will find a solution guide to help you solve it in Windows 10.
By using the always offline mode of files in Windows 10, faster access to cached files and redirected folders will be offered. Always offline allows us to use less bandwidth since users are always working offline, even when they are connected through a high-speed network connection without affecting system resources..
When working online, the performance of Windows file access is based on the speed of the network and the server, while when working offline, the files are housed in the Offline Files folder based on the speeds Local access
When you change a file to offline mode
A device normally switches to this mode without connection in situations such as:
- When mode is always enabled Offline mode
- The server is not available.
- The network connection is slower than normal
- You manually switch to Disconnected mode through the Work Offline button in File Explorer.
This offline mode is available in Windows 10 only in the Pro, Enterprise and Education editions.
1. Enable Always offline option for files in Windows 10
Before enabling this mode in a Windows 10 file, it will be necessary to activate the feature since otherwise it will not work.
Step 1
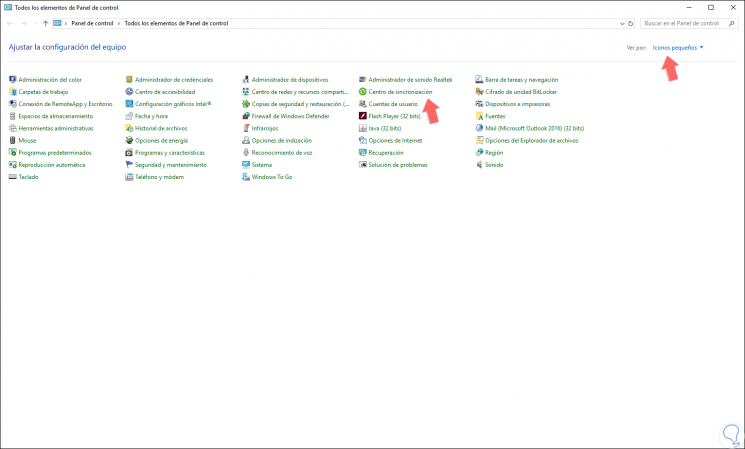
To enable this feature we must go to the Control Panel and in the "View by" field select "Small icons or Large icons", we will see the following:
Step 2
There we select the option "Synchronization Center" and the following will be displayed:
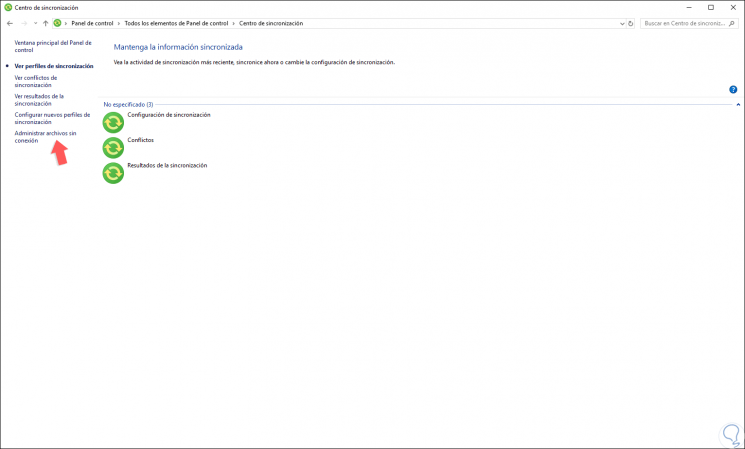
Step 3
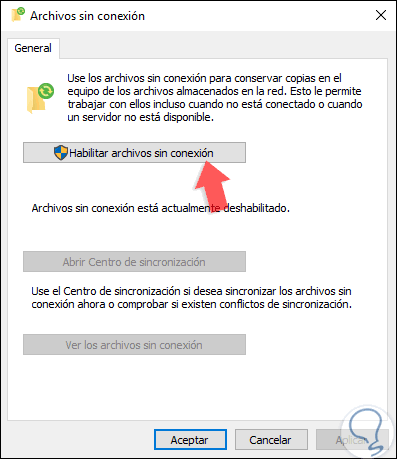
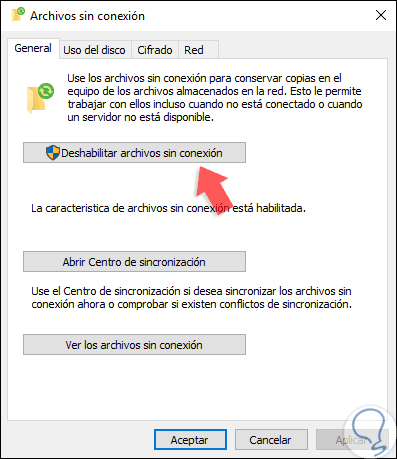
There we click on the option “Manage files offline†and the following window will be displayed. There we click on the “Enable offline files†button and click on OK to apply the changes.
Step 3
Another option to enable this feature is through the Windows 10 registry editor but before that it will be necessary to back up the data in case something goes wrong.
2. Enable Always offline option for files from Registry Editor in Windows 10
Step 1
Now, to access the registry editor we will use the following key combination and execute the regedit command and press Enter,
+ R
Regedit
Step 2
In the displayed window we will go to the following route:
HKEY_LOCAL_MACHINE \ SYSTEM \ CurrentControlSet \ Services \ CSC
Step 3
There, we must place the DWORD value “Start:
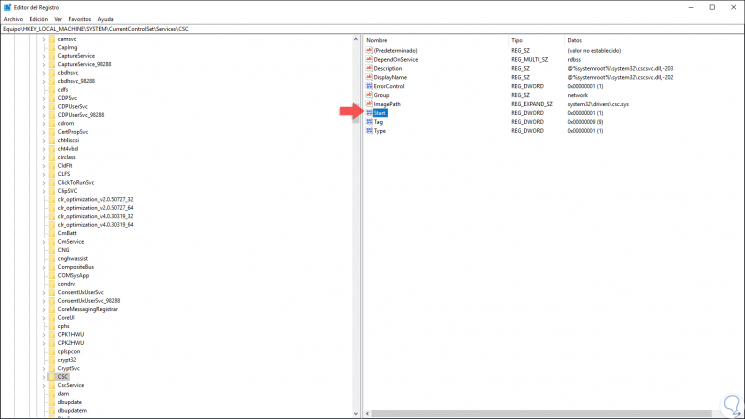
Note
If it does not exist, we can create it by right clicking and selecting the option “New / DWORD Value (32 bits)â€.
Step 4
We double click on this value and in the field "Value information" enter the number 1:
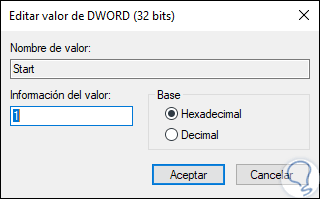
Step 5
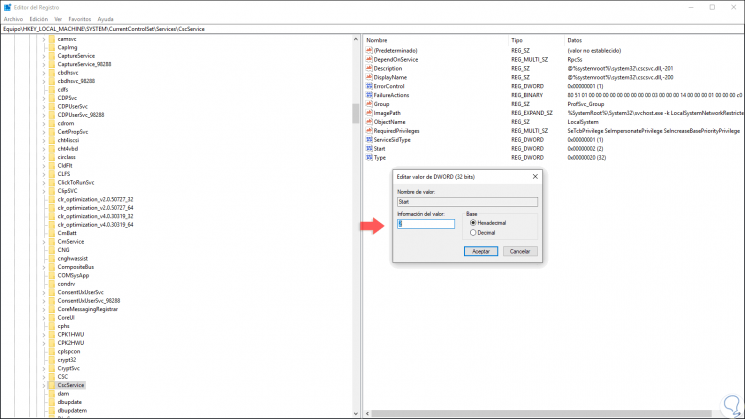
Click on OK to apply the changes, now we must go to the following route:
HKEY_LOCAL_MACHINE \ SYSTEM \ CurrentControlSet \ Services \ CscService
Step 6
There we will locate the DWORD value called “Start†and double clicking on it, enter the number 2 in the “Value information†field. After using any of the indicated steps we must restart Windows 10 to apply the changes.
3. Enable Always offline mode for files in Windows 10
Step 1
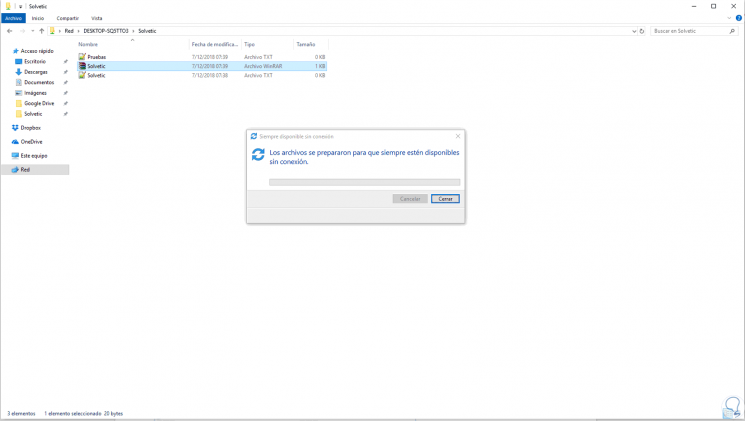
Once you activate the feature, we go to the file browser and in the "Network" section we will right click on the folder or file that we want to be available offline, the following will be displayed:

Step 2
There we select the option “Always available offline†and automatically the file or folder will be prepared for this method:
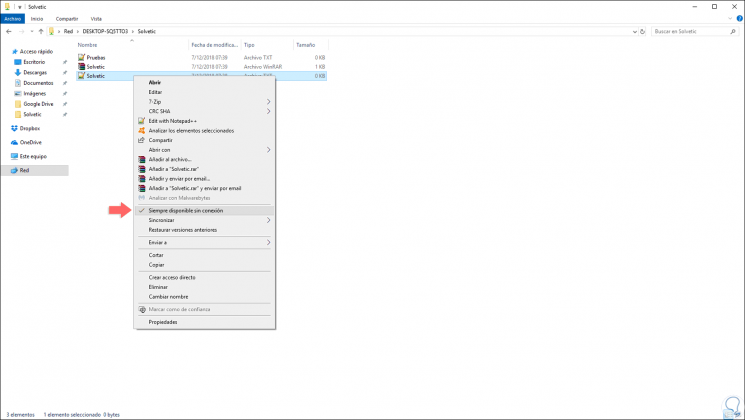
Step 3
Click on Close to exit this assistant. If we right click again on the selected file we will see that the “Always available offline†line is active:
Step 4
Now we go back to the Synchronization Center from the Control Panel where we will see the following:
Step 5
There we can perform the following actions:
- Disable offline file functionality
- Access the synchronization center to update the edited items
- View files available offline
Step 6
If we agree to see what files are available with this method, we will see the following:

Step 7
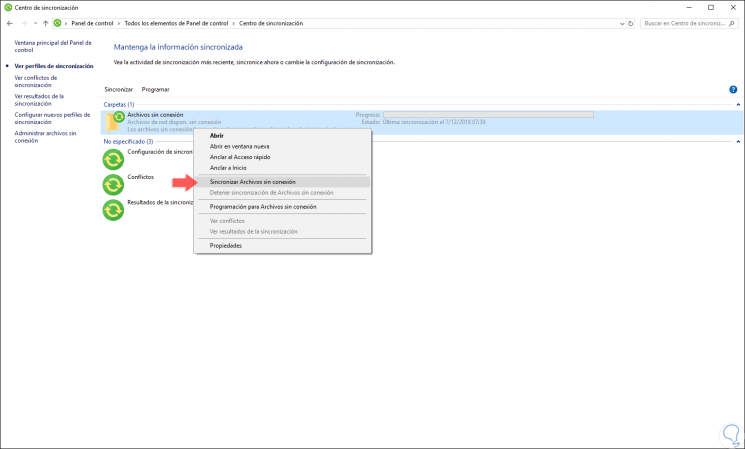
There we will know in detail what files are available with this method, now, if we want to execute the synchronization to apply changes, we must go to the “View synchronization profiles†line and right click on the “Offline files†folder and select the "Synchronize files offline" option:
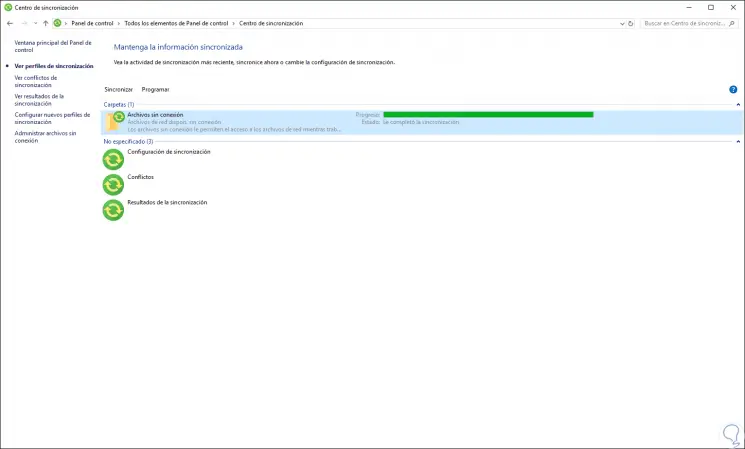
Step 8
The process of synchronization of the files will be automatically given:
Thanks to this functionality of Windows 10, it will be possible to access various files in a practical way, but without using high resources of the computer..