The current world revolves around the network and thanks to it it will be possible to perform hundreds of tasks and functions that let you know the taste or preferences of other users. This is achieved thanks to online surveys which can be created with different options of questions and options and in a very simple way to have the opinions of the people who answer these surveys. Google offers us a simple and functional alternative to create an online survey in a simple way through Google Forms where we have advantages such as Google support and that to access it it is enough to have a Google account..
Google Forms provides the option to customize the format of the survey already using a logo or personal photo and automatically the application is responsible for completing the survey design . With Google forms, you have the ability to establish questions, fundamental in the survey, and use them from the multiple choice format to drop-down options or linear scales. In addition to this it will be possible to add images and videos from YouTube or make use of the new branch of pages and filter questions.
1. Create Google Docs form
Step 1
To access this functionality we must go to the following link:
Google Drive
Step 2
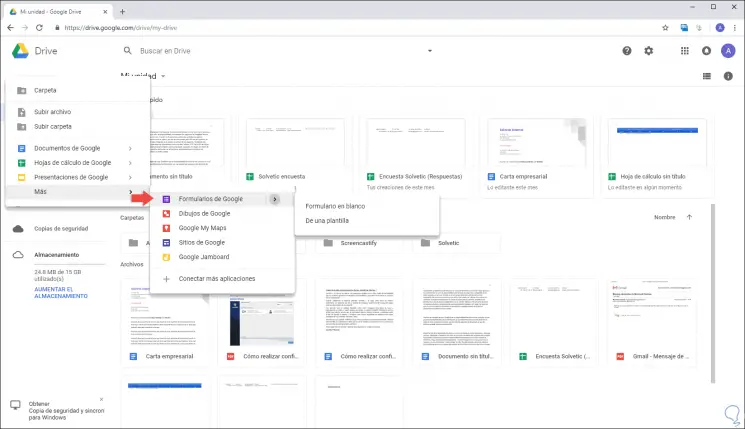
Once there, click on the “New / More / Google Forms†button:
Step 3
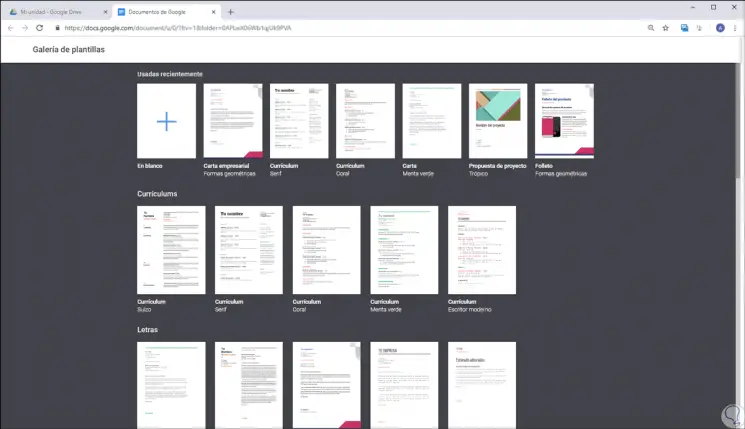
There we can select the “Blank Document†option to create a clean presentation or select “From a template†to take a base:
Step 4
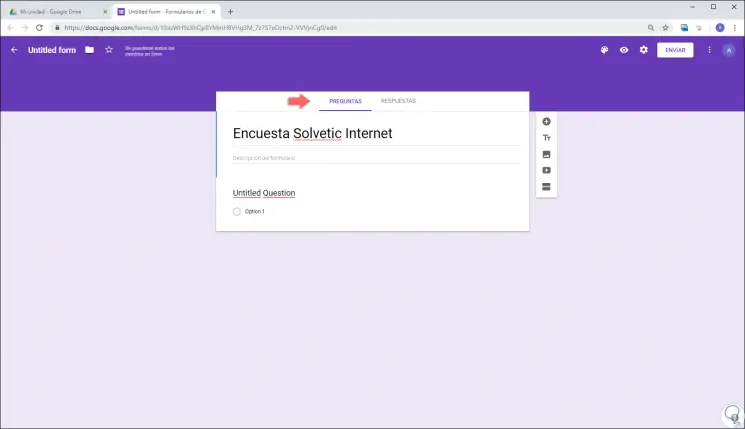
For this case we will use a blank form and in the next window we will assign a name to our survey:
Step 5
We can see that we have two tabs, Questions and Answers, we can configure the format independently for the questions and answers by clicking on each tab and entering the appropriate values. Actions such as:
- Add title and description
Step 6
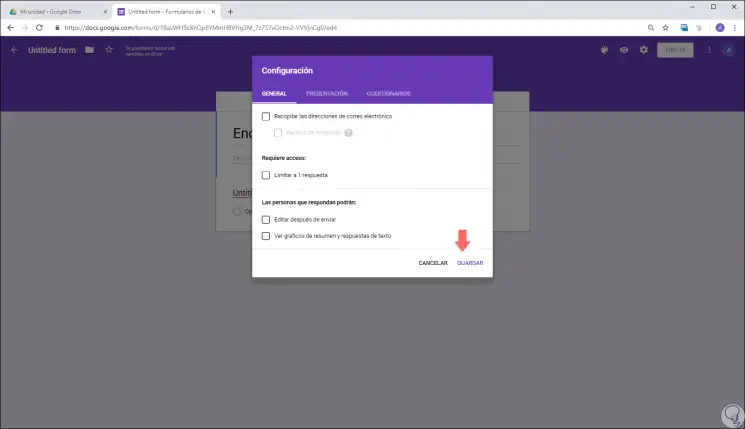
When accessing a tab, it will be possible to access the formatting options by clicking on the gear icon (Settings) and navigating through the available options:
Step 7
We have three sections that are as follows. Once we apply any change, click on the "Save" button.
general
There we can establish values ​​such as:
- Store used email addresses.
- Limit to only one answer.
- See summary charts and more.
Presentation
There it will be possible to configure:
- Show the link to send the reply.
Questionnaires
There we have options such as:
- Activate the form as a questionnaire.
- See right and wrong questions and more.
2. Create questions in Google Docs
Step 1
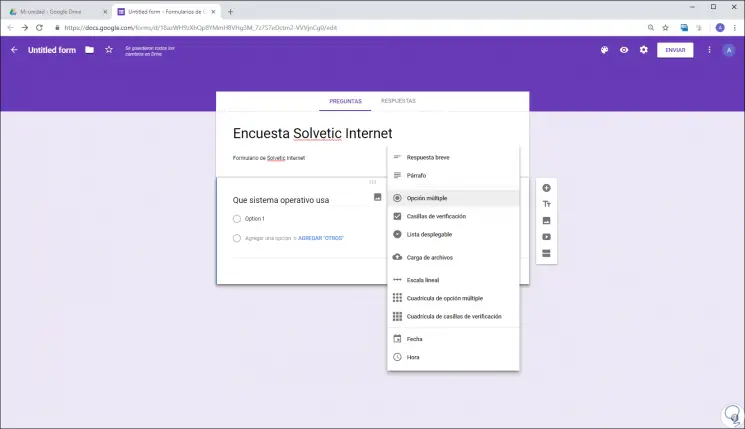
To assign the question, we click on the name field and enter the question to ask, then it will be necessary to define the type of answer associated with that question:
Step 2
We can see a series of options such as the following. The type of answer will depend on the type of questions to ask in the survey.
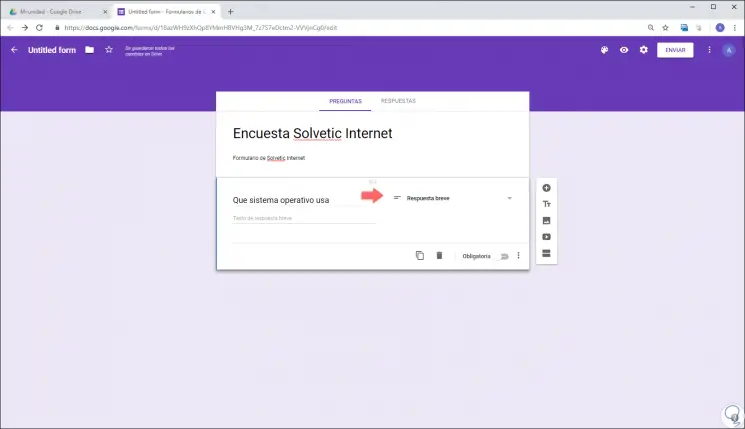
- The short answer and the paragraph generate a blank field for the user to complete with their response
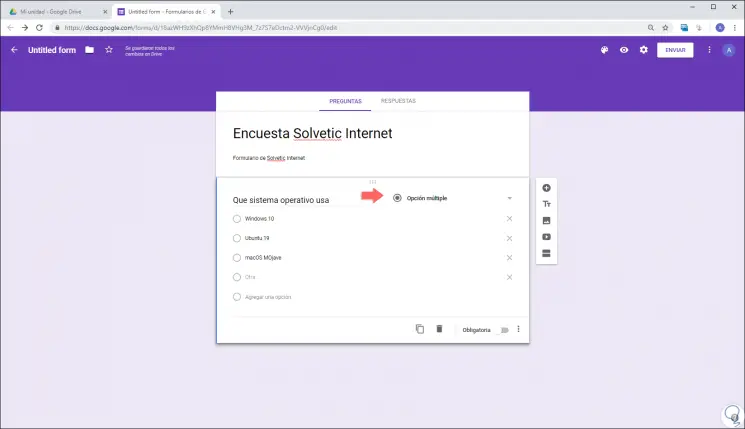
- Multiple selection allows users to select a response based on a series of options added in the creation of the form, while the check boxes give users the possibility to select multiple responses simultaneously.
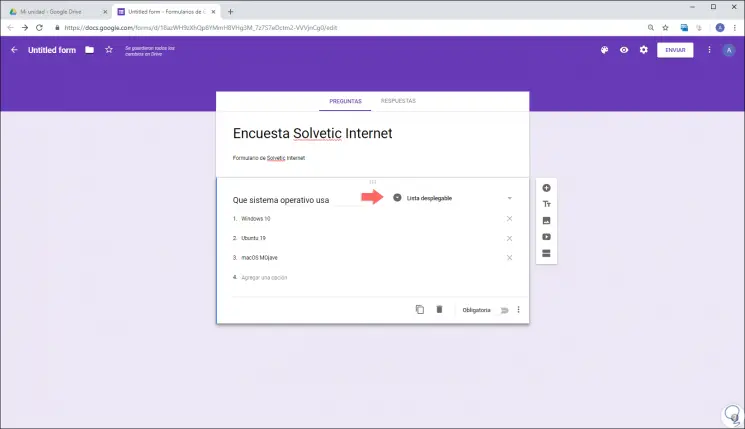
- With the drop-down menu, users are given the possibility of accessing a field where various options will be displayed and there selecting the desired response:
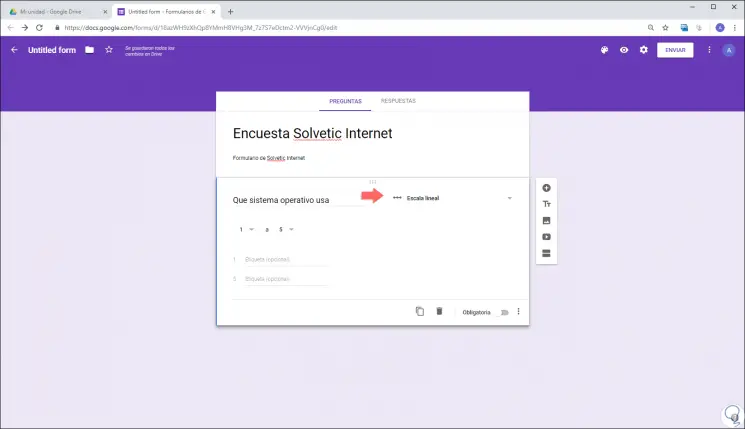
- The linear scale allows users to respond by selecting a rating of a range such as 1 to 5 depending on the configuration applied.
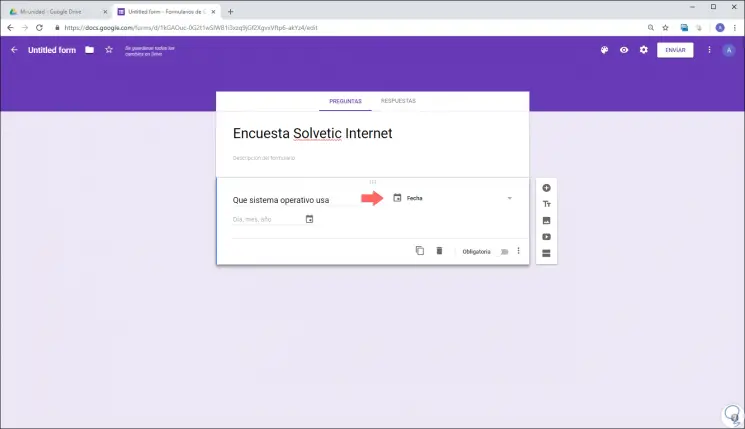
- The date and time gives the recipients the possibility to select a specific date or time
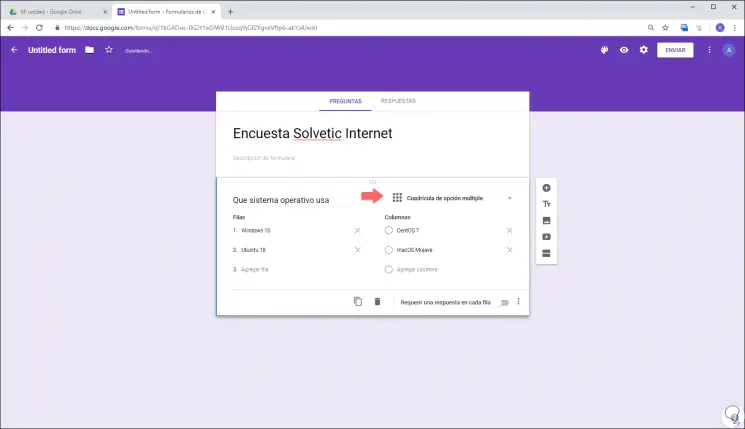
- In the multiple grid option we can add several options for users to select more than one answer.
3. Add questions in Google Docs forms
Step 1
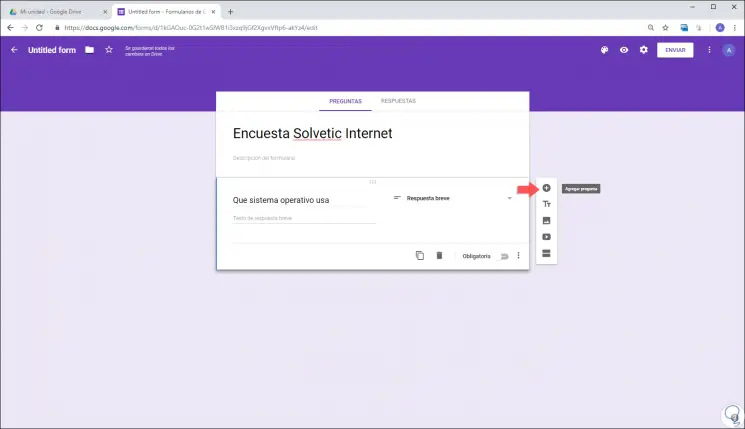
If we want to add more questions to the form, we must click on the + sign located in the right sidebar:
Step 2
The Add section (=) icon in the right sidebar gives us the possibility to add a new section, called Section Header, which will lead to a more extensive survey. At the bottom, we can click on the "Mandatory" switch in order to make a question mandatory or click on the duplicate or trash icons to clone or delete the selected question.
4. Customize Google Docs form
Step 1
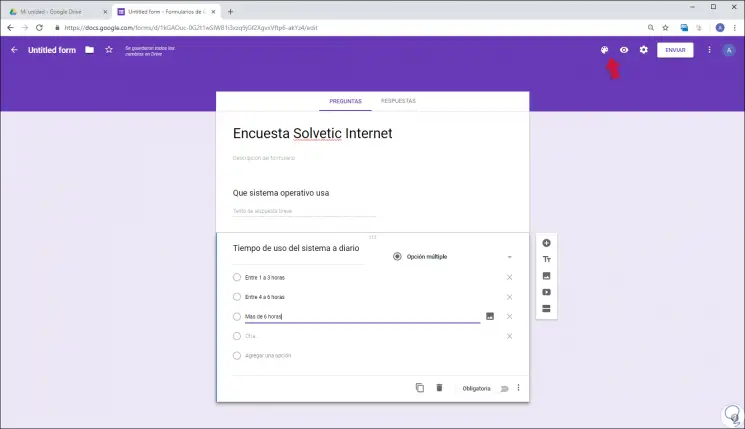
To create a much higher visual impact, we can click on the color palette icon in order to select the background for the survey:
Step 2
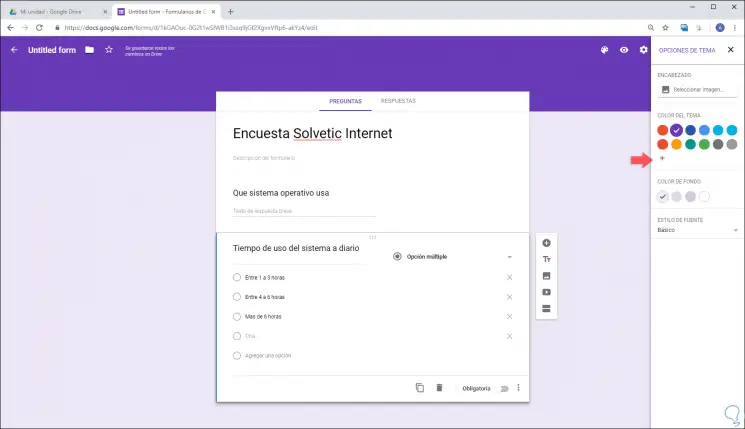
We can choose any of the available colors or click on the + sign to set more customization options, or we can click on the “Select image†button to establish a background to the survey:
Step 3
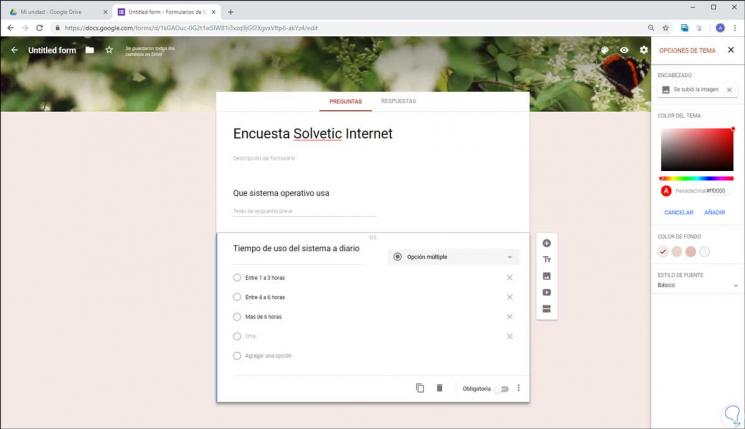
Once the image is selected we click on “Select†and it will automatically be applied to the survey:
Step 4
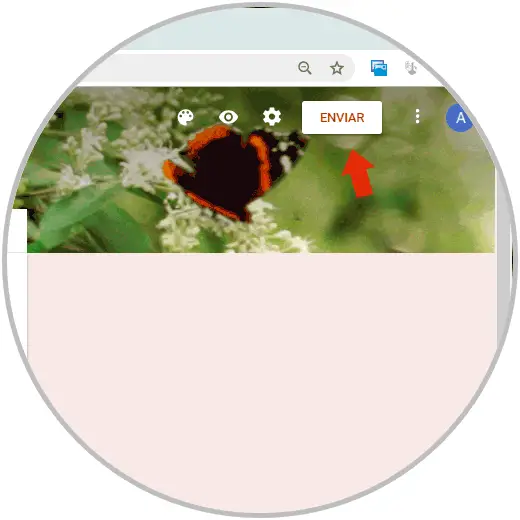
Once the survey questions are defined, click on the "Send" button to send the survey to the selected recipients in the "To" field, but the general options are:
- Send the survey by email.
- Send the survey through a link that can be shared.
- Insert the form into a website through the Embed HTML option.
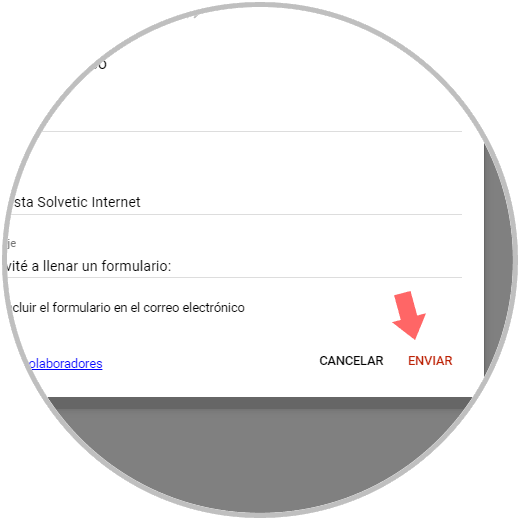
Step 5
In this case it has been sent through the mail where the recipient will see the following:
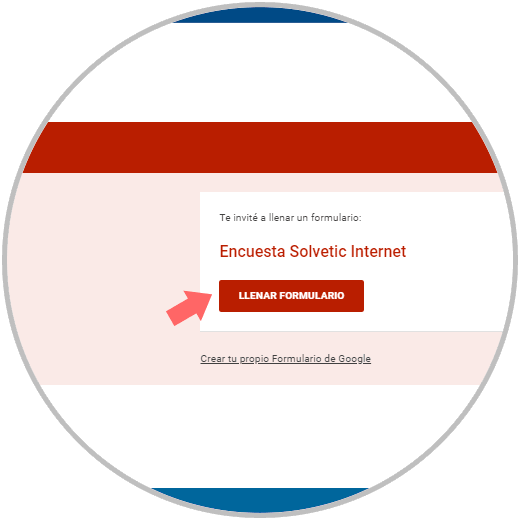
Step 6
There you must click on the “Fill in form†button and you will be redirected to the survey environment with the different response options created:
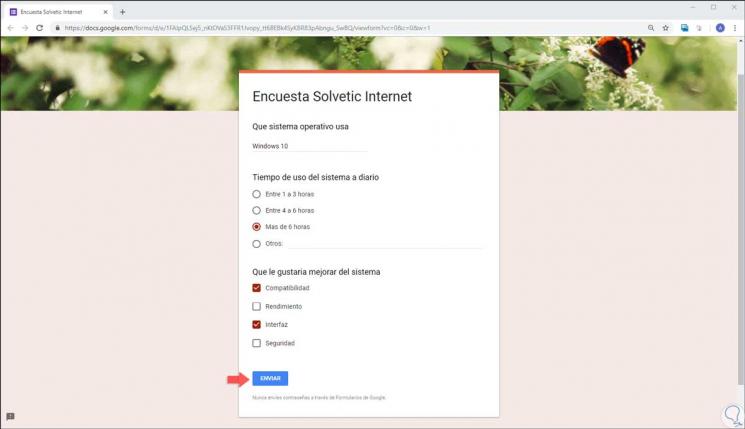
Step 7
By clicking on the "Send" button you will receive a notification which can be customized from the "Settings" option on the form:
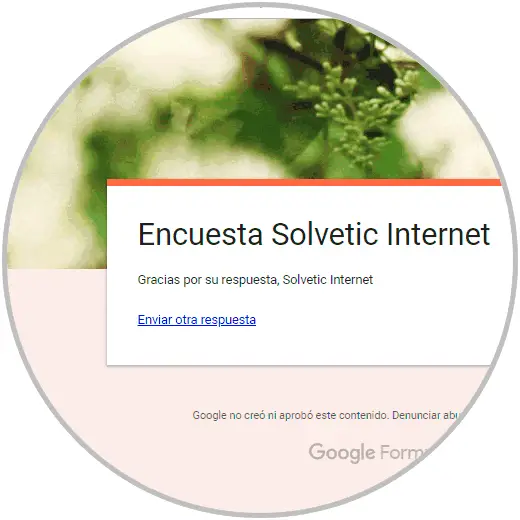
Step 8
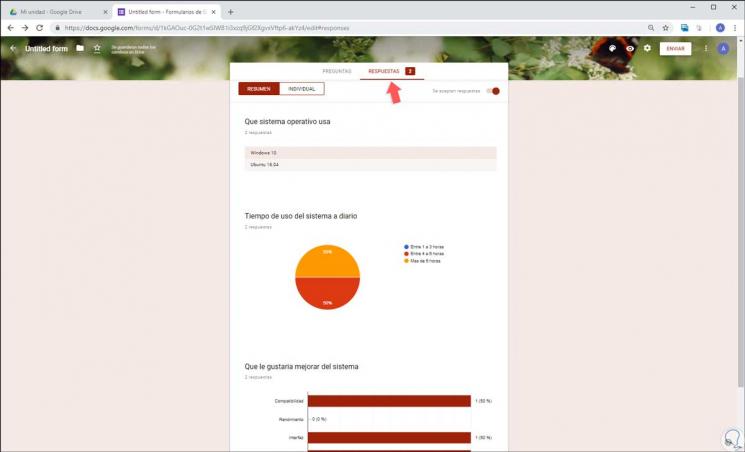
Now, in the form panel, we can go to the “Answers†​​tab to see graphically each data that has been completed in the surveys carried out:
Step 9
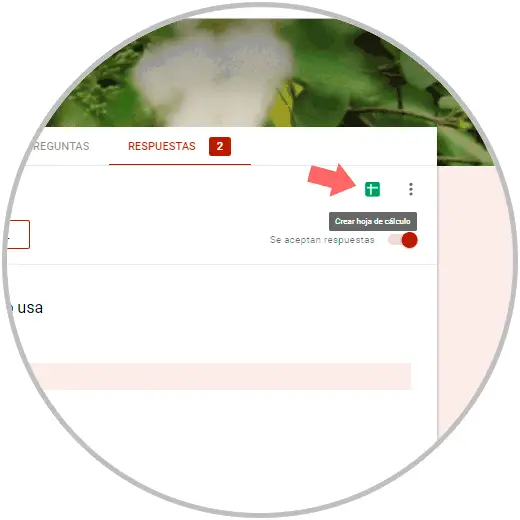
In order to keep a more precise control of the data, we can create a spreadsheet and link it with the answers, for this we click on the upper icon “Create spreadsheet†and then we can create a new sheet or use an existing one :
Step 10
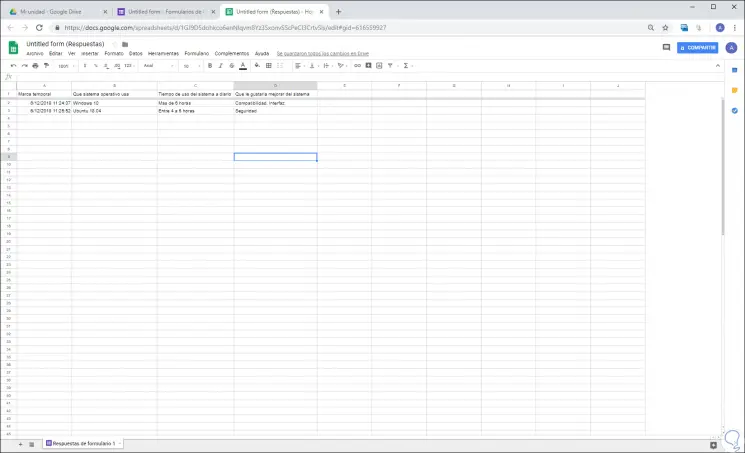
The result will be as follows. There we will take the date and time the survey was carried out along with the answers entered, this will help to better control them.
Step 11
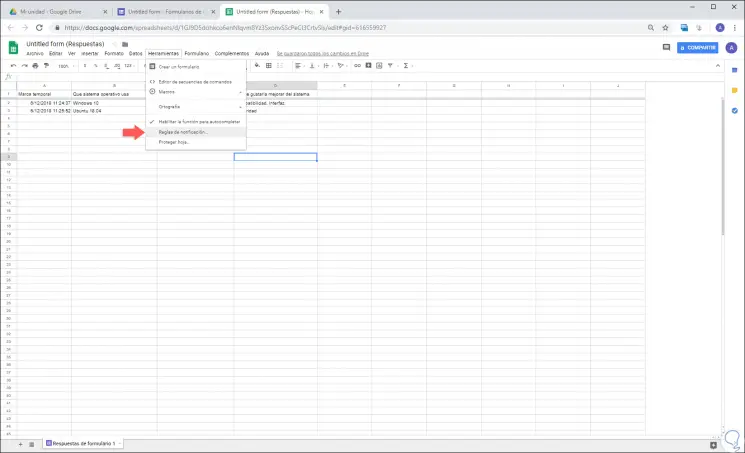
If we want to be aware of the new notifications, we can activate the spreadsheet to alert us to a new response, for this we go to the "Tools" menu and there we select "Notification rules":
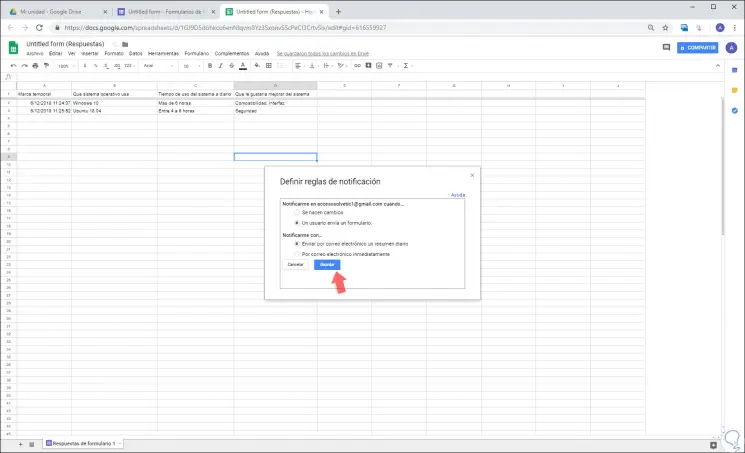
Step 12
The following window will be displayed where we will activate the boxes that best adapt to the need for information. Click on "Save" to apply the changes.
In this way, the surveys created through the Google forms give us a series of useful tools and options so that each response sent is treated in the correct way and a specific control of each one is taken, which will allow a better control and a better quality of the general purpose of the survey..