Windows 10 is an operating system that integrates numerous functions to help both users and administrators to manage each component, application and integrated service in a much more centralized way. One of these features is the possibility of restricting the use of bandwidth and although it seems unbelievable, some users have some limitation in the use of the network for reasons such as:
Reasons for bandwidth problems
We may find limitations on band use for reasons such as:
- They are connected in a corporate network with limitations of use for each user.
- They have a data plan with a limit of GB to use.
- They are in test environments where network variables and more are analyzed.
Now, bandwidth restriction occurs because many applications and processes in the background, for example, p2p apps, constantly use the network to download or upload information and this can have a positive impact not only on data consumption (if we are with a limit) but also with the overall performance of the operating system..
Starting with Windows 10 Creators Update, we are able to restrict the download speed both at a general level of the system and its applications worse, we must emphasize that Windows 10 integrates the option only for the operating system so that we must resort to additional software for restriction in applications . TechnoWikis will explain how to carry out this task comprehensively. It is very useful to keep in mind that we can directly block the use of an Internet program to prevent it from continuing to consume resources without permission:
To keep up, remember to subscribe to our YouTube channel! SUBSCRIBE
1. Limit bandwidth with the built-in function in Windows 10
Windows 10 gives us the option of restricting the amount of bandwidth that Windows Update uses in the background for the entire process of updating and downloading them, remember that Windows 10 is a service-based system so that some of them can use high levels of network
Step 1
To configure this, we will go to the Start menu and there we will go to the Configuration utility:

Step 2
There we will go to the “Update and security†category and in the new window we will go to the “Windows Update†section:
Step 3
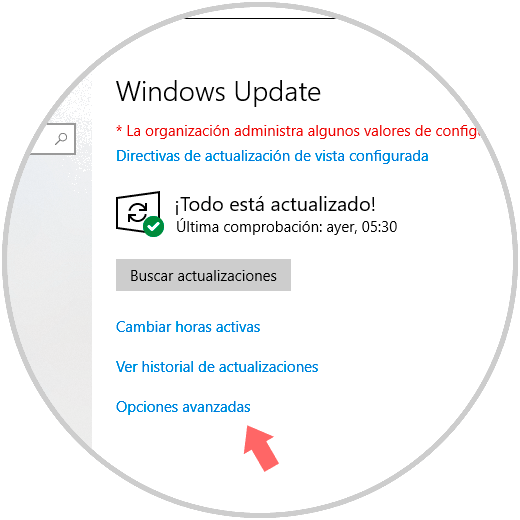
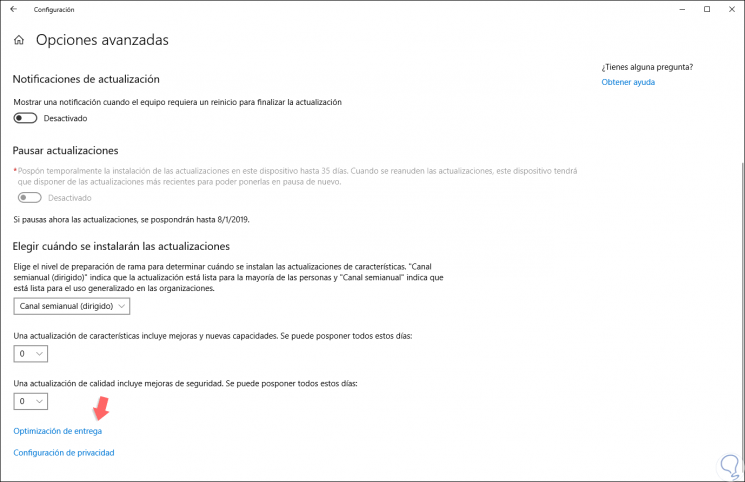
We click on the “Advanced options†line and at the bottom we click on the “Delivery optimization†line:
Step 4
The following will be displayed:
Step 5
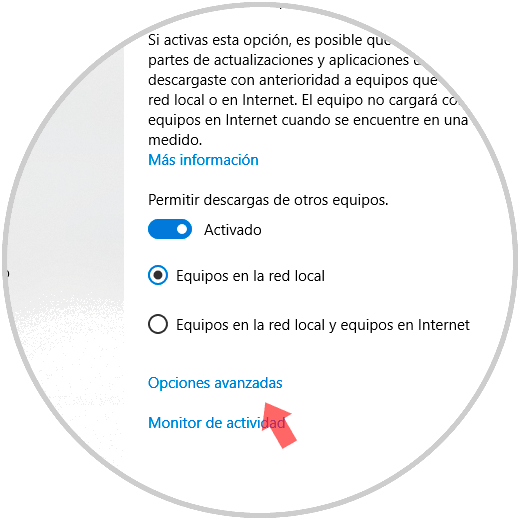
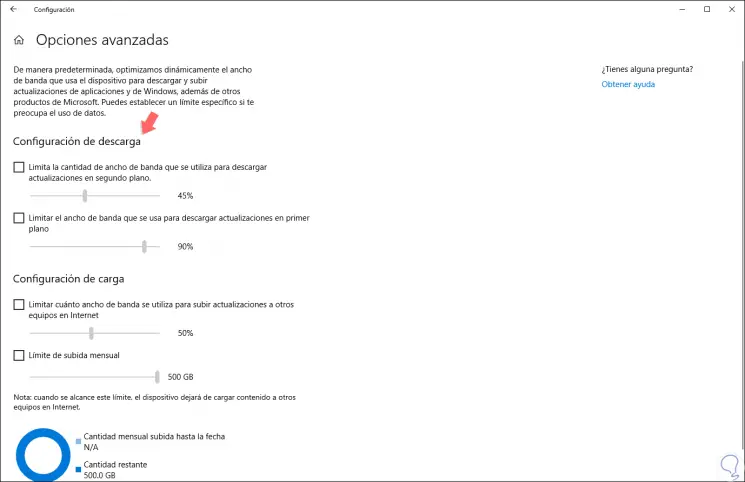
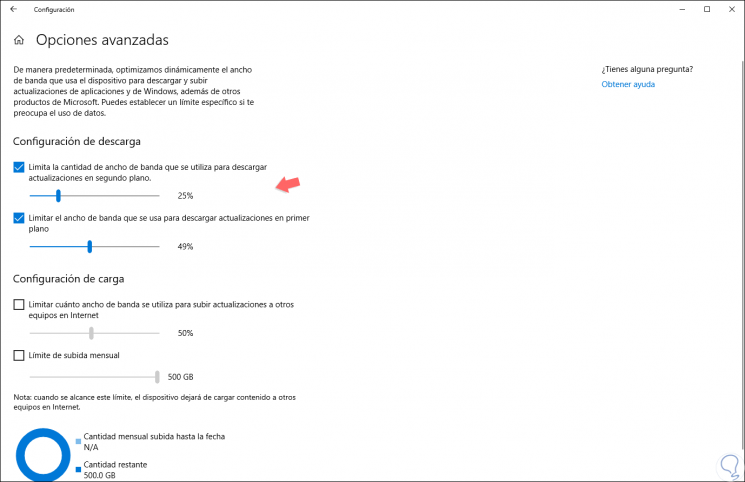
We click on the “Advanced options†line and by default we will see the following:
Step 6
There we must activate the boxes that we consider necessary and in the drop-down bar we define the percentage of network to be assigned. Automatically changes will be applied.
2. Limit bandwidth usage with TMeter Windows 10
TMeter is developed as a tool to share traffic and Internet in Windows environments. When using TMeter, it will be possible to measure network traffic flexibly and accurately regardless of specific specifications using values ​​such as the source or destination IP address, protocol, port, etc. All this in real time with the immediate output of the statistics collected in a graph or in reports.
TMeter integrates a NAT engine (network address translation) that allows several hosts in a private network to access the Internet using a single public IP address, also has a firewall developed to protect the host or network against threats on the Internet. Traffic Shaper allows us to restrict the speed of Internet access for specific users. We can download TMeter in the following link:
TMeter
Traffic Shaper Features
Some of its main features are:
- Creation of rule sets for various monitoring purposes.
- Unlimited number of filters for captured traffic.
- Real-time presentation of traffic activity illustrated in graphics.
- Create traffic reports via XML.
- Registration of traffic counters using common databases such as Microsoft SQL Server, Microsoft.
- Track network packets for each of the filters.
- Extraction and processing of unencrypted VPN packets.
- The user can be identified with TMeter native authentication or Windows domain authentication.
- It has packet filtering Firewall.
- DNS forwarding server incorporated.
- Internet speed limitation ..
- The use of the free version allows you to limit the bandwidth of four applications at the same time.
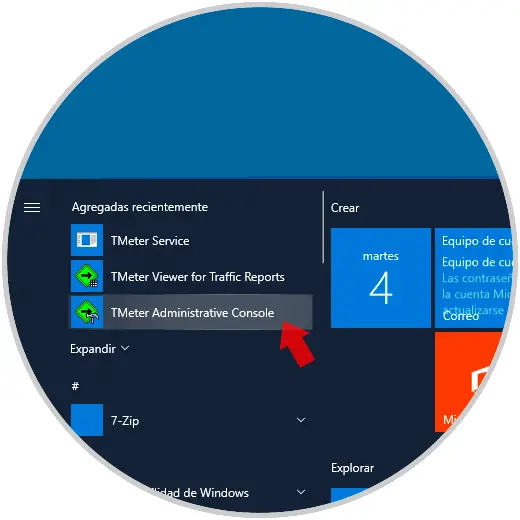
Step 1
When it has been installed, we must access the “TMeter Administrative Console†option:
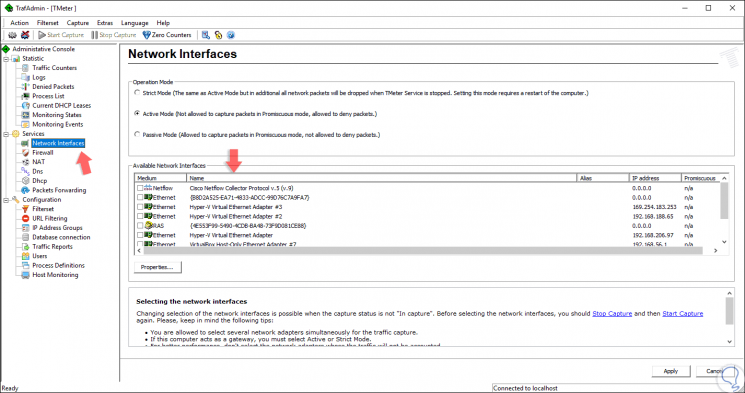
Step 2
At its first start, we must select the network interface by clicking on "Network Interfaces" in the sidebar, and then checking the box next to the network interface we use:
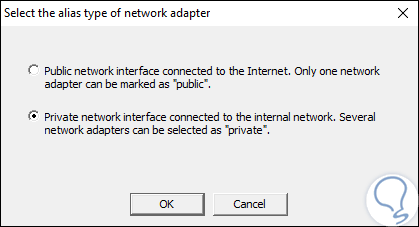
Step 3
When selecting the interface, we will see a message indicating that we must select a type of network, in case we have a router in the personal network, we select the "Private" option, but if we are connected directly to the Internet or in a public Wi-Fi network , select the "Public" option. Click on Ok to confirm.
Step 4
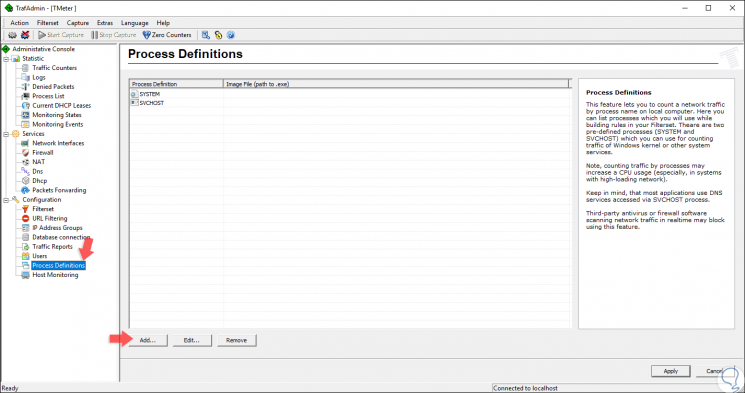
Once selected, we must define the processes that we want to limit, for this, we click on the “Process Definitions†section in the sidebar and then click on the “Add†button:
Step 5
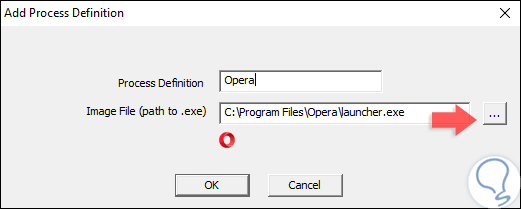
The following window will be displayed where we will enter a name to the process, as well as the path of the executable of the same:
Step 6
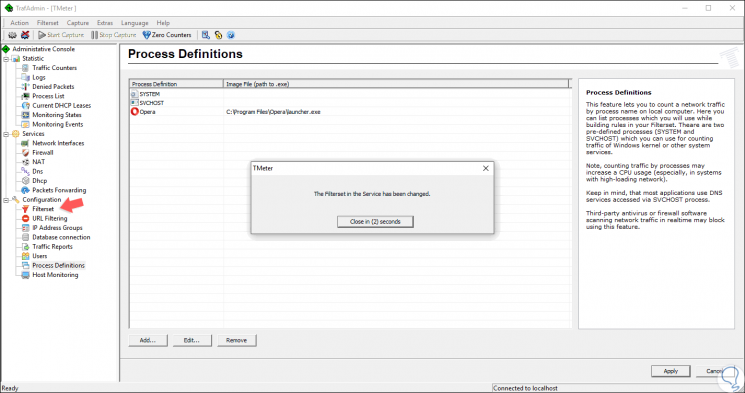
Click on Ok to confirm the action and in the main window click on “Applyâ€:
Step 7
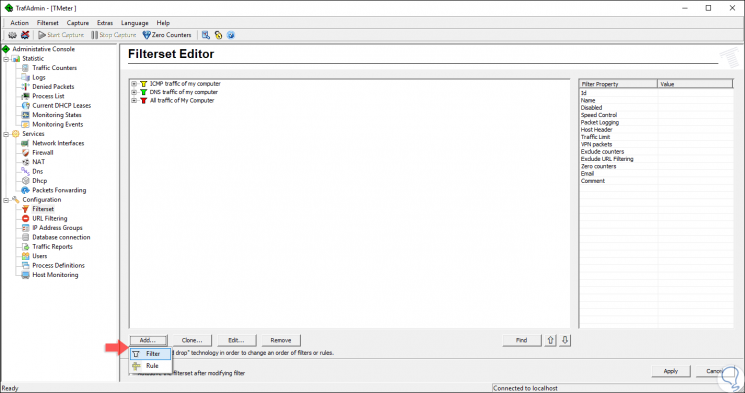
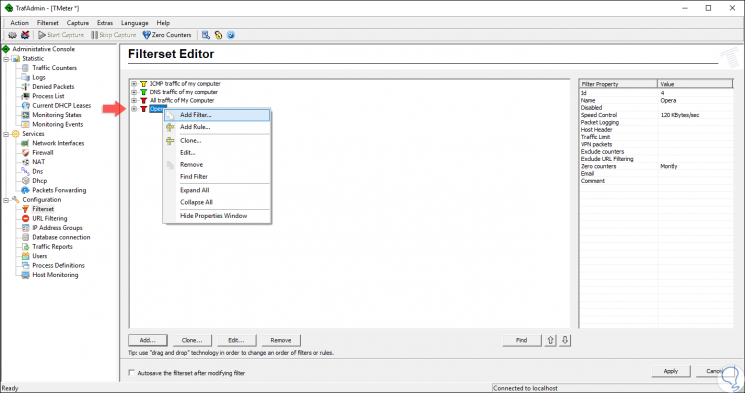
Now we are going to create a filter that limits the bandwidth of the application, for this we click on the “Filterset†section in the sidebar and then click on “Add / Filterâ€:
Step 8
The following window will be displayed:
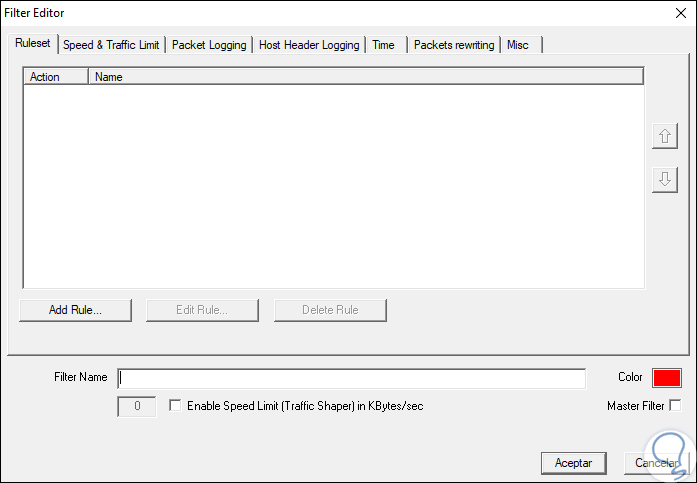
Step 9
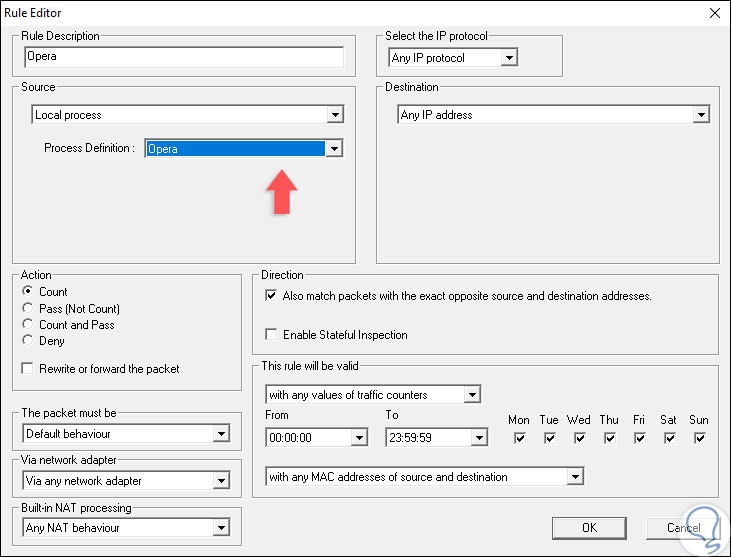
There we click on the “Add Rule†button and in the pop-up window we configure the following:
- In the "Rule description" field we enter a name for the rule.
- In the "Source" field we select "Local process".
- In the “Process Definition†line we select the process created previously
Step 10
Click on Ok and we will see this:
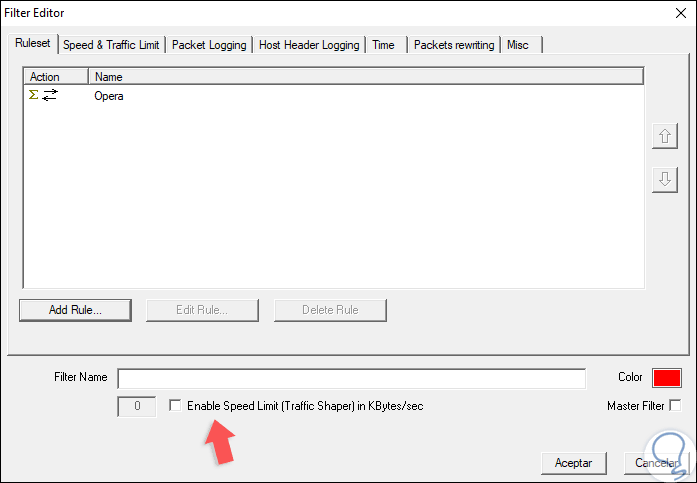
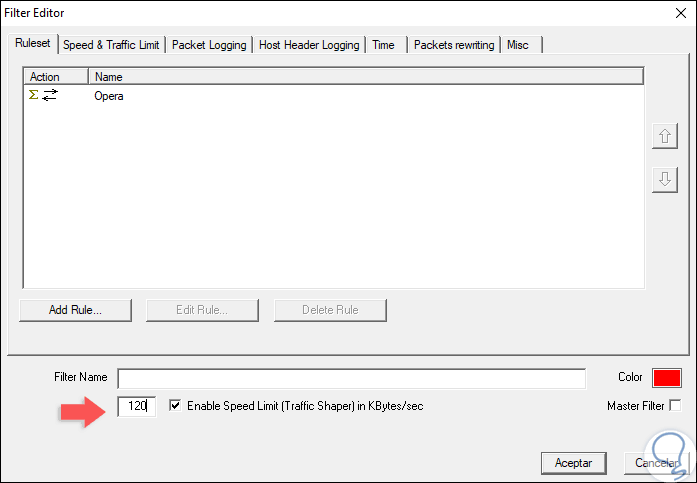
Step 11
There we will activate the “Enable Speed ​​Limit / Traffic Shaper) in KBytes / Sec†box and in the field we enter the desired speed for that application. Click on "Accept" to save the changes.
Step 12
In the main window we can right click on the rule to perform some actions such as deleting the rule, editing it and more. So we can use this application for this purpose.
3. Limit bandwidth usage with NetBalancer Windows 10
Another useful application to manage bandwidth in Windows is NetBalancer which allows us to manage network traffic through traffic rules in which it is possible to set priorities, limit or block the measured network traffic based on various settings, such as the time of day, the network protocol or the type of application used. With NetBalancer it will be possible to access real-time traffic data and create advanced traffic statistics and graphs over multiple periods of time
Step 1
NetBalancer is available for download at the following link:
NetBalancer
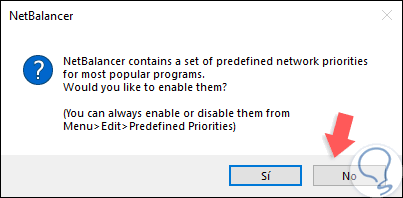
Step 2
When the application is installed, we will see the following message on its first start. We will click on No.
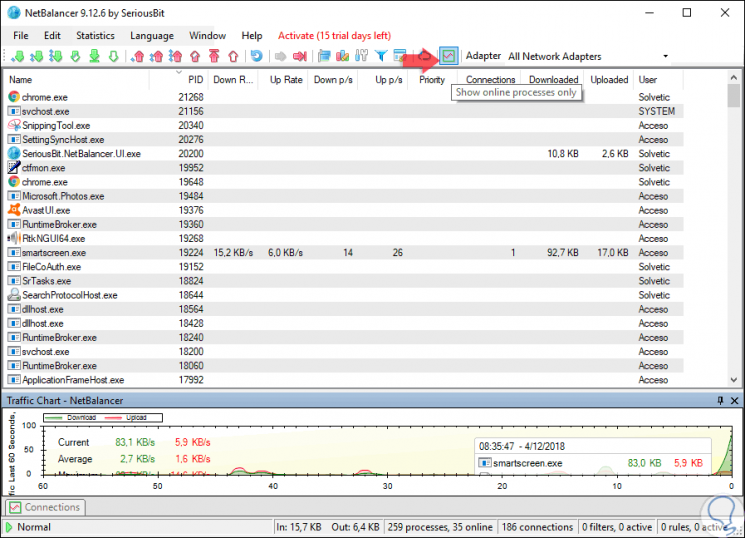
Step 3
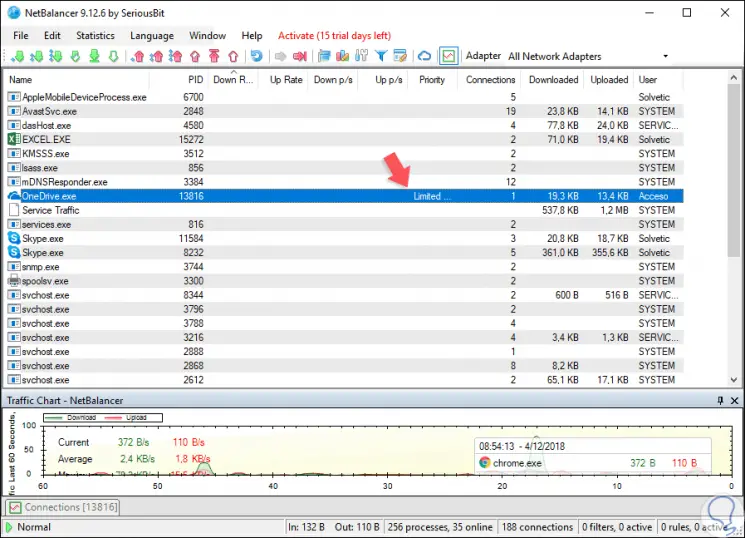
We will access the application and in the main window, we will filter the processes that are connected to the Internet, for this we must click on the "Show online processes only" icon in the upper right corner:
Step 4
We can click on the Download Rate column to sort all the processes according to the amount of bandwidth used. Once we detect the process to be edited, we will right click on it and in the “Download priority†line we select options such as low, normal or high priority:
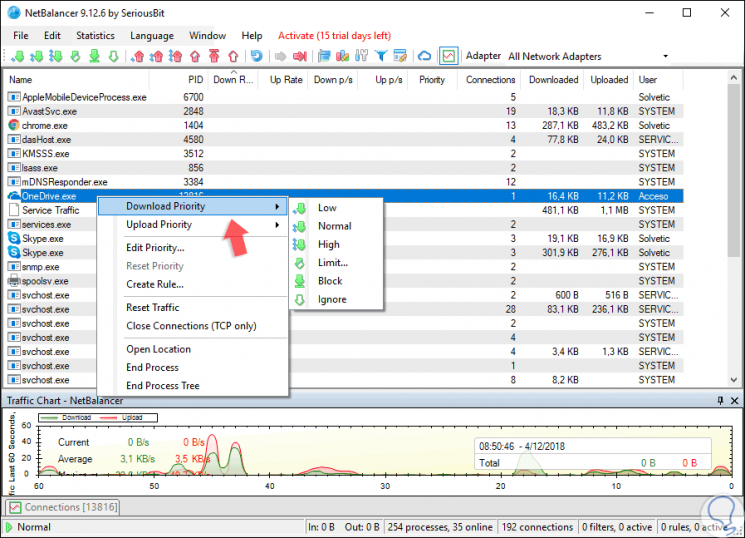
Step 5
If you want to limit with a specific value we must select the “Limit†option and in the pop-up window we will enter the speed to use in KB / s. Click on OK to apply the changes.
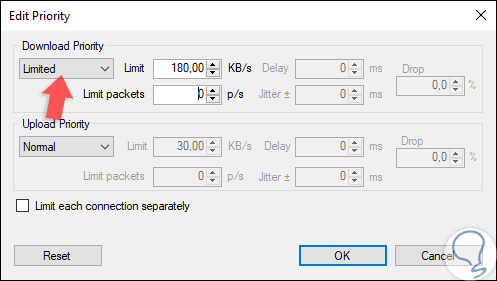
Step 6
We can see that this process is limited to the speed we have specified:
Step 7
To eliminate the speed limit we must change the Priority status from "Limit" to "Normal". If the application cannot detect the network card, we must click on the “Edit†menu and select the Network Adapters option:
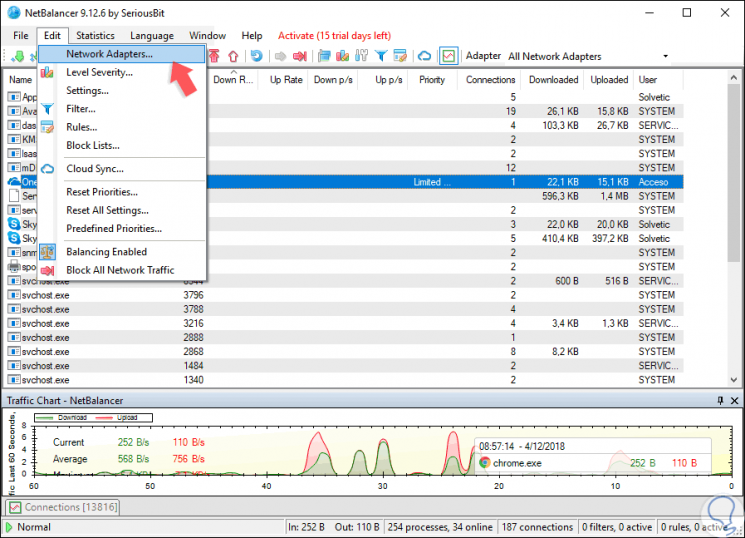
Step 7
In the window that will be displayed, we go to the tabs of each adapter to review and there activate the “Monitor this adapter†box:
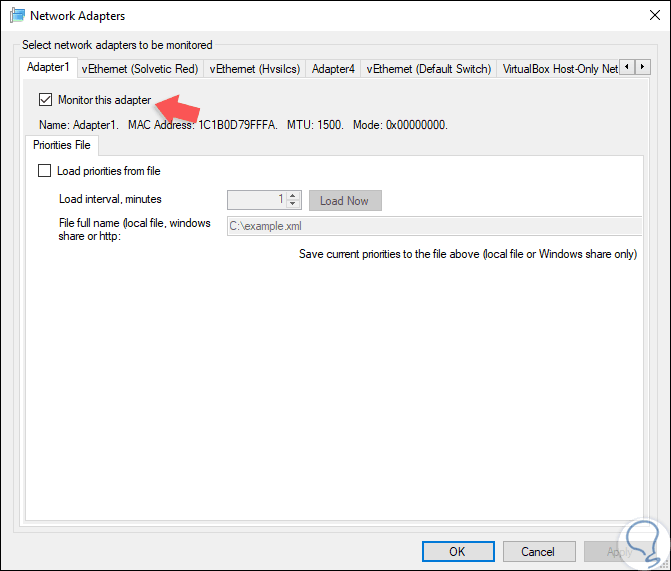
Thus we have several options to limit the bandwidth of both the system and applications in Windows 10 and keep better control of these.