When using Windows or some other operating system, various components come into play that have a direct impact on the performance of all the processes that are executed in the system and perhaps one of the most important is the processor or CPU, it is in charge of carrying out all operations and tasks such as:
CPU operations
- Execute instructions housed in the control unit and in the arithmetic-logic unit
- Control the operation of the system at a general level
For these reasons it is possible that for some specific actions you want to limit the use of the CPU, that is, prevent a program or application from making use of 100% of its resources so that other more relevant tasks can be executed, additionally when limits the use of the processor we can see a better performance and stability of the system since some applications can increase the percentage of CPU use, causing crashes or unscheduled reboots..
TechnoWikis will explain in a simple way how to limit the use of the CPU of a program in Windows.
To stay up to date, remember to subscribe to our YouTube channel!
SUBSCRIBE ON YOUTUBE
How to limit the CPU usage of a program
Step 1
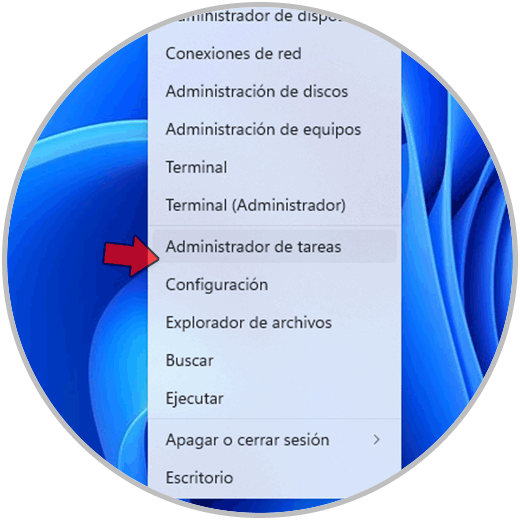
To carry out this we open the Task Manager from the Start context menu:
Step 2
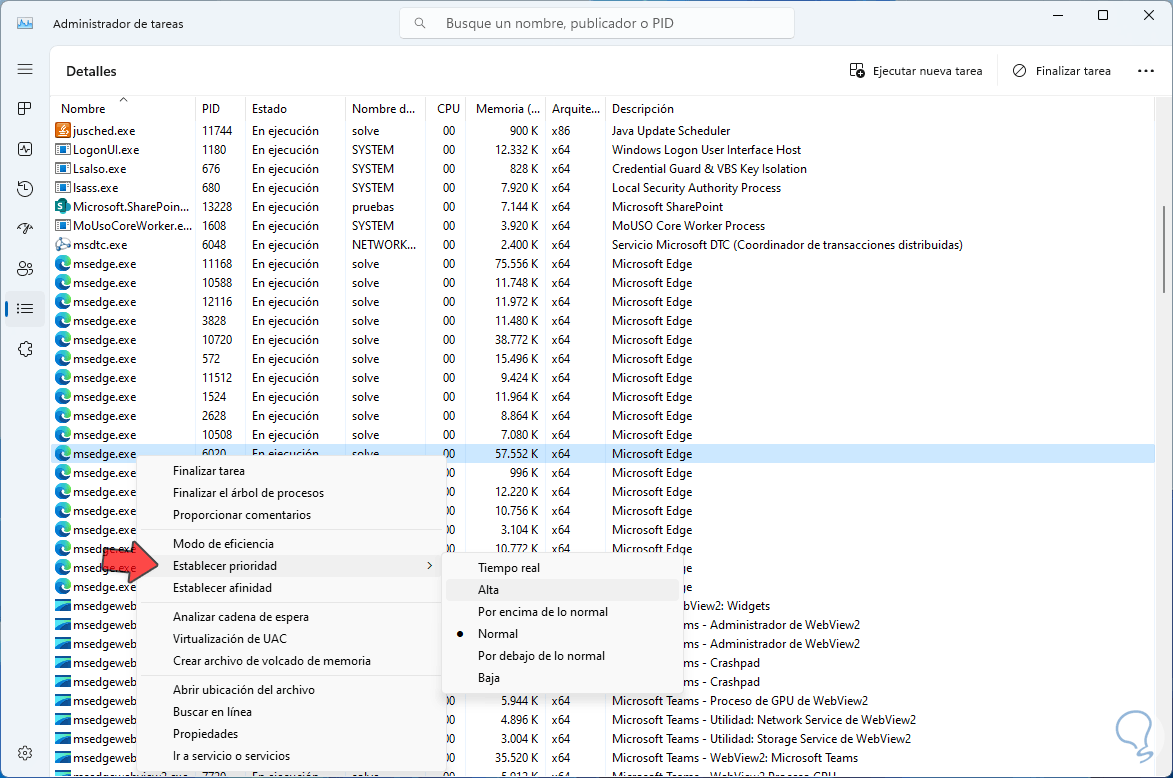
In the Task Manager, in the "Details" section, we right-click on the app to limit and then click on "Set priority" to define the level to use:
Step 3
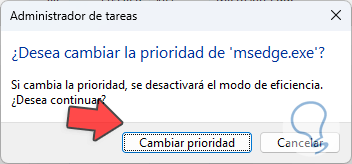
This function in the Task Manager allows us to adjust the priority of a running process or task, this priority will indicate the amount of system resources such as CPU and memory that have to be assigned to that specific process or application but not to others active processes in Windows. There we have different levels as we consider necessary, the higher the level, the more resources will be assigned, when clicking on the level we will see the following:
Step 4
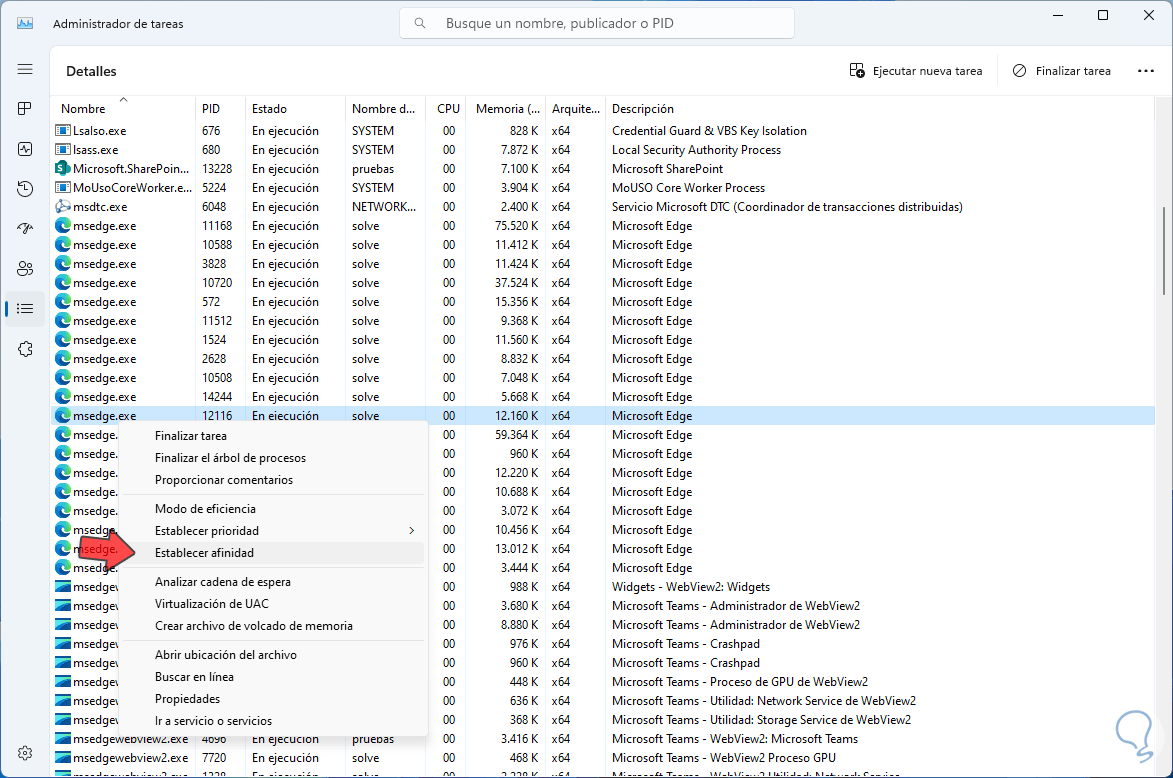
Apply the changes. In addition, we right click on the app and this time we click on "Establish affinity":
step 5
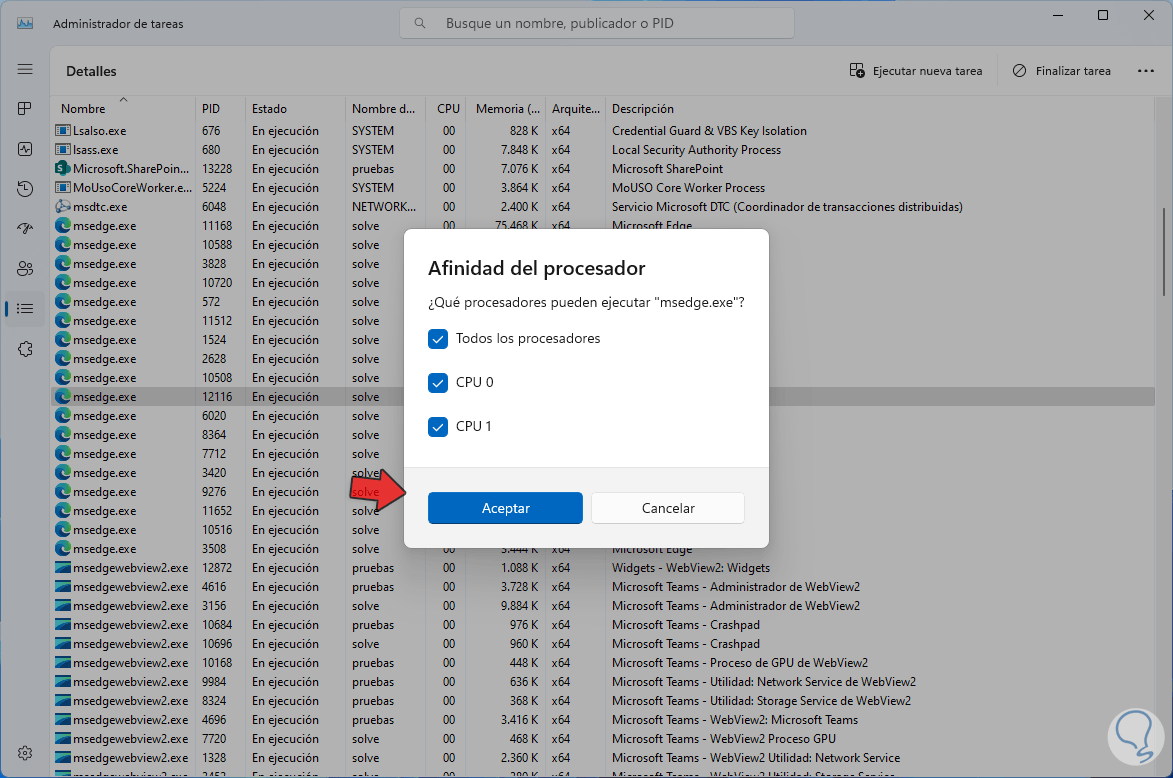
This option allows us to set the number of CPUs available for that particular program:
step 6
There we can uncheck the boxes of the desired CPU:
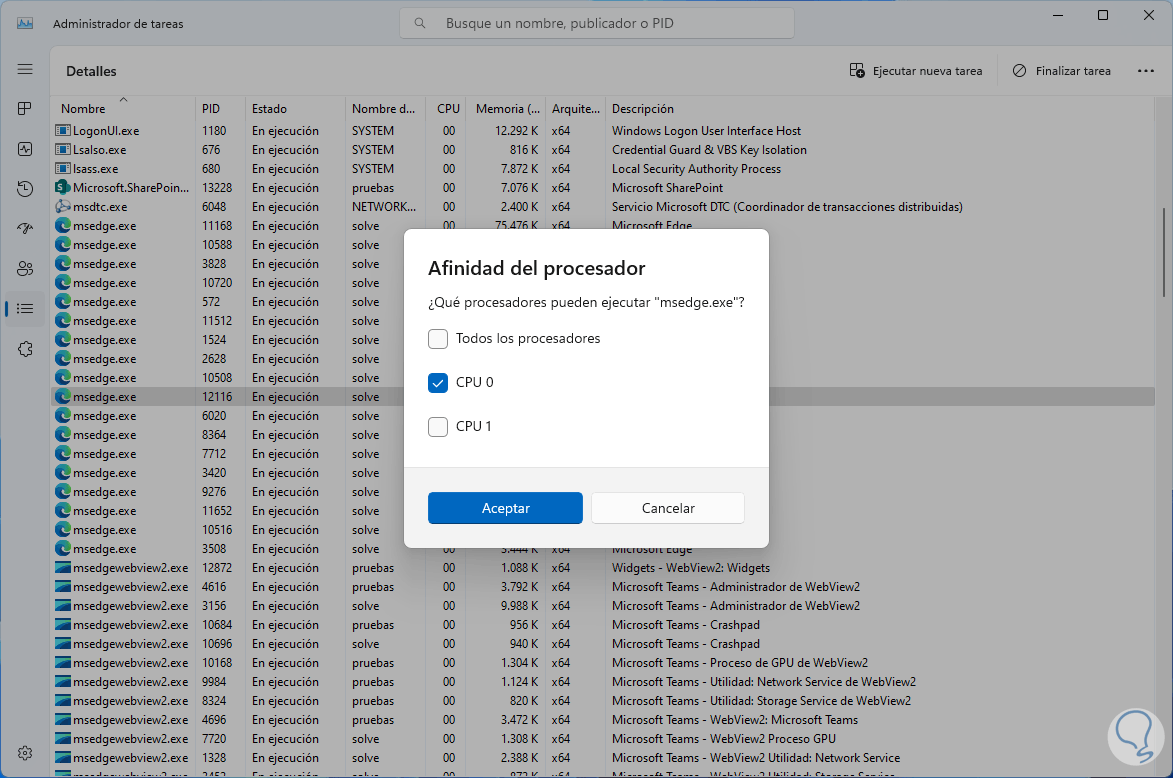
We apply the changes and in this way it is possible to limit the use of the CPU for applications in Windows..