RAM memory is a fundamental part of Windows 11 since, thanks to it, the processes that are executed in the system are largely determined, both by the system itself and by applications and programs. We currently have computers with large amounts of RAM memory which significantly speeds up operations but a recurring problem is that Windows 11 does not use the total RAM but a percentage of it..
By limiting the use of RAM we are saying that one hundred percent of its use is not used, so it would not be a well-used hardware element. Although the system usually optimizes the use of RAM quite well, you can force its use as we will see today. This will undoubtedly affect the performance of the PC and for this reason TechnoWikis will explain how to make use of the total RAM in Windows 11.
To stay up to date, remember to subscribe to our YouTube channel!
SUBSCRIBE ON YOUTUBE
1 Remove RAM limit from System Settings
Step 1
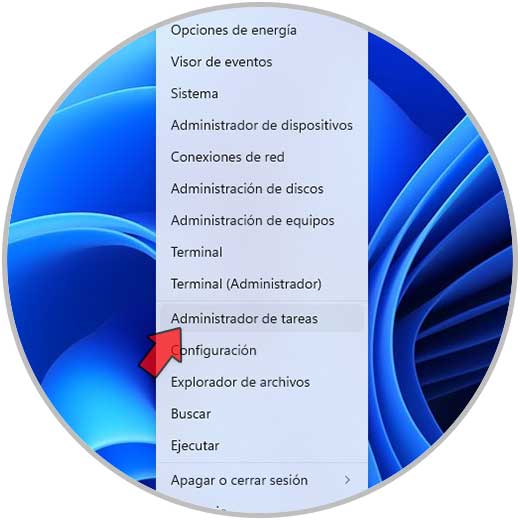
This is one of the simplest methods to achieve 100% use of the RAM memory, first of all we will validate the current RAM, for this we open the Task Manager:
Step 2
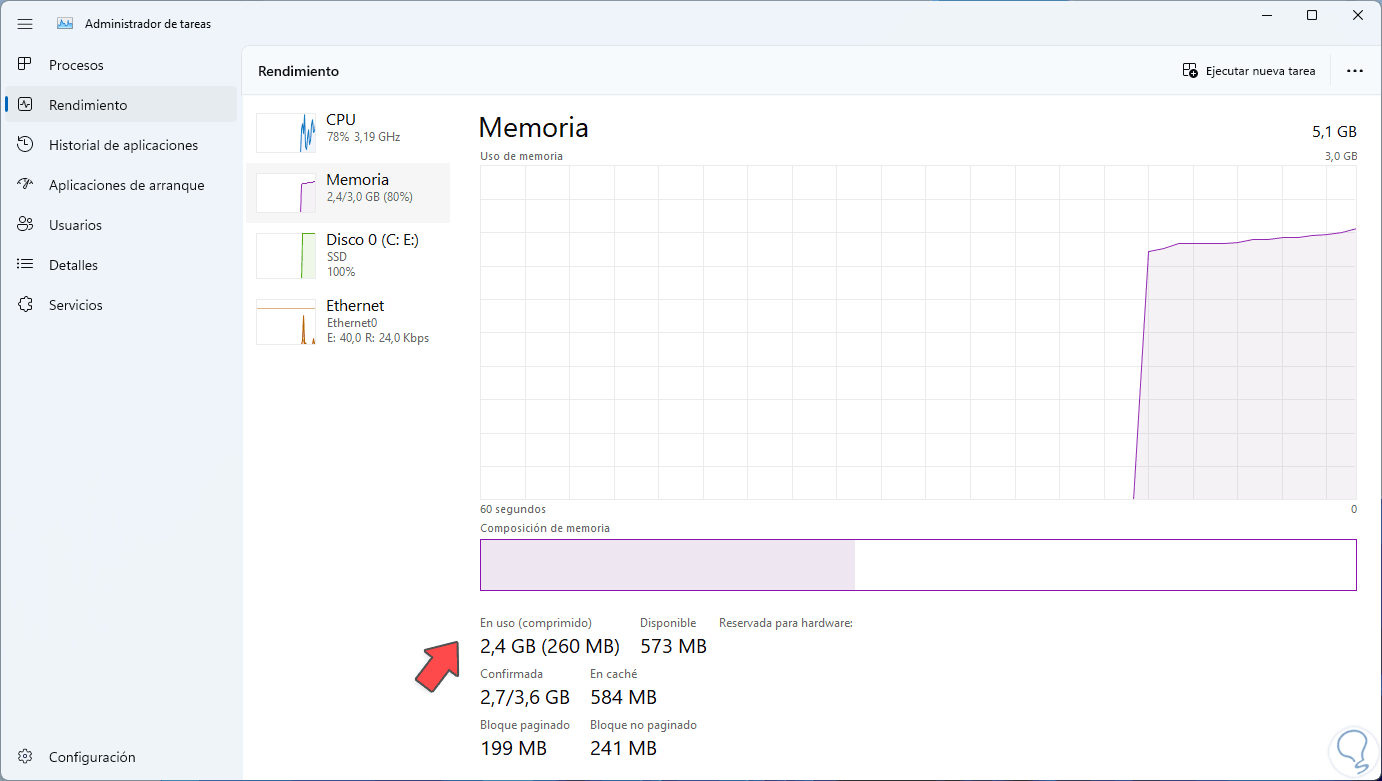
In "Performance" we go to the "Memory" section and there we determine that the total RAM is not used:
Step 3
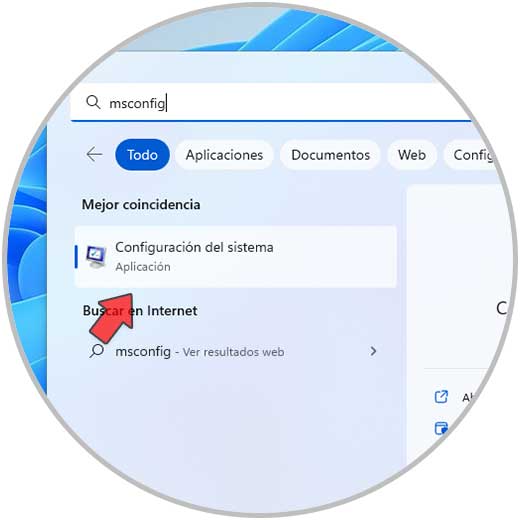
Now in the Start search engine we enter "msconfig":
Step 4
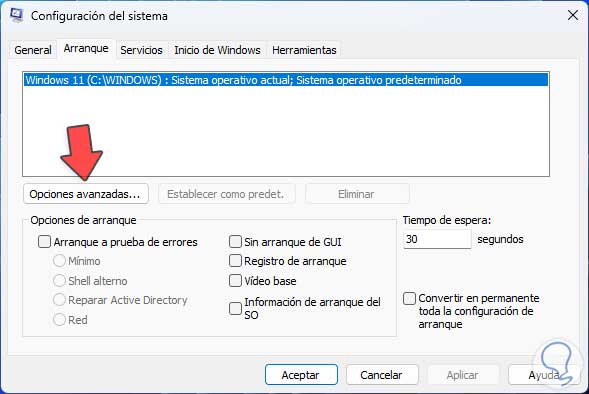
We click on "System Configuration" and in the pop-up window we go to the "Boot" tab:
step 5
We click on "Advanced options" to see the following window:
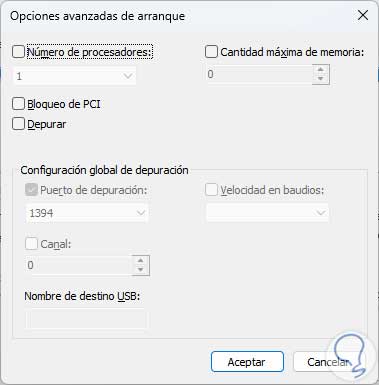
step 6
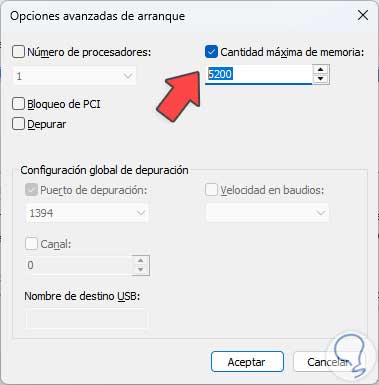
We activate the "Maximum amount of memory" box and Windows 11 will automatically allocate the total available RAM on the computer:
step 7
If this is not done automatically, we must calculate the total RAM, the formula for it is very simple, this is the syntax to use:
1024X RAM
step 8
For example, if we have 8 GB of RAM we will execute. This will be the value to enter in the respective field. We apply the changes.
1024 X 8 = 8192
step 9
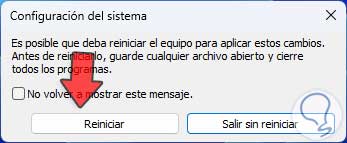
In the main window we apply the changes and we will see the following window:
step 10
Restart Windows 11:

step 11
Open Task Manager at login:

step 12
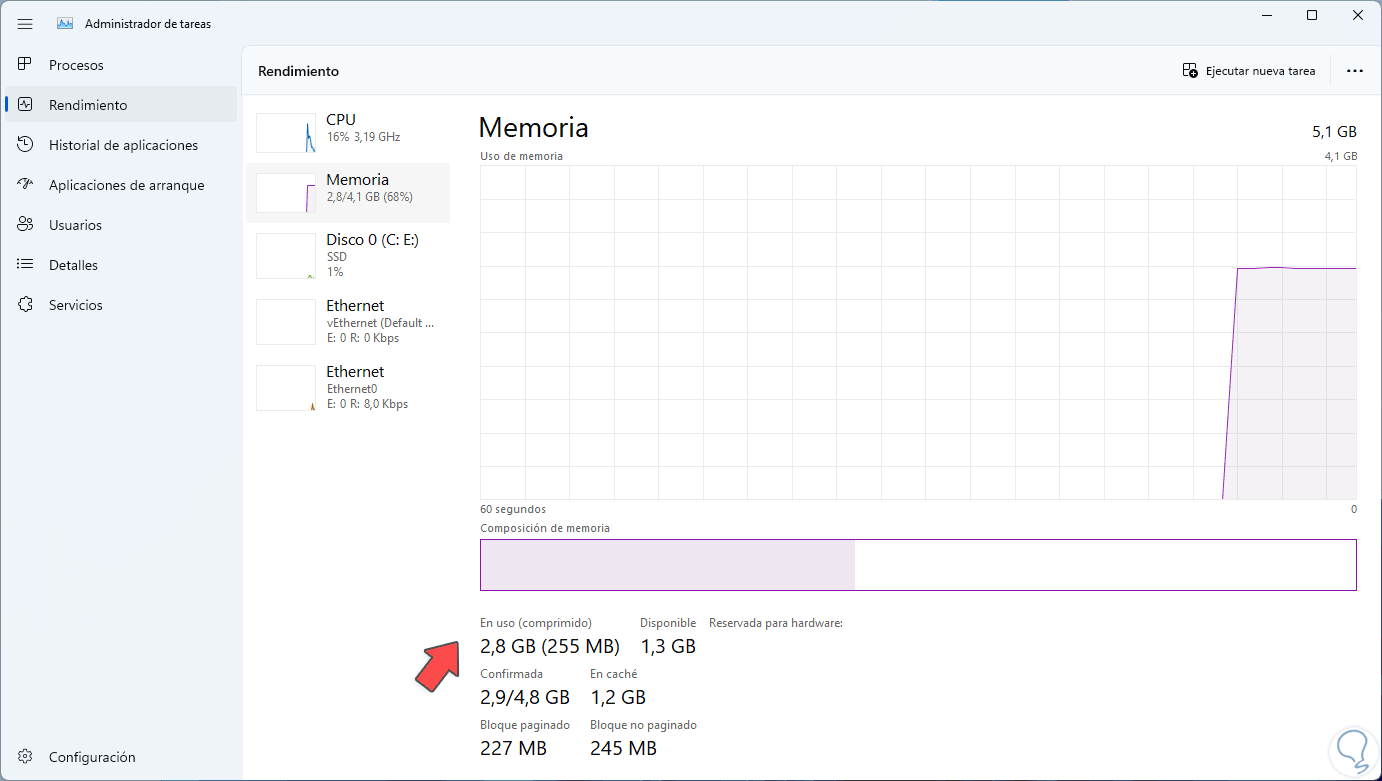
We validate the available RAM memory. We can see that although the increase is not yet the full RAM memory, for this we will show you the following solution.
2 Remove RAM limit from BIOS/UEFI
Step 1
To make use of this step we will go to:
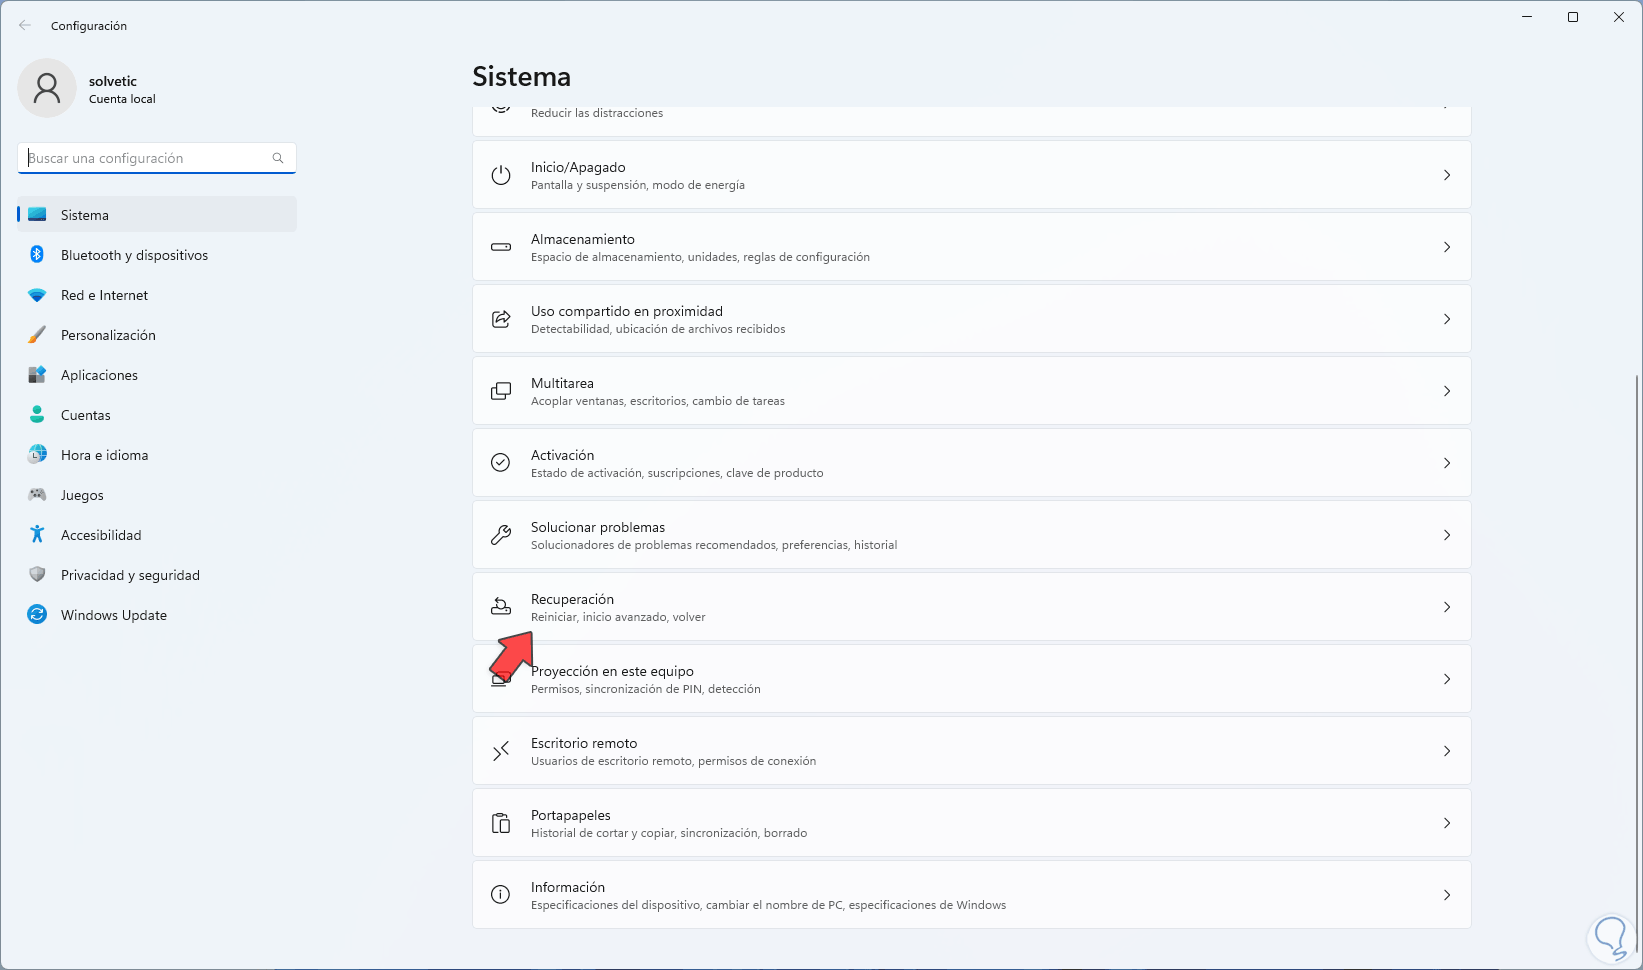
Step 2
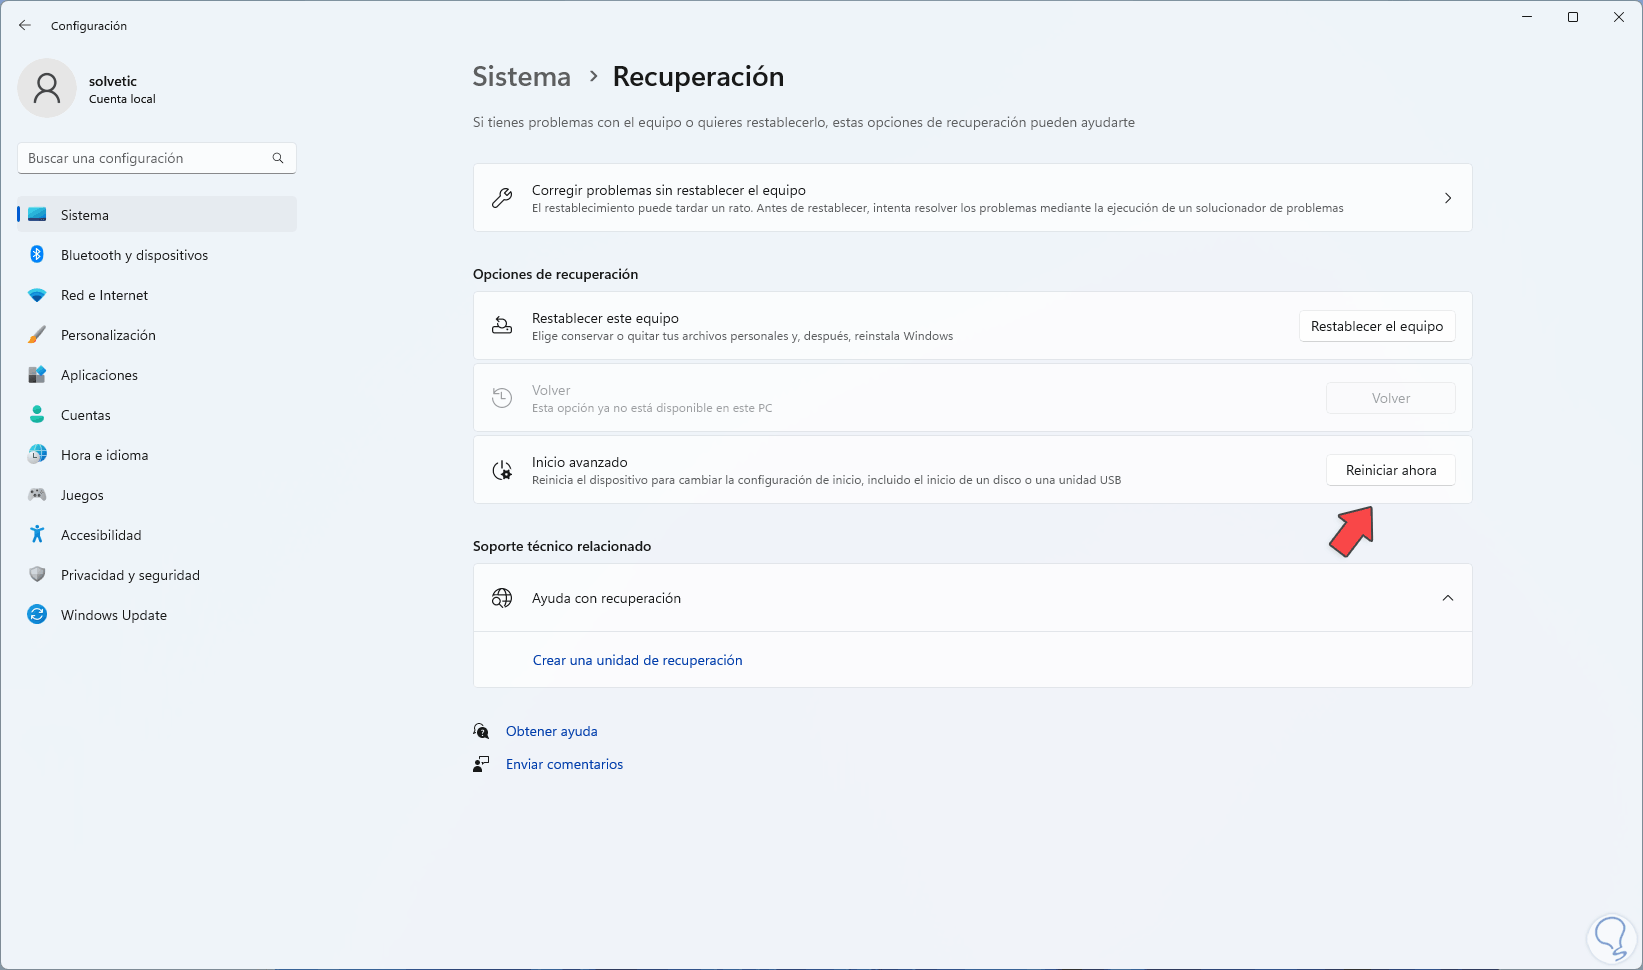
By clicking there we will see the following. We click on "Restart now"
Step 3
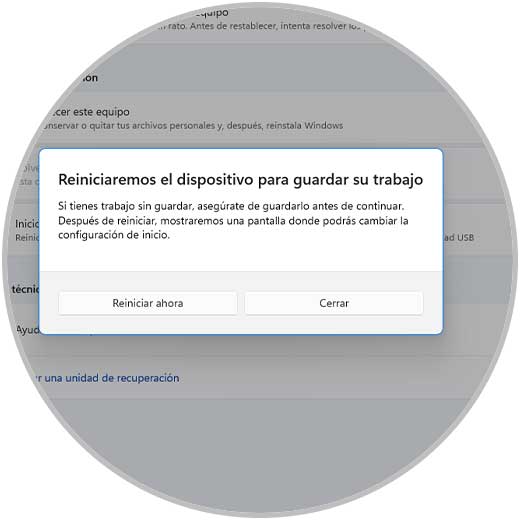
and the following message will open:
Step 4
Confirm the process and Windows 11 will restart:

step 5
Advanced mode will be accessed:
step 6
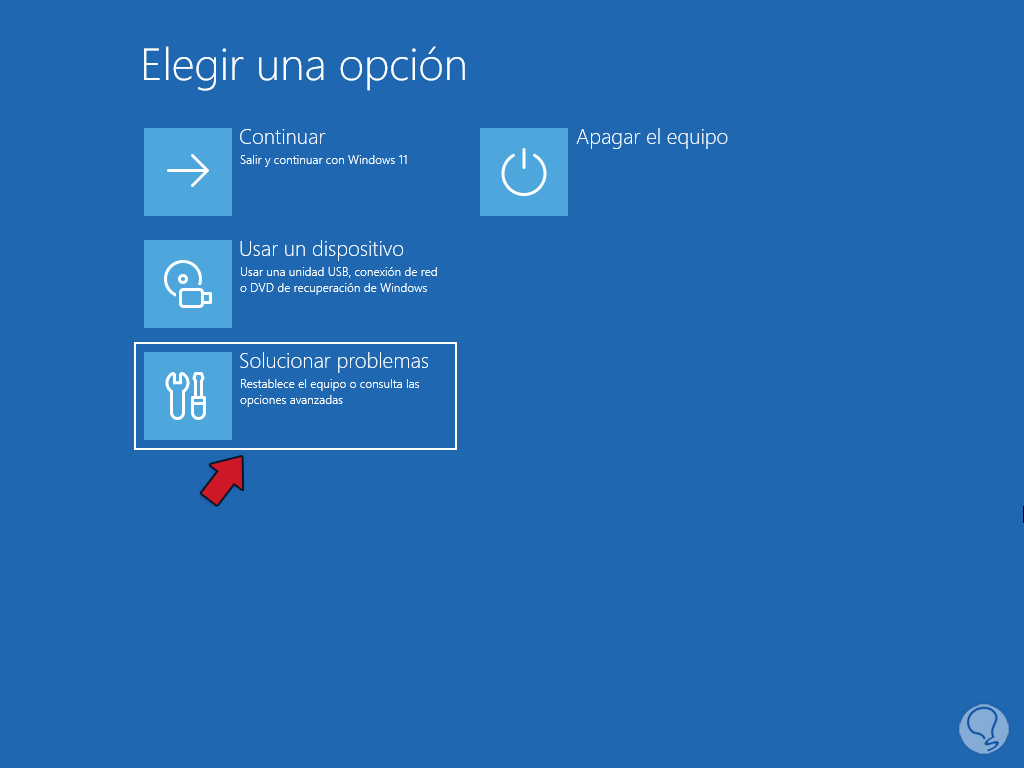
We click on "Solve problems":
step 7
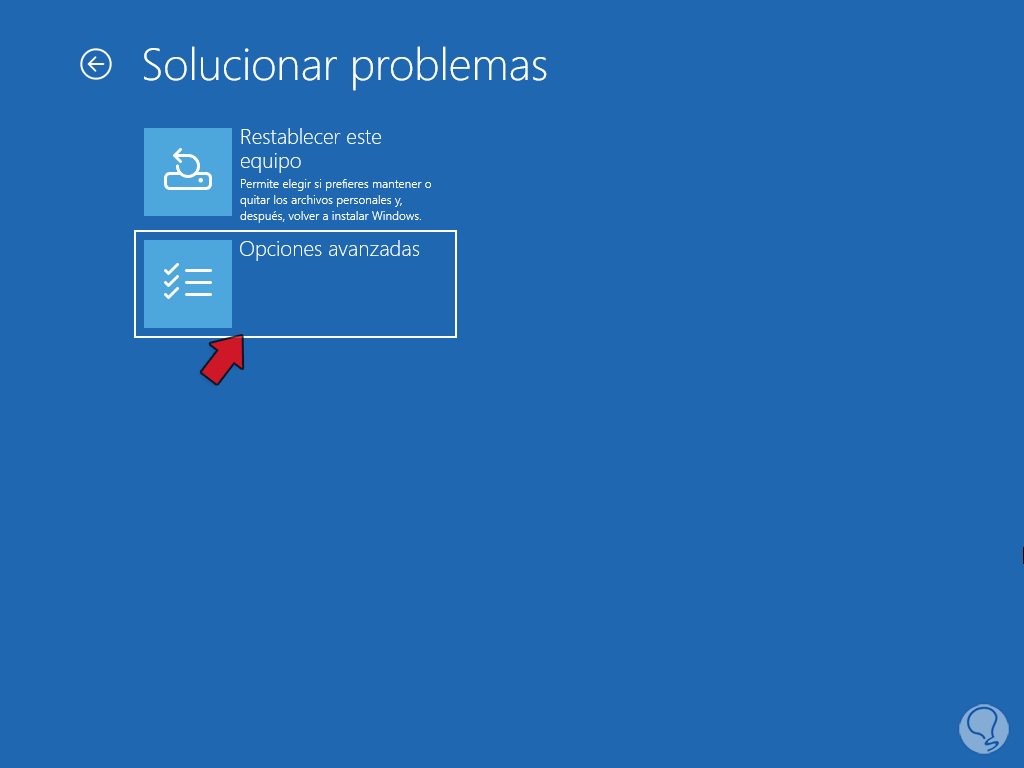
Then we click on "Advanced options":
step 8
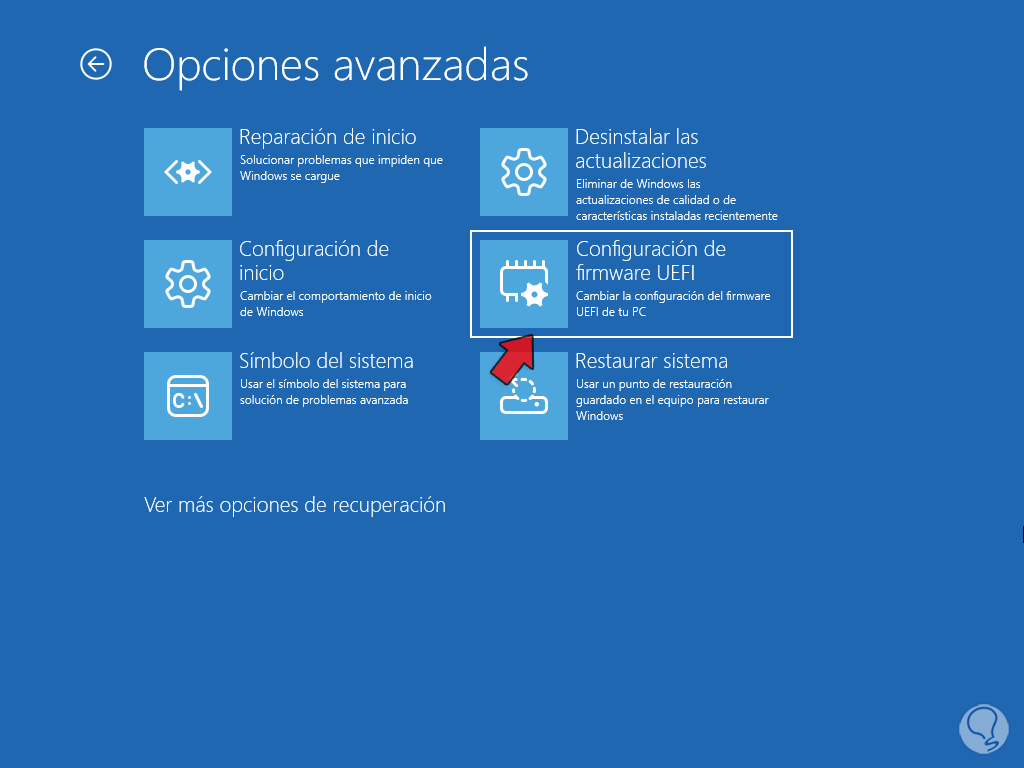
Then we click on "UEFI Firmware Configuration":
step 9
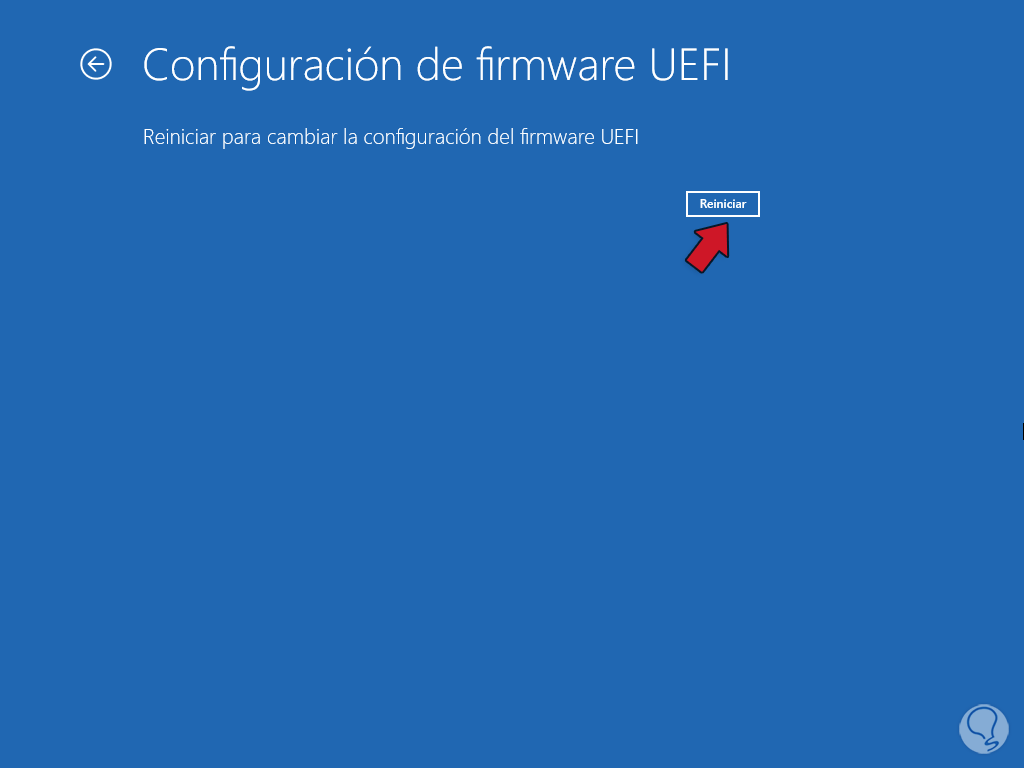
By clicking there we will see this:
step 10
We click on "Restart" to access the BIOS or UEFI:
step 11
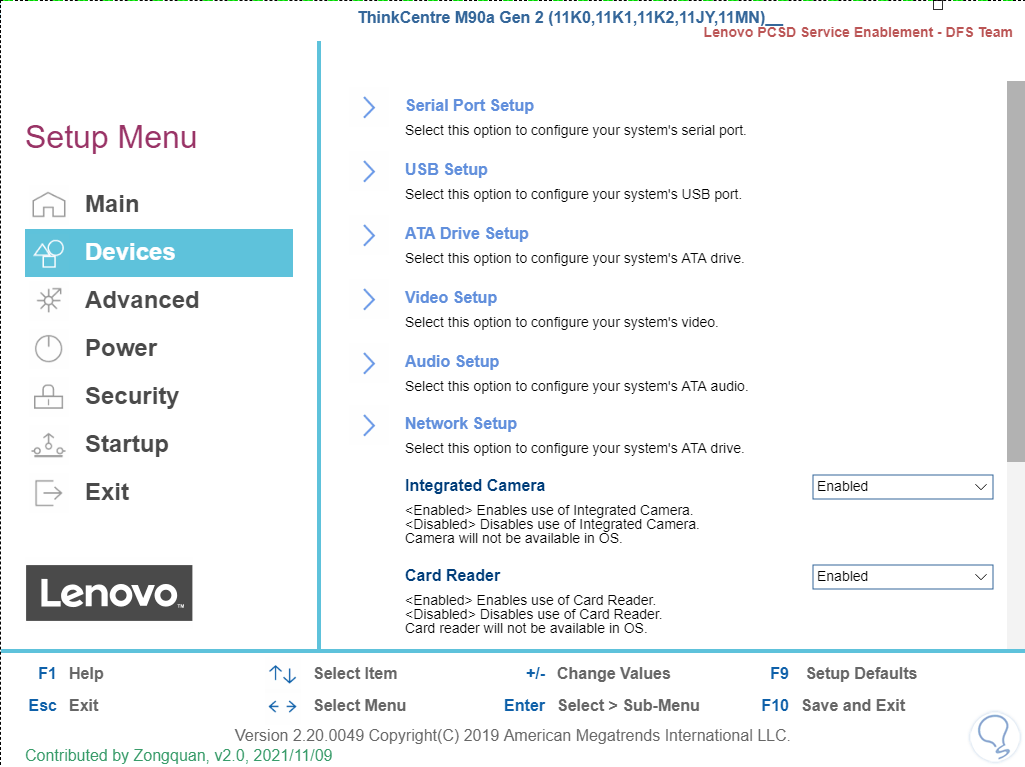
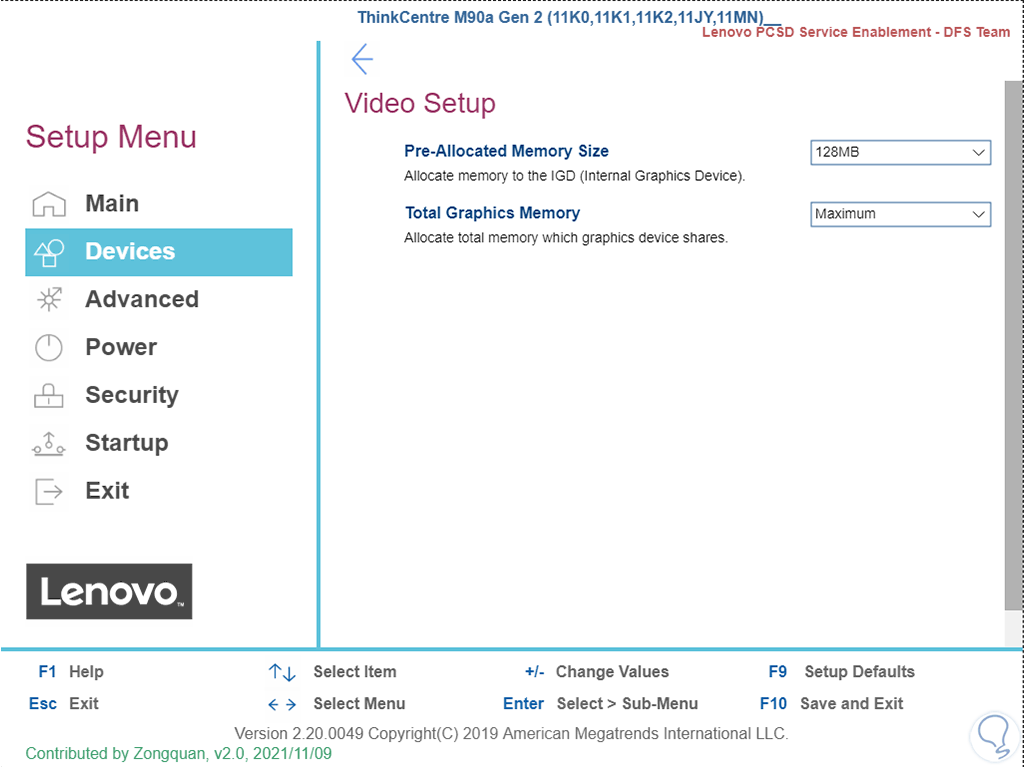
Based on the motherboard we must configure the video and validate that it is being used to the maximum, in this case we click on "Devices - Video Setup", we will see the following:
step 12
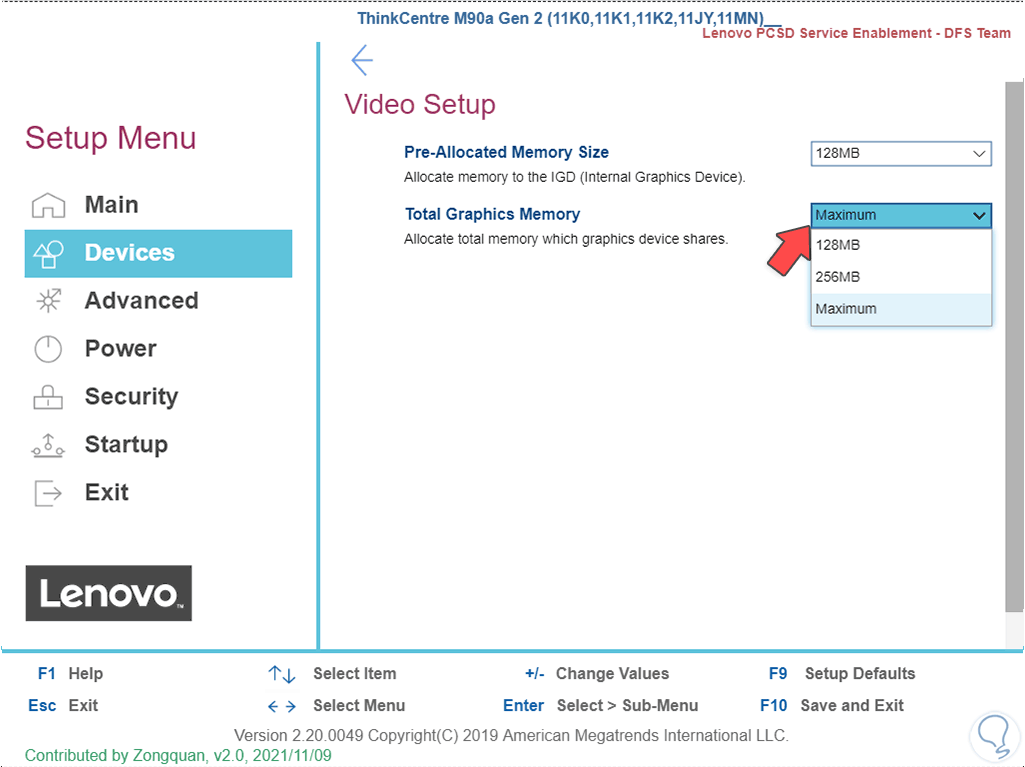
In "Total Graphics Memory" we must assign the Maximum value (maximum):
step 13
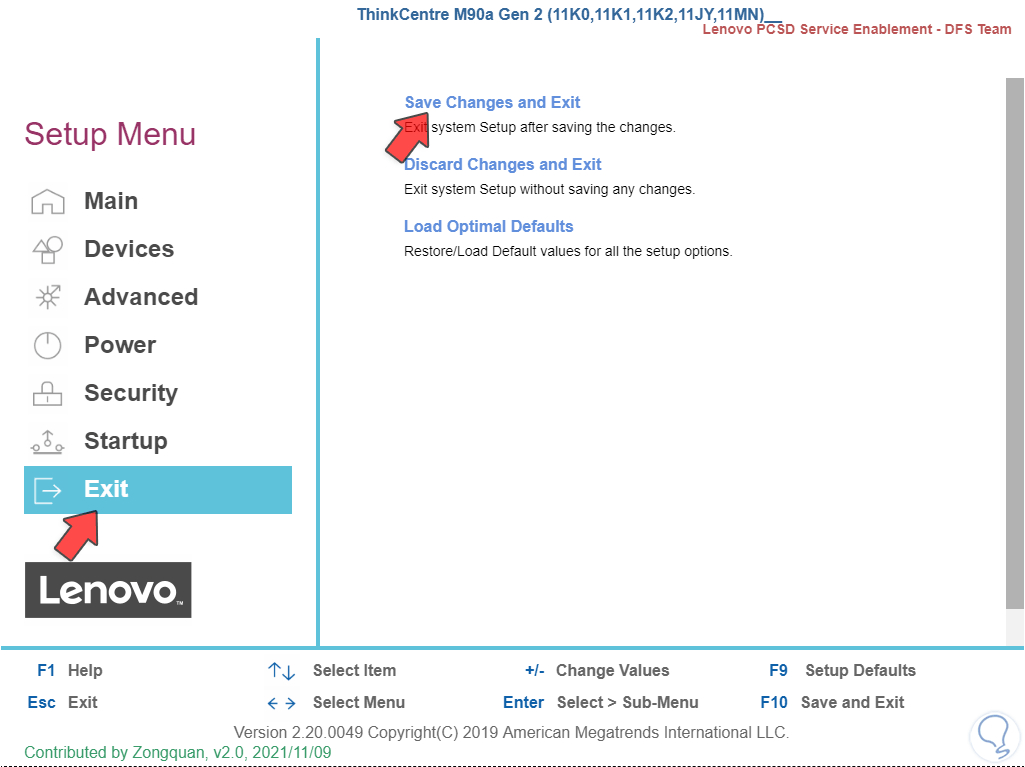
In "Exit" we click on "Save Changes and Exit" to apply the changes:
step 14
The system will reboot:
step 15
When logging in, it confirms the available RAM and we can see that this time the maximum available of it is being used:
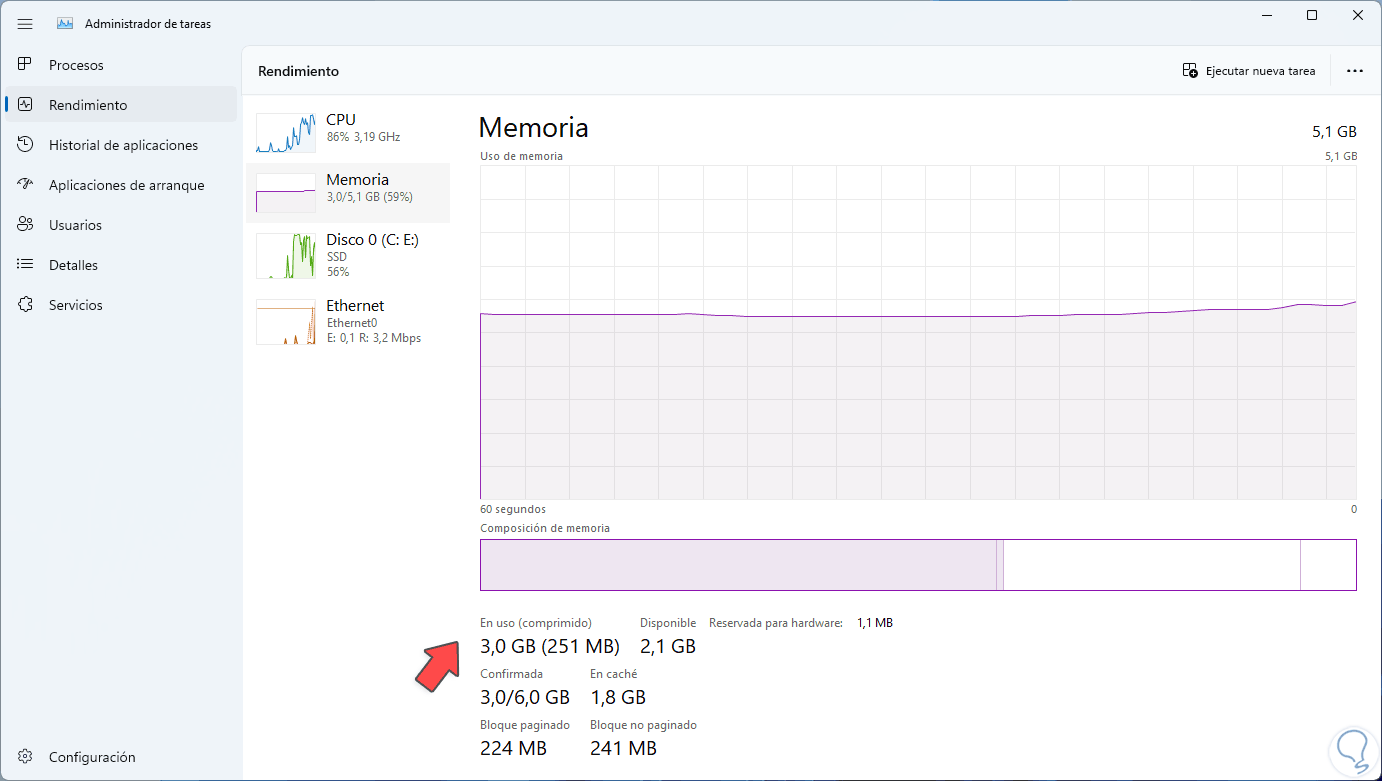
With this we can be sure that all the operations we carry out will be processed with the maximum amount of RAM and this undoubtedly has a positive impact on the execution speed..