Social networks have become one of the main ways to keep us informed of what our family, friends and in many cases popular people we are following.
Among them, one of the most popular is Facebook, and this is due to the large number of users who have joined this community and who are dedicated to uploading and sharing content such as wall posts , photos or videos practically daily..
One of the most important aspects to be found by others on Facebook is the name, since it is the main aspect by which we are searched within the social network, hence the importance that the name houses. It may be that for some reason you want to change the name on your profile on Facebook , and precisely in this TechnoWikis tutorial we explain how to perform this action on Facebook from your iPhone mobile.
For this you will have to follow the steps that we indicate below in the following video tutorial that we leave you below:
To keep up, remember to subscribe to our YouTube channel! SUBSCRIBE
Step 1
In your Facebook profile, at the bottom, you will see several icons. Click on the one on the right at all.

Step 2
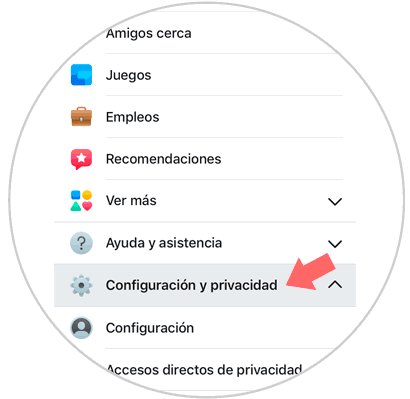
In the list of options, swipe to the end where you will find the "Settings and privacy" option. New options will be displayed and you will have to click on "Settings".
Step 3
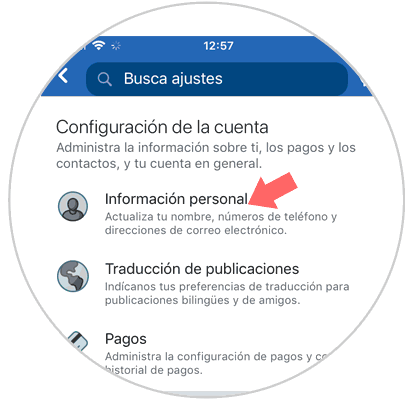
In the "Account settings" section, select the "Personal information" option to continue.
Step 4
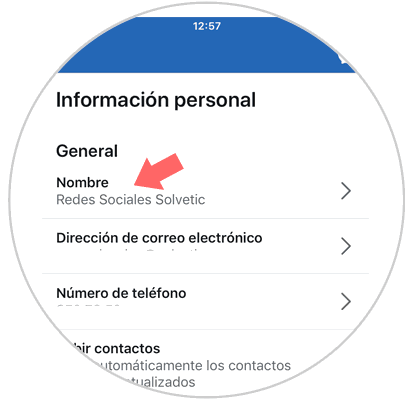
Within this section, at the top you will see the “Name†option and below the name you have assigned in your Facebook profile. Click on this option.
Step 5
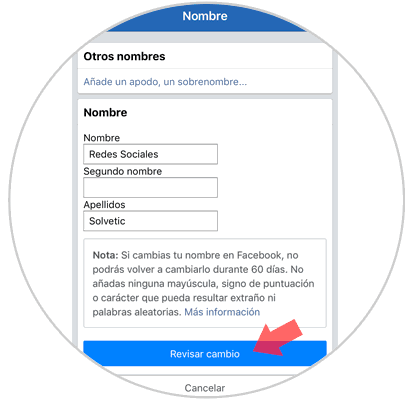
Here, delete the established name and type the new name. Once you do, you will have to send the name change request by clicking on the blue “Check change†button. Facebook will have to review the name change and approve it.
If you respond positively to this request, you will have been able to change your name on your Facebook profile following these simple guidelines..