We can say that among the operating systems that Windows 10 offers us, it is undoubtedly one of the preferred by users and this results in it also being one of the most used worldwide. Your Microsoft Edge browser , your Cortana assistant or the number of applications you offer are some of the many reasons that support your success..
One of the parameters that, although it seems basic to the naked eye but that can play a fundamental role in many operations of both the operating system itself and the applications, is the time set in the system. This is vital since an incorrectly configured or incorrect time can lead to synchronization errors , the non-execution of scheduled tasks and, if we use applications based on the system time, erroneous reports or records can occur. Basically the time in Windows 10 can be affected by a bad regional configuration or by failures in the CMOS of the computer.
The Windows time service , which is also called W32Time, is in charge of synchronizing the date and time so that the operation of many of the Windows services and applications installed there is correct. The Windows time service makes use of the network time protocol (NTP) in order to synchronize the clocks of the equipment taking as criteria an exact clock value or time stamp..
It is for this reason that in this tutorial TechnoWikis brings a series of practical tips to correct the time and determine that it is always within the correct ranges of use in Windows 10.
1. Set the correct time in Windows 10 to fix error when synchronizing time
Step 1
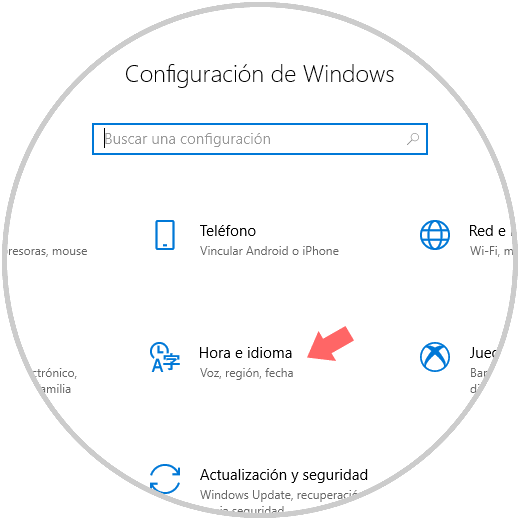
To make use of this first option, we must go to the "Start" menu and then click on the "Configuration" utility where we will see the following. We select the category "Time and language".
Step 2
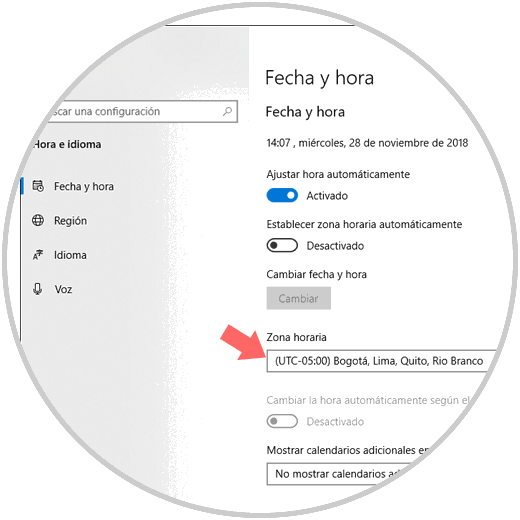
In the new window we go to the "Date and time" section where we will see the following. In the "Time zone" field, we must validate that the format established is that of our geographical location. If not, we can click on the drop-down arrow and select the correct option, alternatively we can enter another time zone and after a short time enter the correct zone again.
Note
Within this same section we find the option "Set time automatically". If it is active, when Windows 10 is connected to the network, the time will be adjusted based on our geographical location, so it is a good option to leave it active.
2. Check the Windows 10 time service to fix error when synchronizing time
As we have mentioned, the time in Windows 10 is a service called "Windows Time", which has the mission of synchronizing date and time on the computer. If this service fails or has not been started, this will have a negative impact on the synchronization and thus the incorrect time will be displayed.
Step 1
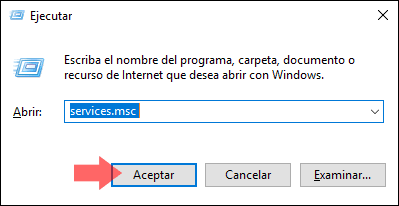
To access the validation of this service we will use the following keys:
+ R
We execute the command:
services.msc
Press "Enter" or "Accept."
Step 2
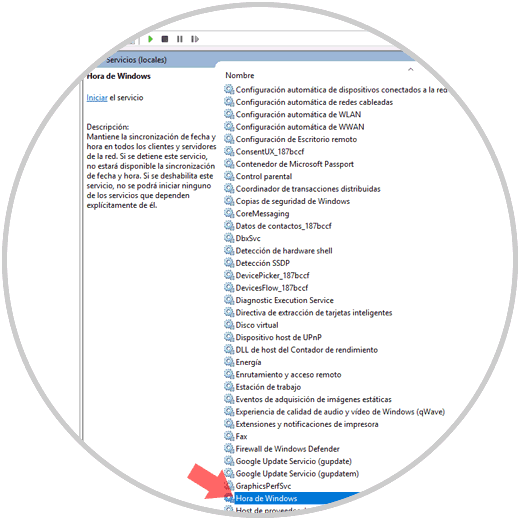
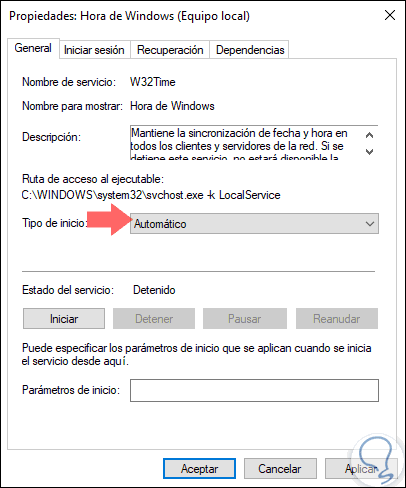
In the window that will be displayed, we will locate the "Windows Time" service. We double click on it to access its properties.
Step 3
In the "Start type" field, select the "Automatic" option and, if it is stopped, click on the "Start for execution" button:
3. Set the time in Windows 10 manually to fix error when synchronizing time
If Windows 10 synchronizes the time incorrectly, it will be possible to set it manually.
Step 1
To do this we go to the route:
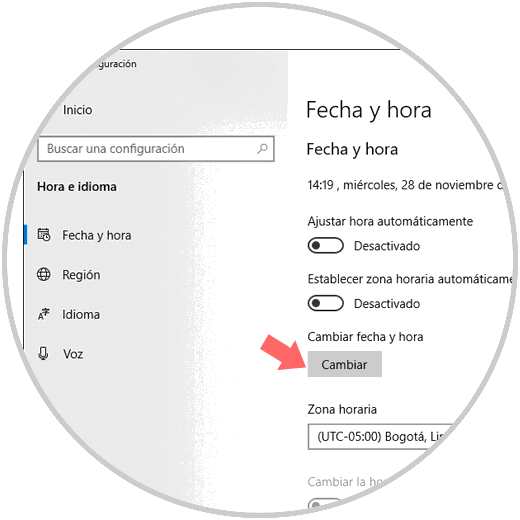
- In the "Date and time" section we must deactivate the "Set time automatically" switch. This enables the "Change" button in the "Change date and time" field, click there.
Step 2
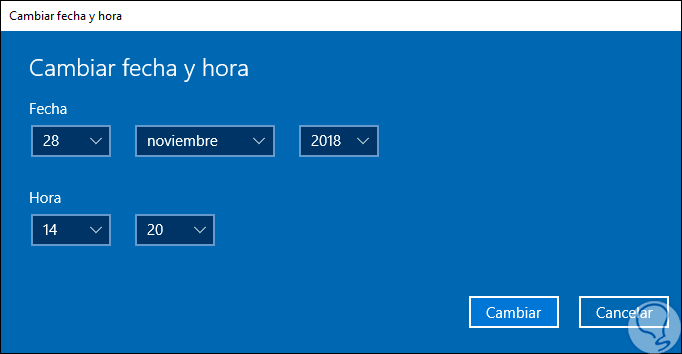
The following window will be displayed where we will enter the time manually:
4. Edit the Internet server time in Windows 10 to fix error when synchronizing time
Windows 10 synchronizes with the Internet time server to obtain the correct time, so that if this server were to present a fault this will impact Windows 10.
Step 1
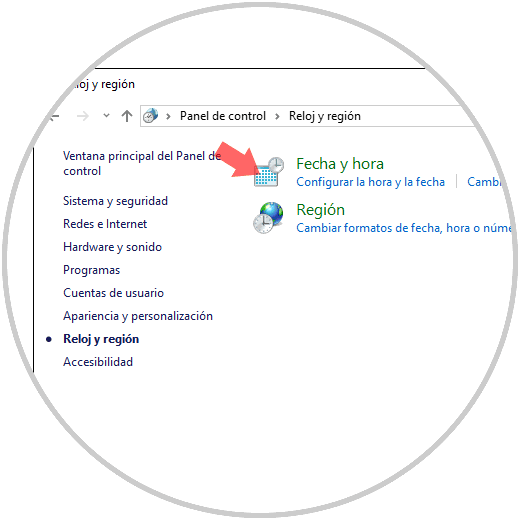
We can change the time of this server for another to validate that the fault is there. For this we must go to the next route.
- There we click on the "Date and time" line.
Step 2
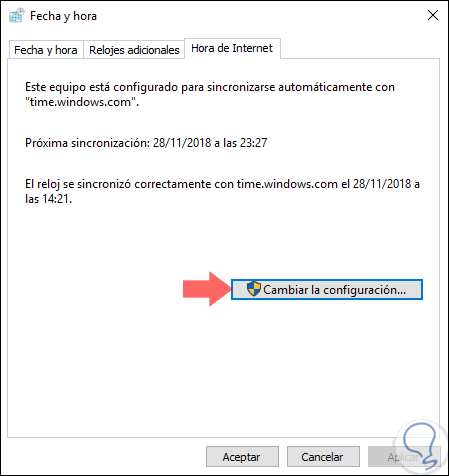
In the displayed window we go to the "Internet Time" tab. Click on the "Change settings" button.
Step 3
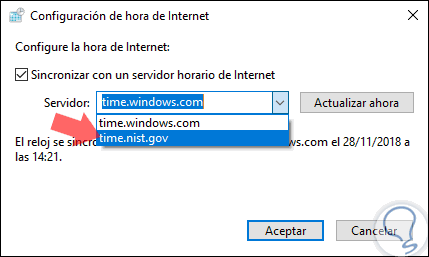
In the pop-up window, simply go to the "Server" field and select the other available server or add a new one if necessary. Once this is done, click on "Accept" to apply the changes.
5. Register the Windows 10 time service again to fix error when synchronizing time
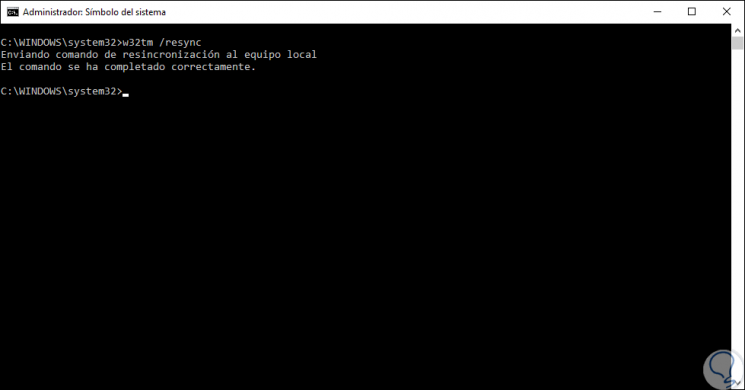
If the fault is constant, we can re-register the Windows time service in order to reset its values. For this we must go to the command prompt as administrators and there execute the following commands:
w32tm / unregister w32tm / register net start w32time w32tm / resync
6. Update the BIOS in Windows 10 to fix error when synchronizing time
When updating the BIOS, the system time may be displayed correctly. For this we must go to the manufacturer's website and download the latest update available.
Note
It is important to note that this is a complex and risky task, so all data protection measures must be taken.
When going to the manufacturer's website, there we will find the respective downloads available from the latest BIOS update:
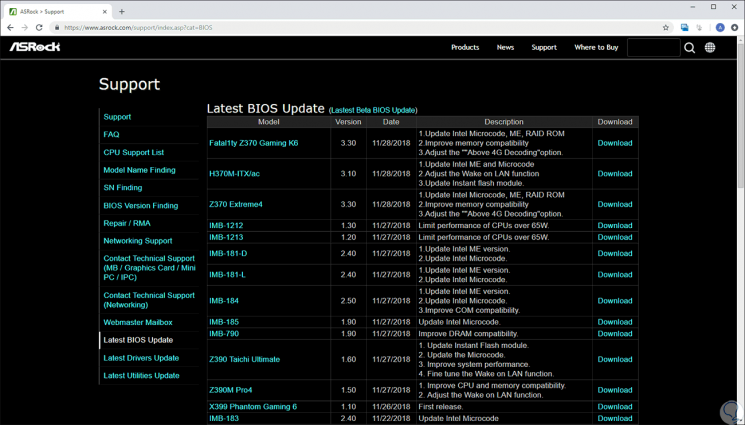
Some links are:
Asrock
Asus
Gigabyte
7. Add the DWORD RealTimeIsUniversal value in the Registry Editor in Windows 10 to fix error when synchronizing time
This option applies only if we are using a dual boot with Windows 10 and Linux. For this, some changes must be made in Linux and in Windows.
Step 1
Linux
In the case of Linux, we must execute the following commands as root user:
ntpdate pool.ntp.org hwclock –systohc –utc
Windows 10
We proceed to restart Windows 10 and after logging in, we access the registry editor with the following keys:
+ R
Enter the command:
regedit
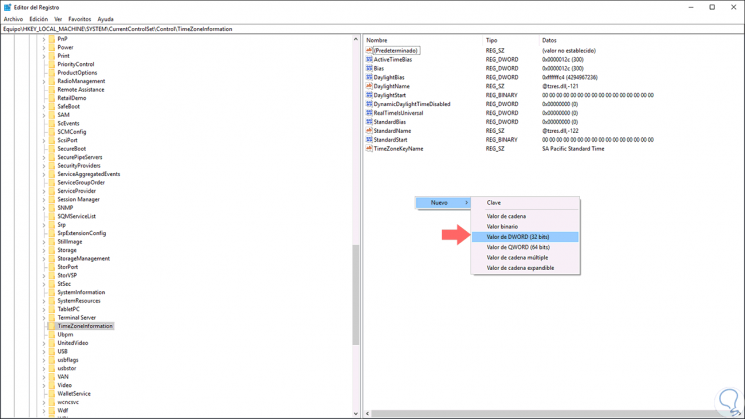
And we will go to the following route:
HKEY_LOCAL_MACHINE \ SYSTEM \ CurrentControlSet \ Control \ TimeZoneInformation
There we will right click somewhere free and select the New / DWORD Value option (32 bits):
Step 2
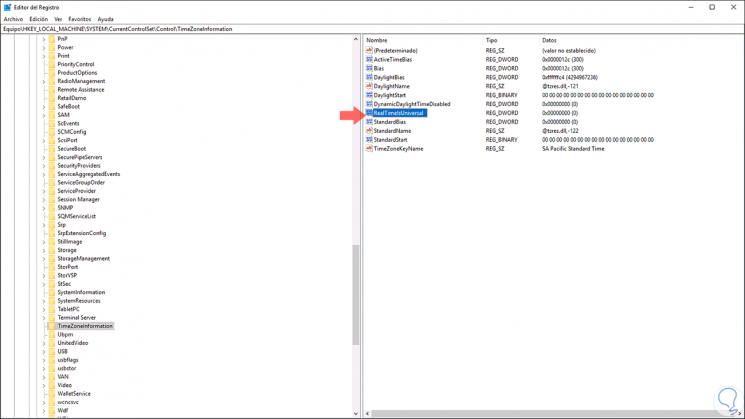
This new DWORD value will be called RealTimeIsUniversal:
Step 3
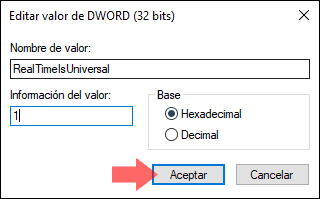
We double click on it and in the field Value information enter the number 1. Click on "OK" and we can exit the registry editor in Windows 10.
8. Update Windows 10 to fix error when synchronizing time
In certain situations, the Microsoft development group releases updates within which corrections are found for time problems in the system.
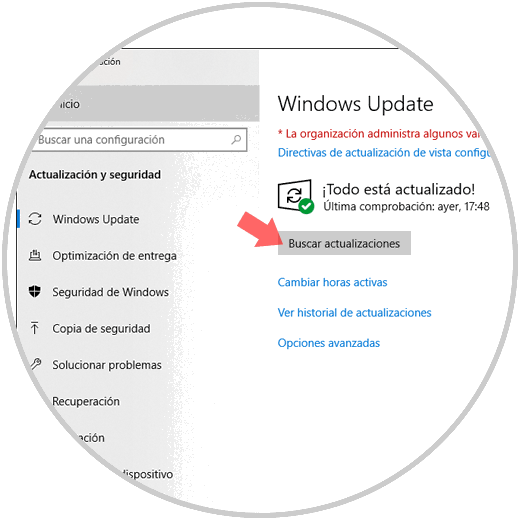
To check for updates, we will go to the route:
There we click on the "Check for updates" button in order to execute the task.
9. Check the CMOS battery in Windows 10 to fix error when synchronizing time
The CMOS battery is responsible for keeping the date and time properly in the system whether it is turned off or not. So, if the CMOS battery is reaching the end of its useful life, this can lead to errors in the generation of the date and time.
For this, we must uncover the equipment and remove the CMOS stack and replace it with a new one and restart the system again..
Undoubtedly with all these options we can successfully solve the problem and thus configure the correct and synchronized time in Windows 10 to avoid possible failures and errors in the System.