Both Microsoft Word and Microsoft Excel are applications used daily by millions of people to comprehensively manage data of all kinds and thanks to the functions and features integrated into these applications, management will be much more dynamic and central. Thanks to these two applications, we can make text documents or spreadsheets easily and with great possibilities in each of these formats . We can also customize these files with different options that we can find in each of the available programs for free..
In the 2019 edition, Microsoft has introduced new changes in these applications, but certainly there will continue to be certain actions that we perform daily as part of the task of creating documents and one of them is to add watermarks to the documents.
A watermark is basically a message, which can be an image, a text or a signature and which is superimposed on the document with a high percentage of transparency One of the main tasks of watermarks is to protect the author's rights of the document or indicate the current status of the document as is the case of Draft. TechnoWikis will explain how we can add or remove a watermark in Word or Excel 2019 in a simple way so that our documents are more personalized or adjusted to our needs at any time..
1. How to make a watermark in Word 2019
Microsoft Word 2019 gives us the possibility to add a watermark to a new file, an existing file or a specific section of the selected document.
Step 1
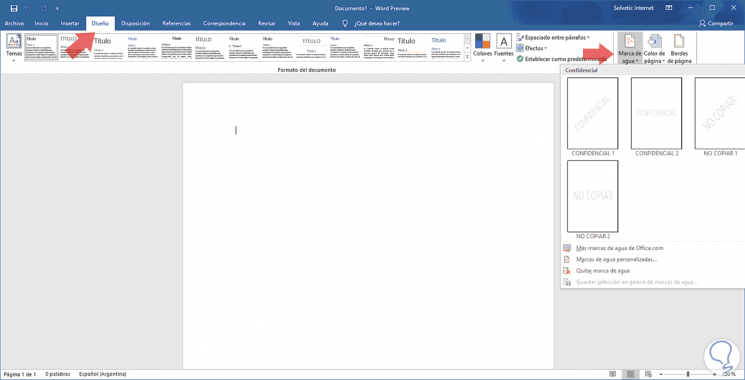
We access a new Word 2019 file and we will go to the Design tab, in the Page Background group we can see the option Watermark which, when pressing, will display various options, either add a default form or create a custom watermark:
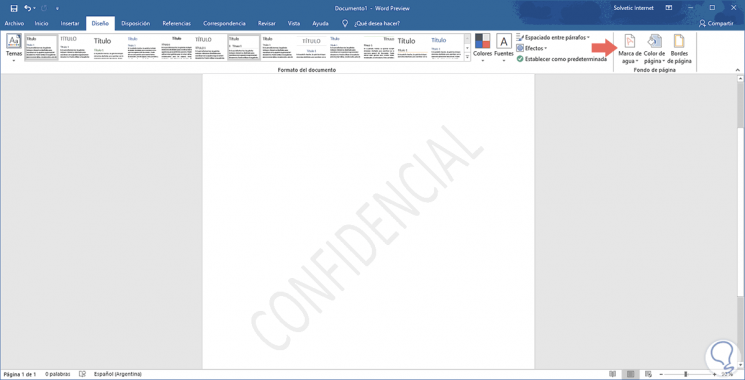
For example, if we use one of the preset options we will see the following:
Step 2
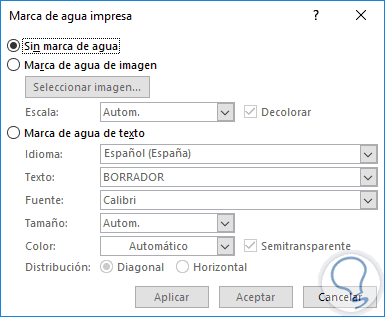
Now, we click on the Custom watermark line to create our own watermark and the following wizard will be displayed:
Step 3
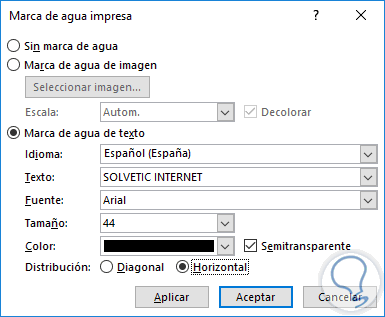
There we can insert a watermark of both image and text, for example, if we want to add our own watermark we activate the text Watermark box and enter the desired text, the type of font to use, size of it , the color and the way the text will be distributed either horizontally or diagonally:
Step 4
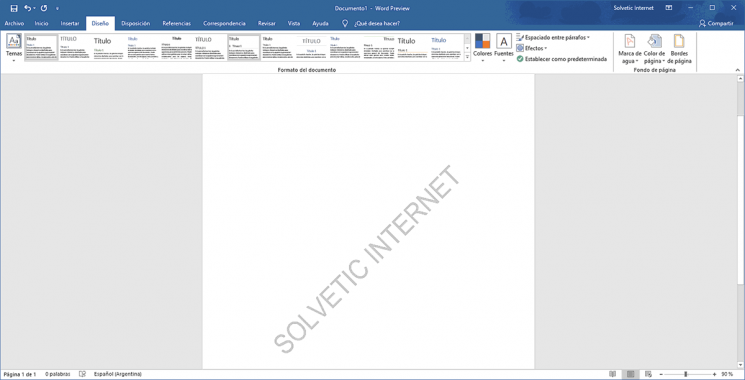
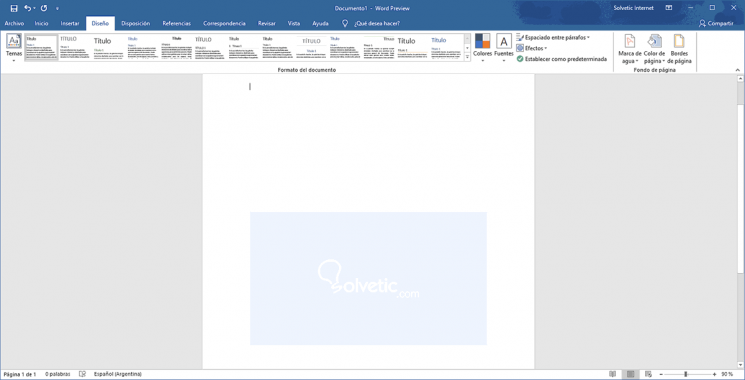
Click on the Apply and Accept button to save the changes and this will be the result obtained:
Step 5
In the case that we want to add an image watermark, we activate the Image watermark box where we will see the following:
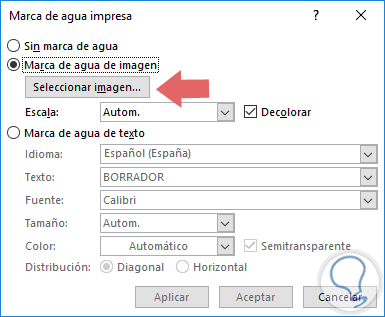
There we click on the Select image button and the following will be displayed:
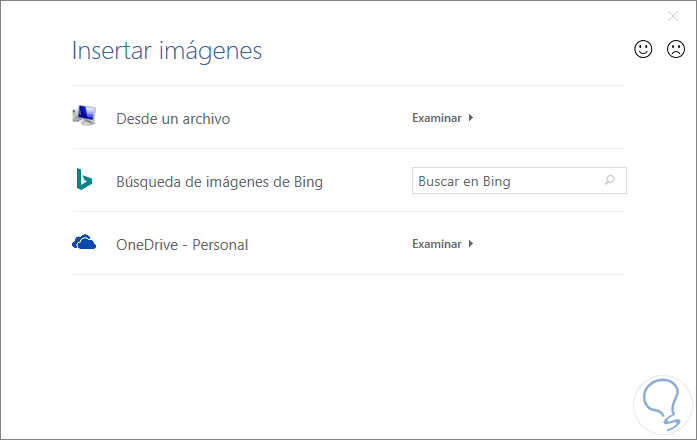
As we can see, we can select an image of the crazy team, from the Bing search engine or from our OneDrive account.
Step 6
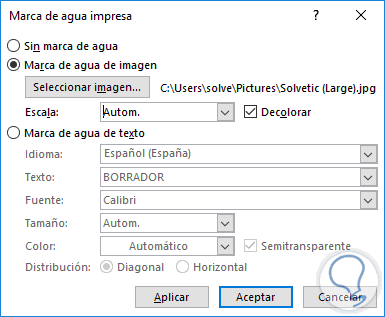
In this case we select the local team and once the image is defined we will see the following. In the scale field we can define the zoom percentage to be applied to the image with options of 50, 100, 150, 200 or 500% and we can also activate the Discolorate box to apply this effect to the image.
Step 7
Once the image is added, this will be its appearance in Word 2019:
2. How to put a watermark to a Word 2019 section
With the previous method the watermark will be applied to all the sheets of the document, but it is possible to apply a watermark only to a particular section of that document.
Step 1
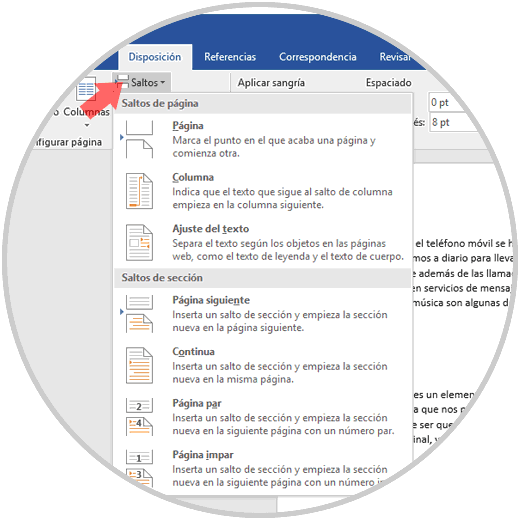
To achieve this, it will be necessary to create sections in the document to be edited and for this we will go to the Layout menu and in the Page Setup group and click on the Hops option where the following will be displayed:
Step 2
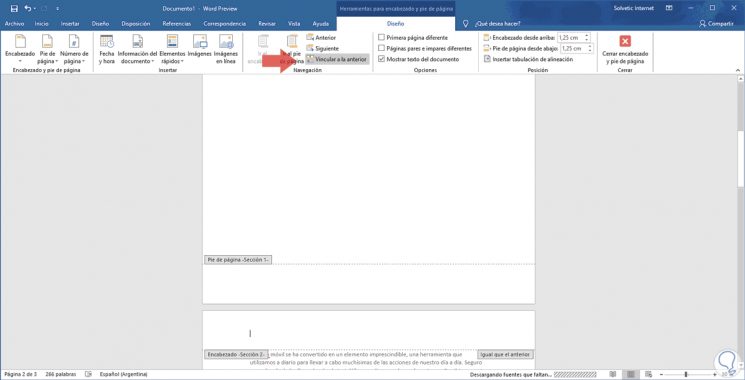
We use any of the options in the section Breaks section and we will automatically see the change reflected in Word 2019, now we will double click on the page header so that the following is displayed:
Step 3
As we can see, now we have a new menu called Header and Footer Tools, we must go to the Design tab and click on the