Microsoft Word 2019 follows the traditional line of functions and scalability of Word 2016 allowing the end user to experience great options when working on their documents with the best options to create professional files. One of the most basic things that we sometimes forget is the security of the data we store in Microsoft Word, in this case 2019, and we cannot be oblivious to the high levels of attacks that exist today either by third-party attacks or by own mistakes..
Microsoft Word 2019 gives us the opportunity to assign a password to the active document which gives us one more security step as it will prevent other unauthorized users from accessing the information hosted there and not only can read it but copy it or apply changes.
TechnoWikis will explain in detail how to set or delete a password in Microsoft Word 2019..
To keep up, remember to subscribe to our YouTube channel! SUBSCRIBE
1. Put a password to a Word 2019 document
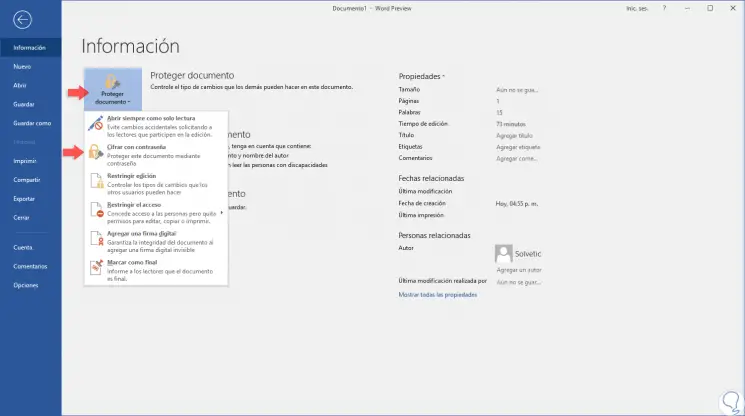
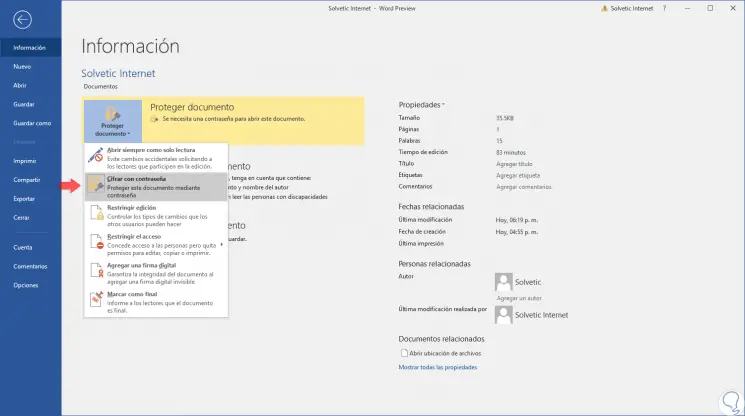
Step 1
To set a password in Word 2019, we go to the “File†menu, there we go to the “Information†section and by clicking on the “Protect document†option we select “Encrypt with passwordâ€:
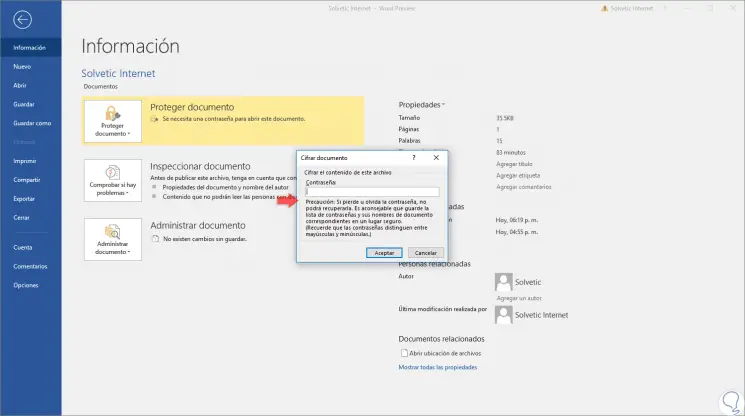
Step 2
The following window will be displayed where we will enter the respective password. Click on OK to apply the changes.
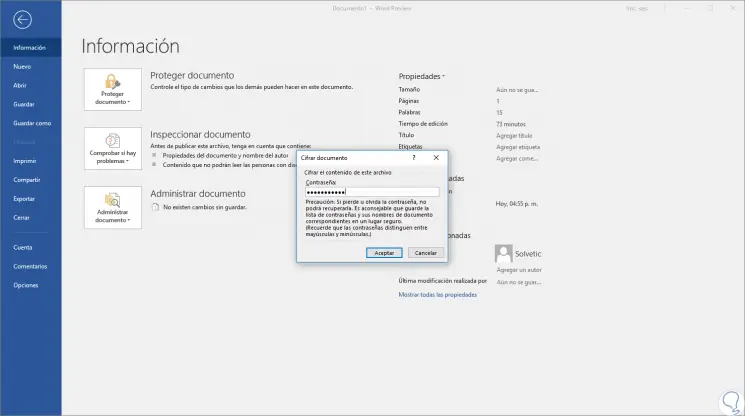
Note
We must assign a strong password but remember easy.
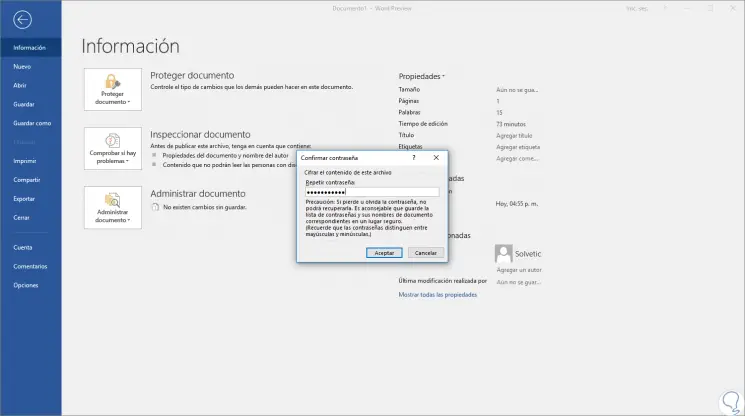
Step 3
By clicking on Accept we must confirm the password:
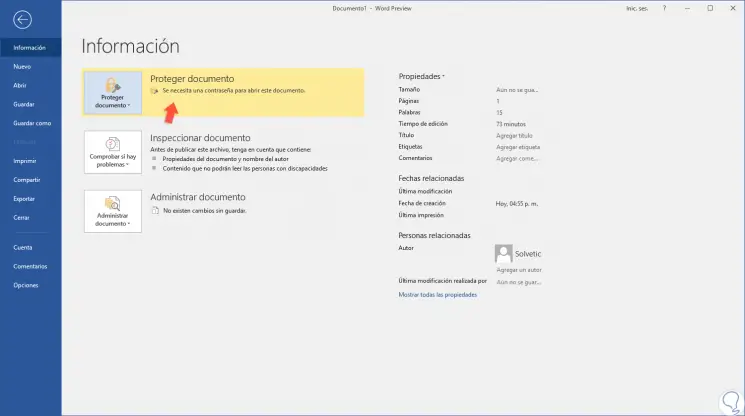
Step 4
Again click on OK to set the assigned password and we will see the following confirming the action created:
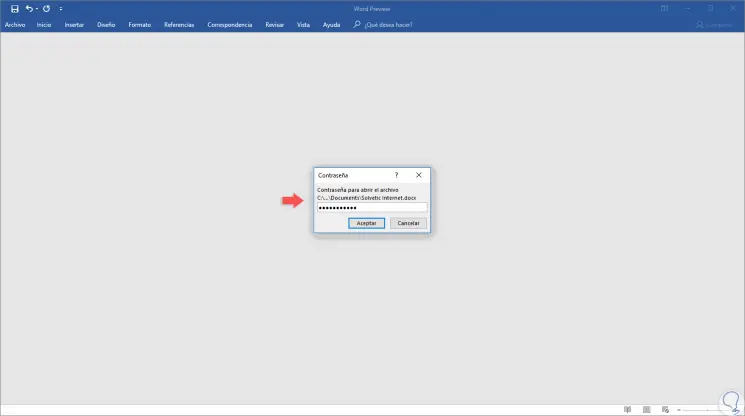
Step 5
We save the file and the next time we go to access it, the following will be displayed. There we will enter the password assigned to the document and click on the Accept button to access it.
2. Remove password to a Word 2019 document
Step 1
For this process we open the protected file and go back to the path “File / Information / Protect document†and there we select “Encrypt with passwordâ€:
Step 2
The following window will be displayed where by default the password assigned to the document will be:

Step 3
We just have to delete this password:
Step 4
Click on Accept and we will see that the password protection of this document has been removed. In this way we can access the document without any restrictions.
Thus, Word 2019 allows us to simply establish a new security measure for the most important information by establishing a secure password or eliminating an existing one.