PowerPoint is one of the Office applications through which we are able to create professional presentations using great transition tools , effects and designs . Many presentations can be highlighted with multimedia elements which gives a touch of elegance to the slides. Thanks to this tool, we can create visual documents that allow us to dynamically represent some subject..
One of the options that we can implement in any PowerPoint presentation, both in its 2016 version and in 2019, is to add a watermark. Remember that a watermark is a background image, which can be text or an image itself, which has a faded effect and can be used to indicate the status of a document, states as confidential, draft, or add a logo
This is a common task in Microsoft Word, but in the case of PowerPoint we do not have a built-in watermark function, so TechnoWikis will explain how to achieve it easily. It is a simple process, which can give us the possibility to customize our presentations and ensure that our brand has been integrated.
Note
This method applies to both PowerPoint 2016 and 2019.
1. How to create watermarks in PowerPoint
It is possible to add watermark text to the slide background both individually and to all slides at the same time through the master slide function.
Step 1
To start this process, we create a new slide and go to the Vista menu:

Step 2
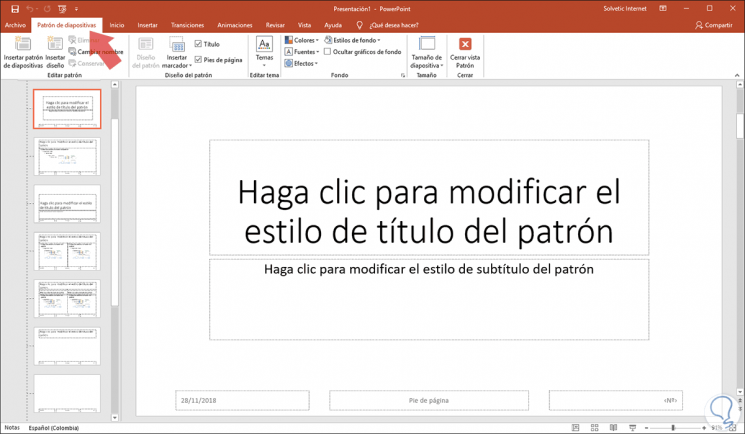
There we must click on the Slide Master option located in the Pattern Views group, the PowerPoint design will be as follows:

Step 3
There we select the first slide, in case of applying the watermark for all the slides, in the case that we only want to insert watermark text on a single slide, we must select the individual slide in which the text has to be inserted instead of going to the slide master.
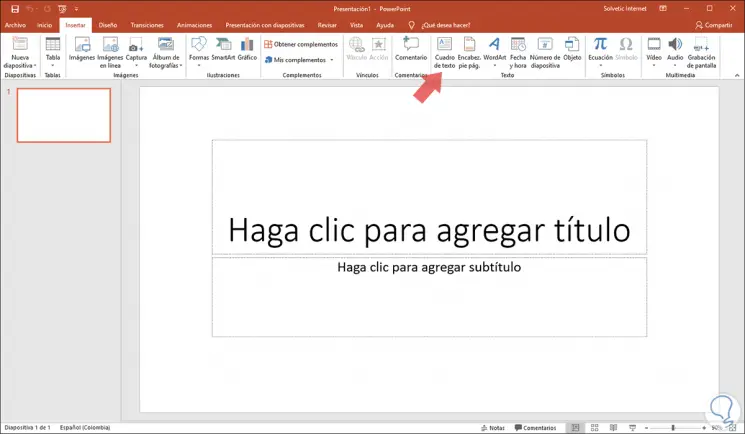
To just add the watermark on a single slide we go to the Insert menu where we will see the following:

Step 4
There we must click on the Text box icon located in the Text group and in the box that appears we will insert the desired text and we can define its style, size or position:

Step 5
It will also be possible to go to the Format tab on the PowerPoint ribbon to change settings such as color, transformations and more:

Step 6
After applying the desired changes, we can define if the watermark will be visible behind all the other elements on the slide, this is the purpose of the watermark, for this we must click on the "Send back" button on the Format tab and there select the Send back option:

Step 7
After applying the desired changes we go to the View menu and there we select the Normal option:

Step 8
Upon returning to normal view we can enter the desired text and there we will see the watermark we have created:

2. How to remove a watermark from PowerPoint
To erase the watermark of PowerPoint, simply go back to the View menu and select Slide Master and then click on the text and proceed with its deletion:

Then again select the Normal view and in this way we will no longer have the watermark on the slides to be used in PowerPoint..
As we can see, although there is no integrated function, we can add or remove our own watermark in a simple way in PowerPoint 2016 or 2019. In this way we will be able to customize all of those presentations that we are creating in the event that we It is necessary.