The photos have become part of our daily lives due to the rise of social networks and the incorporation of good cameras in mobile phones. No doubt today having good photos is something that many users are looking for when buying a phone, since the cameras have gone to the background because of this..
Undoubtedly, the options and functions of cameras on mobile phones have evolved over time, and that is why it is interesting to know how to use all of them to get the most out of them. One of the options that users like best is the portrait mode, which allows you to take good pictures with depth of field.
Undoubtedly this is a very good option in case you want to take a photo in which to highlight something and that the background appears without focusing. In the case of iPhone XR , this mode offers a lot of image quality, since after all it is an effect that we can achieve with the best cameras. That is why we explain all its modalities below, so you can know which one to choose at any time..
Note
The portrait mode on iPhone XR can only be done with people. It does not detect animals or objects. On iPhone X , XS or iPhone XS Plus models, if you recognize other types of objects.
To keep up, remember to subscribe to our YouTube channel! SUBSCRIBE
1. How to use portrait mode on iPhone XR
Step 1
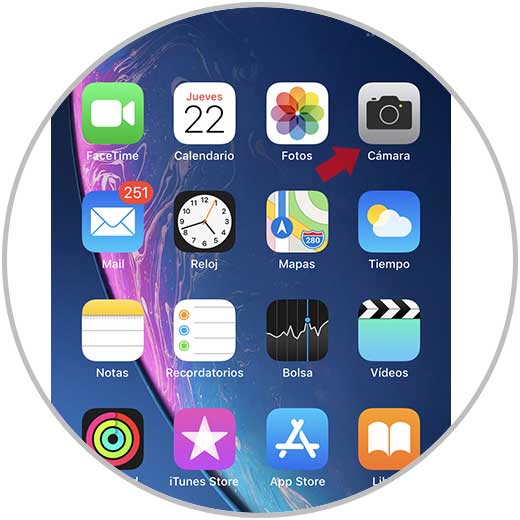
The first thing you should do is enter the "Camera" of the phone.
Step 2
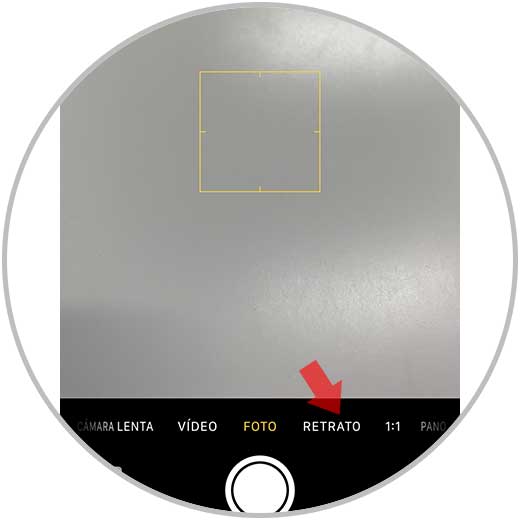
Next, you have to select the “Portrait†option from the options at the bottom.
Step 3
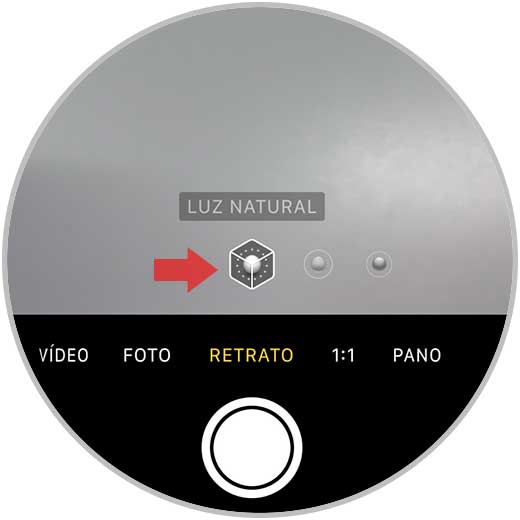
Once you have selected this option, you will see that at the top of the image you have three options.
Natural light
This is a good option if you are in an outdoor place and the outside light is good. If you select this effect, the mobile will not adjust any light. Basically what we will achieve will be to blur the background of the image.
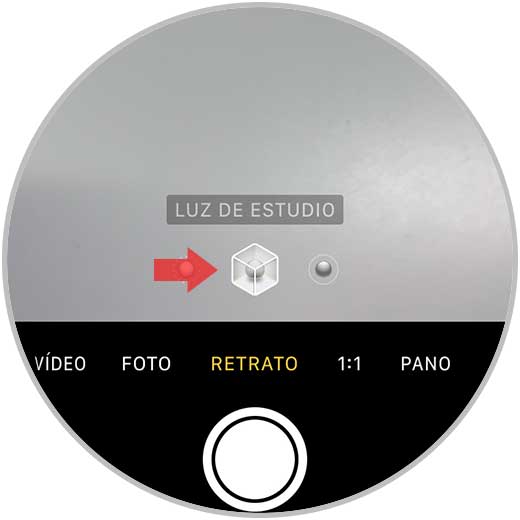
Study light
In the case that we select this option, we will see that the subject we want to focus on is brighter.
Contour light
Finally, in iPhone XR we have this other option, which offers a result similar to the study light, but in this case it darkens the edge more so that the lighting of what we want to highlight is even more remarkable.
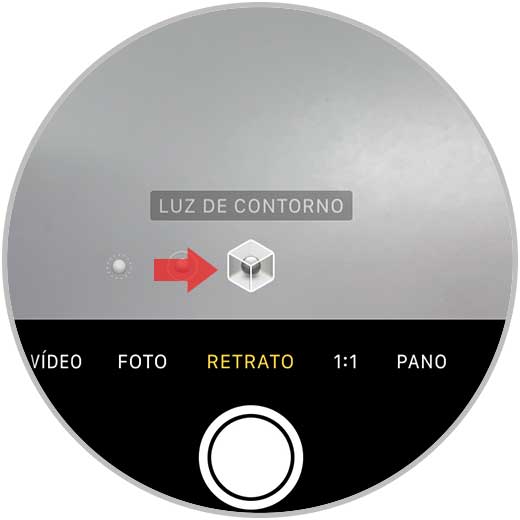
Finally select the mode you like best, and take the picture.
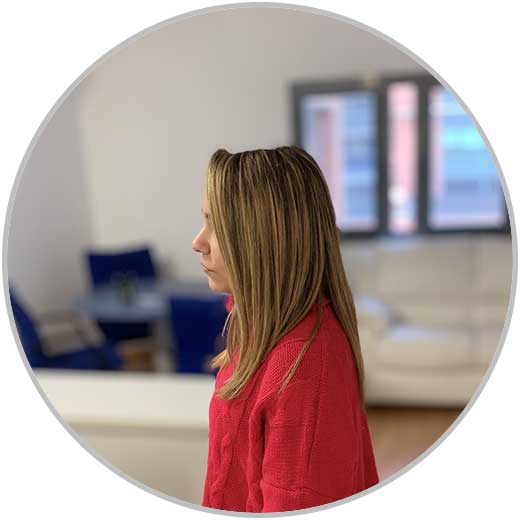
2. How to edit and remove portrait mode on iPhone XR
Once you have taken the picture if you want to edit the portrait mode or remove it, you should highlight the following.
Step 1
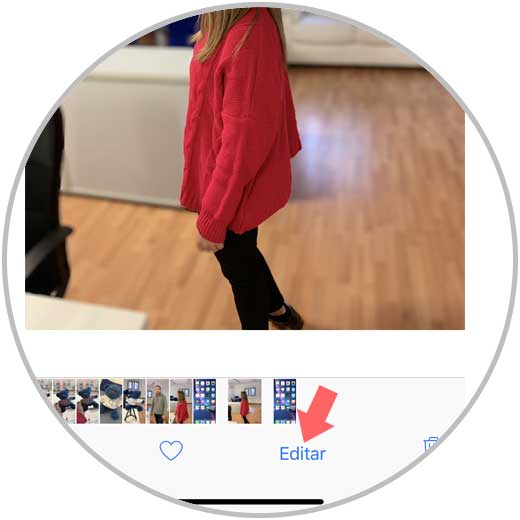
The first thing you should do is enter the gallery of your iPhone and select the desired photo. Then select "Edit" at the bottom.
Step 2
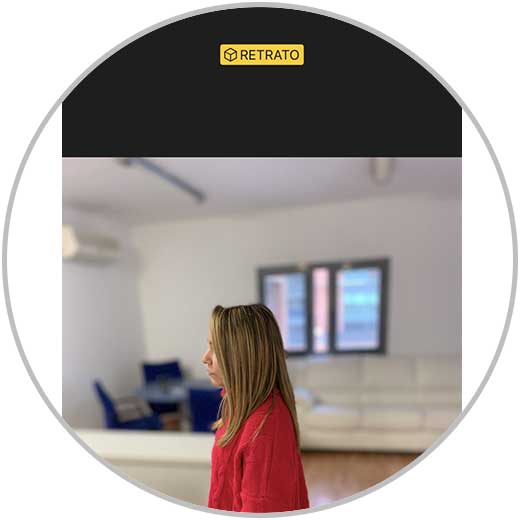
You will see that the portrait option marked in yellow appears at the top.
Step 3
If you click on this option, portrait mode will have been deactivated.
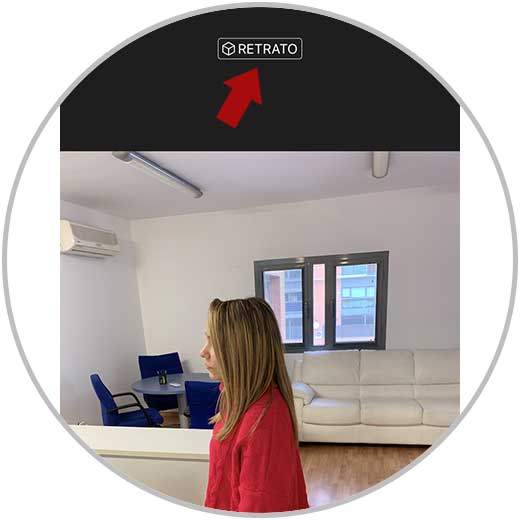
Step 4
In case you want to give more or less depth to the portrait mode with the photo once taken, you can do so by sliding the lower depth bar. You can also select the type of light
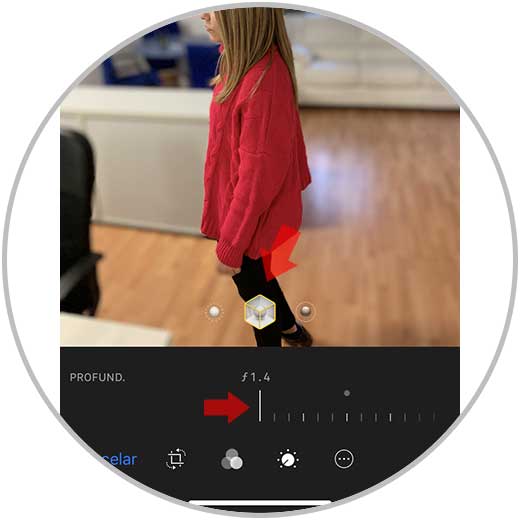
In this way, depending on how we want our image to come out, we can select one type of light or another and take advantage of these effects to get almost professional photos. Without a doubt, it is best to try it and select the one that we like the most according to our criteria