One of the great advantages that Linux distributions offer us is the possibility of expanding its resources and services since, thanks to open source, we find thousands of useful tools and options that will make administration, management and delivery options to users more work tools..
Within this vast world of options, we have an alternative called Tig Stack; which is composed of three powerful utilities such as:
What is Grafana?
Grafana is a platform that has been developed in order to perform tasks such as consulting, visualizing, alerting and understanding the metrics generated by the system regardless of where they are stored, since Grafana is able to access this data and deploy them in real time. With Grafana we can create, explore and share panels with more users and thus achieve a much more centralized administration.
With Grafana it will be possible:
Generate alerts through Slack, PagerDuty and more available platforms
With this function it is possible to visually edit and configure the alert rules associated with the most important metrics. With this, Grafana will evaluate them constantly and thus send notifications of these.
Display options
Grafana offers us various options for displaying data such as heat maps, histograms, graphs and more. This adds to the Add-ons Panel, which provides many different ways to view the metrics and records generated.
Integration
This is achieved since Grafana supports dozens of databases natively.
Expandability
Thanks to the fact that Grafana has hundreds of boards and accessories available in the official library.
Multiple authentication options
Like LDAP, Google Auth, Grafana.com, Github.
Better configuration options
Since Grafana includes advanced preferences such as the option to select dark or white themes, change time zones and more.
Best notifications
Since at the moment an alert changes its status automatically notifications are sent, and these can be received by email or directly from Slack, PagerDuty, VictorOps, OpsGenie or via webhook.
Dynamic boards
Which allow us to create dynamic and reusable dashboards using template variables, which are displayed in the form of drop-down menus at the top of the Grafana dashboard.
What is InfluxDB?
InfluxData is a platform that offers various time series in order to implement, observe, learn and automate all types of systems, applications and business processes in various work environments.
Some features of InfluxDB
- Ability to observe and automate key systems, infrastructure, applications and business processes.
- Analyze and automate sensors and devices in real time, which generate information for administration tasks.
- Multiple instrumentation options which detect usage patterns and from there new business opportunities can be created
What is Telegraf?
Telegraf has been developed as a server agent, which is controlled by add-ons in order to collect and report metrics for its administration.
Telegraf is highly scalable thanks to the integrations that allow us to access metrics, events and records directly from the containers and systems in which the utility is running, and from there be able to extract third-party API metrics or also access metrics from StatsD and Kafka consumer services and, as an additional point, there are outlets to send metrics to other bases or services such as InfluxDB, Graphite, OpenTSDB, Datadog, Librato, Kafka, MQTT, NSQ and many more.
Some of its functions are:
Easy connection to data sources
Like MongoDB, MySQL, Redis and more to collect and send metrics.
Metrics Collection
Through a modern stack of cloud platforms, containers and orchestrators.
Possibility of collecting data
Both critical status type (pressure levels, temperature levels, etc.) of the IoT sensors and devices.
Integrate a metric collection daemon
This can collect metrics from a wide range of inputs and write them on multiple outputs.
It has more than 200 accessories
That can be used on platforms or services such as InfluxDB Line Protocol, JSON, Graphite, Value, Nagios and Collectd.
Compatible with system service processes
Without affecting the workflow.
Now, TechnoWikis will explain how to install this Tig Stack in Ubuntu and thus raise the service levels of our server.
1. How to install InfluxDB on Ubuntu (Linux)
The first step is to install the time series influexdb in the system.
Step 1
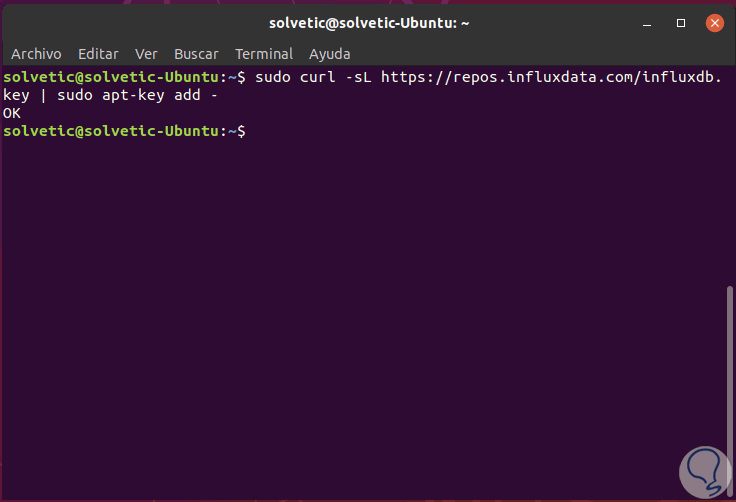
For this we will install both 'influexdb' and 'telegraf' from the same 'influexdata' repository, since both programs have been developed by the same group. For this we execute the following line to add the InfluxDB key:
sudo curl -sL https://repos.influxdata.com/influxdb.key | sudo apt-key add -
Step 2
Now, let's add the influexdata repository:
source / etc / lsb-release echo "deb https://repos.influxdata.com/${DISTRIB_ID ,,} $ {DISTRIB_CODENAME} stable" | sudo tee /etc/apt/sources.list.d/influxdb.list 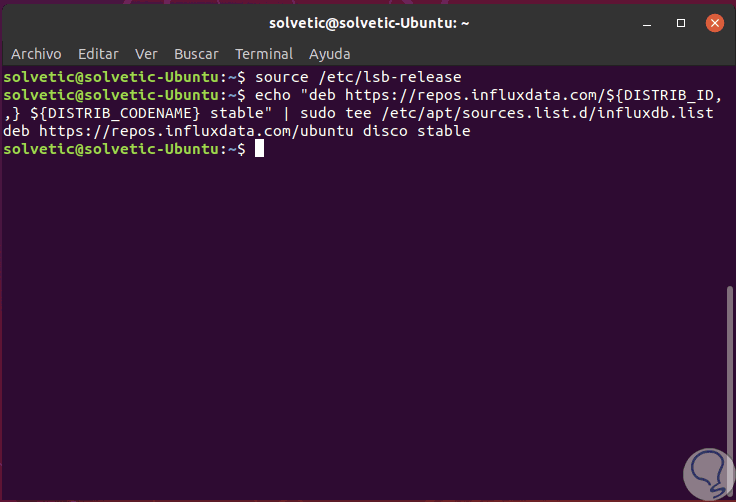
Step 3
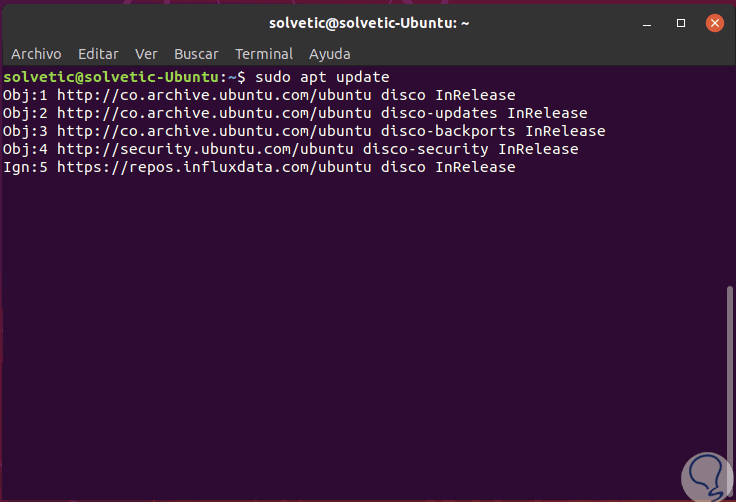
We proceed to update the repository:
sudo apt update
Step 4
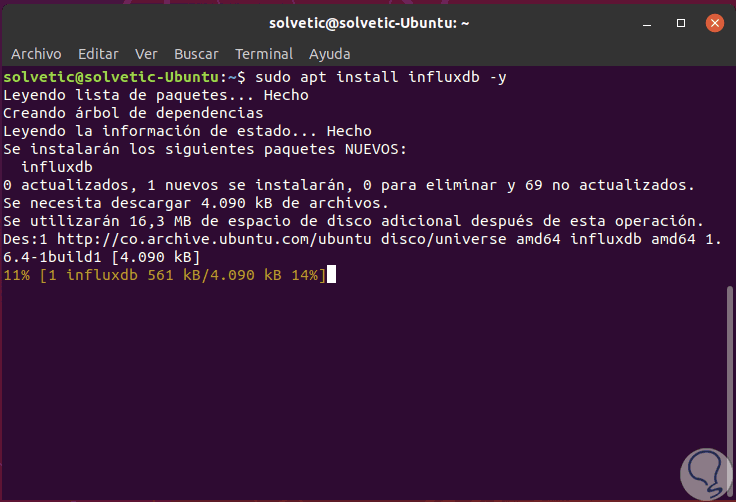
We install the influexdb package with the following command:
sudo apt install influxdb -y
Step 5
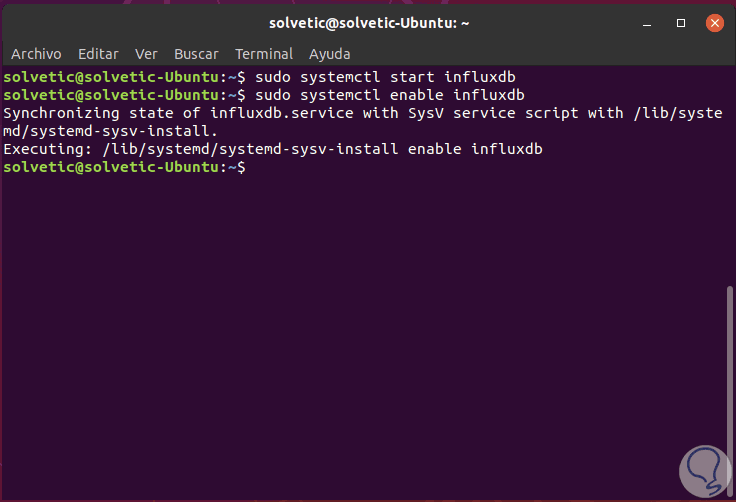
After the installation finishes, we will start the influexdb service and enable it to start every time during system startup with the following commands:
sudo systemctl start influxdb sudo systemctl enable influxdb
Step 6
Let's check the open ports in Ubuntu:
netstat -plntu
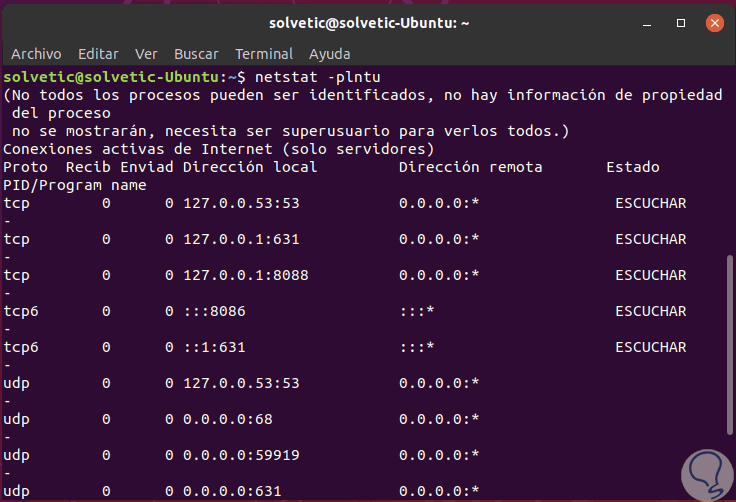
There we must ensure that the influexdb ports '8088' and '8086' are in the LISTEN state..
2. How to create InfluxDB database and user in Ubuntu Linux
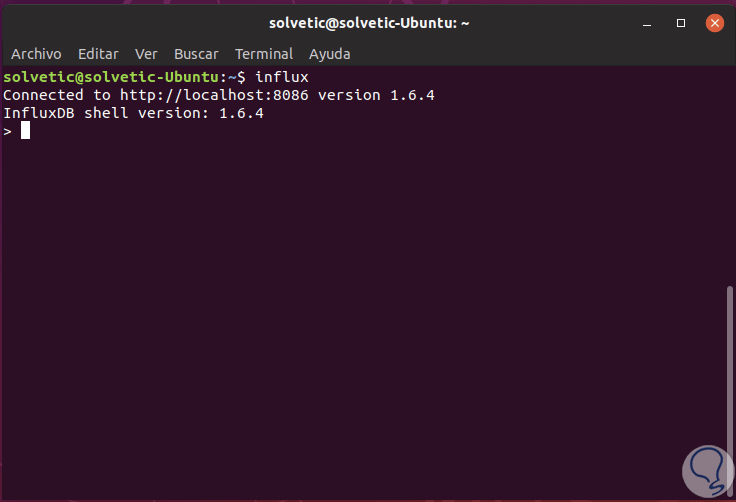
In order to store all the data of the telegraph agents, it will be necessary to configure the database and the user of influexdb in the system. InfluxDB has the CLI tool called influex which allows you to interact with the InfluxDB server.
Step 1
The Influx command gives us access to the database:
Influx
This gives us access to the database:
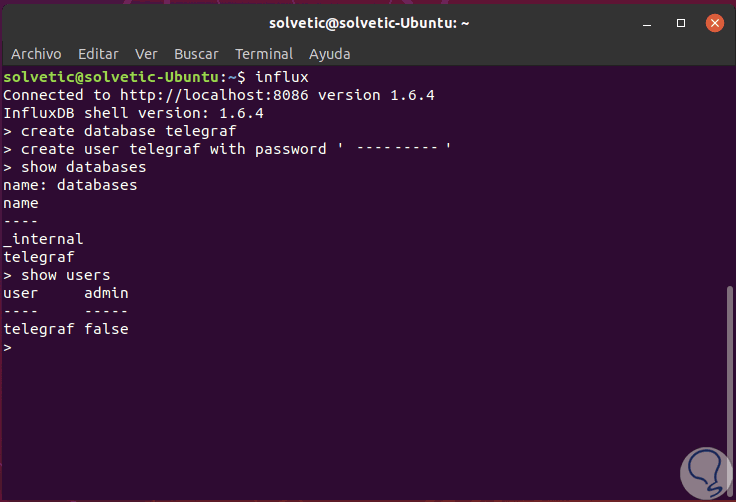
Step 2
There we will add the following:
create database telegraf create user telegraf with password 'password'
This will create a telegraf user with the password we assign. If we want to check the database created with its user, we execute:
show databases show users
3. How to install the Telegraf agent on Ubuntu Linux
Since Telegraf has been created by influexdata, which I also think influexdb; therefore, when the influexdata key and repository was added to the system, it is possible to install both applications.
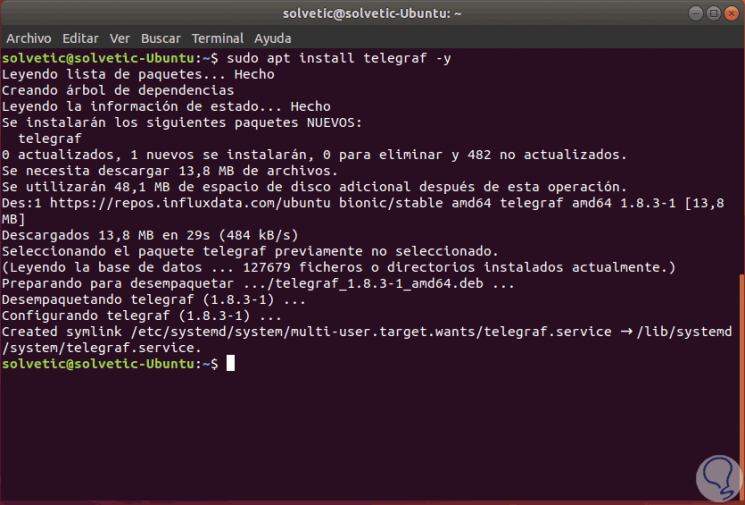
Step 1
For this we execute the following line:
sudo apt install telegraf -y
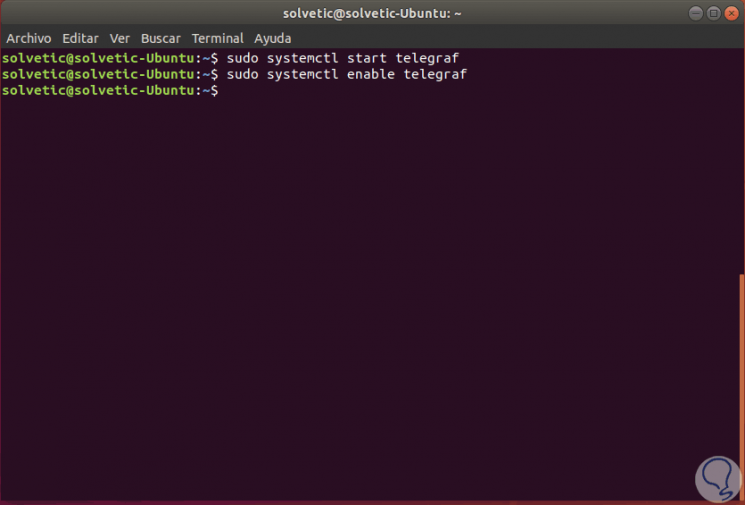
Step 2
Now we are going to start the telegraphy service and enable it to start every time Ubuntu starts:
sudo systemctl start telegraf sudo systemctl enable telegraf
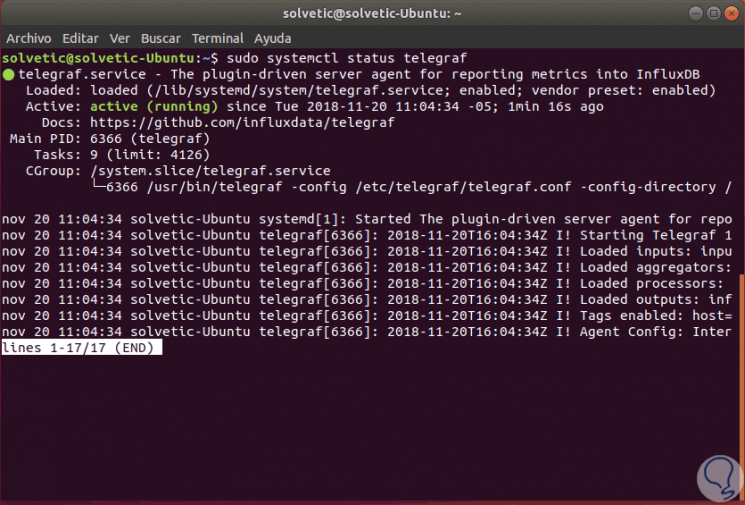
Step 3
To check its status we execute the following line and we can see that its status is active and running.
sudo systemctl status telegraf
4. How to configure Telegraf in Ubuntu Linux
Telegraf is a complement-based agent and has 4 types of concept complements that are:
- Through the 'Input Plugins' to collect metrics.
- With the 'Processor Plugins' to transform, manage and filter metrics.
- Taking the 'Add-ons' to create and add metrics.
- With the 'Output Add-ons' in order to write metrics in multiple destinations, including influexdb.
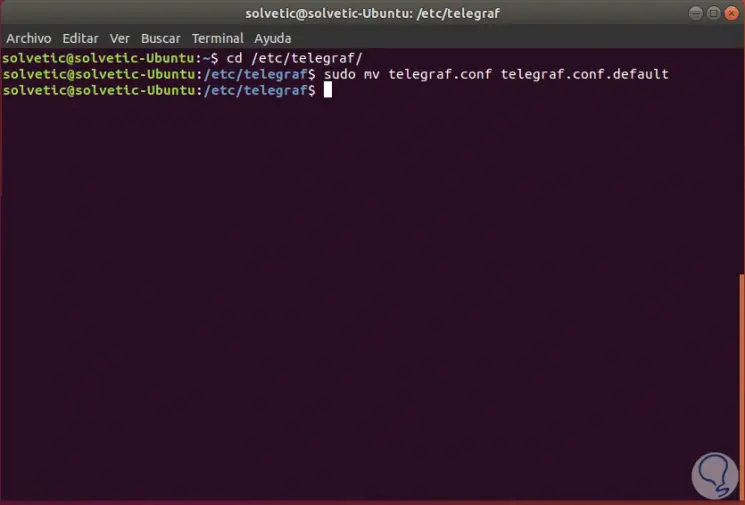
Step 1
To configure it we will go to the respective directory like this:
cd / etc / telegraf /
Then, we will rename the original file:
mv telegraf.conf telegraf.conf.default
Step 2
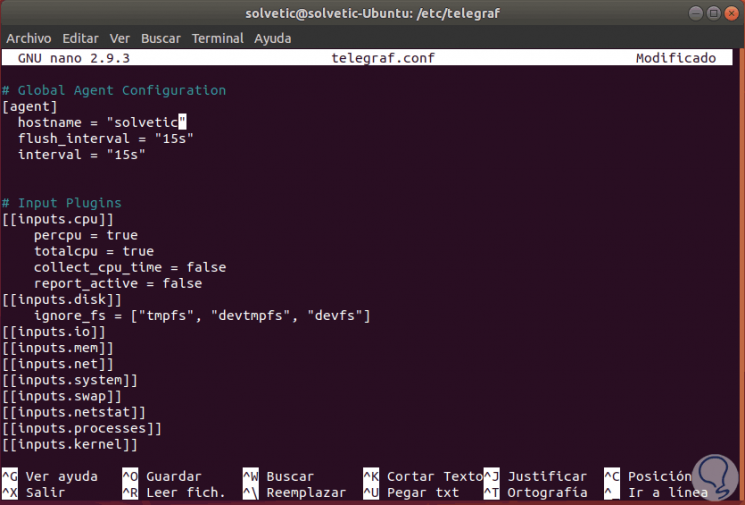
Now we will create a configuration file called telegraf.conf with some text editor, in this case with nano:
sudo nano telegraf.conf
In this new file we will paste the following configuration:
# Global Agent Configuration [agent] hostname = "solvetic" flush_interval = "15s" interval = "15s" # Input Plugins [[inputs.cpu]] percpu = true totalcpu = true collect_cpu_time = false report_active = false [[inputs.disk]] ignore_fs = ["tmpfs", "devtmpfs", "devfs"] [[inputs.io]] [[inputs.mem]] [[inputs.net]] [[inputs.system]] [[inputs.swap]] [[inputs.netstat]] [[inputs.processes]] [[inputs.kernel]] # Output Plugin InfluxDB [[outputs.influxdb]] database = "telegraf" urls = ["http://127.0.0.1:8086"] username = "telegraf" password = "*********"
We save the changes using the keys:
+ O Ctrl + O
Then we will press the following to exit the editor.
+ X Ctrl + X
Step 3
Telegraf integrates the telegraf command in order to manage the configuration, including the configuration generation.
Step 1
To do this we execute the following:
telegraf config -input-filter cpu: mem: disk: swap: system -output-filter influxdb> telegraf.conf cat telegraph
After this we can restart the service by running:
sudo systemctl restart telegraf
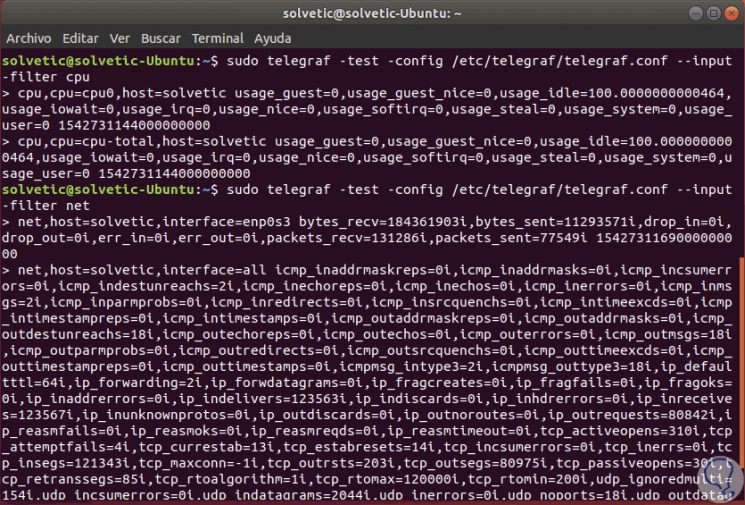
It will be possible to validate the Telegraf configuration by executing the following lines:
sudo telegraf -test -config /etc/telegraf/telegraf.conf --input-filter cpu sudo telegraf -test -config /etc/telegraf/telegraf.conf --input-filter net sudo telegraf -test -config /etc/telegraf/telegraf.conf --input-filter mem
5. How to install Grafana on Ubuntu Linux
Step 1
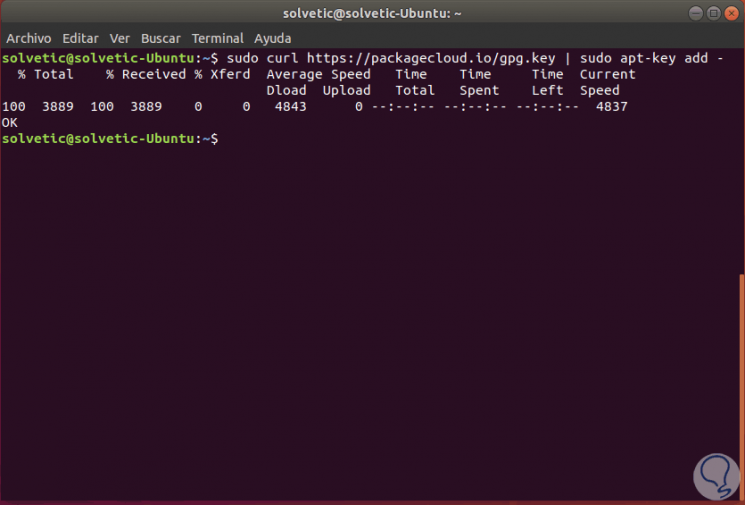
The first step is to add the Grafana key:
sudo curl https://packagecloud.io/gpg.key | sudo apt-key add -
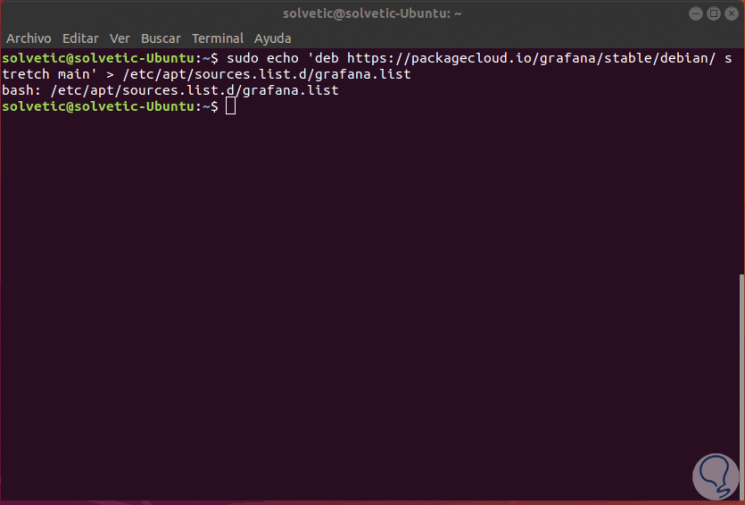
Then we add the repository:
echo 'deb https://packagecloud.io/grafana/stable/debian/ stretch main'> /etc/apt/sources.list.d/grafana.list
Step 2
After this we update the packages and install Grafana:
sudo apt update sudo apt install grafana -y
Another option to install Grafana is by running the following lines:
wget https://s3-us-west-2.amazonaws.com/grafana-releases/release/grafana_5.1.4_amd64.deb sudo apt-get install -y adduser libfontconfig sudo dpkg -i grafana_5.1.4_amd64.deb
Once it is installed, we will start the service and enable it on startup:
sudo systemctl start grafana-server sudo systemctl enable grafana-server

Step 3
We check the ports:
netstat -plntu

Note
Grafana will be accessible by port 3000.
6. How to access Grafana in Ubuntu Linux
Step 1
Now, we go to a browser and execute the following syntax in a new tab:
http: // IP_address: 3000 /
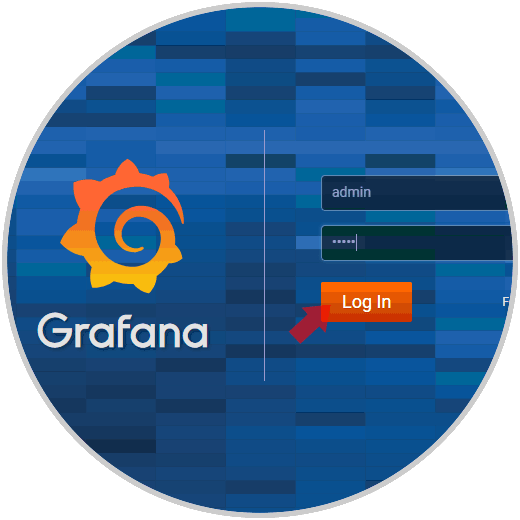
This will be the environment of Grafana and first we access with the username and password admin. Click on the "Login" button.
Step 2
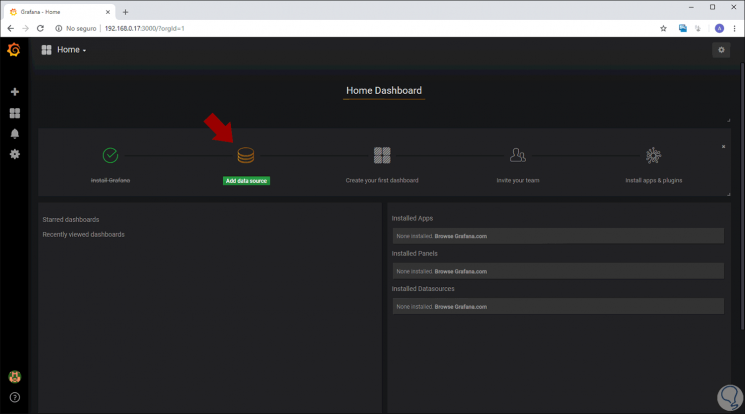
When accessing we will see the following. There we click on the Add data source button in order to add the resources of the database.
Step 3
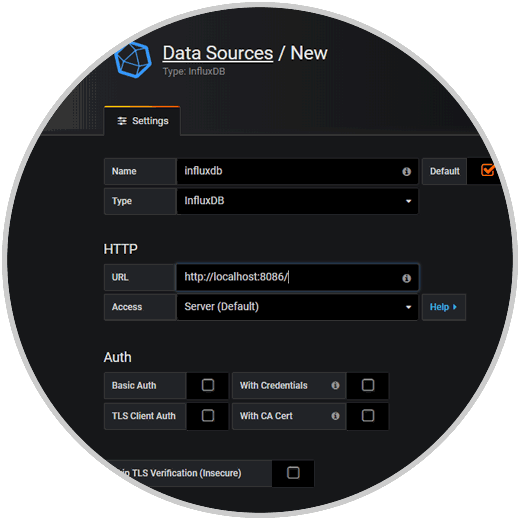
In the displayed window we will enter the following in the Settings section:
URL
http: // localhost: 8086 /
Step 4
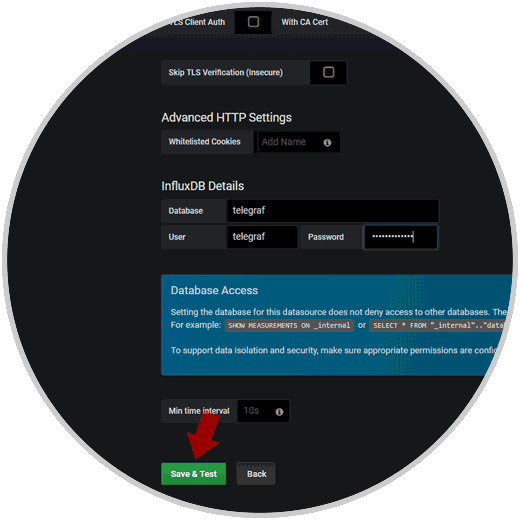
At the bottom in the InfluxDB Details section we enter:
Click on the Save & Test button to validate the configuration
Step 5
The result will be as follows:

7. How to configure the Grafana board in Ubuntu Linux
Once influexdb has been added as a data source to the Grafana server, we will import the Grafana board based on the configuration of the Telegraf input add-ons.
Step 1
Grafana provides the repository of accessories and panels of Grafana through:
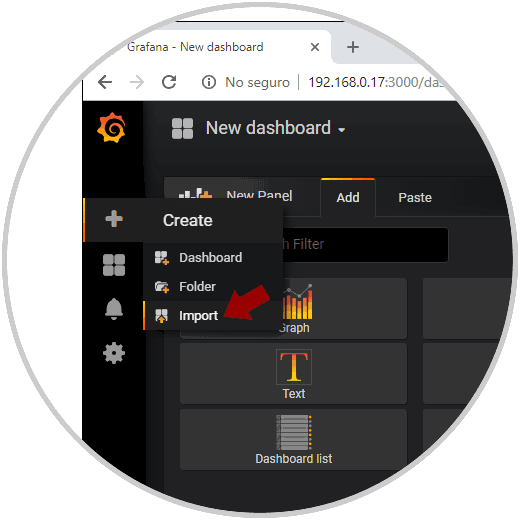
To import the Grafana panel, we will click on the '+' menu in the left panel and click on the Import option:
Step 2
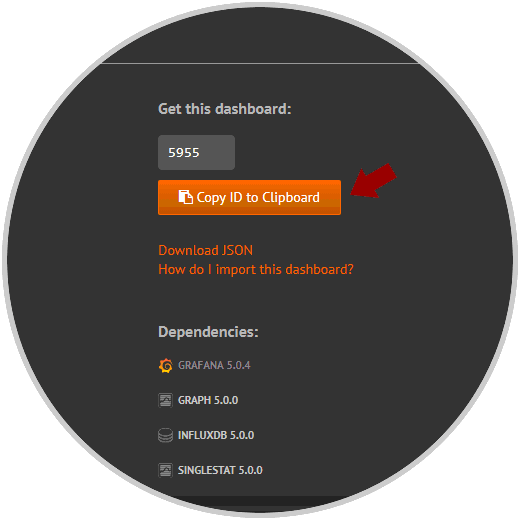
Now, we will go to the following web address:
Grafana Panels
There we click on the Copy the ID to Clipboard button..
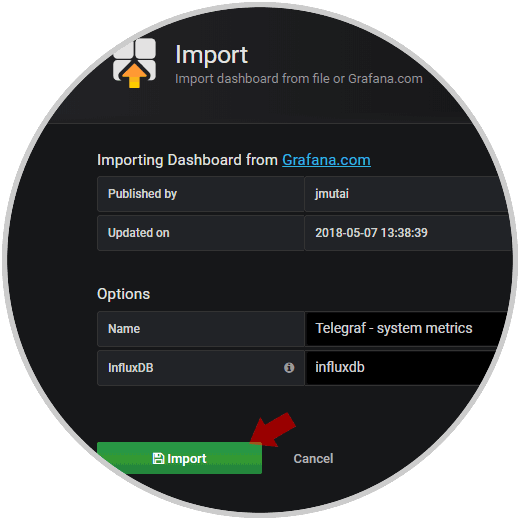
Step 3
This will automatically be added in Grafana.
Now, at the bottom, in the InfluxDB field we select our InfluxDB database. Click on the "Import" button.
Step 4
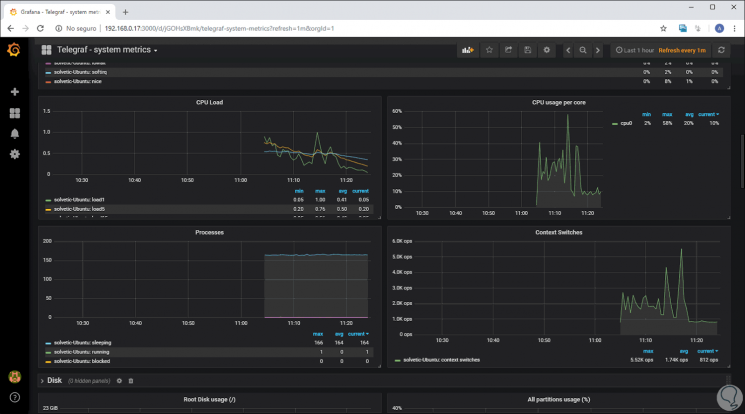
After a moment we can see the record that Grafana will take from the server:
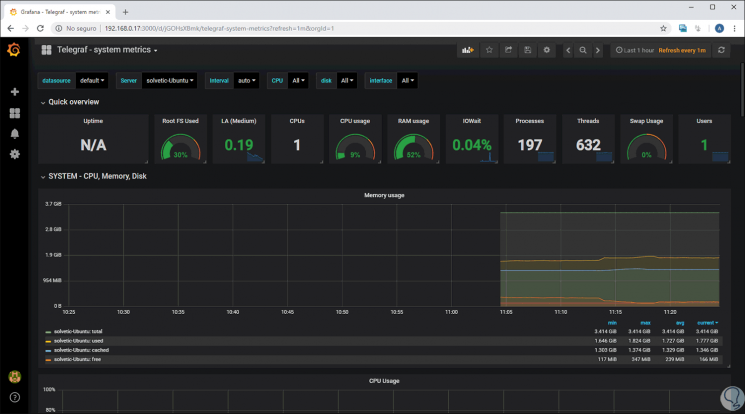
Step 5
We can see in detail numerous aspects of the server which is very useful for administrators and support staff.
Thus, Tig Stack is a comprehensive solution to use various tools in Ubuntu and achieve not only a better level of recursion but also access and graphics.