One of the most effective security practices is to create backup copies of the information we work with, and when using a macOS system, without a doubt, the best option is Time Machine. Time Machine has been developed as a backup function integrated in the equipment with which it is possible to carry out an automatic or manual backup of our personal data and other elements such as applications, music, photos, emails and everything this allows that in case of errors in the system it is possible to recover them in a simple way and with the integrity of these..
The disks, methods or units that we can use to create a backup with Time Machine are:
- USB, Thunderbolt, or FireWire external drives plugged into the respective ports on your Mac
- Another macOS computer shared as a Time Machine backup destination
- An external drive that's connected to an AirPort Extreme Base Station (802.11ac) or AirPort Time Capsule
Time Machine is responsible for creating an image of the information and this can be called a "snapshot" and Time Machine works in the background without affecting the user's operation.
TechnoWikis will teach you how to use this function in macOS and thus preserve the availability and integrity of the information..
To stay up to date, remember to subscribe to our YouTube channel! SUBSCRIBE
How to use Time Machine on macOS
Before starting, we must take into account the following:
- Time Machine will automatically create backups every 24 hours as well as daily backups for the last month or weekly backups for all months prior to the initial process
- All old copies will be deleted with the new ones
- Time Machine will only make backups only of the files that had some modification since the last copy, if none had it, it will not be replaced and this improves the creation times of the copy
- It is possible to press the Option key, then click on Explore and select the drives in case you want to create a backup on several disks
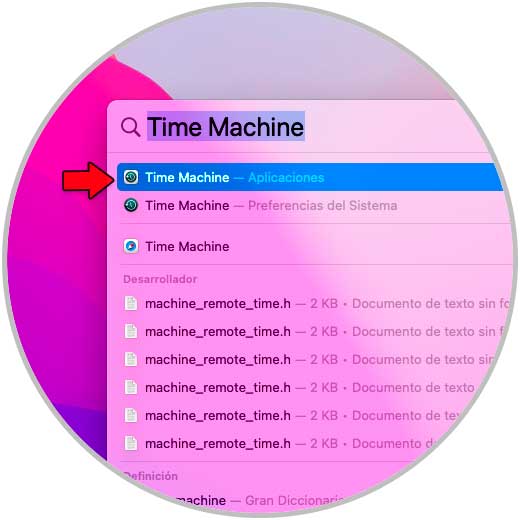
Step 1
We open Time Machine from Applications or Spotlight:
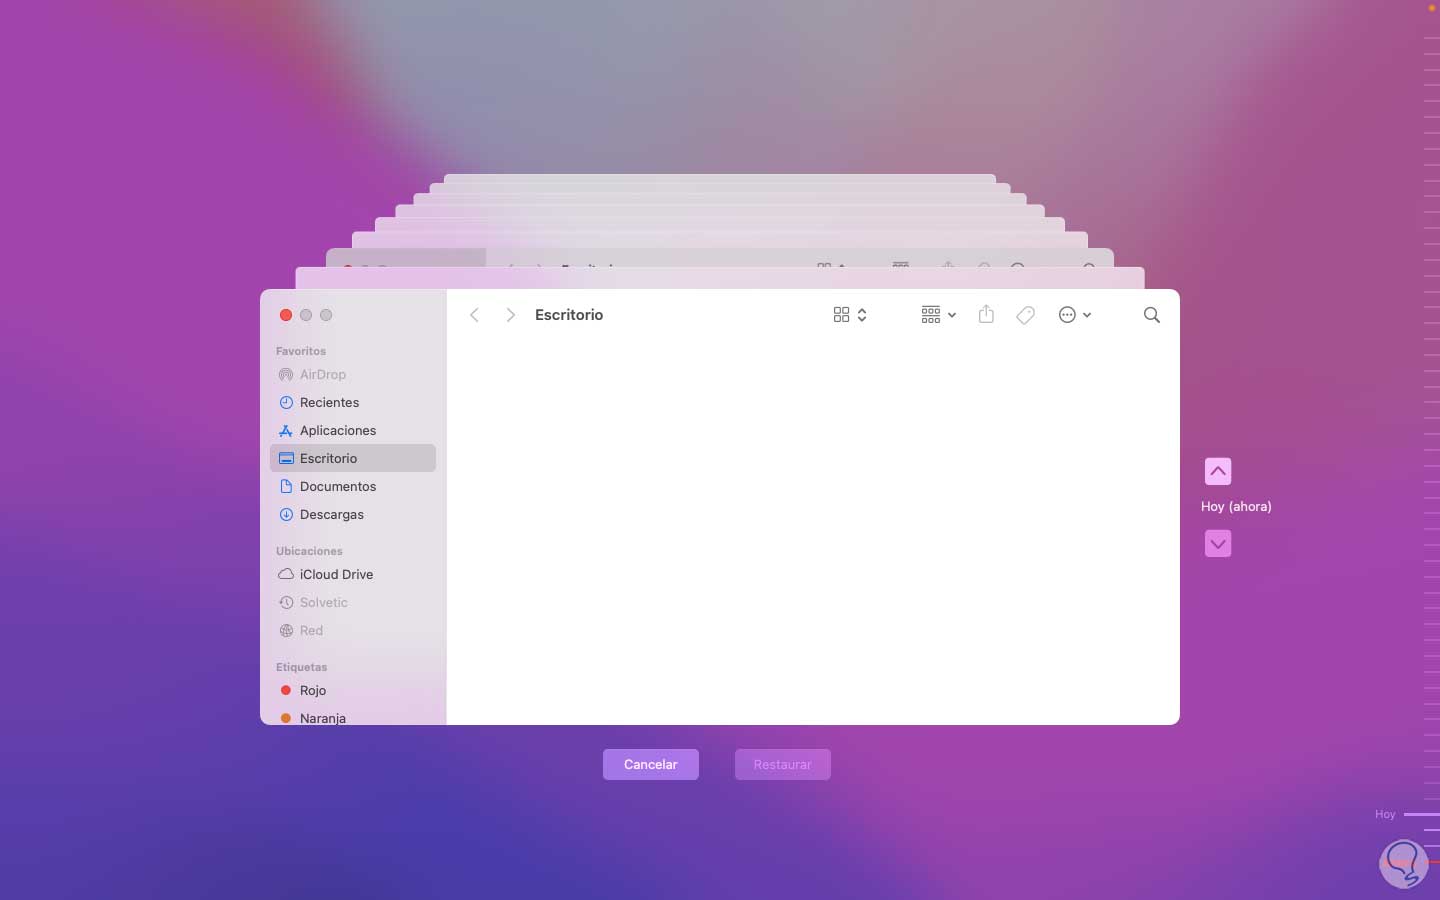
Step 2
On some occasions, if Time Machine has already been used, we will see the current or previous copies if they exist:
Step 3
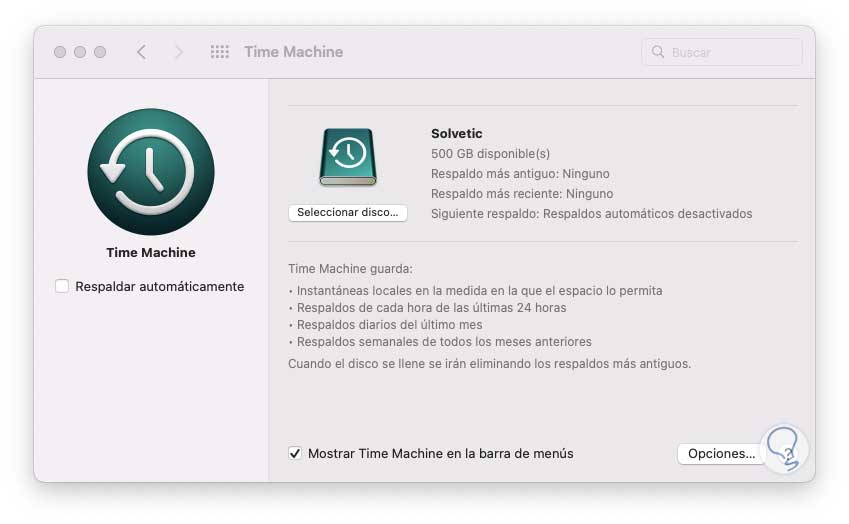
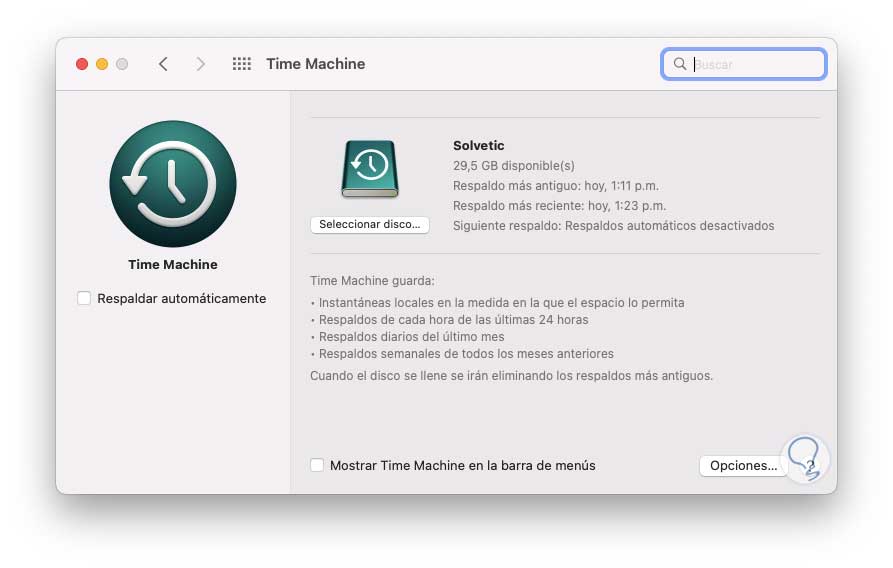
After this we will have access to the Time Machine configuration:

Step 4
We click on "Options" to see the following:
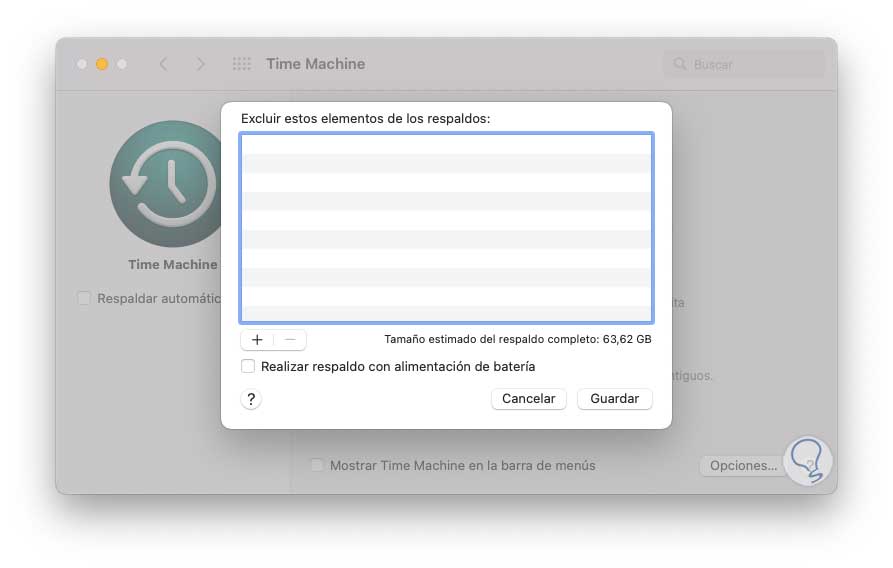
step 5
There it is possible to add or exclude folders from the backup using the + or - signs as well as activate battery usage:
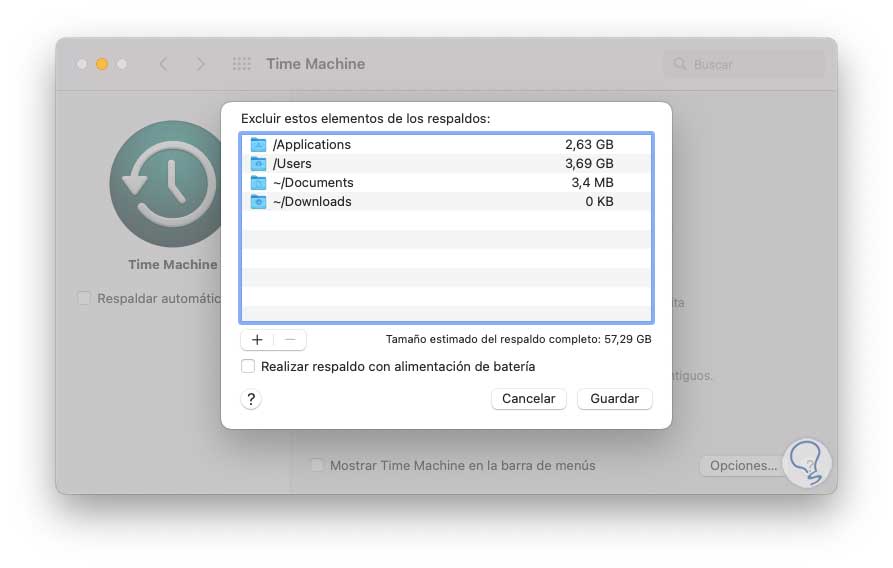
We apply the changes if necessary.
step 6
We click on "Select backup disk" and choose the drive to use to create the backups:
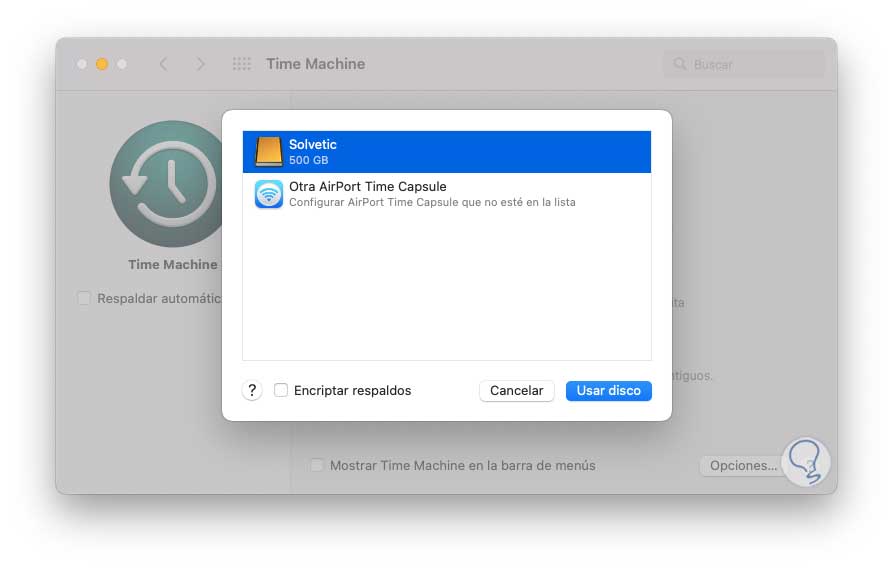
Step 7
Once the disk to be used is selected, we click on "Use disk" to confirm the process:
step 8
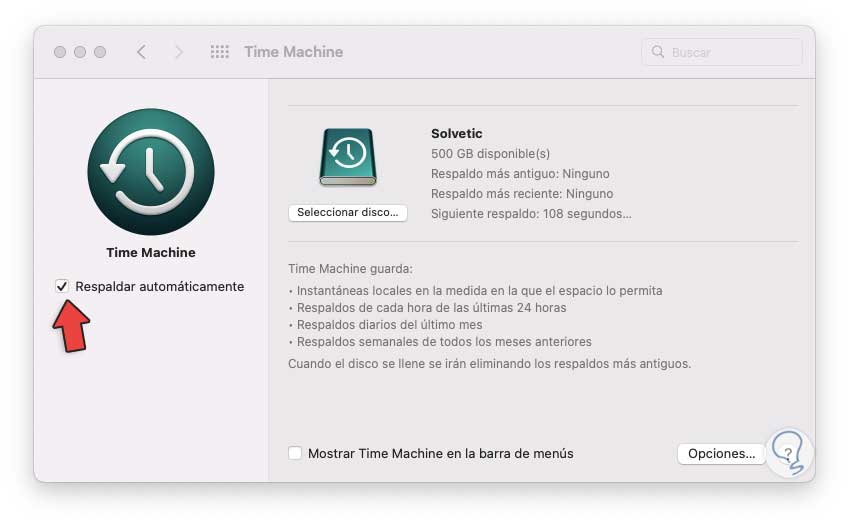
We activate the "Backup automatically" box to configure the backup copies automatically based on the default periods:
step 9
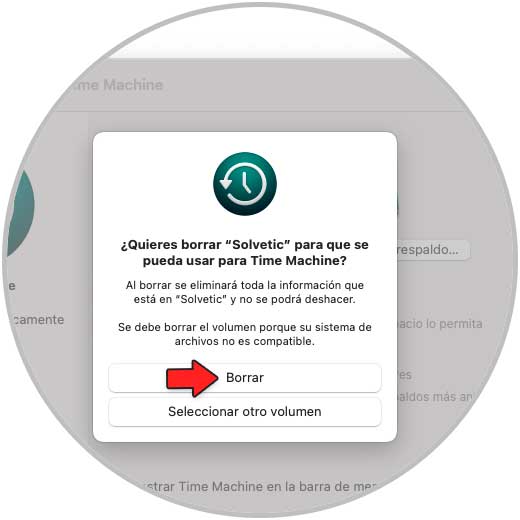
When selecting the hard drive we will see the following message:
step 10
We click "Delete" to configure the backup disk:
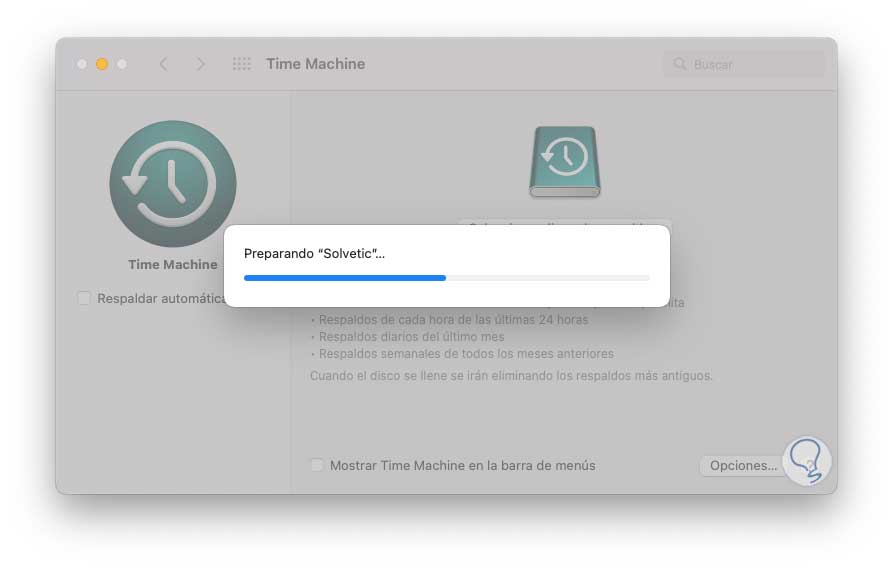
We wait for the process to finish..
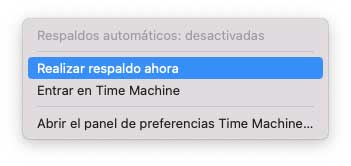
step 11
We activate the box "Show Time Machine in the title bar" and from there we can manage the tasks, among the options are to start the backup manually with the option "perform backup now":
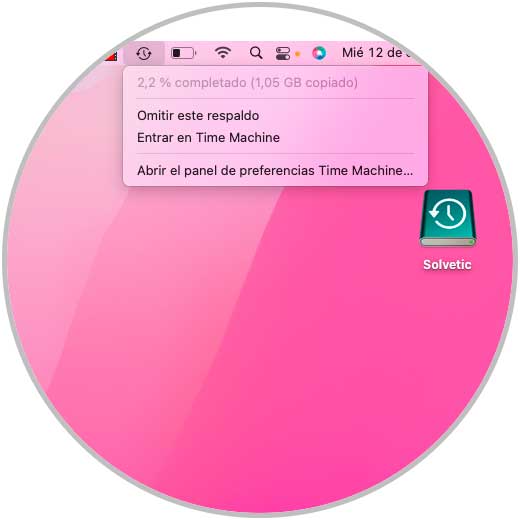
step 12
Skip the current backup if it needs to be interrupted:

The other options allow us to access the available Time Machine copies or open the panel to make adjustments as we saw before.
step 13
We click on the Time Machine icon in the title bar to access the options and select "Back up now" to start the backup with Time Machine, the process will start:
step 14
Wait for the backup process to finish and at the end we will see the date and time of the backup:
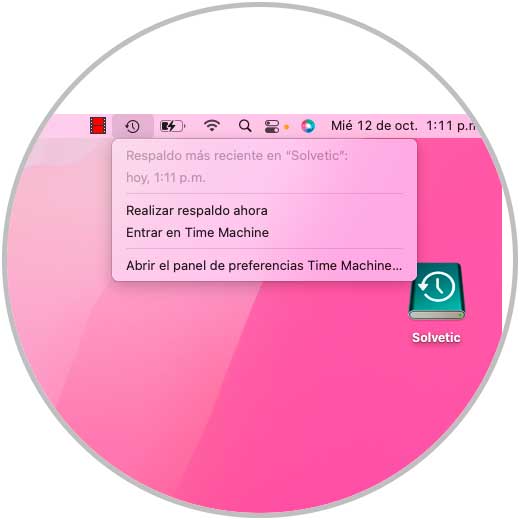
step 15
After a moment we will be notified that the backup has finished successfully:

step 16
In the Time Machine console we find the details of the copy made:
step 17
There we will see when the next backup will be if we have activated the automatic option.
We click on "Enter Time Machine" to see the structure of the copy made:
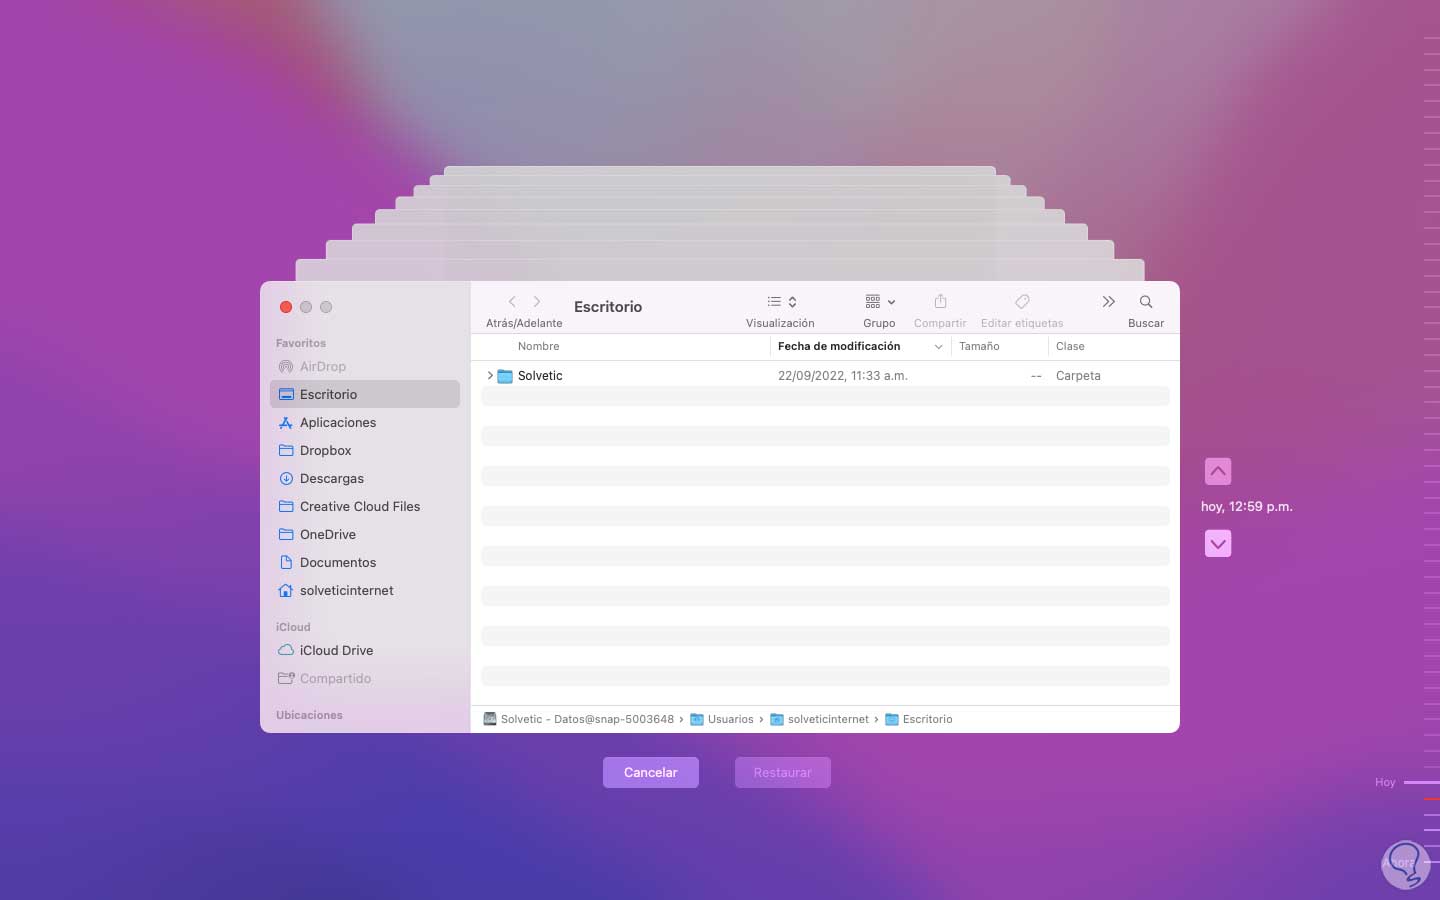
There we can move between the various copies and then use the Restore button to access that backup.
Let us remember the frequency of the copies in case of being automatic:
- daily backups for the last month
- hourly backups for the last 24 hours with the service enabled
- weekly backups for each previous month
For all this, it is key to have enough space on the hard drive that we are using as a backup.
With this method it is possible to have a backup of the system in case of errors.