When managing and administering servers and client computers , it is vital to be clear about what type of access these elements will have to avoid unwanted or sudden attacks affecting the entire natural operation of the environment. One of the technologies most used today for its various features, scalability and configuration are virtual environments . We especially have an option, which, although it is paid, offers a large number of solutions and features to carry out this process in the best way. We talk about Microsoft Azure, a platform that, although it is paid, we have a trial period of one year..
To learn more about the operation of Microsoft Azure we can visit the following link:
One of the tasks, which as we have mentioned, is essential is to know what accessibility you will have on the servers. This is achieved through the opening of ports and for this reason TechnoWikis will give an explanation on how we can open the ports in Microsoft Azure in a useful way and thus manage the type of communication with the system.
1. Open ports in Microsoft Azure using Portal Azure
When we work in Azure, if we want to open a port or create a connection point to one of the virtual machines created, it is required to create a network filter in a subnet or in a virtual machine network interface, the mission of these Filters consist of controlling incoming and outgoing traffic and for this purpose they will be hosted in a network security group associated with the resource that is where said traffic is to be received.
To start this process we must log in to the following link. There we enter our user credentials to access..
Azure Portal
2. Create a network security group using Portal Azure
Step 1
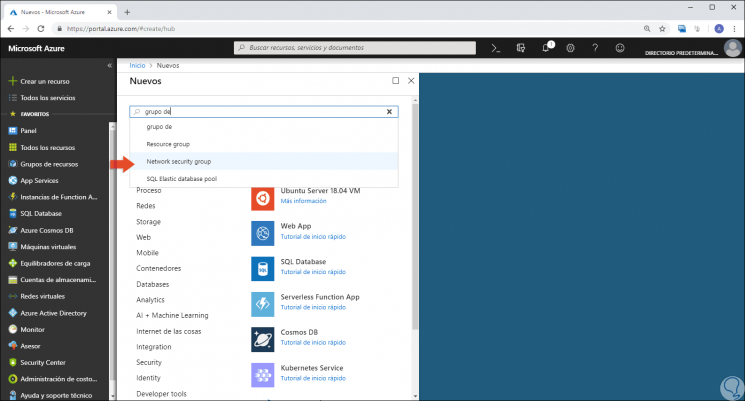
Once we enter the Azure portal, we must create a network security group, for this we go to the “All resources†section and there, in the search field, we enter the term “group of†and a series of options where we must select “Network security groupâ€:
Step 2
This will display the following window:
Step 3
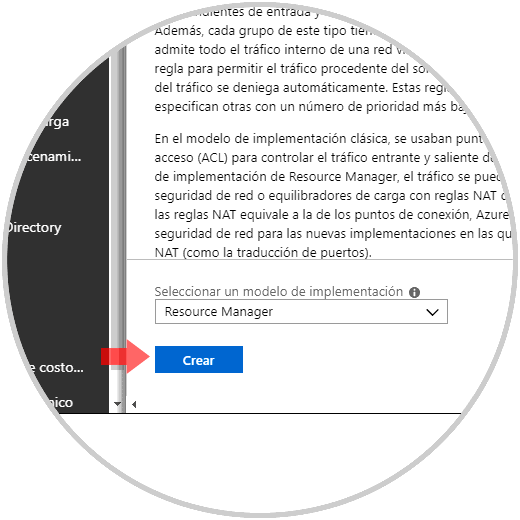
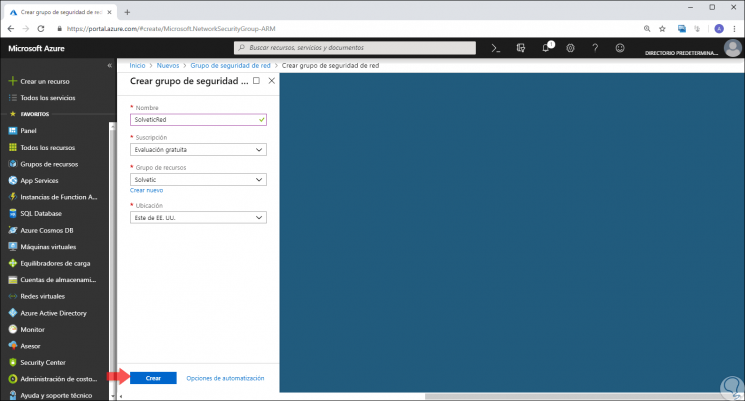
There we select the "Resource Manager" option and click on the "Create" button and in the next window we define. Once this is defined, click on the "Create" button to see that our security group is created correctly in Azure.
- Network Security Group Name
- Type of subscription to use
- Resource group to allocate
- Physical location of the resource
3. Create an entry security rule using Azure Portal
Step 1
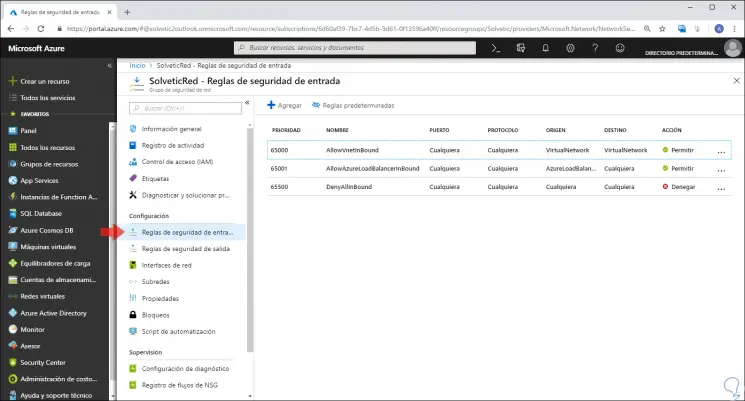
Now, the next step to take is to create a security rule at the entry level, for this we select the group that we have created and in the left side section we select “Entry security rules†and we will see the following:
Step 2
There we click on the “Add†button and in the displayed window we will define the following:
- Priority level (the lower the numerical value, the earlier the rule applies)
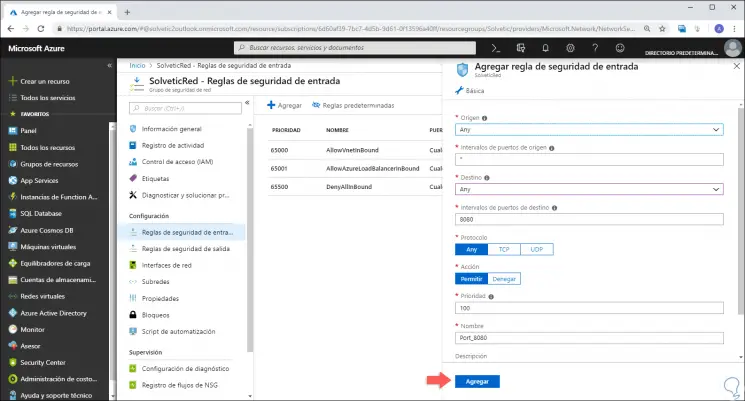
Step 3
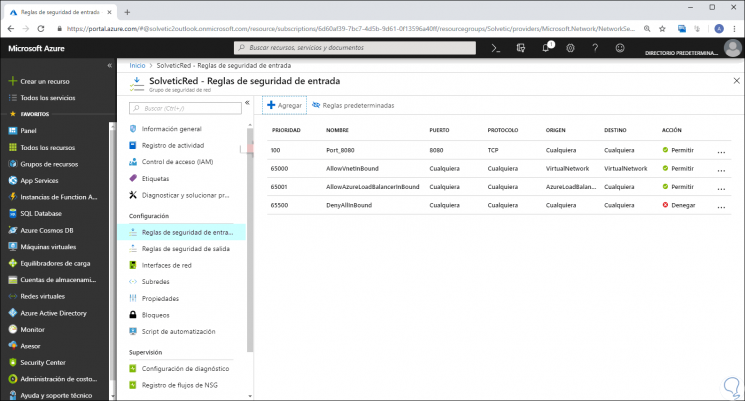
Once these aspects are defined, click on the “Add†button and we will see our added rule:
4. Associate a network security group with a subnet using Azure Portal
Step 1
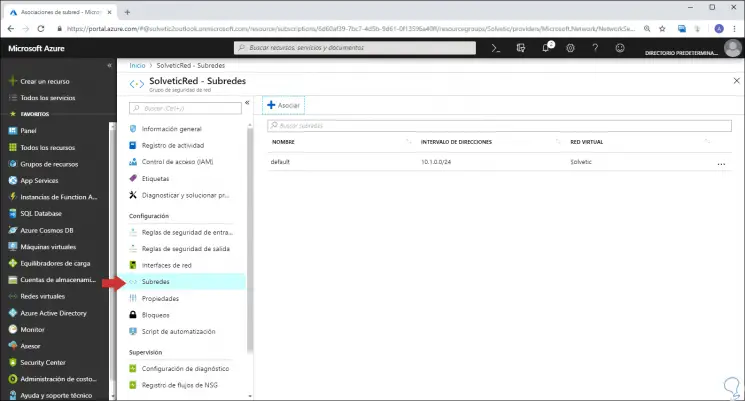
It is necessary for everything to work correctly, that we associate the security group with an existing subnet, for this we go to the “Subnets†section and there we will see the following:
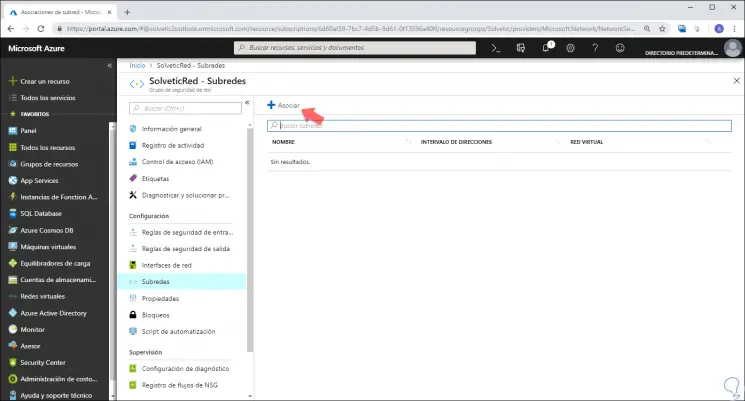
Step 2
We click on the "Associate" button and the following will be displayed:
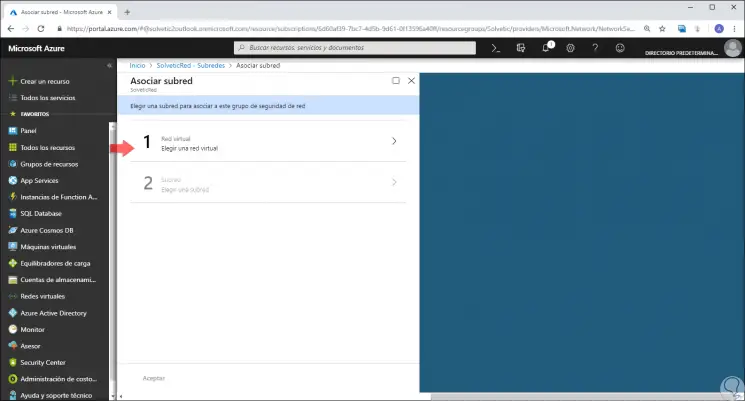
Step 3
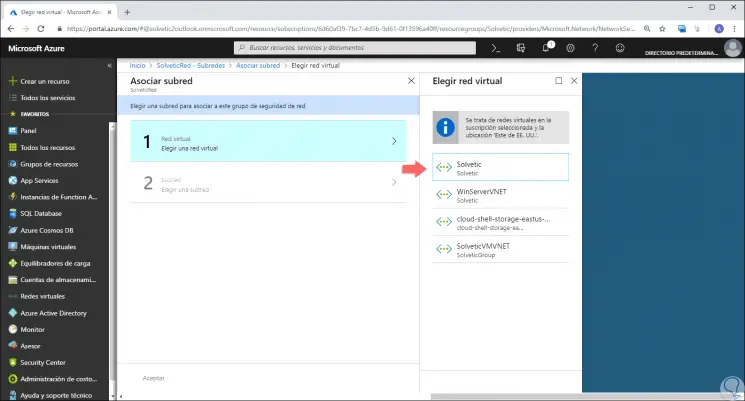
There we click on the “Virtual network†option and we will see the various virtual networks created in Azure:
Step 4
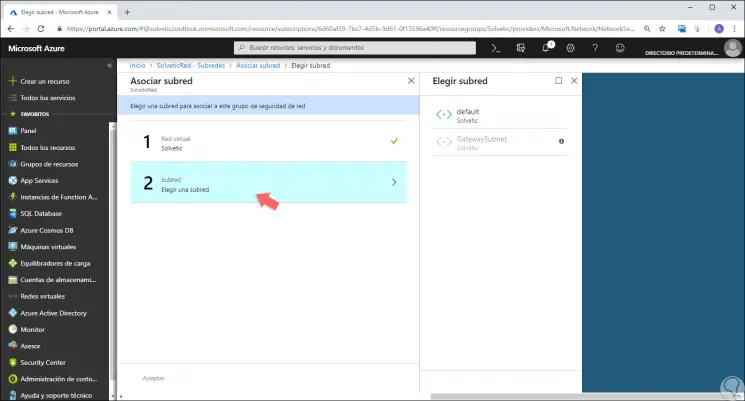
We select the virtual network to use and then we must select the subnet:
Step 5
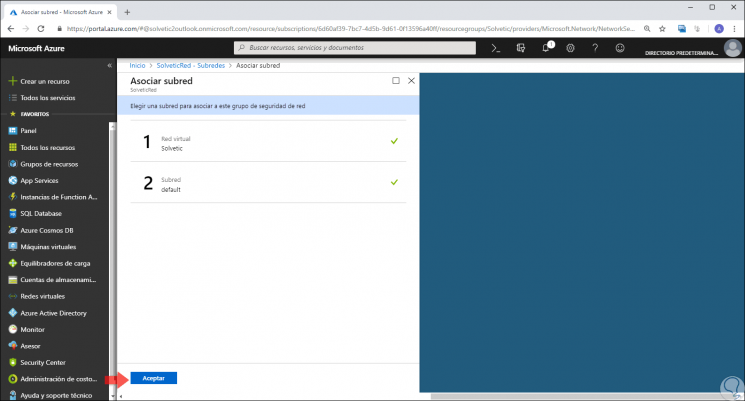
Once selected we will see the following:
Step 6
There we click on the "Accept" button to carry out the process of integrating the security group with the virtual network. Now, through the selected port, you can access the virtual machines that connect to that specific subnet.
5. Open ports in Microsoft Azure using PowerShell
Microsoft Azure integrates PowerShell with which it will be possible to carry out various tasks of creation, management and administration of resources in Azure.
Step 1
The first step is to log in to Azure PowerShell by running:
Connect-AzureRmAccount
Step 2
It will also be possible to log in to the Azure Portal and then go to a new tab and then paste the following:
https://shell.azure.com/powershell
Step 3
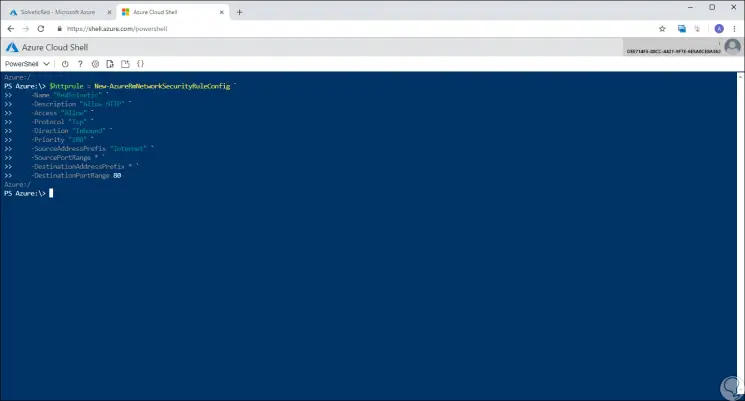
After this, we will create a rule using “New-AzureRmNetworkSecurityGroupâ€, for this example a rule called RedTechnoWikis will be created to allow TCP traffic on port 80, we execute the following:
$ httprule = New-AzureRmNetworkSecurityRuleConfig ` -Name "RedTechnoWikis" ` -Description "Allow HTTP" ` -Access "Allow" ` -Protocol "Tcp" -Direction "Inbound" -Priority "100" -SourceAddressPrefix "Internet" ` -SourcePortRange * ` -DestinationAddressPrefix * ` -DestinationPortRange 80
Step 4
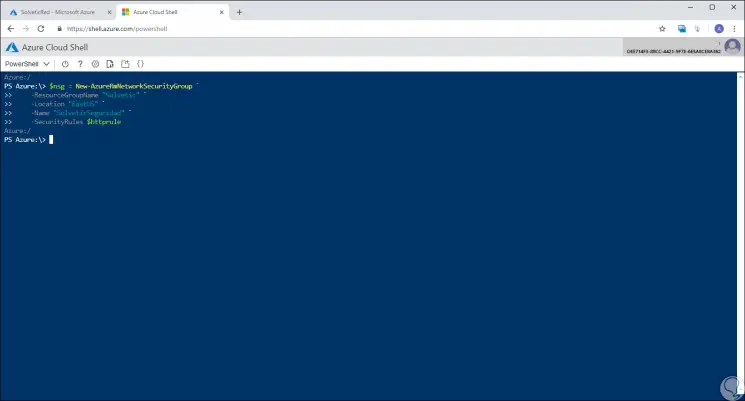
After this, we will create a network security group using “New-AzureRmNetworkSecurityGroup†and there assign the HTTP rule:
$ nsg = New-AzureRmNetworkSecurityGroup ` -ResourceGroupName "TechnoWikis" ` -Location "EastUS" -Name "TechnoWikisSecurity" ` -SecurityRules $ httprule
Step 5
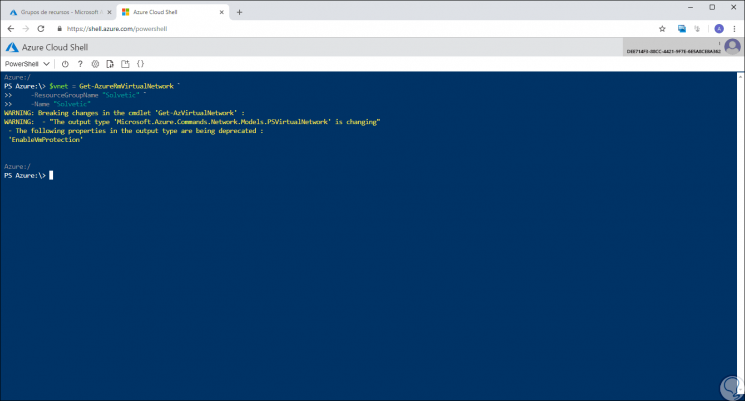
The next step is to assign the network security group to an existing subnet in Azure, for this case we will execute the following:
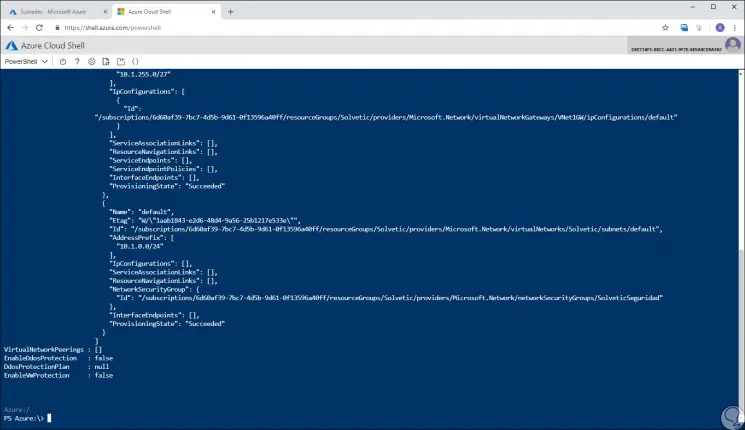
$ vnet = Get-AzureRmVirtualNetwork ` -ResourceGroupName "TechnoWikis" ` -Name "TechnoWikis"
Step 6
As we saw earlier, it will be necessary to associate the network security group with the subnet through the "Set-AzureRmVirtualNetworkSubnetConfig" cmdlet, in this example we execute the following.
$ subnetPrefix = $ vnet.Subnets |? {$ _. Name -eq 'default'} Set-AzureRmVirtualNetworkSubnetConfig ` -VirtualNetwork $ vnet ` -Name "default" ` -AddressPrefix $ subnetPrefix.AddressPrefix ` -NetworkSecurityGroup $ nsg 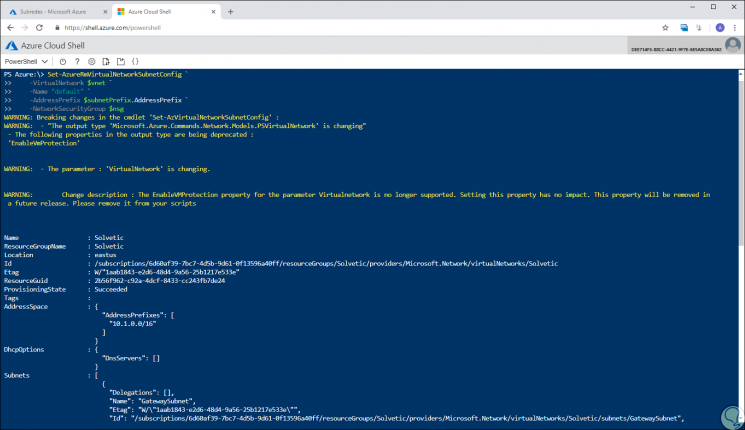
Step 7
In the final part we will see the following:
Step 8
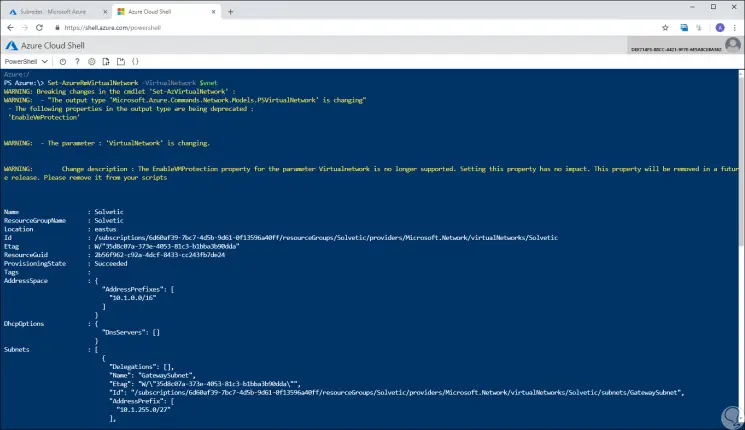
Finally, we must update the virtual network using “Set-AzureRmVirtualNetwork†in order for the changes to have the expected effect:
Set-AzureRmVirtualNetwork -VirtualNetwork $ vnet
As we have seen, we have these methods to simplify the process of opening ports in Azure virtual machines..