In the day-to-day administration of computers and files, there is a practice that should never be overlooked and is to create backup copies of the information, as this guarantees the availability and integrity of the information..
No user and no company is exempt from suffering any software or hardware damage due to mechanical, electrical or bad configuration issues , and in this field the backups play a more than vital role since they guarantee that the information of the equipment is always there ready to be restored .
Microsoft offers us Azure, which is a cloud-based platform through which, with a free year, we have several products to be implemented and used in order to further scale the capabilities of the teams for the integral growth of each user Azure is a secure platform thanks to which we have both graphic and command tools for the management of the created machines, and within these tools Azure Backup is offered, which TechnoWikis will analyze in detail..
What is Azure Backup?
Azure Backup is an integrated Azure service, which is used to back up and recover data in the Microsoft cloud, ensuring its availability at all times.
Azure Backup has several components that are downloaded and implemented on the local computer or server or, if we wish, also in the cloud. The component, or agent, to implement will depend on the information we want to protect, but all Azure Backup components, either locally or in the cloud, can be used to back up data in an Azure store Recovery Services
Some of the advantages we have when using Azure Backup are:
Unlimited scaling
Azure Backup makes use of the underlying efficiency and unlimited scale of the Azure cloud in order to offer high availability without having to perform maintenance or supervision. We are also able to configure alerts in order to obtain information about the events that occur with our data.
Automatic storage management
Azure Backup automatically allocates and manages the storage of backup copies and uses a pay-per-use model with which you will only be paid for what is actually used.
Various storage options
With Azure Backup with two types of replication that are storage with local redundancy and storage with geographic redundancy.
Unlimited data transfer
When using Azure Backup we will not be limited with the amount of input and output data that is transferred and best of all, it is also not charged for the data that is transferred.
Backup consistent with the application
Backups consistent with the application are a recovery point where you have all the necessary data to restore the backup integrally.
Data encryption
This data encryption allows the secure transmission and storage of data in the public cloud where, if security measures are not taken, information may be vulnerable.
Azure Backup component structure
Each component of Azure Backup has a different scenario so we must be clear that it covers each of them.
In the following link you can see more information about these components: Advantages, limits, what is protected and where backup copies are stored in Azure Backup Agent (MARS), System Center DPM, Azure Backup Server and Machine Backup virtual IaaS de Azure..
Azure components back up
Azure Backup has a limit of 9999 recovery points, which are also known as backups or snapshots. For each protected instance which can be a computer, a server (physical or virtual) or a workload configured to back up Azure. In the following link we will see how the Azure Backup components work the backup: Backup frequency (in the Recovery Services store), backup frequency (on disk), retention options, maximum number of points recovery per protected instance, maximum retention period, recovery points on local disk and recovery points on tape.
Azure backrest
Now we are going to learn how to create backup copies of our virtual machines in Azure thanks to Azure Backup.
1. How to create a virtual machine backup using Azure Portal
This is one of the simplest methods to create Azure backups because through Azure Portal we have a user interface, which is based on the browser in order to create and configure Azure backups and all the resources associated with these machines.
Azure Backup creates recovery points that are stored in recovery stores with default geographic redundancy.
To use this method we must go to the following link. There we must log in with the registered account to access the Portal panel.
Azure Portal
Step 1
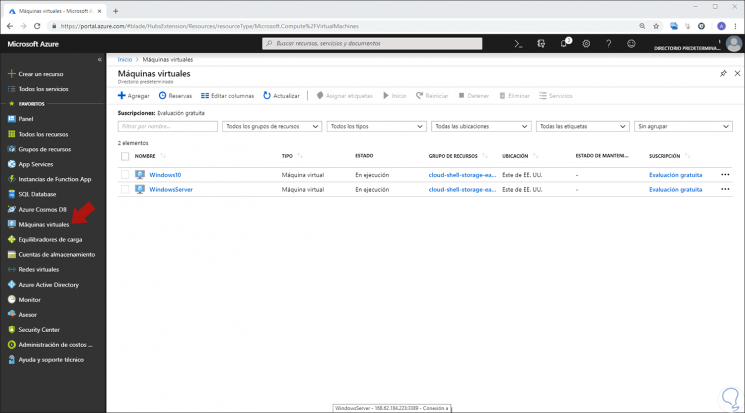
One of the first tasks to perform will be to create a simple scheduled daily backup in a Recovery Services store. To do this, click on the "Virtual machines" option in the left side panel and in the central part we will see the virtual machines that we have created in Azure. There we select the virtual machine on which the backup will be created.
Step 2
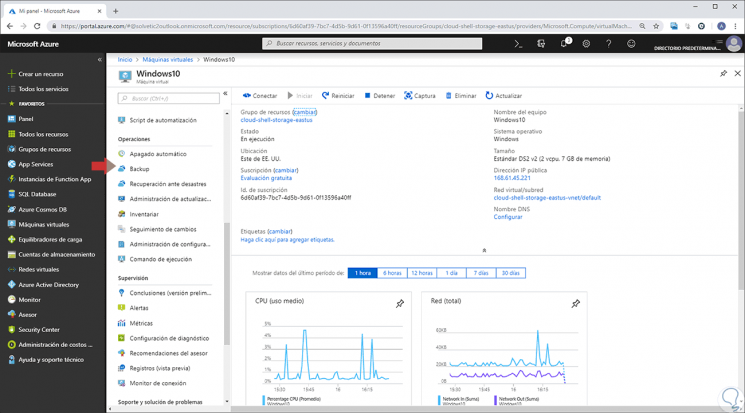
In the left panel we select the "Backup" option located in the "Operations" section:
Step 3
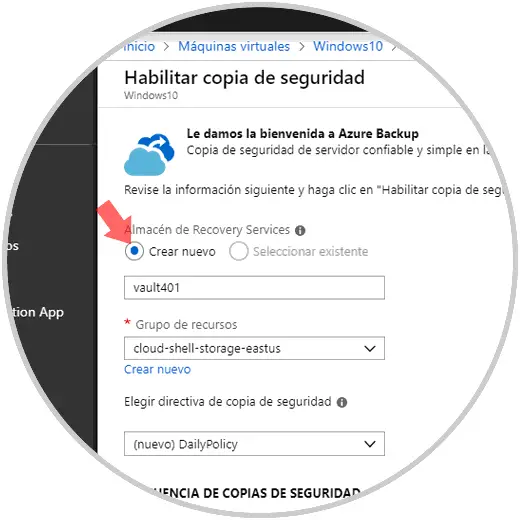
By selecting this option we will see the following window. There we activate the "Create new" box and we can create a new group of resources or select an existing one. By default, the store is set for storage with geographic redundancy, but if we want to protect the data at an even higher level, this level of storage redundancy ensures that backup data is replicated in a secondary Azure region which is located hundreds of kilometers from the primary region.
Step 4
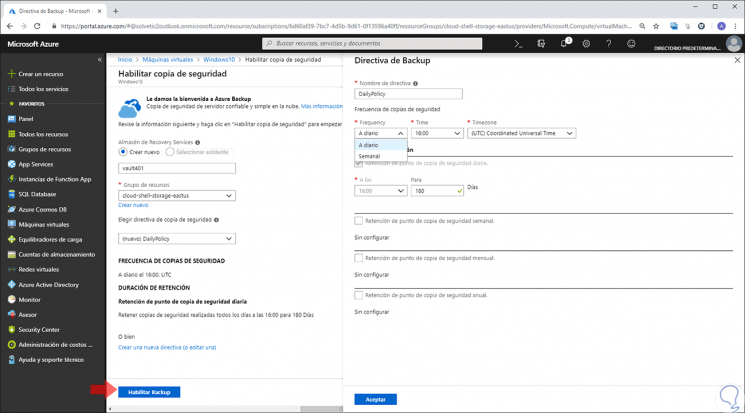
The default protection policy runs a backup job every day and will keep the security points for 30 days, which is useful for better protection, but if we click on the "Choose backup policy" drop-down field, it will only be the "Daily Policy" option, which is daily. We can click on the line "Create a new directive" and in the window we can define new values ​​such as:
- Frequency (Daily or weekly).
- Time at which the backup will run.
- Define time zone and more.
Once this is defined, click on "Accept" to apply the changes and for the backup task to be configured we must click on the "Enable Backup" button and the process of creating the Recovery Services store will take a few minutes to obtain the first backup.
2. How to run a backup job in Azure
It is possible to start a backup at any time without waiting for the default policy to carry out the task as scheduled. In this case, the first backup job will create a complete recovery point and then each of the backup jobs will create incremental recovery points.
Step 1
To accomplish this, we go to the "Virtual machine backup to protect" window and there we select the option "Make backup" now located at the top:

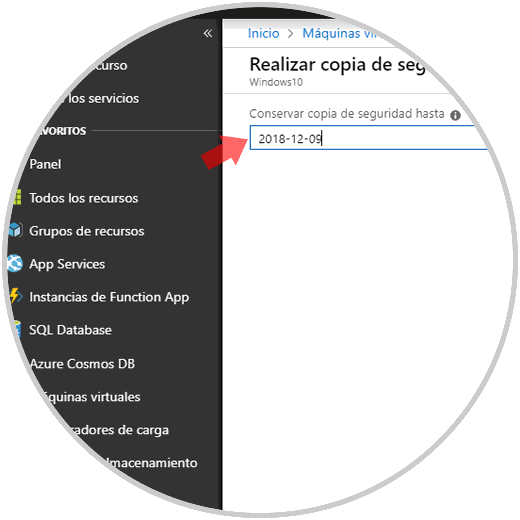
Step 2
Clicking there will display the following. To accept the 30-day retention policy for backups, we leave the default date for "Keep backup up to". And to start the backup job click on "Accept":
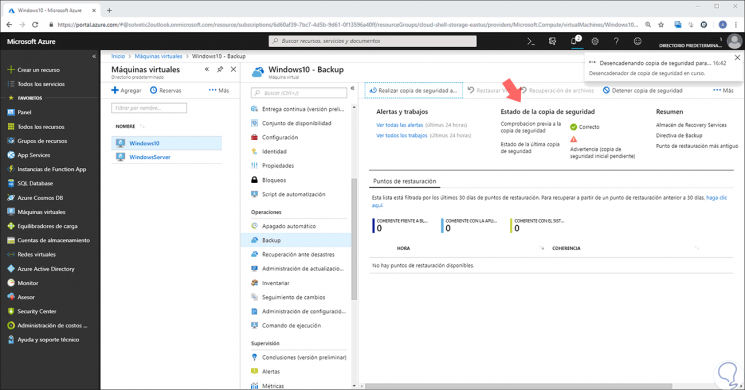
Step 3
Once finished we will see the status of the backup made. There we find associated information at the time of the last backup, the last restore point and the oldest restore point that has been performed.
3. How to disable the backup of a virtual machine with Azure
When we want to stop the virtual machine backup process, it will be possible to disable the protection in the virtual machine, remove the restore points and the Recovery Services store, as well as eliminate both the resource group and the resources of The associated virtual machine.
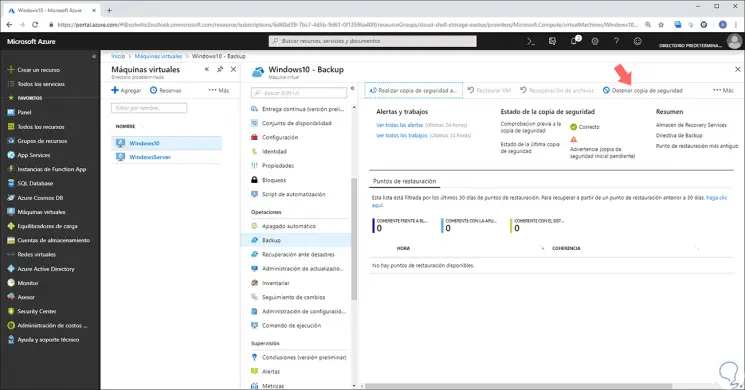
Step 1
In the Backup section we can click on the option "Stop backup" located at the top:
Step 2
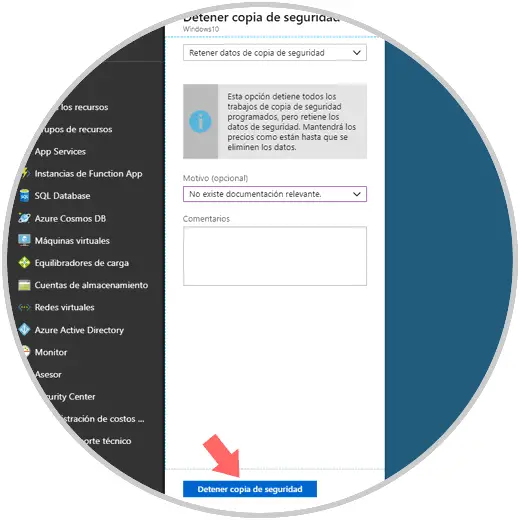
The following will be displayed where the following window will be displayed and there it will be possible to do the following:
- In the upper field we can retain the data from the backup or delete the data from it.
- In the lower part we select the reason for this action.
When configuring this, click on the "Stop backup" button to carry out the process.
4. How to create backups with PowerShell
Another of the alternatives that Azure offers us for the backup of the machines is through PowerShell, for this we must go to the following link and log in if we have not done it yet:
Powerhell
Step 1
The first step to take is to create the Recovery Services store, which is a logical container where the data of the backup copies of protected resources such as Azure virtual machines are stored, as well, when the work of Backup for a protected resource, a recovery point is created in the Recovery Services store and then it will be possible to use one of these recovery points to restore data when necessary.
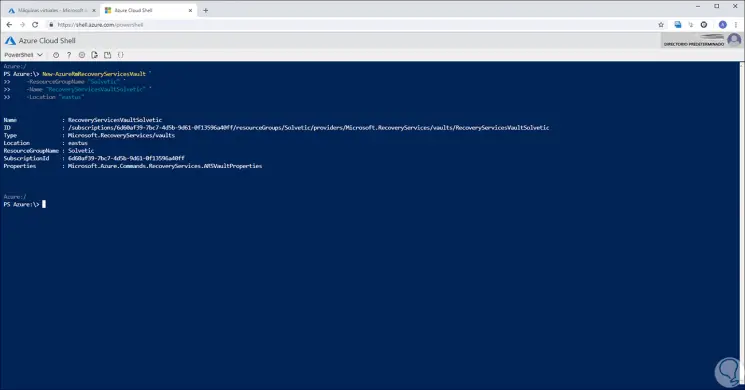
Now we are going to create a Recovery Services store using the New-AzureRmRecoveryServicesVault cmdlet and there we must specify the same resource group and virtual machine location to be backed up, we execute the following lines:
New-AzureRmRecoveryServicesVault ` -ResourceGroupName "TechnoWikis" ` -Name "RecoveryServicesVault" ` -Location "eastus"
By default the store is set for storage with geographic redundancy.
Step 2
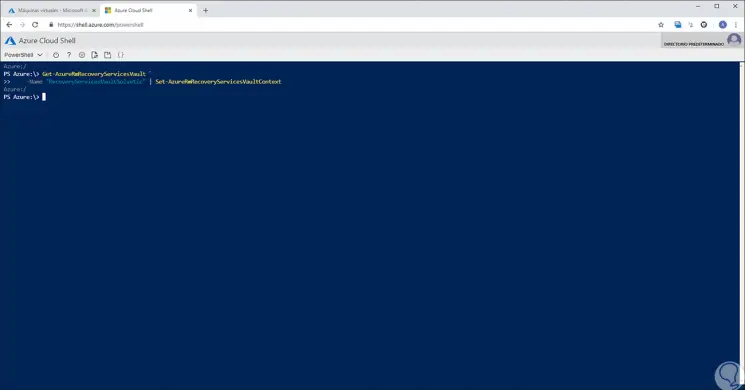
The next step is to establish the context of the store using the cmd:
let Set-AzureRmRecoveryServicesVaultContext: Get-AzureRmRecoveryServicesVault ` -Name "RecoveryServicesVaultTechnoWikis" | Set-AzureRmRecoveryServicesVaultContext
Step 3
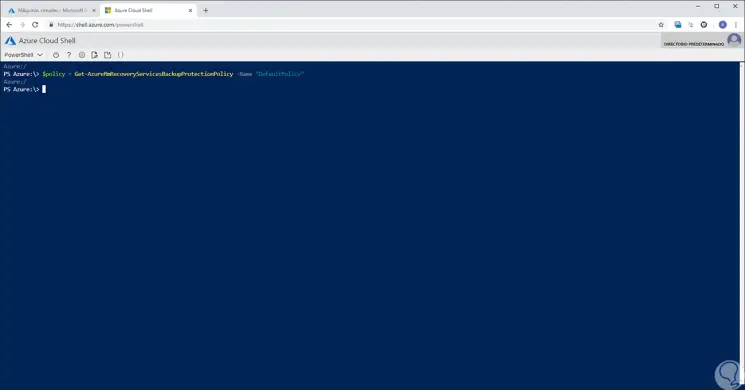
We must now create and use the directives in order to establish when the backup copies are to be executed and for how long the recovery points will be stored. The default protection policy runs a backup job every day and retains recovery points for 30 days.
We will set the default policy by running:
$ policy = Get-AzureRmRecoveryServicesBackupProtectionPolicy -Name "DefaultPolicy"
Step 4
To enable protection using backup copies we will execute the following:
Enable-AzureRmRecoveryServicesBackupProtection ` -ResourceGroupName "TechnoWikis" ` -Name "Windows10" ` -Policy $ policy
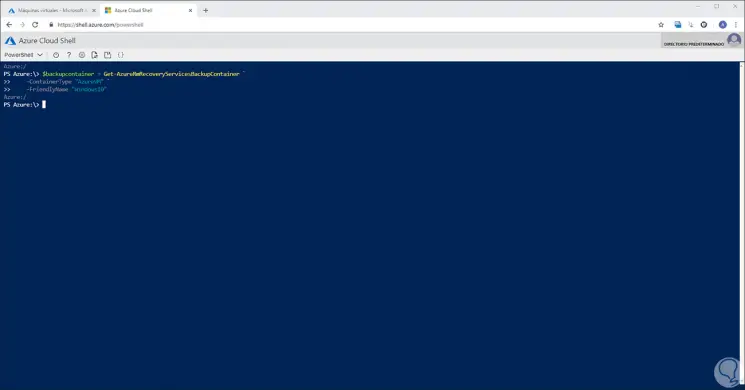
If we want to execute a backup without waiting for it to be done within the stipulated time frame we will execute the following:
$ backupcontainer = Get-AzureRmRecoveryServicesBackupContainer ` -ContainerType "AzureVM" ` -FriendlyName "Windows10" $ item = Get-AzureRmRecoveryServicesBackupItem ` -Container $ backupcontainer ` -WorkloadType "AzureVM" Backup-AzureRmRecoveryServicesBackupItem -Item $ item
If we want to monitor the status of the copies we will use the following line:
Get-AzureRmRecoveryservicesBackupJob
5. How to use Azure Portal to back up multiple virtual machines
We have mentioned that when a data backup is created in Azure, it stores that data in a resource called “Recovery Services Storeâ€. The Recovery Services store resource is available in the Configuration menu of most Azure services.
We can create a Recovery Services store integrated in the Configuration menu in order to access the data backup of virtual machines in a much simpler way.
Step 1
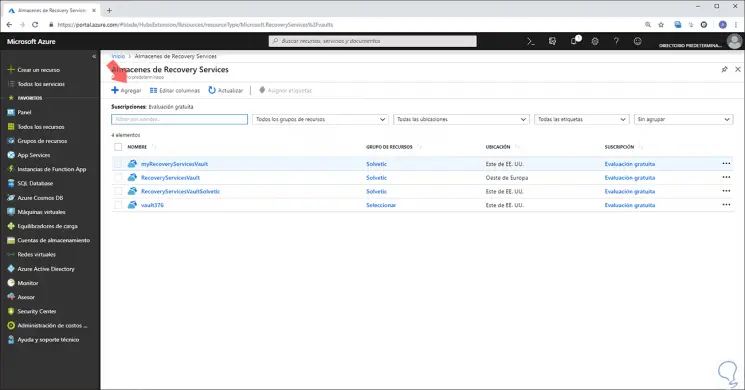
To create this store we go to the "All services" option and in the search field we enter Recovery Services. There we select the available option.

Step 2
The following will be displayed. There we click on the "Add" line to open the Recovery Services Store menu:
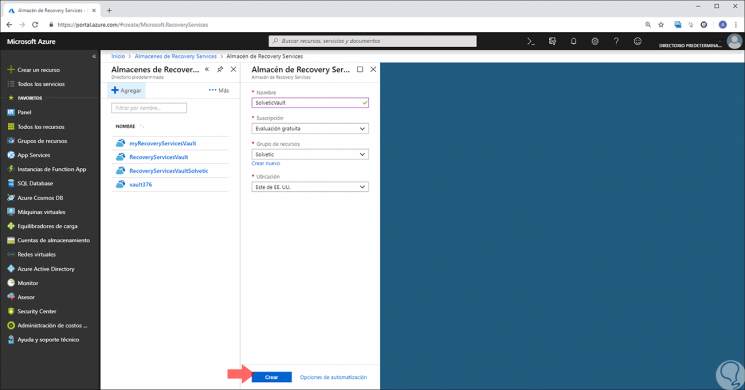
Step 3
There we configure details such as:
Click on "Create to carry out the process" and it is vital that the Recovery Services store is in the same location as the virtual machines that are being protected.
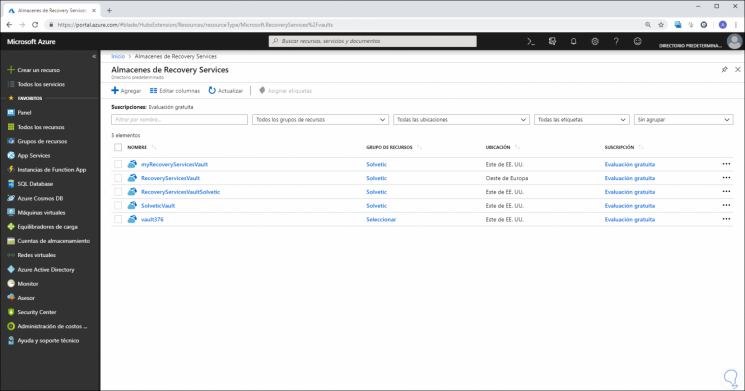
Step 4
After creating the Recovery Services store, we will configure the store for the data type and set the backup policy which is the programming of the frequency and time for the creation of the recovery points; For this we must click on the warehouse we have created:
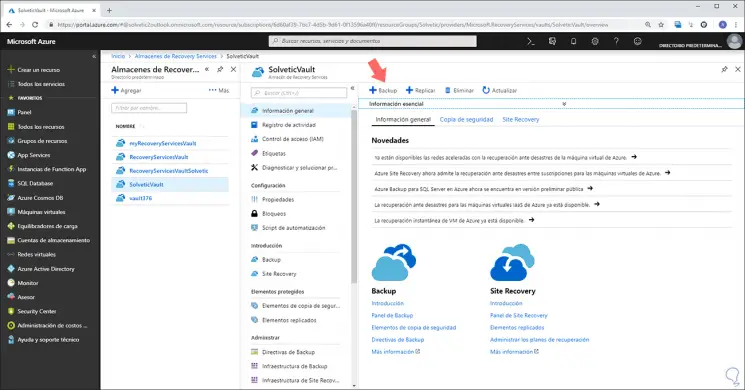
Step 5
The following window will be displayed where we click on the Backup option located at the top:
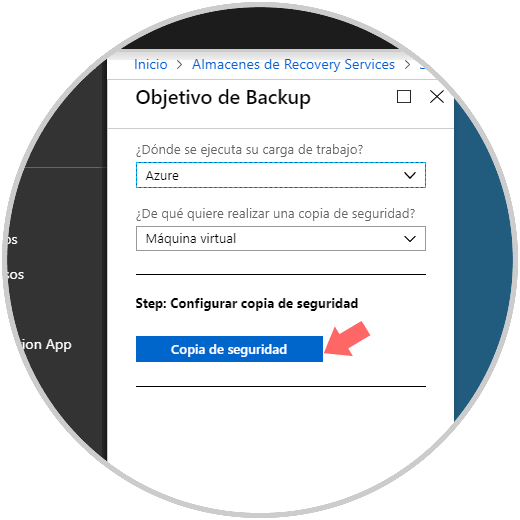
Step 6
In the Backup Objective menu, in the drop-down menu Where is your workload running ?, select Azure and from the drop-down list What do you want to make a backup ?, choose the option "Virtual machine" and then click in "Backup":
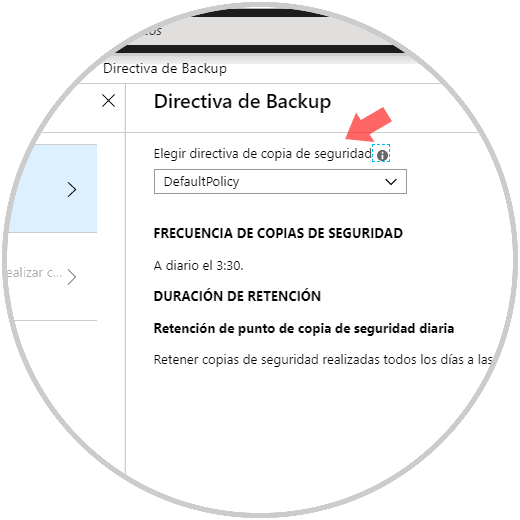
Step 7
We will see the following. If we want to create a new policy, in the drop-down menu "Choose backup policy from the Backup policy menu", select the "Create new" option.
Step 8
The following window will be displayed where we must specify a series of policy parameters:
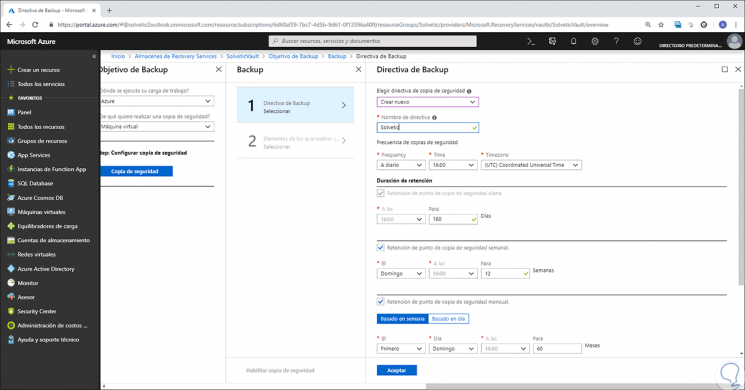
There we can do the following:
- For Backup Frequency, we set the time zone to Central Time.
- In Retention of daily backup point, we can define the period in 90 days or in the desired amount.
- In weekly backup point retention, we can use the Monday restore point and keep it 52 weeks.
- In Monthly backup point retention, we can use the restore point from the first Sunday of the month and keep it up to 36 months.
Click on OK to save the changes and then go to the Elements section and there we select the virtual machines to backup, they must be in the same group of resources.
Thus, it is possible to add various virtual machines to be backed up with their backups.
As we can see, the options are varied to create backup copies through Azure and always have the best backup functions.