The objective with which Microsoft developed the Office suite is to provide each of the tasks that involve editing processes. So we are not experts in the field, Office account and integrates multiple tools focused on that with just a few click turn the objects into something really professional..
One of the most popular Office applications for texts and with this used is Microsoft Word, does it sound true to you? This tool has its main function in the development of text files but with the new editions, starting from the 2016 edition and now with the 21019 edition, we can make this text much more than letters and have a positive impact on the recipient. , this will be achieved, as we have discussed, with the Word editing tools.
One of the simplest actions that will help the text take another perspective is curving the text entered there. It does not matter if it is a title or a section, always the curved style will give an original and professional touch to the document, how do we do it? Then TechnoWikis will give you the answer that is also included in this video..
To stay up to date, remember to subscribe to our YouTube channel! SUBSCRIBE
How to curve a text in Microsoft Word 2016 or 2019
Step 1
To start this process, we go to the document where we enter the curved text and go to the "Insert" menu and in the "Text" group we click on the WordArt button and in the options displayed we will select the desired style to insert.
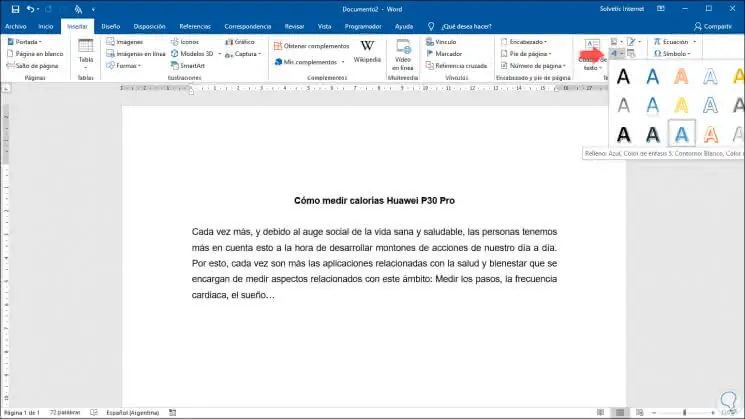
Note
If the selected style you do not like there is no problem, we can later edit that style.
Step 2
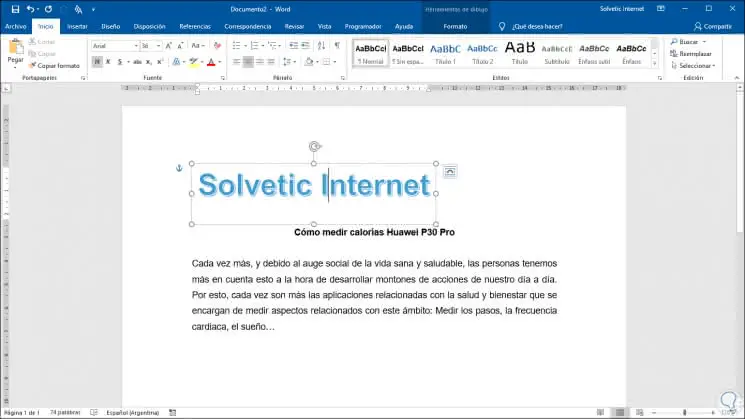
Once we select the WordArt style, we will enter the text that must be curved later:
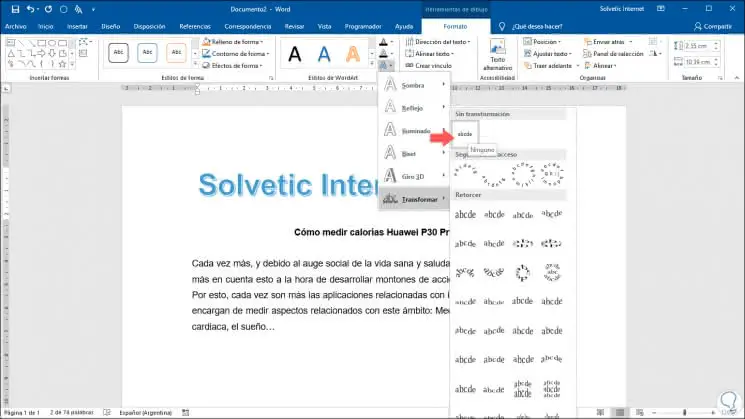
Step 3
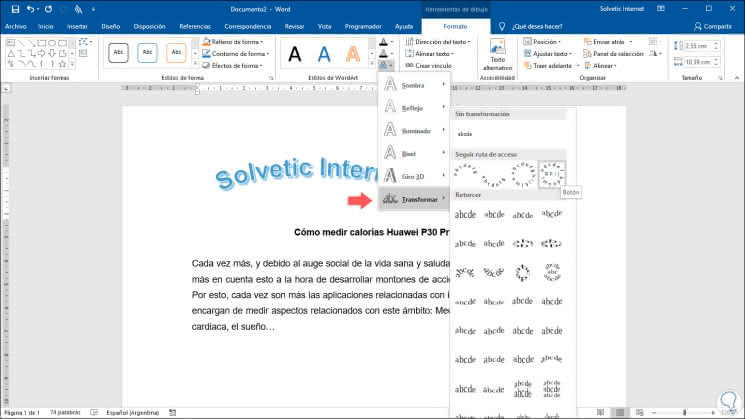
Now, when we define which text to write, we notice that a new menu is created called "Drawing tools", there we go to the Format menu and in group "WordArt Styles" we click on the text Effects option and then we will go to the section "Transform" we can find different styles of bending in the option "Follow path":
Step 4
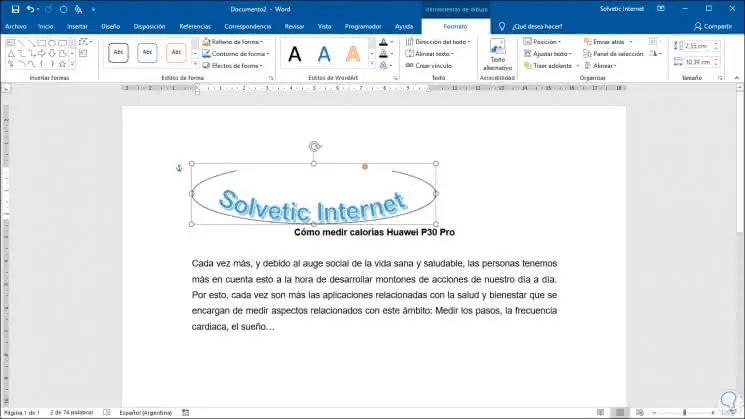
We see that based on the desired style automatically this will be reflected in the text entered.
Once we select the desired style this will be applied and in the right side of the text we will find a submenu where it will be possible to perform some tasks such as:
- Adjust the alignment of the text compared to the outline
- Move with the text of the file
- Adjust the new text with the page, etc

Step 5
In addition to this, we find an orange dot with which we can adjust the curve level of the text:
Step 6
Finally, when we want to remove the bending of the text, we go back to the Text Effects / Transform option and this time we go to the section "Without transformation" and there we click on the available option:
This will remove the curve of our text and as we detailed, it will be possible to add a more professional and modern touch to the text worked in Microsoft Word 2016 or 2019.