With the new functions and features integrated in Microsoft Word, both in its 2016 and 2019 editions , it will be possible to manage in a much more dynamic, centralized and practical way each of the data registered there as well as the format options that we apply to them..
One of the main functions integrated in Microsoft Word is the possibility of sharing a file with other users so that they are able to edit or add more information to that file and thus achieve a common goal among all, the main problem with this type of tasks, is that you can usually edit segments of the file that should not be modified either by its content or focus, in this case the ideal and most practical is to protect that segment from unauthorized editions and thus contextualize the original focus of the project.
TechnoWikis will explain how we can securely protect only one segment or part of a text in Microsoft Word 2016 or 2019..
To stay up to date, remember to subscribe to our YouTube channel! SUBSCRIBE
How to protect a part of a file in Microsoft Word 2019, 2016
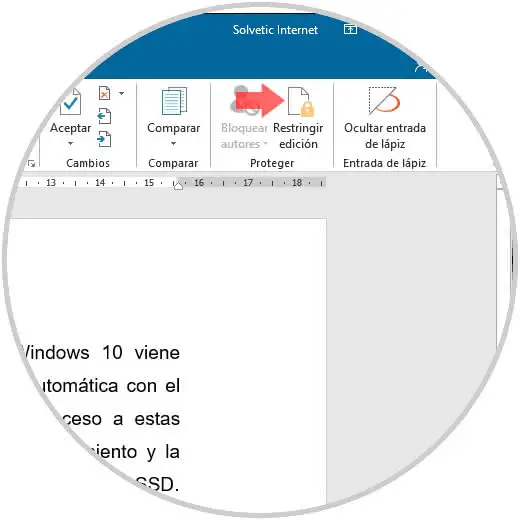
Step 1
To achieve this action, we must open the file to be protected and once open we will go to the "Review" tab and in the "Protect" group we will find the option "Restrict edition":
Step 2
When clicking on this option, the following sidebar will be displayed:
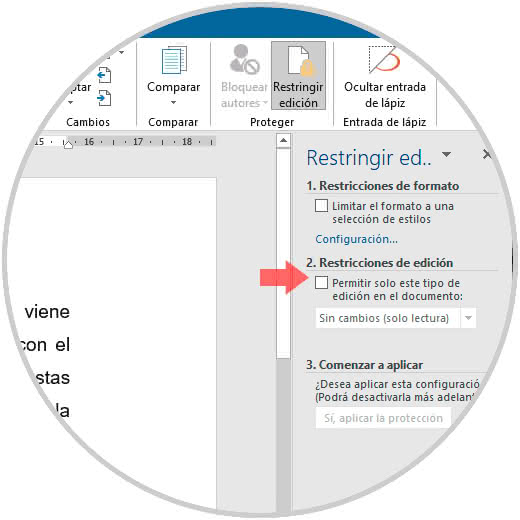
Step 3
There we will activate the box "Allow only this type of edition in the document", when activating this box, the following options will be displayed:
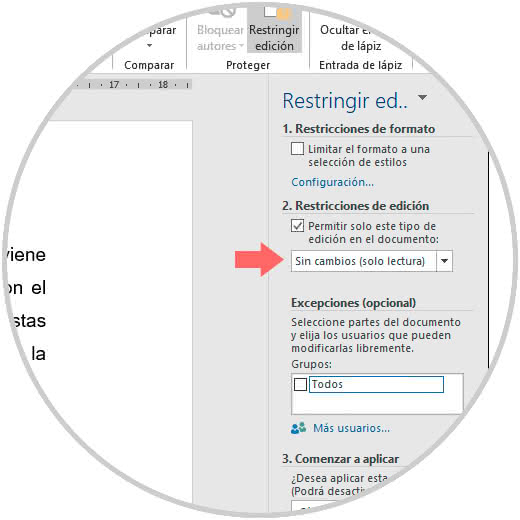
Step 4
There we must select the option "No changes (read only)":
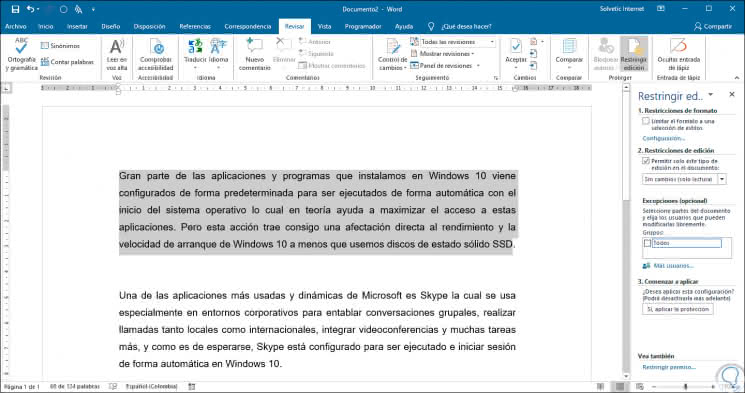
Step 5
After this we must select the parts of the document that must be editable. Those sections that are not selected will become read-only. We must select the text by clicking and dragging the mouse over the text.
Note
In case of having two separate sections that we want to edit, we must press the Ctrl key and at the same time click in order to add them to the selection.
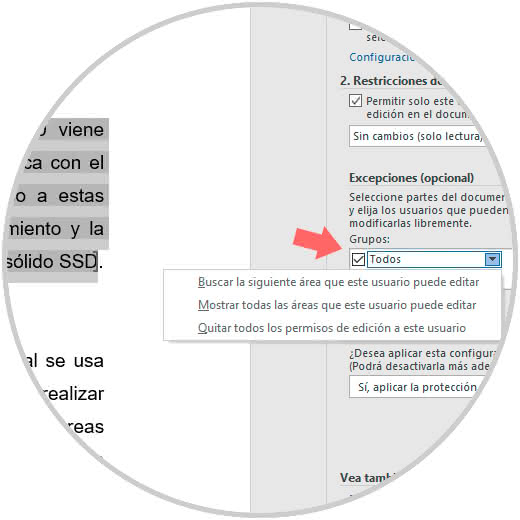
Step 6
Once the desired text is selected we must go back to the sidebar and there activate the "All" box located in the section "Exceptions (optional)", this option has the task of allowing all users who access the document to be able edit the content that has been selected. In case of using a corporate network it will be possible to only add specific users to the edition of the content, for this we select the option "More users" and then enter the names of the desired users.
From the "All" section we have a drop-down field where we have options such as:
- Search the next area that this user can edit
- Show all areas that this user can edit
- Remove all editing permissions to this user
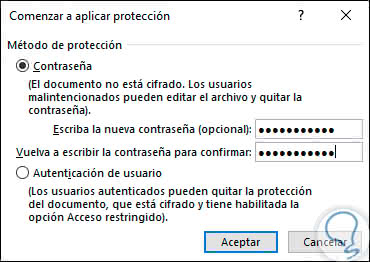
Step 7
There we can select the option that best suits our needs. Once these parameters have been defined, click on the "Yes, apply protection" button to start the process. The following window will be displayed called "Begin to apply protection" which indicates that the document is not encrypted and may be vulnerable to unauthorized interactions, to optimize this parameter we must enter and confirm a secure password:
Note
In case of using users of a domain we must activate the "User Authentication" box.
Step 8
Confirmed this we click on the "Accept" button to apply the protection. As a result of this we can see that Microsoft Word 2016 or 2019 will highlight the text that has been selected, this highlight gives clues to users who have access to the document that this is an editable section. In the right side panel we find a new button called "Find the next area I can edit" or the button "Show all the areas I can edit":
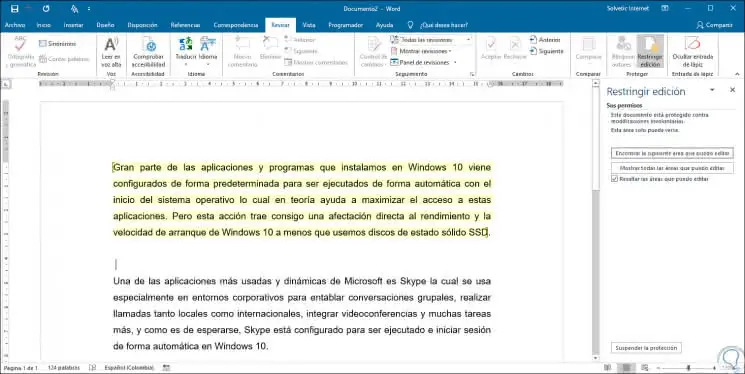
Note
It is ideal that we leave the box "Highlight the areas I can edit" active so that they are different from all the others.
Step 9
Finally, to stop the protection process we must click on the "Suspend protection" button located at the bottom, when clicking there we must enter the password that we have defined previously:
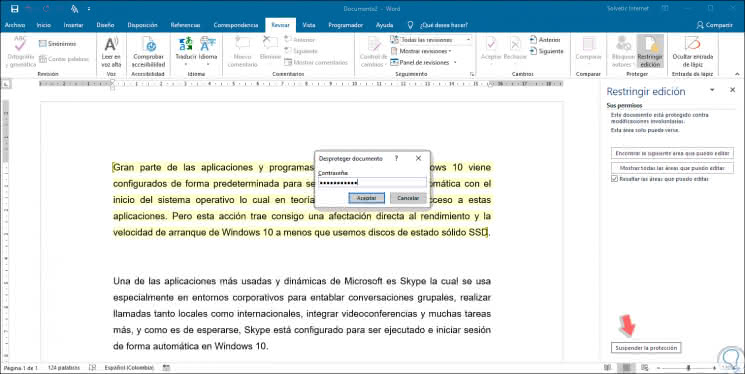
We can see that it is a simple but effective process to avoid editing text that should not be applied for editing in Word, note that with active protection all editing options will be disabled.