VPN networks (Virtual Private Network) are one of the current methods for safe and reliable browsing since a VPN connection gives us the possibility to create a local network without users being physically connected and this is achieved through the Internet. We can make use of a site-to-site VPN gateway connection in order to connect the local network to an Azure virtual network using an IPsec / IKE VPN tunnel (IKEv1 or IKEv2). To achieve this type of connection, a local VPN device that has an assigned public IP address is required..
When we talk about a VPN in Azure we are referring to a virtual network gateway that is used to send encrypted traffic between an Azure virtual network and a local location taking the public Internet network. We can also use a VPN in Azure to send encrypted traffic between Azure virtual networks through the Microsoft network, which gives us a part of security and speed.
TechnoWikis will explain how we can create and configure a VPN network in Azure in a practical way..
Previous requirements
To carry out this process it will be necessary to have the following:
- Have a compatible VPN device.
- Check that we have an external public IPv4 address for the VPN device. This IP address cannot be behind a NAT.
- Define the range of IP addresses to use ...
Previous data
For this tutorial TechnoWikis will use the following data:
- Virtual Network Name: TechnoWikis
- Address space: 10.1.0.0/24
- Resource group: TechnoWikis
- Subnet: front-end: 10.1.0.0/24, back-end: 10.1.1.0/24
- Gateway Subnet Name: GatewaySubnet
- Gateway subnet address range: 10.1.255.0/27
- Name of the virtual network gateway: VNet1GW
- Public IP Address: VNet1GWIP
- Connection Type: Site to Site (IPsec)
- Name of the local network gateway: Site1
- Connection Name: VNet1toSite1
1. Create a virtual network in Azure
Step 1
For this process we will use the Resource Manager implementation model through Azure Portal and for this we must go to the following link:
Azure Portal
Step 2
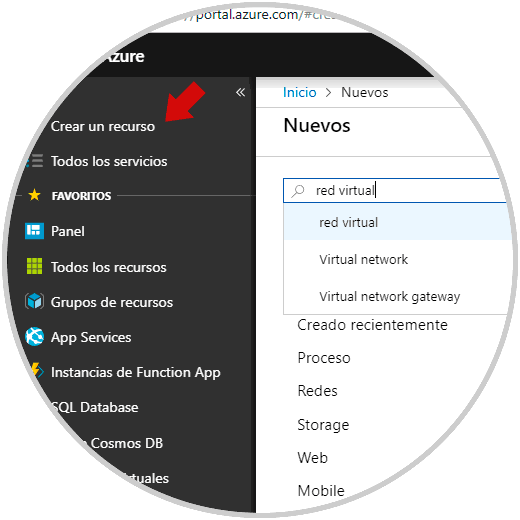
There we must log in with our registered account and in the left side panel we click on the option “Create a resource†and in the field “Search in the Marketplace†we enter virtual network and the available options will be displayed:
Step 3
Select “Virtual network†and the following will be displayed:
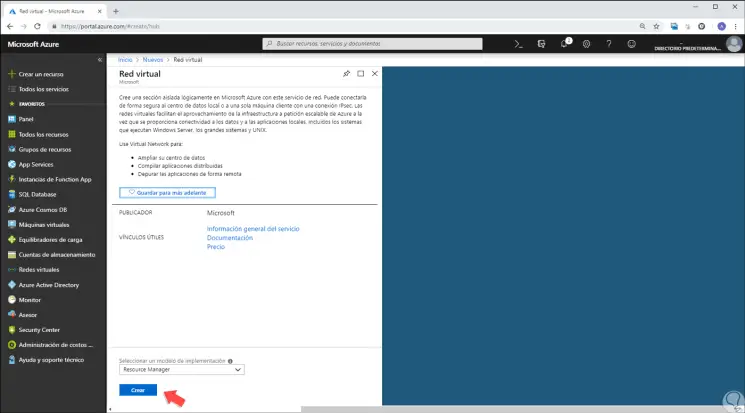
Step 3
There we locate the “Select an implementation module†field located at the bottom and click on the drop-down field, there we select the “Resource Manager†option, click on the “Create†button and the next window called “Create virtual network will be displayed. â€Where we will enter the values ​​defined for the virtual network:
Step 4
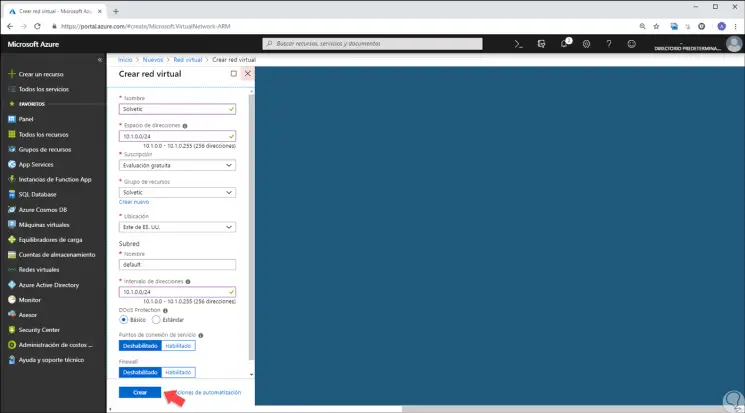
There, when we complete the fields, the red exclamation mark becomes a green check mark when the characters written in the field are valid. In this first section we configure:
First name
There we specify the name of the virtual network.
Address space
Enter the address space, in case you have several address spaces to add, we must add the first address space and then it will be possible to add more address spaces once the virtual network is created.
Subscription
We must select the subscription in which we are using the drop-down list.
Resource group
We can select an existing resource group, or create a new one and assign it a name.
Location
We indicate the location of the virtual network, this location determines where the resources to be used in this virtual network will reside.
Subnet
There we must add the name of the first subnet and the address range of the subnet, if necessary, after creating the virtual network, it will be possible to add more subnets and the subnet of the gateway.
Step 5
Alternatively, we can enable the Firewall and Service Connection Points settings to increase the virtual network's performance. With this defined click on "Create" to execute the process of implementing the virtual network in Azure:
Step 6
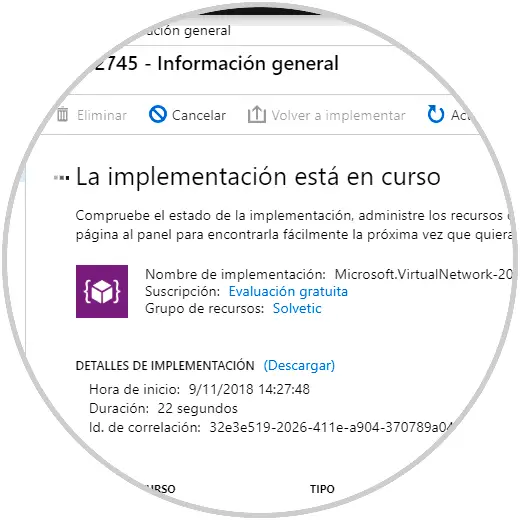
Once the process is finished we will see the following:
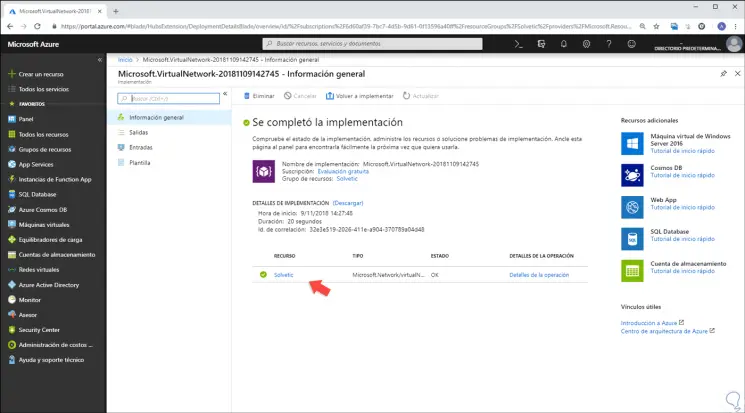
Step 7
There we can click on the name of the resource to access the general configuration of the virtual network created:
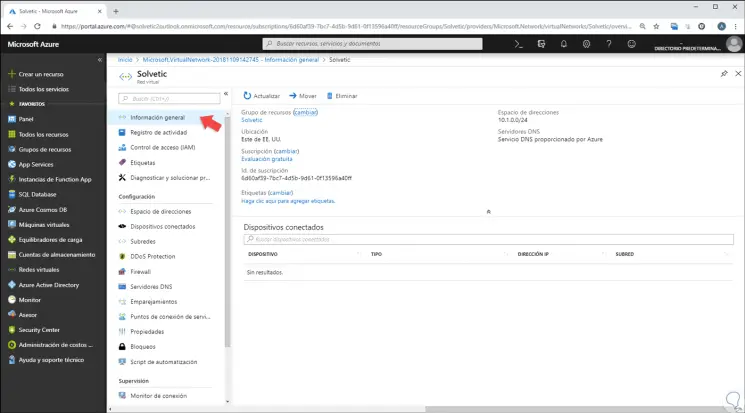
2. Assign DNS servers of a virtual network in Azure
The DNS server is not mandatory for site-to-site connections, but it can be implemented in order to have a name resolution method for the resources to be implemented in the virtual network. For this it is useful to specify a DNS server. By doing this, it will be possible to specify the DNS server that we want to use for virtual network name resolution. If we want to do this, click on the "DNS Servers" line and check the "Custom" box and enter the IP address of the DNS server. We can use public DNS like Google's (8.8.8.8 and 8.8.4.4):

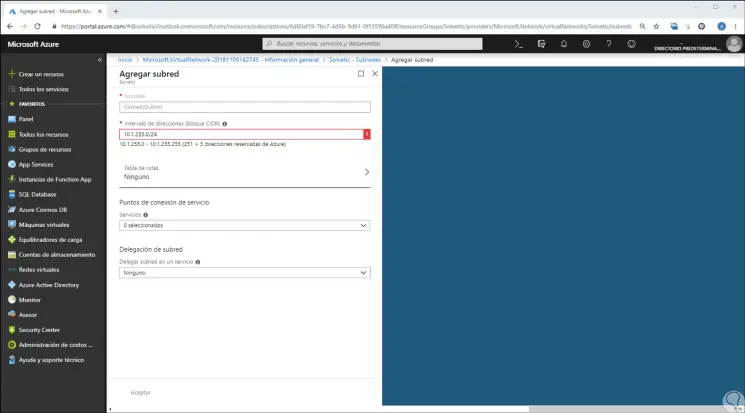
3. Create gateway subnet in a virtual network in Azure
The virtual network gateway makes use of a subnet called the gateway subnet, this subnet integrates the range of virtual network IP addresses which are indicated during the virtual network configuration process. This subnet integrates the IP addresses used by the resources and gateway services of the virtual network. This subnet must be called "GatewaySubnet" in order for Azure to implement the resources of the gateway. And you cannot specify another additional subnet, in case you do not have a subnet called "GatewaySubnet", when creating the VPN gateway, an error will be generated.
In the process of creating the gateway subnet, we must specify the number of IP addresses that the subnet will contain, this number of IP addresses depends on the VPN gateway configuration to be created.
Step 1
To create this subnet we select the “Subnets†line and we will see the following:
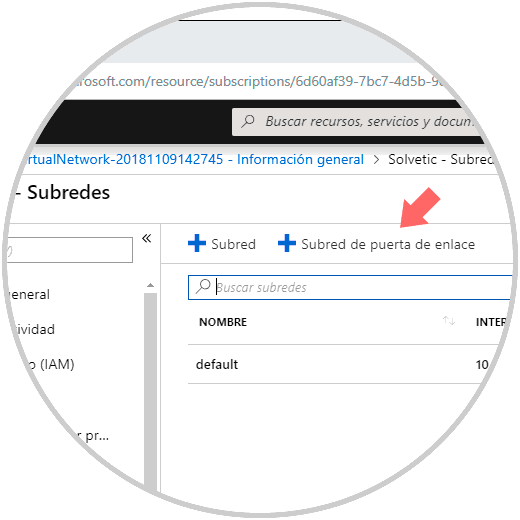
Step 2
There we click on the "Gateway Subnet" option and the subnet name will be created automatically. Enter the address range and click OK to apply the changes.
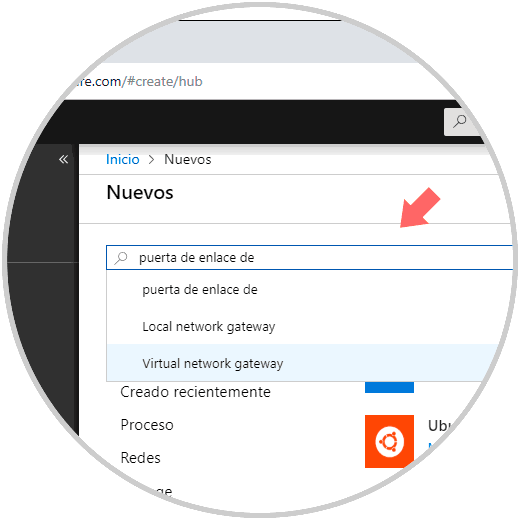
4. Create VPN gateway in Azure
Step 1
For this process we click on the “Create a resource†option and in the Marketplace field we enter the gateway and select the “Virtual network Gateway†option:
Step 2
We will see the following:
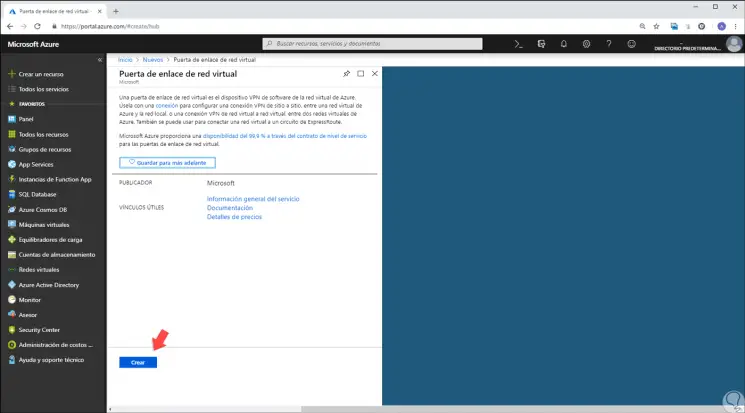
Step 3
There we click on the “Create†button and in the new window we will enter the values ​​as necessary:
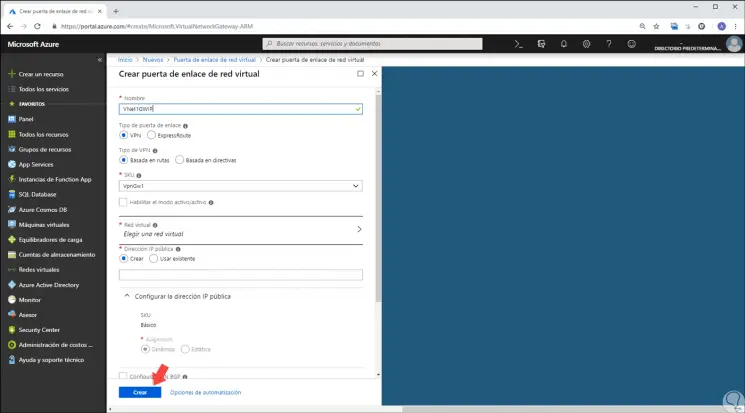
Step 4
There the values ​​to use are:
First name
We indicate a name to the gateway, this is the name of the gateway object to create.
Gateway Type
We select the VPN option. VPN gateways use the virtual VPN network gateway type.
VPN type
We choose the type of VPN to use for the configuration, in this case based on routes.
SKU
We select the gateway SKU from the drop-down list. The SKUs available in the drop-down list depend on the type of VPN selected.
Location
This location will be on the route where the virtual network is located, in case the location does not point to the region in which the virtual network resides, when selecting a virtual network it will not appear in the drop-down list in the process.
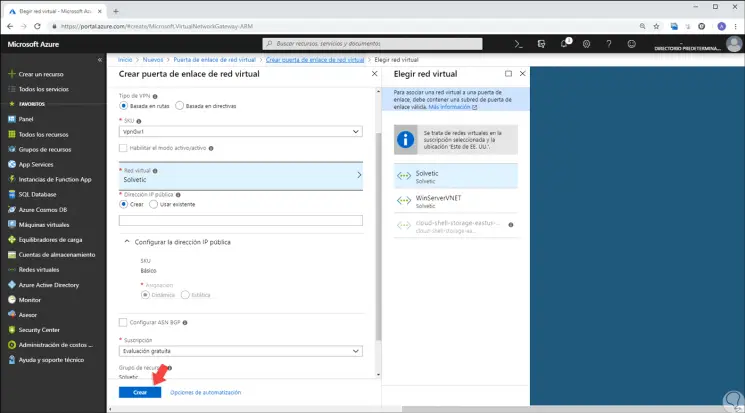
Virtual network
We select the virtual network to which this gateway is to be added, we must click on Virtual Network to open the "Choose a virtual network" page and then select the virtual network.
Gateway Subnet Address Range
This option will be available if a gateway subnet for the virtual network has not previously been created.
IP settings
With the option "Choose public IP address" you can create a public IP address object that is associated with the VPN gateway. The public IP address is dynamically assigned to this object when the VPN gateway is created. For this, we click on “Create gateway IP configuration†and there we enter the value for this tutorial which is VNet1GWIP.
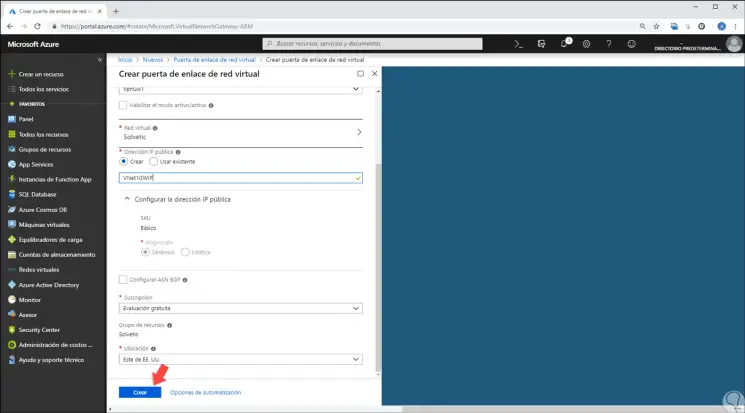
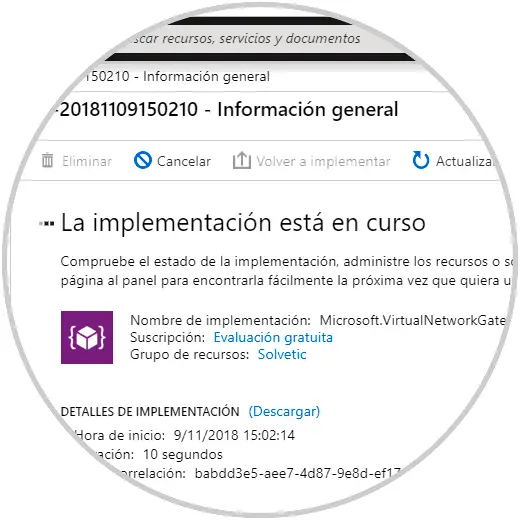
Step 5
Click on "Create" and the process of implementing the virtual network gateway will begin:
5. Create local network gateway in Azure
This local network gateway is the local location, for this you must assign the site a name that Microsoft Azure can refer to and then specify the IP address of the local VPN device with which a connection will be created and also it will be possible to indicate the IP address prefixes that will be routed through the VPN gateway to the VPN device.
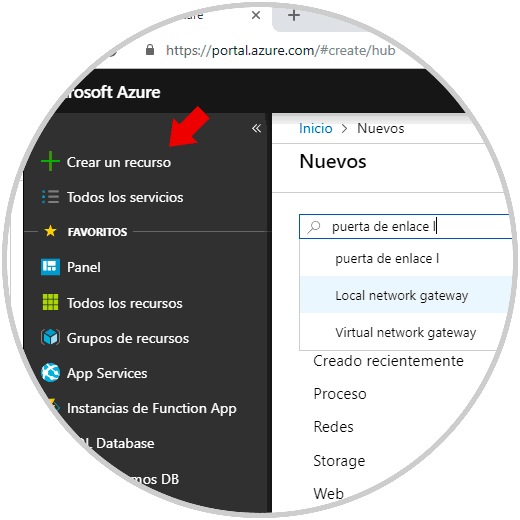
Step 1
To achieve this we must click on the “Create a resource†option and in the Marketplace field enter the local network gateway to see the associated results:
Step 2
There we click on Local network Gateway and the following window will be displayed:
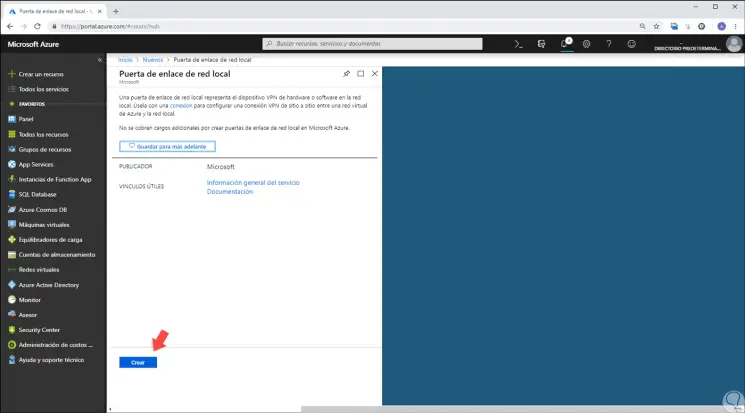
Step 3
Click on the "Create" button and there we must specify the following:
First name
We assign the name of the local network gateway object.
IP adress
It is the public IP address of the VPN device to which you want Azure to connect there, we must indicate a valid public IP address.
Address space
It refers to the address ranges of the network that this local network represents and it will be possible to add several address space ranges.
Configure BGP
This option is only used when BGP is configured.
Subscription
We indicate the current subscription.
Resource group
There we select the resource group to use, it is possible to create a new resource group or select an existing one.
Location
We select the location in which this object will be created.
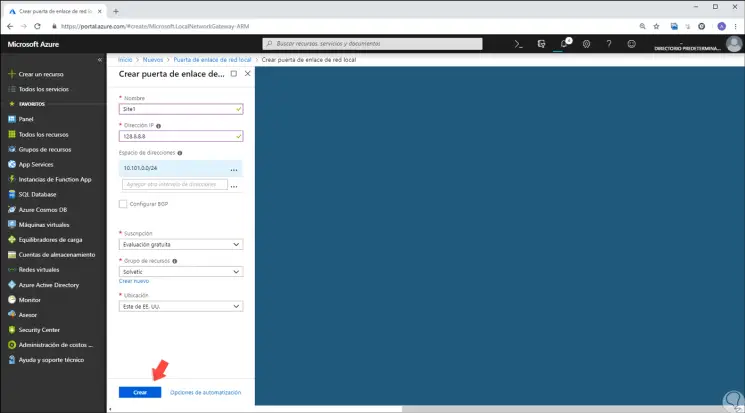
Step 4
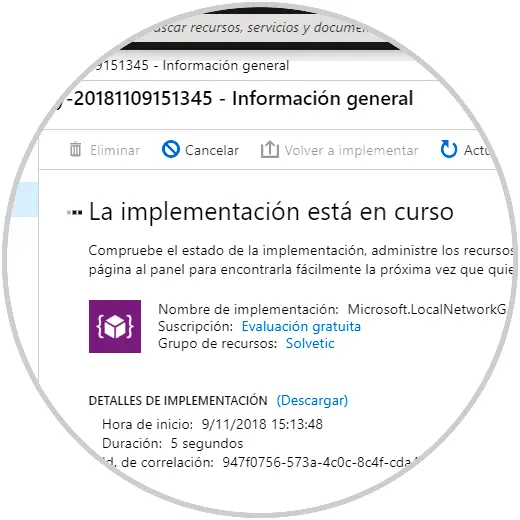
Click on "Create" to start the implementation:
6. Configure the local network VPN device in Azure
Site-to-site connections to a local network require a VPN device. To configure the VPN device correctly we must take into account:
- A shared key which is the same shared key that is specified when creating the site-to-site VPN connection.
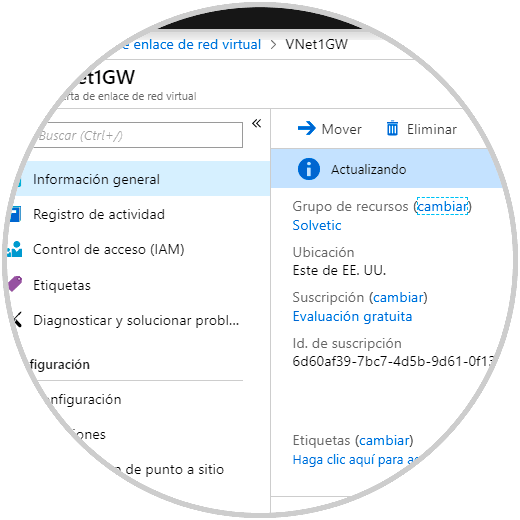
- The public IP address of the virtual network gateway that can be visible from Azure Portal, PowerShell or the CLI. To find the public IP address of the VPN gateway through the Azure Portal, we will go to “Virtual network gateways†and click on the name of the gateway.
6. Create the VPN connection in Azure
This process allows the site-to-site VPN connection between the virtual network gateway and the local VPN device.
Step 1
Now, we can configure these parameters in the system, in this case Windows 10, to access the VPN network:
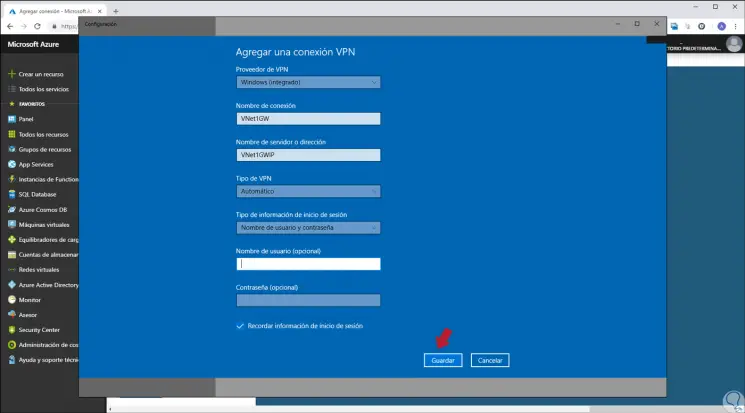
Step 2
Click on Save to apply the changes and now when we try to connect we will see that it is necessary to enter the credentials:
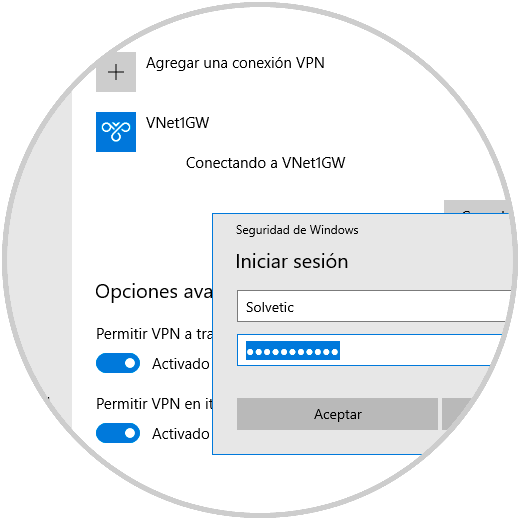
Step 3
When you do this, the VPN connection process will start:
Step 4
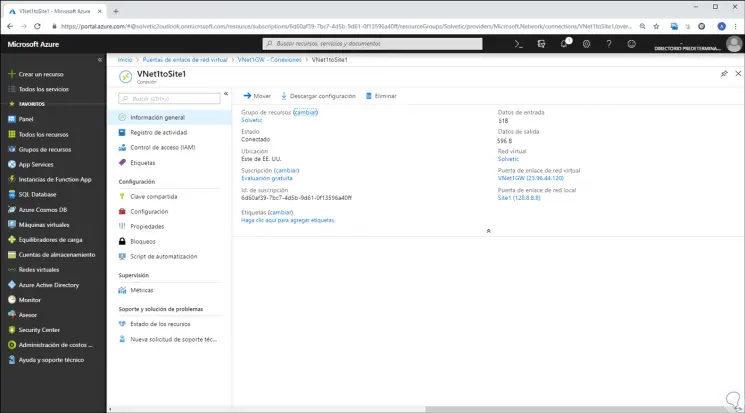
A point to configure in Azure are the VPN connections, for this we access the virtual network and go to the “Connections†section where we will enter details such as:
First name
Allows you to assign a name to the connection.
Connection type
There the option Site to site (IPSec) is selected.
Virtual Network Gateway
It is a fixed value since it is connected from this gateway.
Gateway of local network
We click on Choose a local network gateway and select the local network gateway to use.
Shared key
This value must be the same as the one you use for the local VPN device.
Others
The remaining Subscription, Resource Group and Location values ​​are by default.

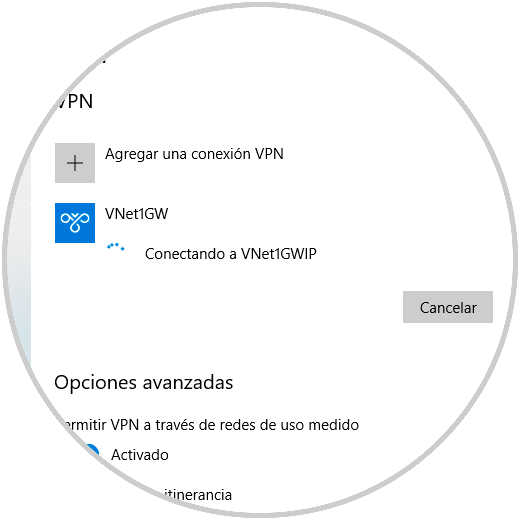
Step 5
Click on OK to apply the changes. Now, we can go back to the virtual network and by clicking on the “Connections†option, the Azure Portal validates that the connection process begins. After connecting we can see the status of use of the VPN:
With this method, Azure allows us to create a VPN connection and take full advantage of each of its configuration and security alternatives..