Ubuntu has made available to users the betas of the following editions that will be released, these betas give us an idea of what will come but they are constantly modified or may undergo variations, at this time we have the beta version of Ubuntu Server 22.04 which is oriented, as its name indicates, to organizations..
What's new in Ubuntu Server 22.04
Some of the new features of Ubuntu Server 22.04 are:
- Improved availability of business applications with native support for Microsoft Structured Query Language (SQL) Server
- New advanced hardware enablement (HWE) features
- Support for preconfigured Debian installer scripts
- Support for all x64-64 architectures, ARM v7, ARM64, POWER 8, POWER 9, IBM s390x
The download of the Ubuntu Server 22.04 ISO image is available at the following link:
UbuntuServer 22.04
Now, being a beta version, what better than using VirtualBox to test it without affecting a machine in production, VirtualBox offers us various special functions to manage the virtual machine in the best way, its download is available at the following link :
VirtualBox
Let's see how to install Ubuntu Server 22.04 in VirtualBox and learn about its improvements.
To stay up to date, remember to subscribe to our YouTube channel!
SUBSCRIBE ON YOUTUBE
1. Install Ubuntu Server 22.04 in VirtualBox
Step 1
We open VirtualBox and create a new virtual machine using the New button:

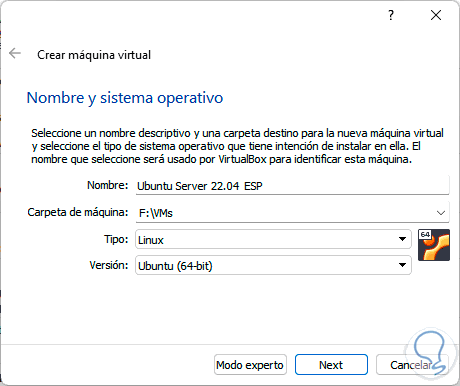
Step 2
In the pop-up window we enter:
· Name of the virtual machine
· Location
· Type of system
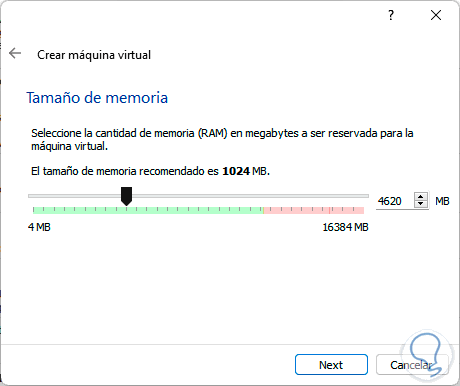
Step 3
We click Next to set the RAM to use:
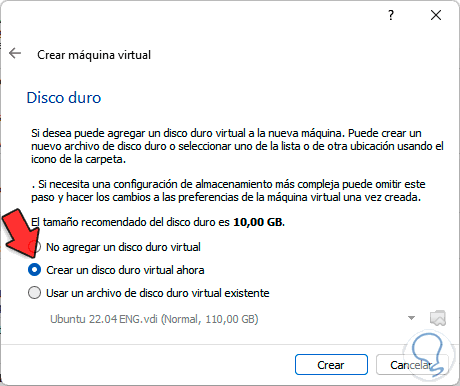
Step 4
After this we will create and configure the parameters of the hard drive. We click on Create and select the type of hard drive to use:
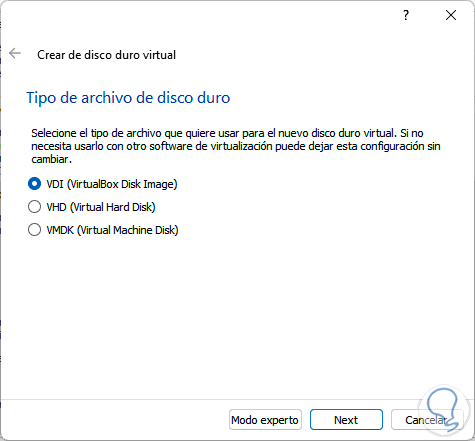
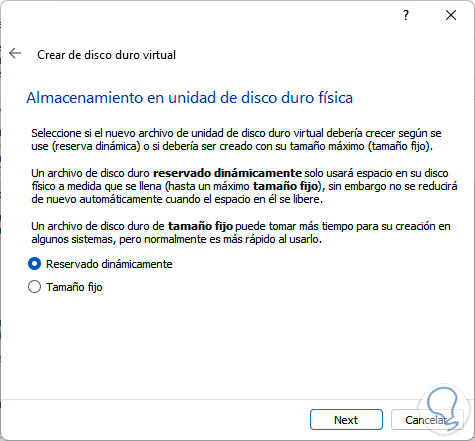
step 5
Then we set the storage form:
Step 6
We click Next to set the size of the hard drive and its location:
Step 7
We click "Create" to complete the process:

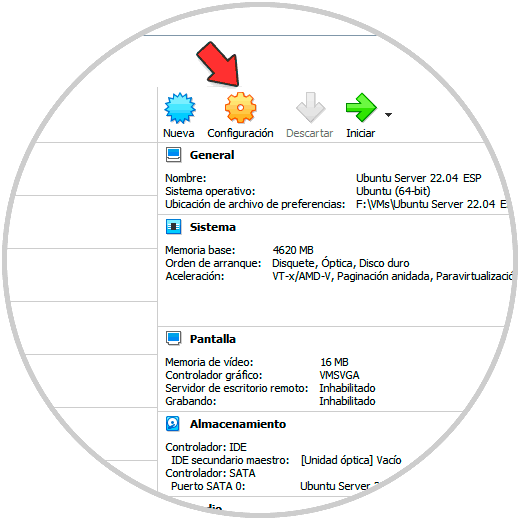
step 8
We click on "Settings"
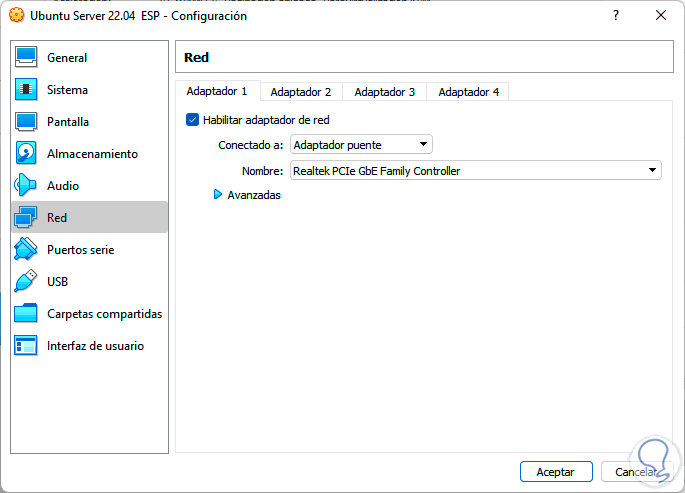
step 9
In the Network section we assign the physical adapter. We apply the changes.
step 10
We start the virtual machine and we will see the following:
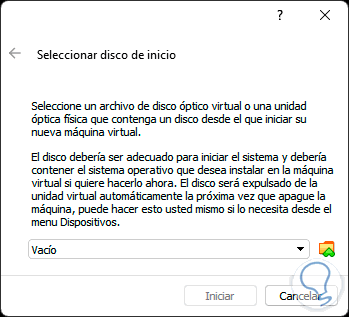
step 11
We click on the folder icon to select the Ubuntu Server 22.04 ISO image:
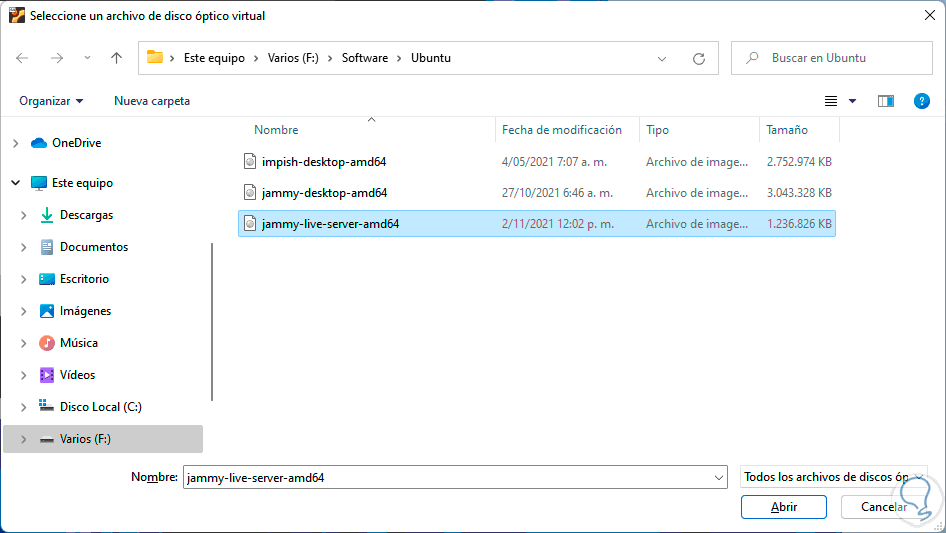
step 12
We click Open to integrate the ISO:
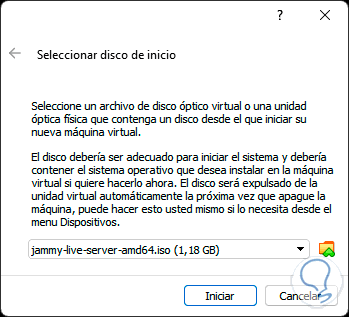
step 13
We click Start to see the Ubuntu Server 22.04 installation wizard screen:

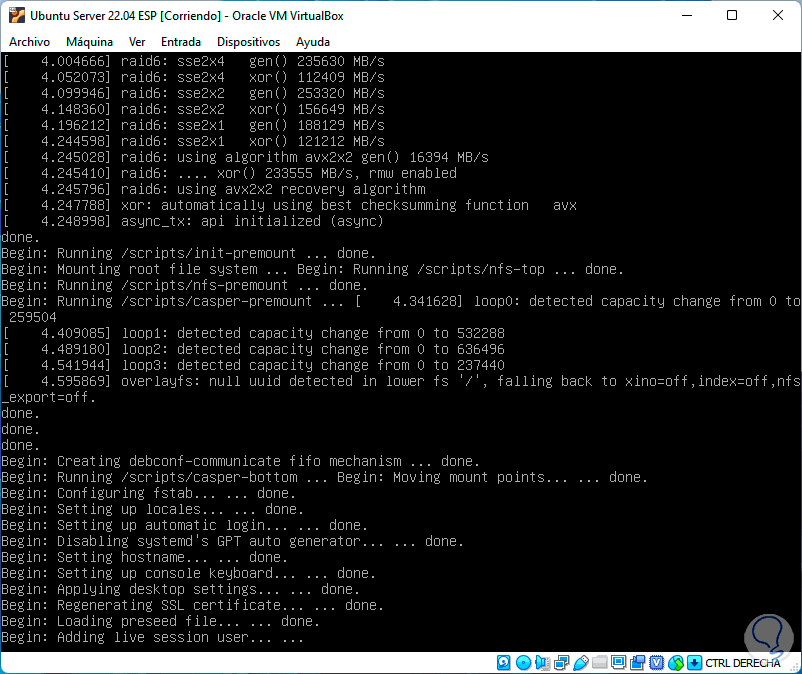
step 14
We click on "Ubuntu Server" to start loading the services:
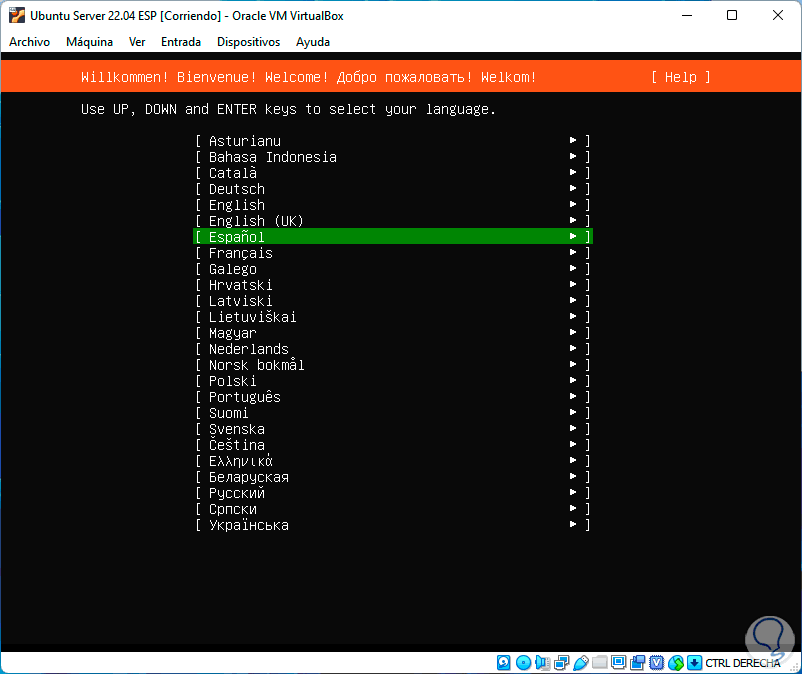
step 15
Then we select the system language:
step 16
There we can use the arrow keys and the Enter key to confirm, then we define the keyboard language:
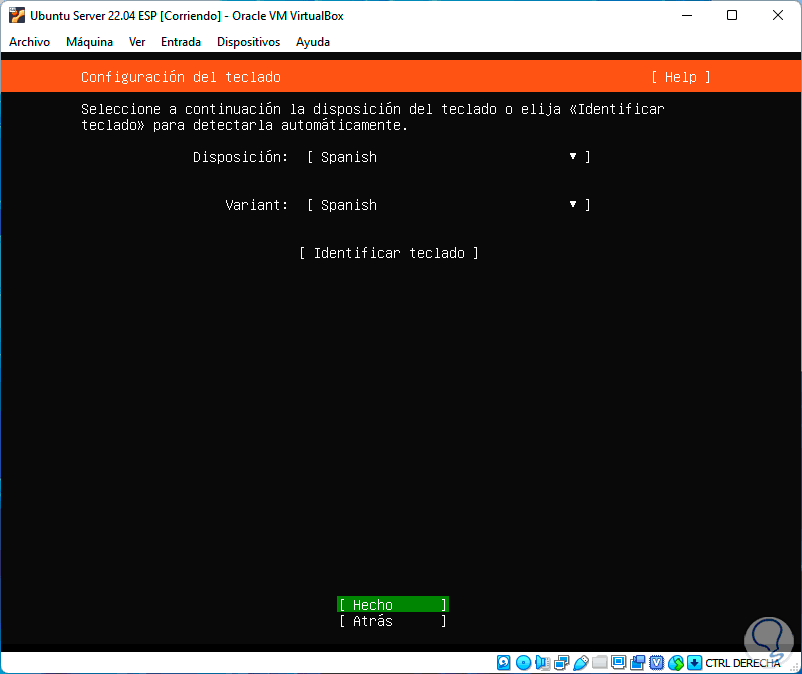
step 17
We click Done to confirm, in the next window we select the type of installation to use, the options are:
- Ubuntu Server: it is the default option which installs the Ubuntu Server packages for optimal work
- Ubuntu Server (miniized): it is the option of minimum requirements used in computers with low performance or for limited work
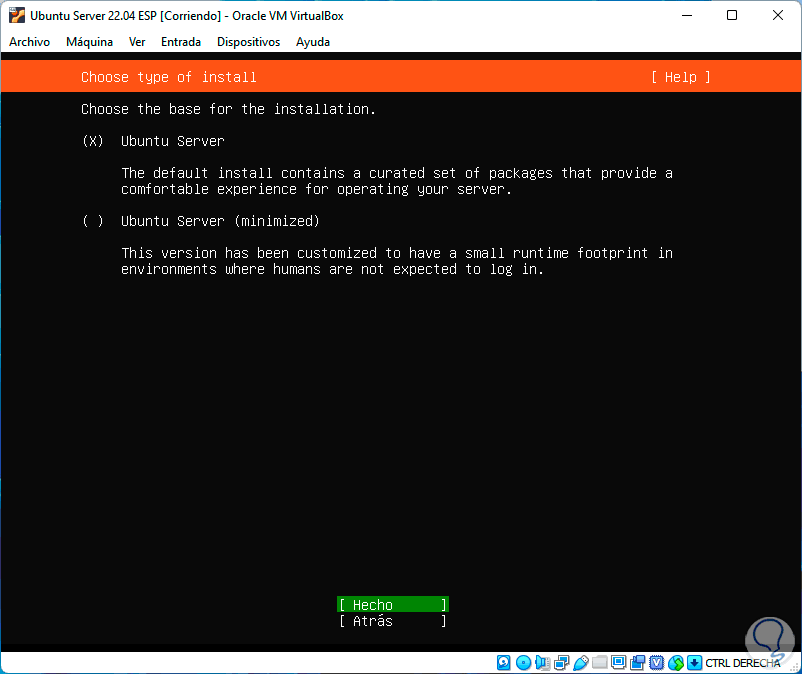
step 18
We leave the default option and click on Done, now we will see the network parameters:

step 19
In the next window we enter the proxy (if applicable):
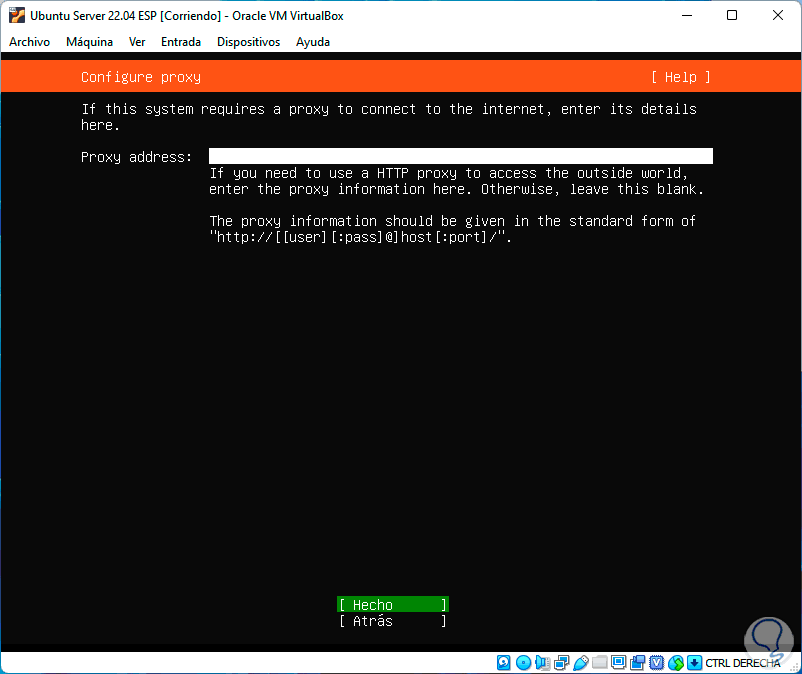
step 20
Next we select the Ubuntu Server 22.04 mirror for replica management:
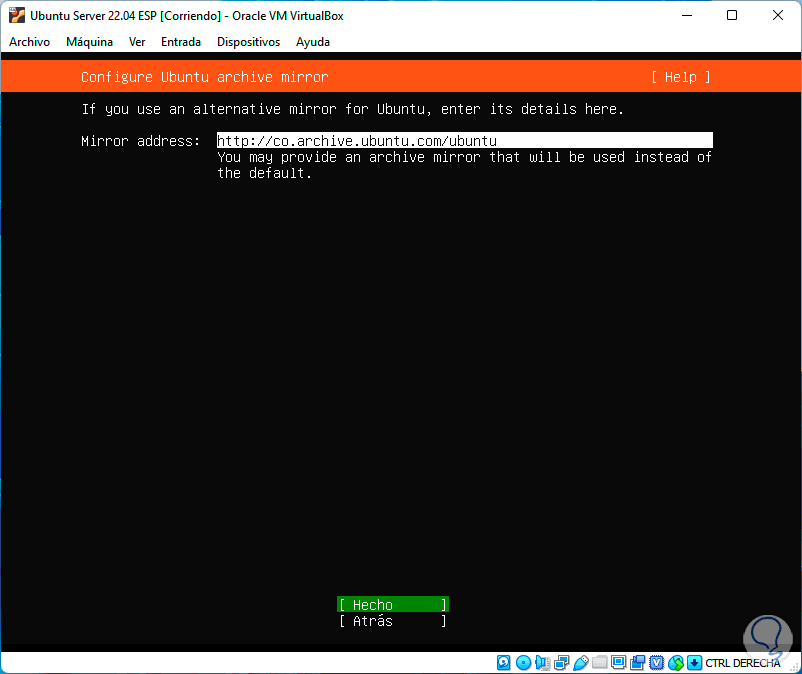
step 21
After this we enter the hard disk section where the disk configuration form is defined:
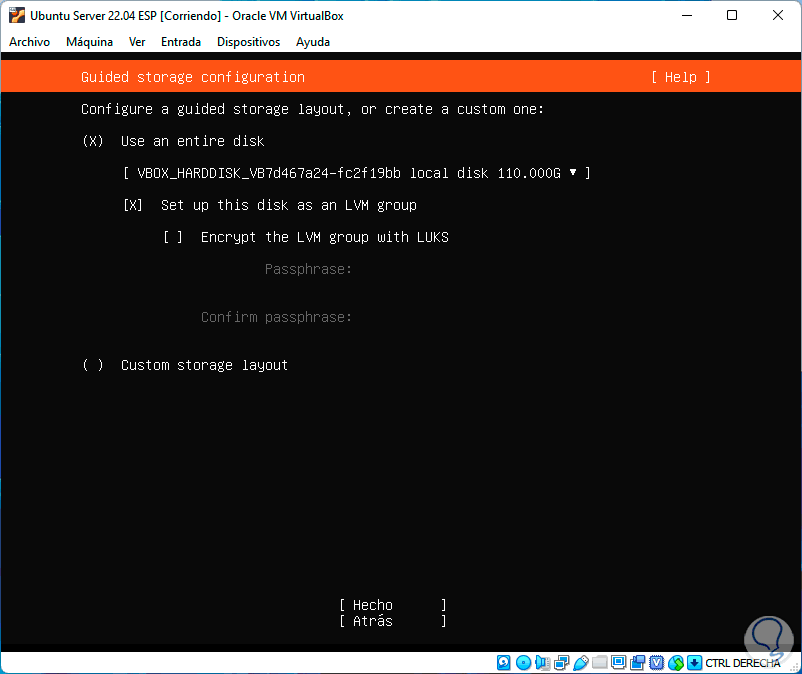
step 22
There we select the disk and it is possible to activate the encryption or perform the partitioning manually, we click on Done to see how Ubuntu Server 22.04 distributes the disk partition:
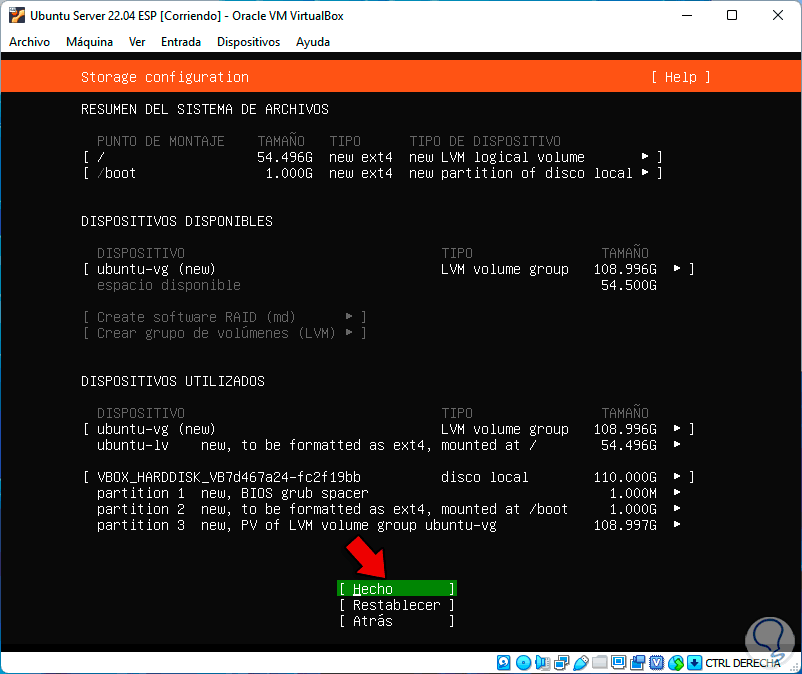
step 23
We select Done and we will see the following message:
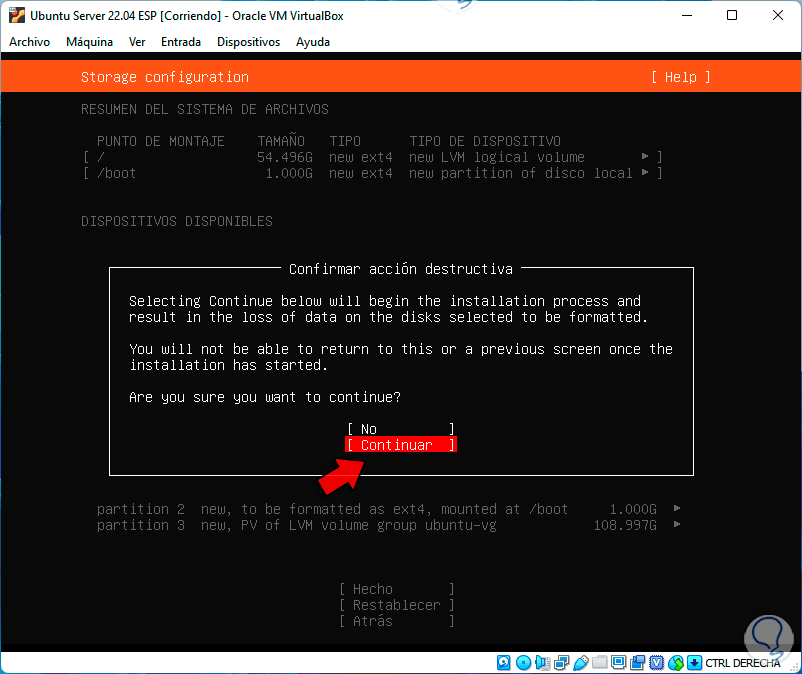
step 24
We apply the changes by clicking Continue and now we are going to enter the user and equipment information:
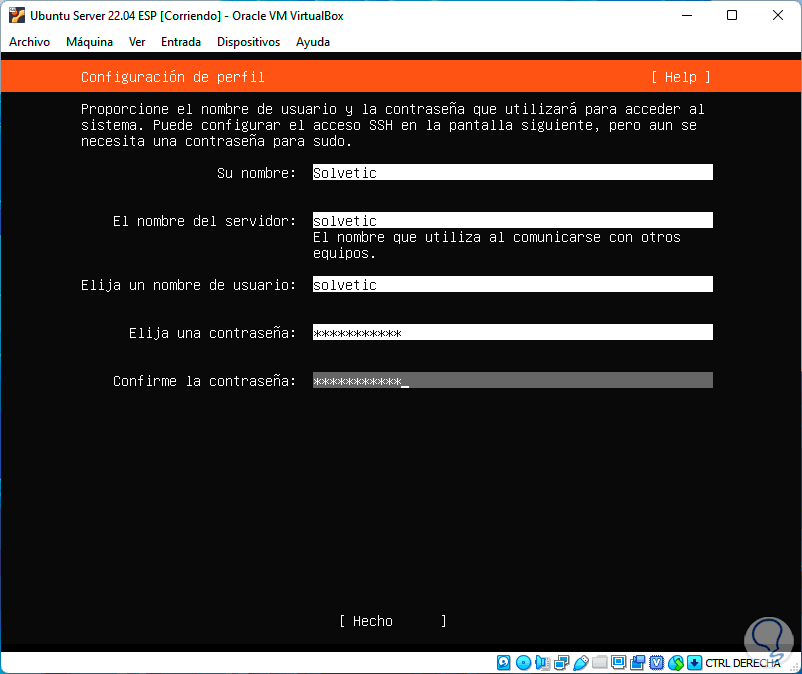
step 25
We confirm the process and it is time to define whether or not OpenSSH is installed:
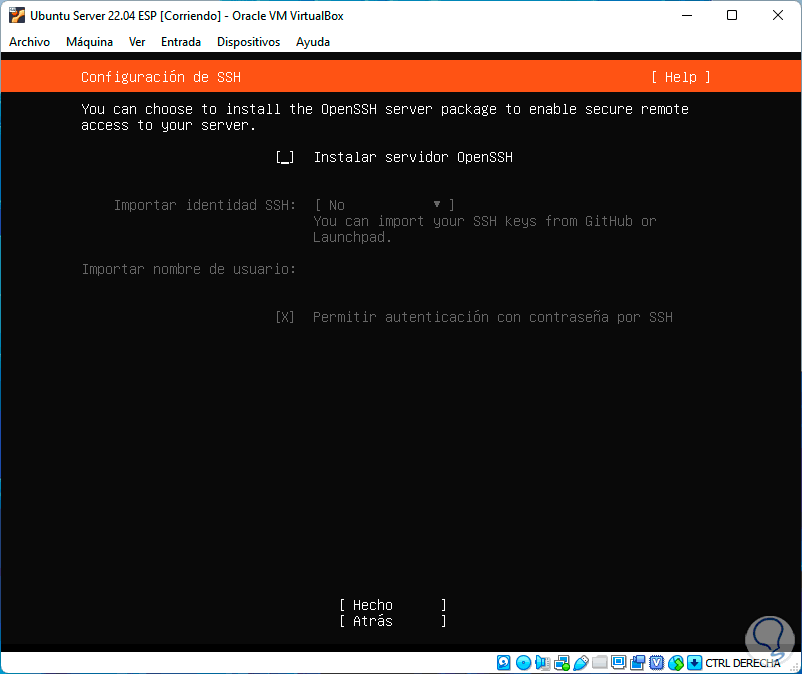
step 26
After this we configure the packages to install on the server:
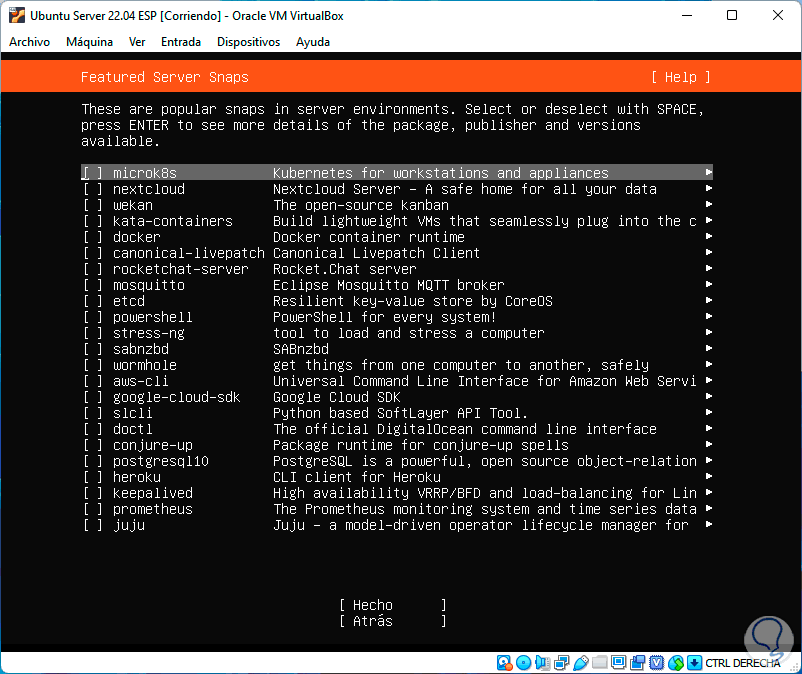
step 27
We click Done to start the installation of Ubuntu Server 22.04 in VirtualBox:
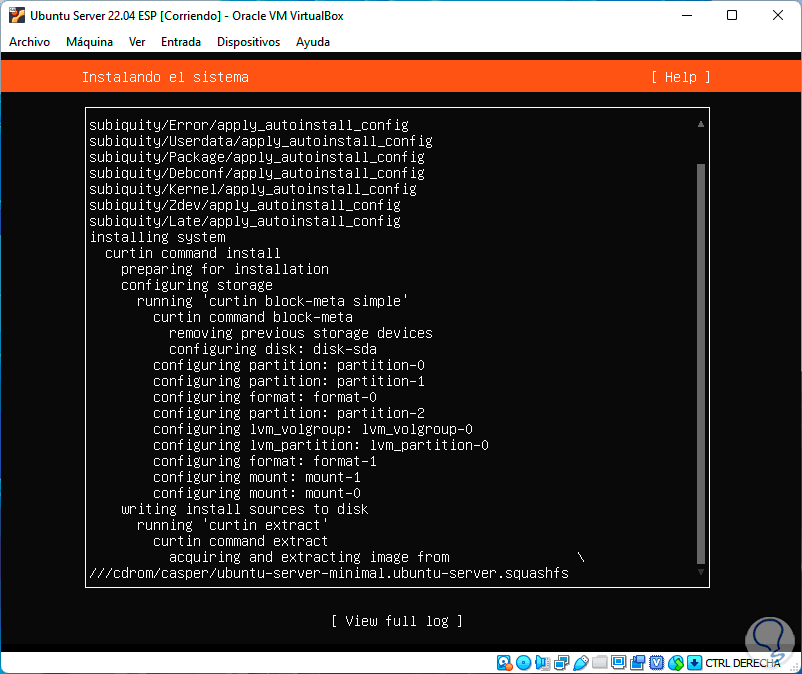
step 28
Once the installation is finished, some updates will be applied:
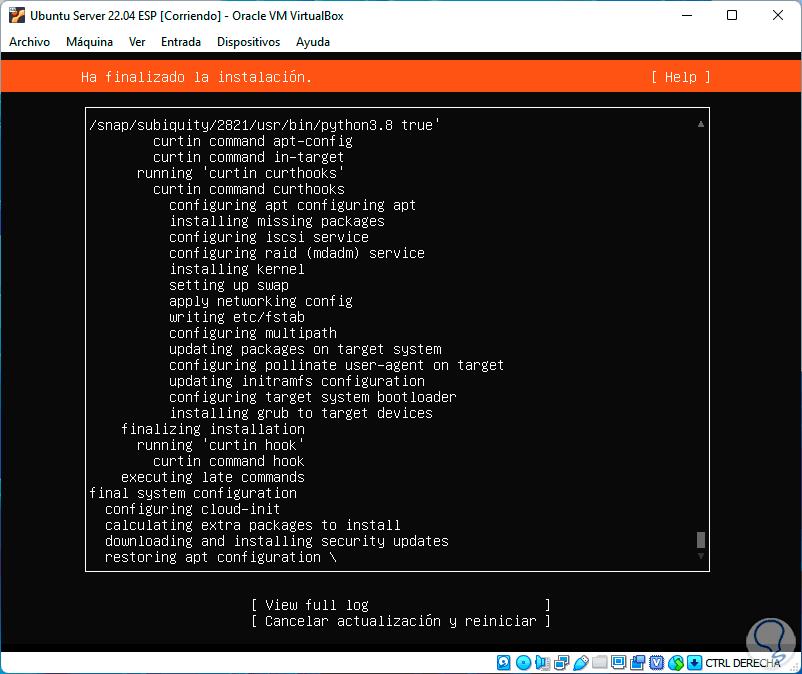
step 29
Finally we will see the following:

step 30
We restart the virtual machine:
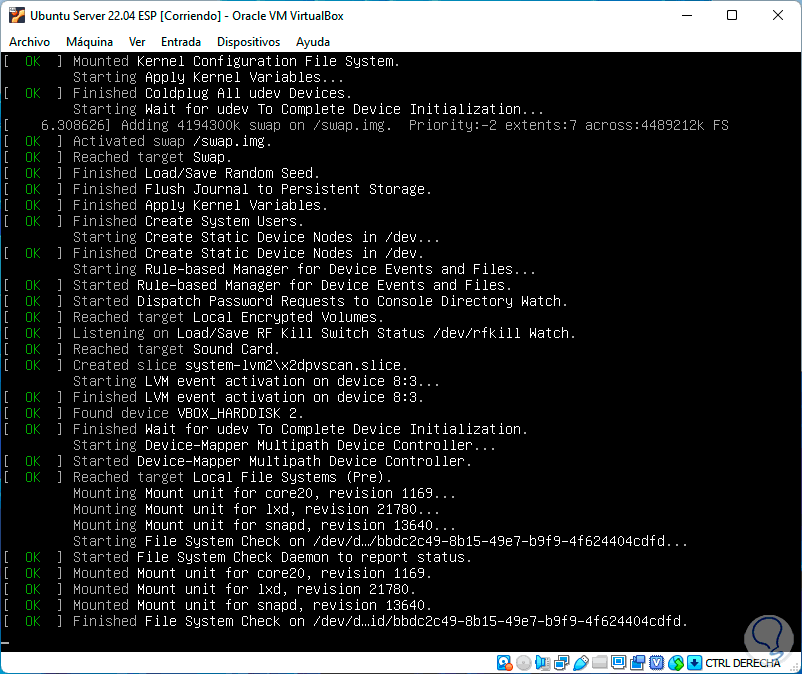
step 31
After this we log in:
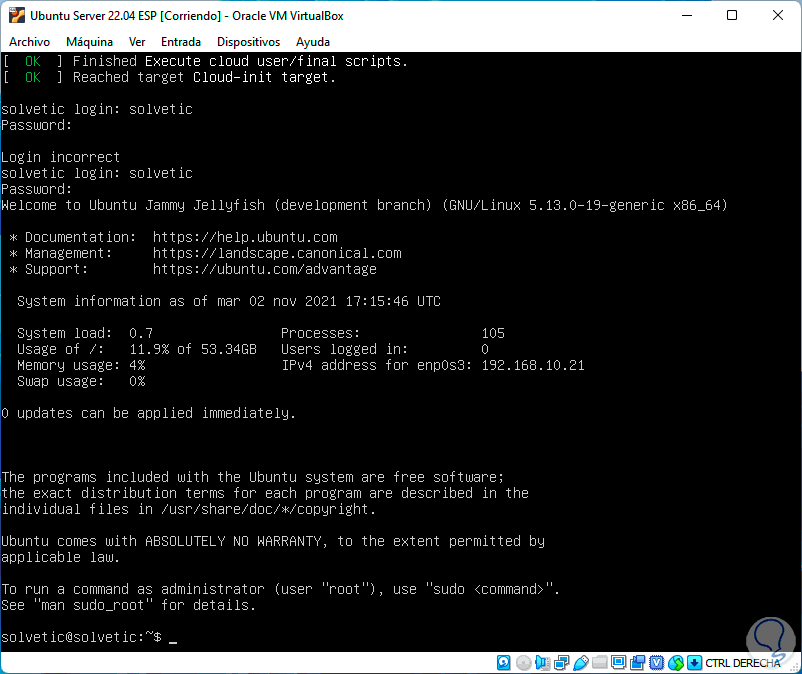
step 32
We execute the following command to validate the version:
lsb_release -a
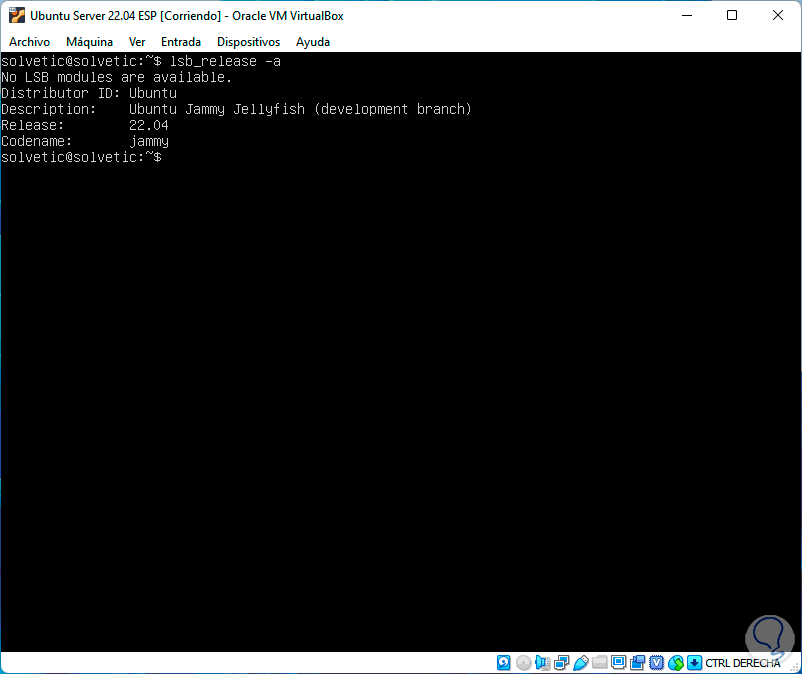
This is all we need to do to install Ubuntu Server 22.04 in VirtualBox and explore each of its features..