Windows 10 has different functions which allow the access and administration of different system options to be as practical as possible. A sample of this can be seen when we right click on any of the icons of the applications that are anchored in our taskbar, since when we right click there the last 12 files that have been edited with that application will be displayed..
This is practical because it gives us the opportunity to go directly to a previous file by clicking there without having to go to the full path where that object is stored. As we know, Windows 10 also displays files that have been recently opened and the places that are frequently accessed in the File menu of File Explorer . These recent documents can be useful when we need to re-enter a document used recently and want to have it accessible quickly. The problem with this is that they are mixed according to the last access and can become somewhat tedious.
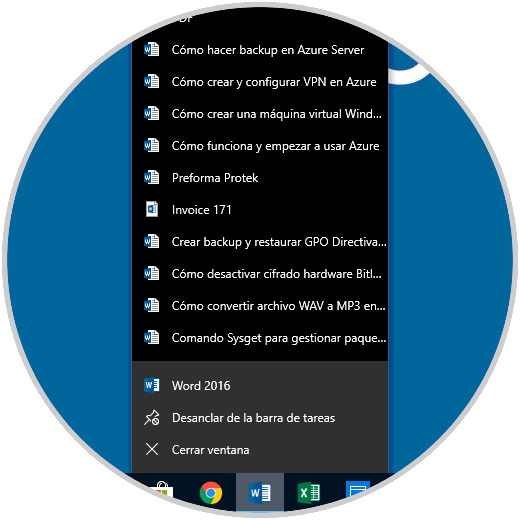
If we want to remove these recent or frequent files due to security or control issues, TechnoWikis will give different methods to do it in a complete way..
To keep up, remember to subscribe to our YouTube channel! SUBSCRIBE
1. Remove recent files through Settings in Windows 10
Step 1
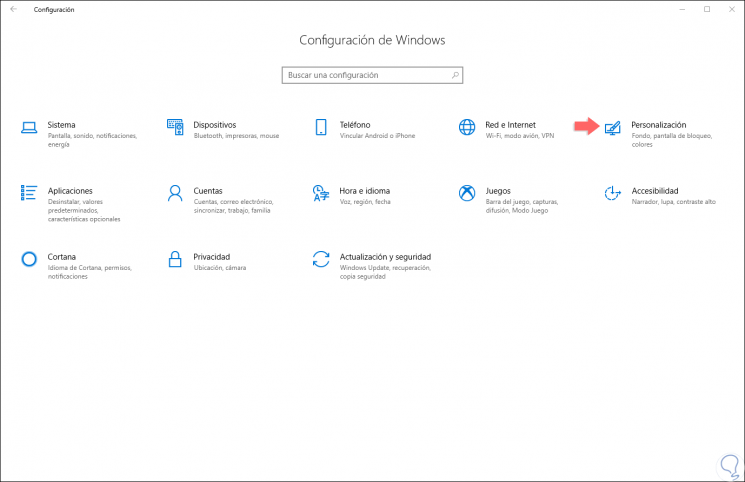
The Configuration utility is one of the most complete solutions that Windows 10 offers us for the management of various application components, for this we must go to the Start menu and there select the “Configuration†utility, we will see the following:
Step 2
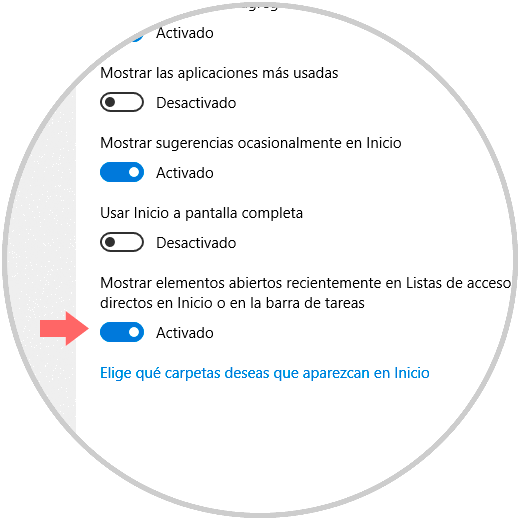
There we select the “Personalization†category and in the new window we go to the “Start†section and we will see the following. There we must click on the switch called "Show recently opened items in Shortcut Lists in Start or on the taskbar" in order to disable this collection.
2. Remove recent files through Group Policies in Windows 10
This option only applies to the Pro, Enterprise and Studio editions of Windows 10.
Step 1
To access the group policy editor we will use the following key combination and execute the gpedit.msc command, press Enter or Accept.
+ R
gpedit.msc
Step 2
In the displayed window we will go to the following route:
Step 3
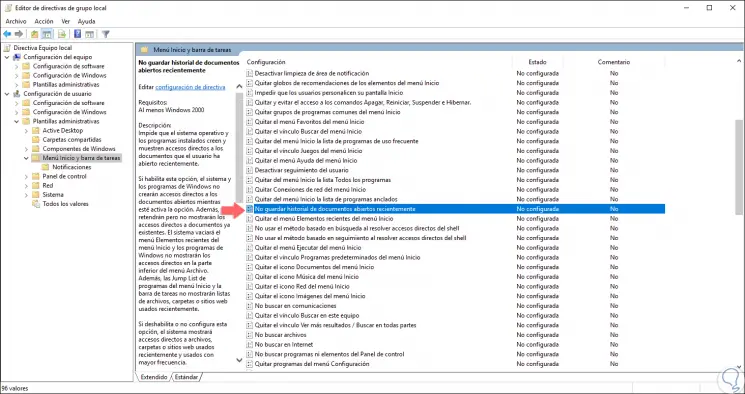
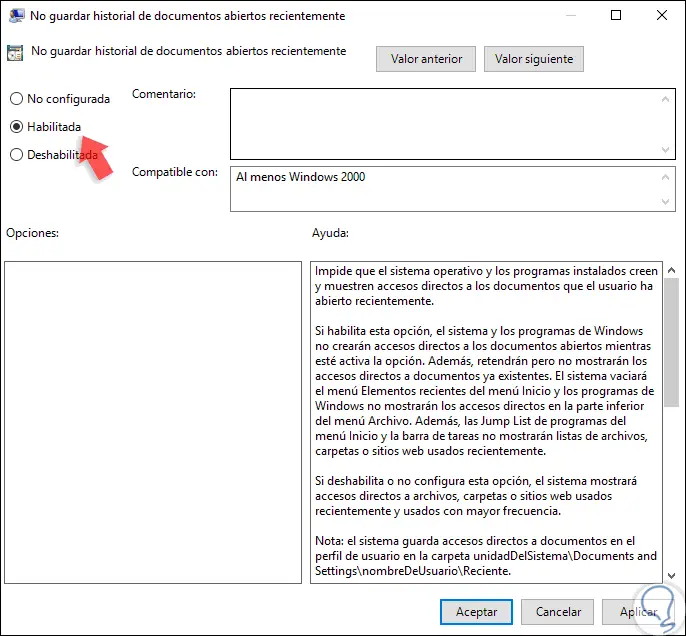
There, in the central panel, we locate the policy called “Do not keep history of recently opened documentsâ€:
Step 4
We will double-click on this policy., Or right click / Edit, and in the displayed window we activate the “Enabled†box. Click on “Apply†and Accept to save the changes, now, we access the command prompt and execute gpupdate / force to force the change.
gpupdate / force
3. Remove recent files through the Registry Editor in Windows 10
This option applies to all editions of Windows 10.
Step 1
To access this editor we use the following keys and execute the regedit command.
+ R
regedit
Step 2
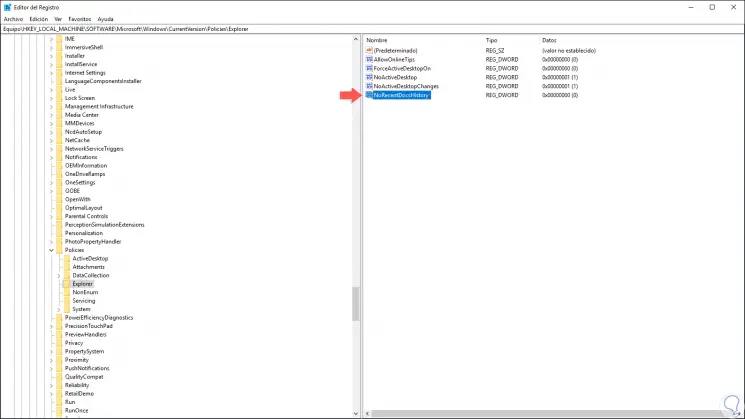
In the displayed window we will go to the following route:
HKEY_LOCAL_MACHINE \ SOFTWARE \ Microsoft \ Windows \ CurrentVersion \ Policies \ Explorer
Step 3
There we must locate the DWORD value called “NoRecentDocsHistoryâ€:
Step 4
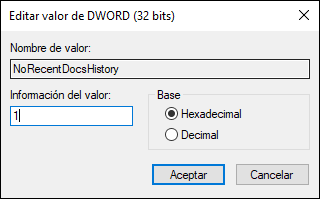
If this value does not exist, we can right-click and select New / DWORD Value (32 bits) and assign that name there. Now, we double-click on this value and in the Value information field we assign the number 1. Click on OK to save the changes.
Thus, we have different ways to not store file history in Windows 10.