Windows 11 is undoubtedly one of the most used operating systems by millions of users who frequently access their computers to carry out different tasks and store information..
On many occasions we turn on our Windows 11 computers and walk away and leave them there connected and turned on. This may not initially cause an effect but over time it can have an impact on the performance of the system, the CPU, the fans, the power supply, etc, and even more on our energy bill.
This is something that can be avoided if the PC has been on for too long without just cause, it is possible to check how long the Windows 11 PC has been on in various ways that TechnoWikis will explain to you. Below you will see how to verify this data in detail in each of its forms..
To stay up to date, remember to subscribe to our YouTube channel!
SUBSCRIBE ON YOUTUBE
1 How to see how long the Windows 11 PC has been on from Task Manager
Step 1
This is one of the simple methods to see this data, to do this open the Task Manager:
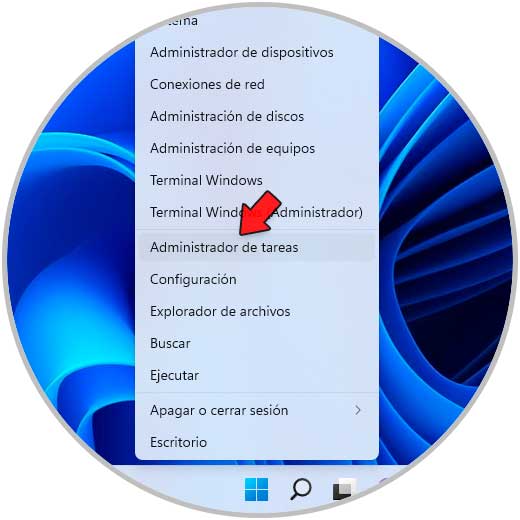
Step 2
In the Manager in the "Performance" tab we click on "CPU":
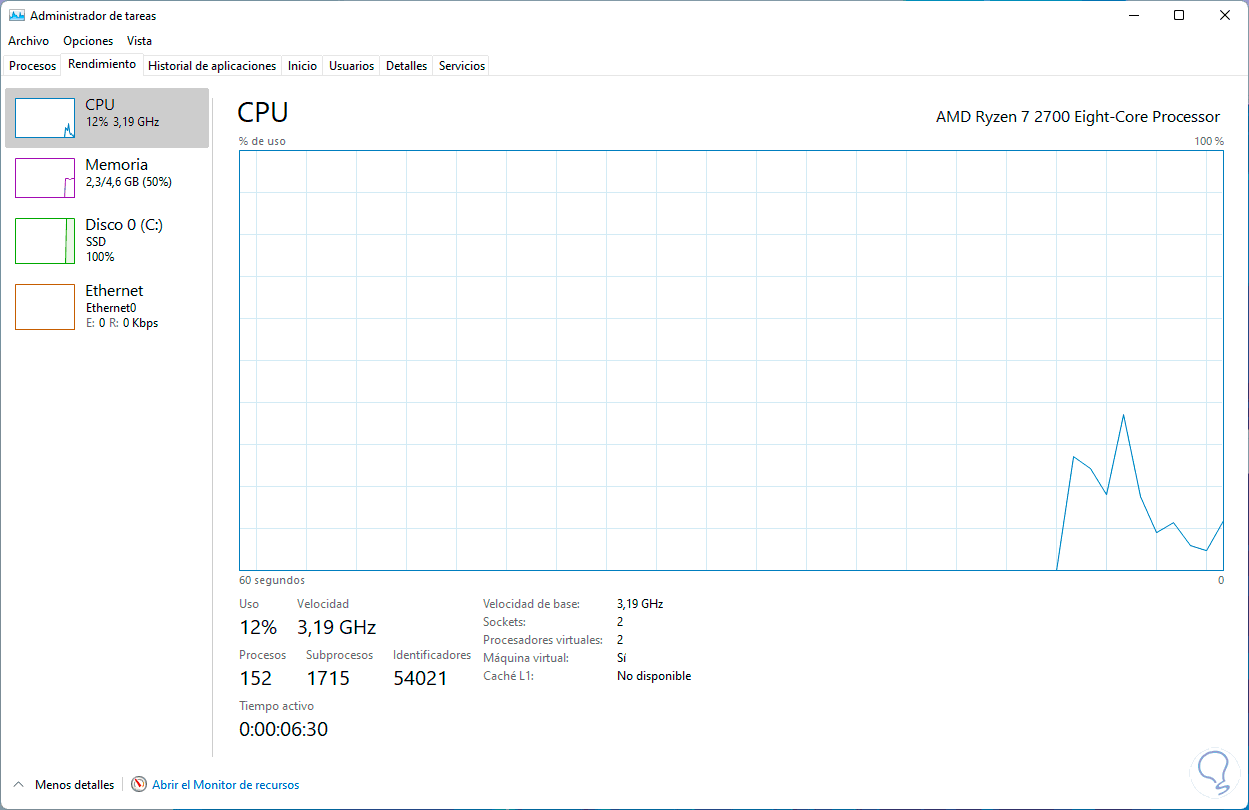
At the bottom in "Active time" we will see the time of use.
2 How to see how long the Windows 11 PC has been on from Settings
Another method available to access this information is through Settings.
Step 1
To use this mechanism we will go "Start - Settings - Network and Internet - Advanced network settings":
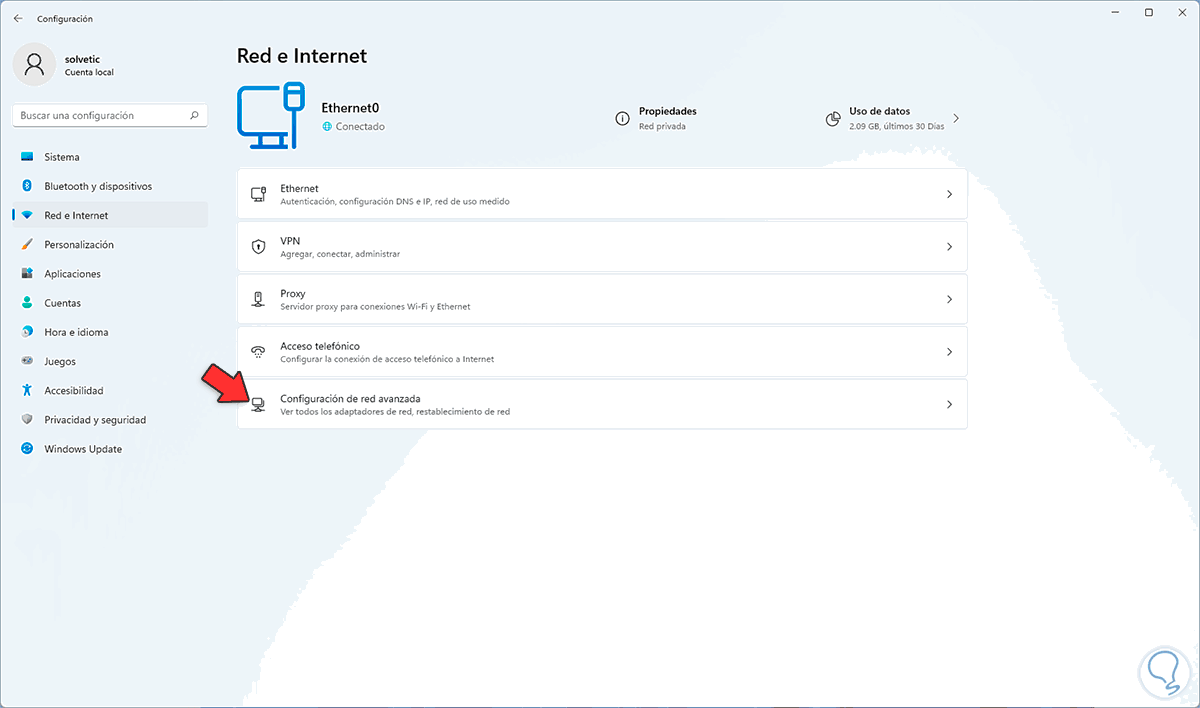
Step 2
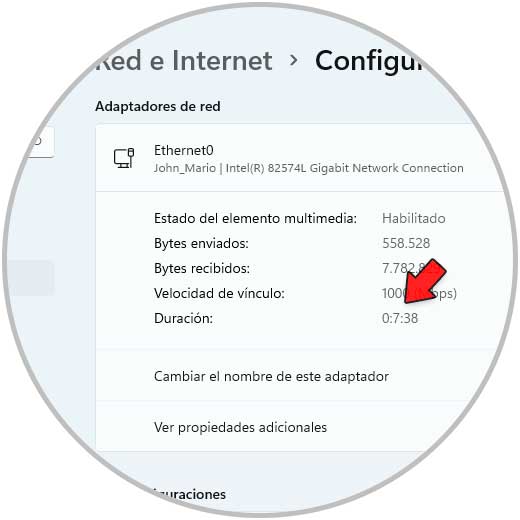
We click on "Ethernet" and in the "Duration" line you will see the time of use of the PC:
3 How to see how long the Windows 11 PC has been on from Control Panel
Step 1
Another alternative is through the Control Panel, we open the Control Panel:
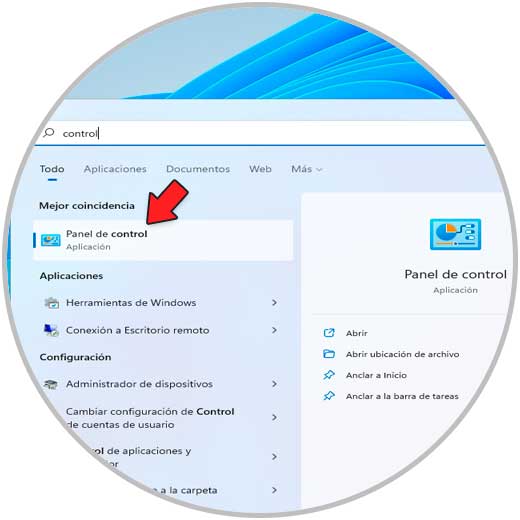
Step 2
We will see the following:
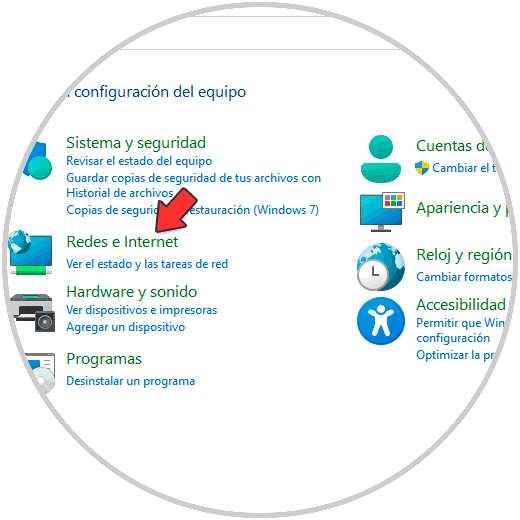
Step 3
We click on "Networks and Internet" to see the following:
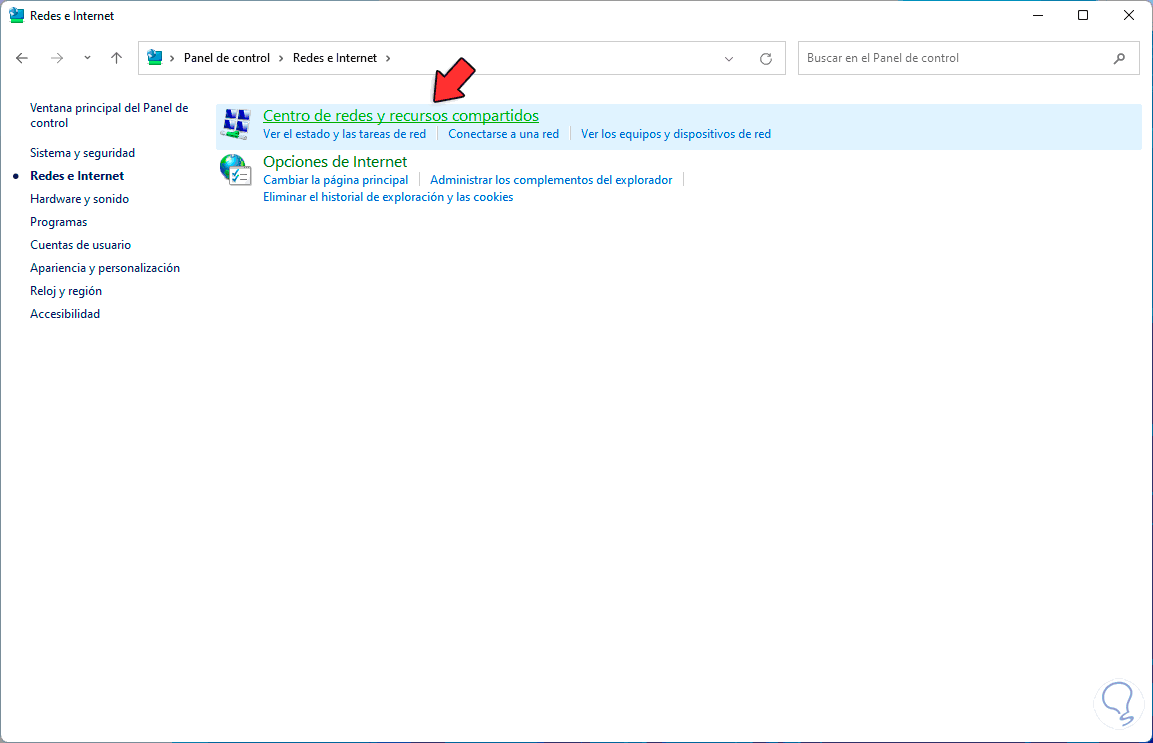
Step 4
We click on "Network and Sharing Center" and then we will see the following window:
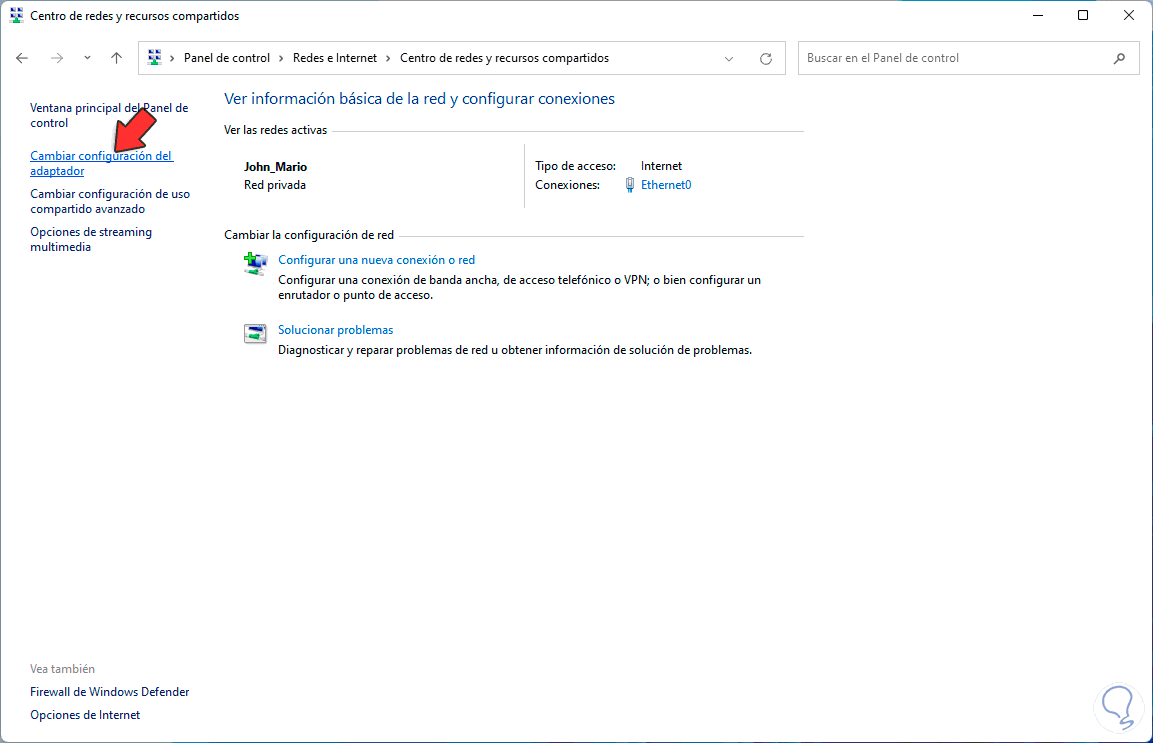
step 5
We click on "Change adapter settings" to see the current network adapter used:
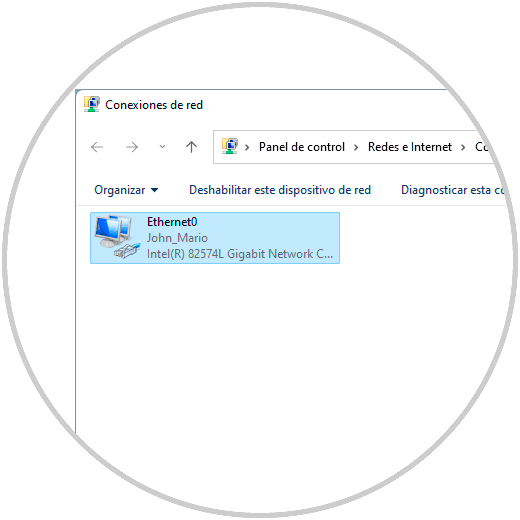
Step 6
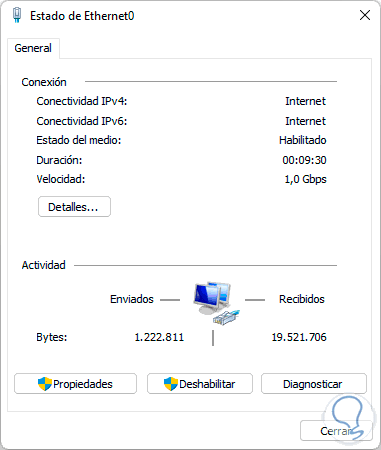
We double click on the adapter and in the "Duration" line we will see the active time:
4 How to see how long the Windows 11 PC has been on from CMD
Step 1
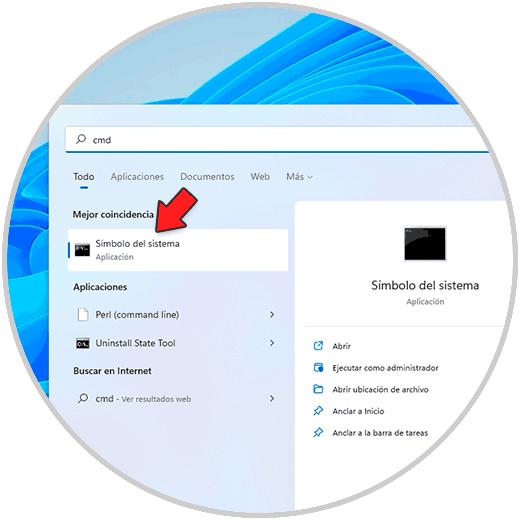
The CMD console is another alternative to access this information, we open CMD as administrator:
Step 2
We execute the following:
wmic path Win32_OperatingSystem get LastBootUpTime
We will see a complete output format:
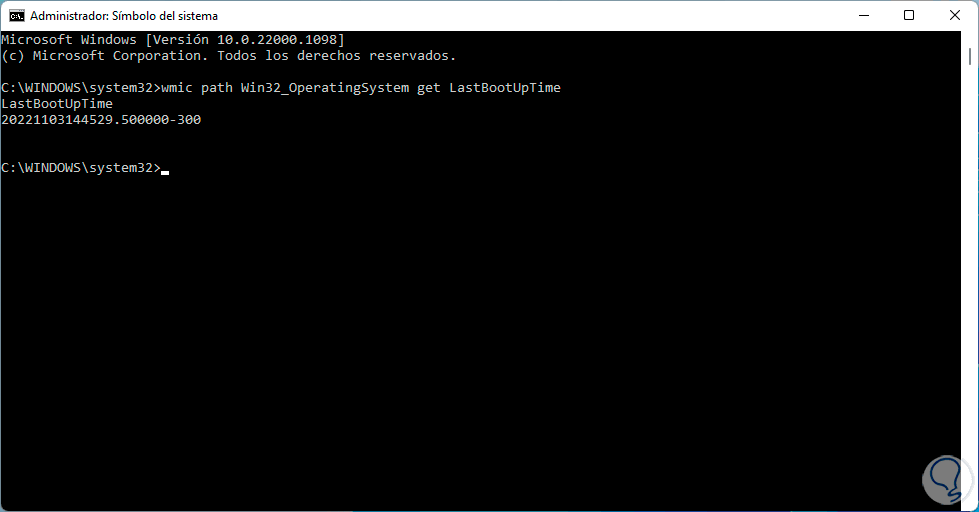
The summary information we see is as follows:
- GMT: -300 (5 hours before GMT)
Step 3
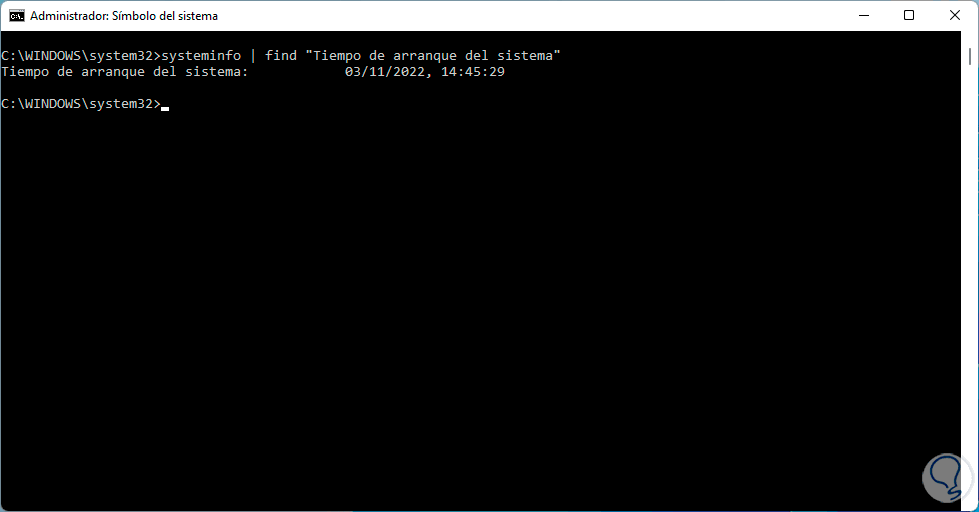
Now we will use another format that is easier to understand, for this we execute the following:
systeminfo | find "System Boot Time"
This command takes information from the msinfo32 utility:
5 How to see how long the Windows 11 PC has been on from PowerShell
Step 1
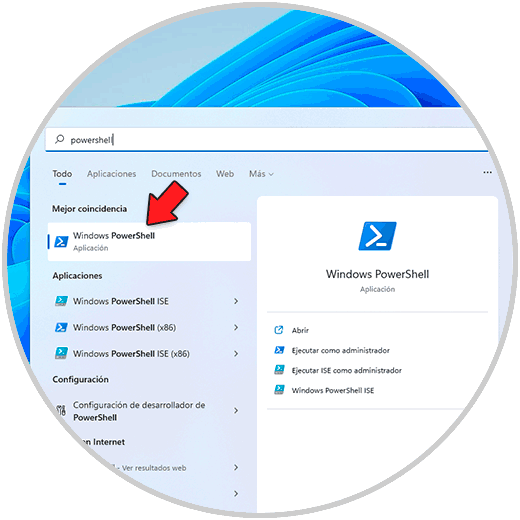
Finally it is possible to make use of PowerShell to see these details, open PowerShell as administrator:
Step 2
We execute:
(get-date) – (gcim Win32_OperatingSystem).LastBootUpTime
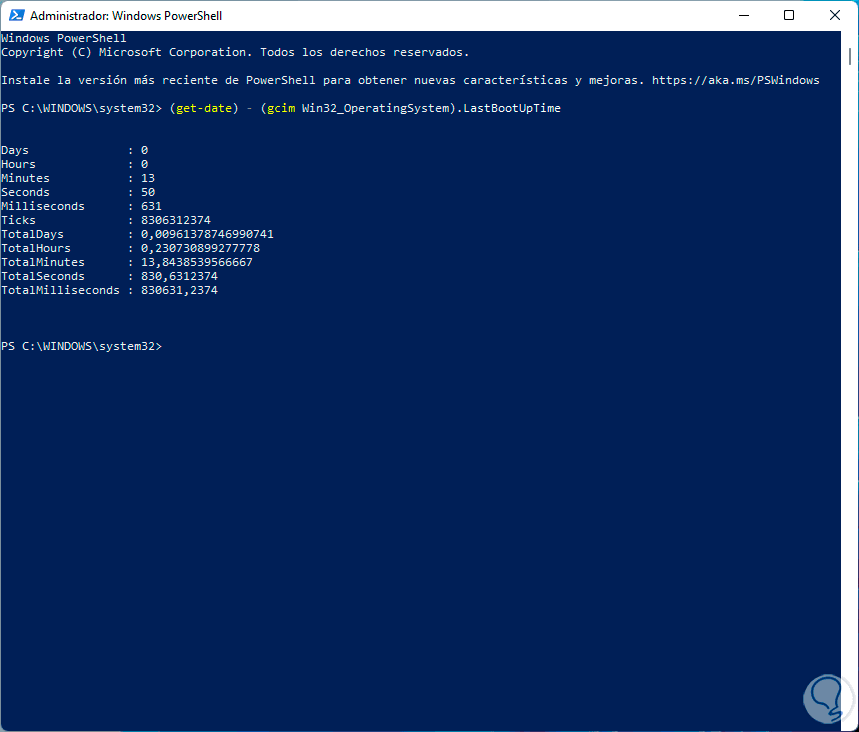
There we see a complete summary of each data on the PC.
These are the options to see the PC power-on time in Windows 11. In this way you will be able to check this data whenever you need it..