Although from the beginning the main function of mobile phones has been to call and receive calls , it is true that since the arrival of the Internet to these devices the amount of actions we can perform from them has become infinite..
One of the most recurrent in the use of the device is undoubtedly the download and use of internet applications for different purposes: From games, photo editing applications to the mail or instant messaging Apps are used by everyone on a daily basis.
Automatic updates of these Apps are useful when it comes to being up to date and having the latest versions, in which failures or problems of the previous ones are usually resolved for an improvement of the same. But these automatic updates also have a less friendly side, such as mobile terminal data spending if we are not connected to a WiFi network or extra battery cost . It is for this reason that today in TechnoWikis we will explain step by step how to enable and disable automatic updates in one of the terminals of the moment: Apple's iPhone XR..
For this you will have to do the following:
To keep up, remember to subscribe to our YouTube channel! SUBSCRIBE
Step 1
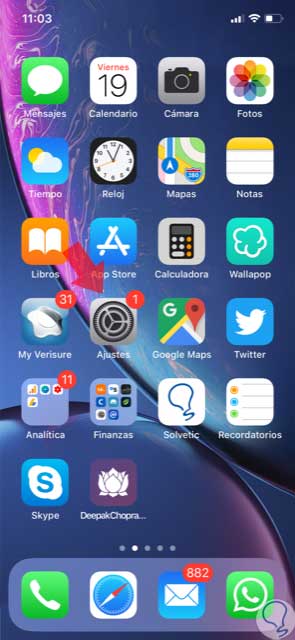
Tap on the "Settings" of the device on the gear icon of your iPhone XR.
Step 2
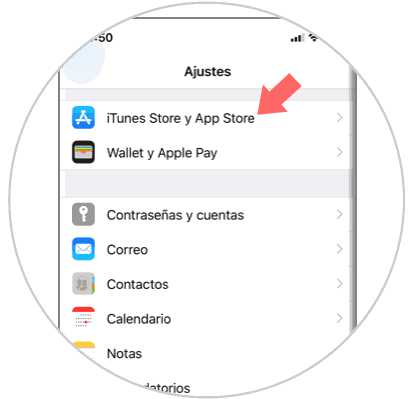
In the list of configuration options, tap iTunes and App Store to continue.
Step 3
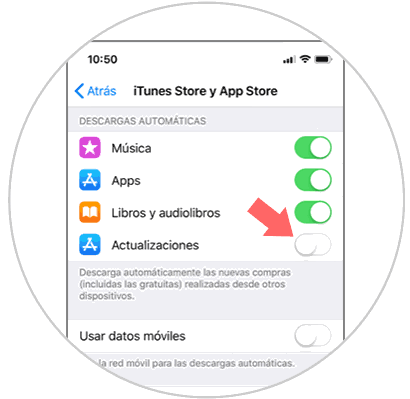
Within the section of automatic downloads, you will find the “Updates†option, in which you must deactivate the tab so that these updates do not occur automatically in the terminal.
Step 4
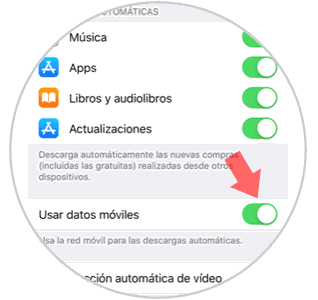
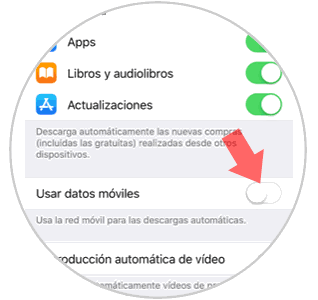
Another option is to have automatic updates active but that these only occur when we are connected to a WiFi network so as not to have an extra expense of mobile data. In this case, disable the “Use mobile data†tab by sliding it to the right and automatic updates will only be performed when you are not using them.
It's that simple to enable and disable automatic updates on the iPhone XR.