As we use the Windows 11 operating system and its respective applications and libraries, it is natural and normal that it is stored on the hard drive (in a special cache part of these sites and apps, this is stored in order that future accesses or openings are much faster..
But over time we can store too much cache or modify the internal data of files or applications and this will lead to errors and direct effects on the performance of the computer.
That is why TechnoWikis will explain various ways to free the Windows 11 cache and thus optimize the system. Below you will see how to carry out each of these options, so that you can carry out this process whenever you need it on your computer..
To stay up to date, remember to subscribe to our YouTube channel!
SUBSCRIBE ON YOUTUBE
1 Free Cache Memory Windows 11 From File Explorer
Every day we access File Explorer to go to our personal files and folders, access hard or external drives and generally open Libraries, but this hosts cache that can affect normal use.
Step 1
To clear the cache there, we open File Explorer and click on the "See more - Options" menu:
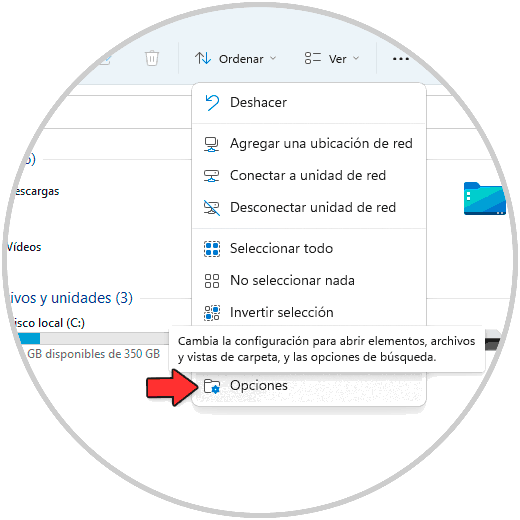
Step 2
The following window will open. In the "Privacy" section we click on "Delete" and apply the changes.

2 Free Cache Memory Windows 11 From Privacy and security (Activity)
This is one of the most discussed privacy options in Windows 11 since all activity on the computer is recorded there, which can be annoying for many users and this process also hosts cache.
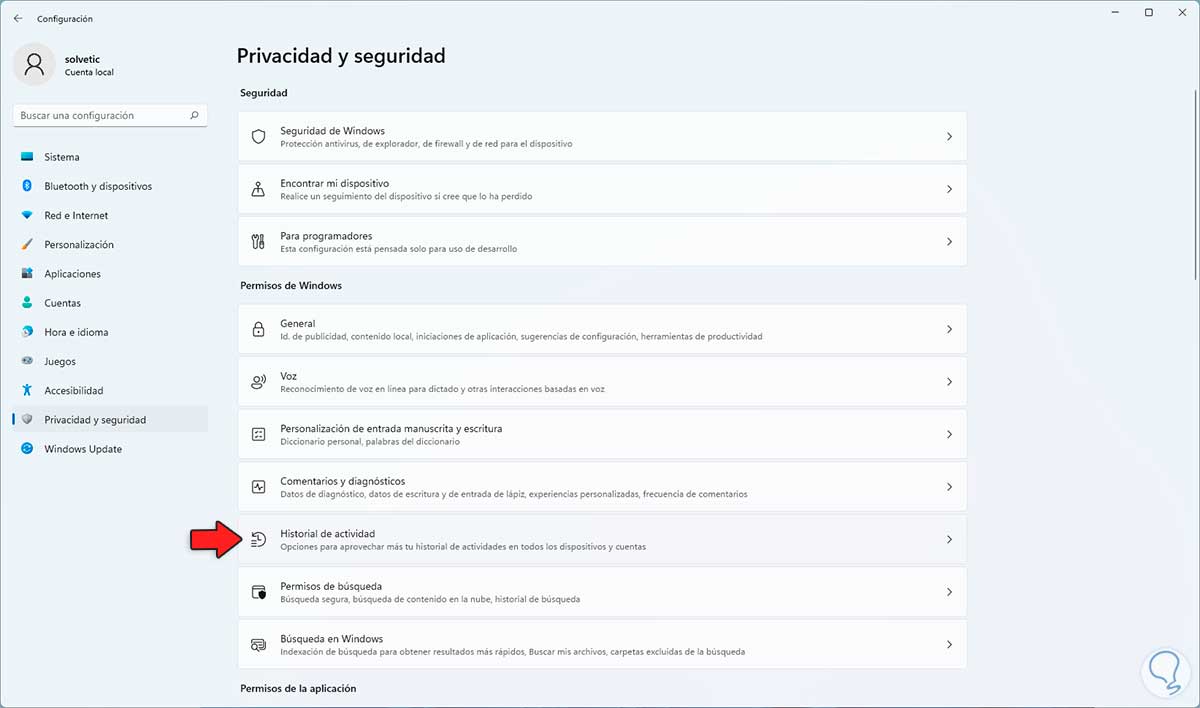
Step 1
To delete it, go to "Start - Settings - Privacy and security - Activity history":
Step 2
By clicking there we will see the following:
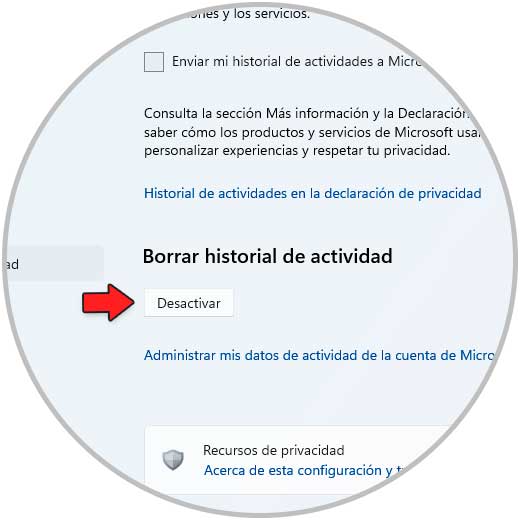
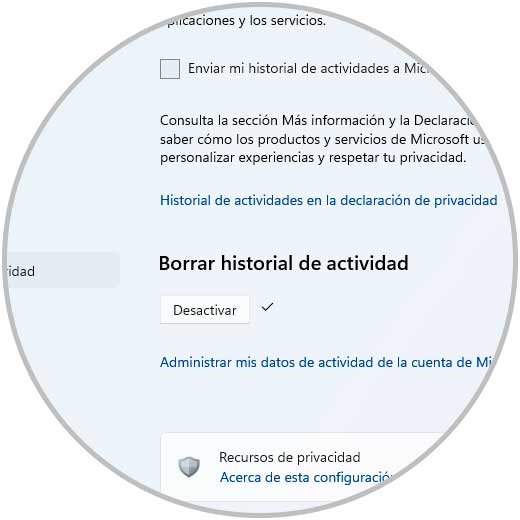
Step 3
We click on "Deactivate" in "Clear activity history" and the following window will open:
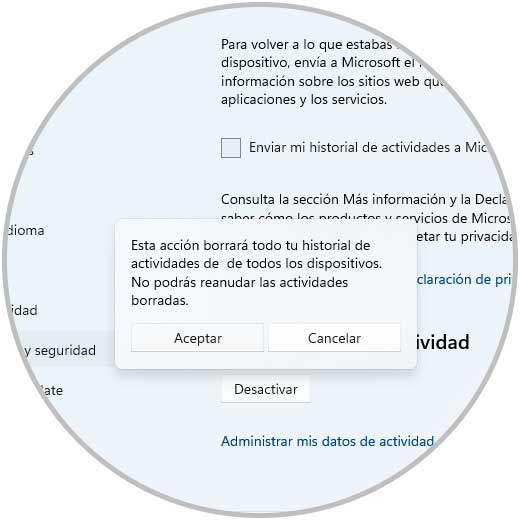
Step 4
Confirm the process:
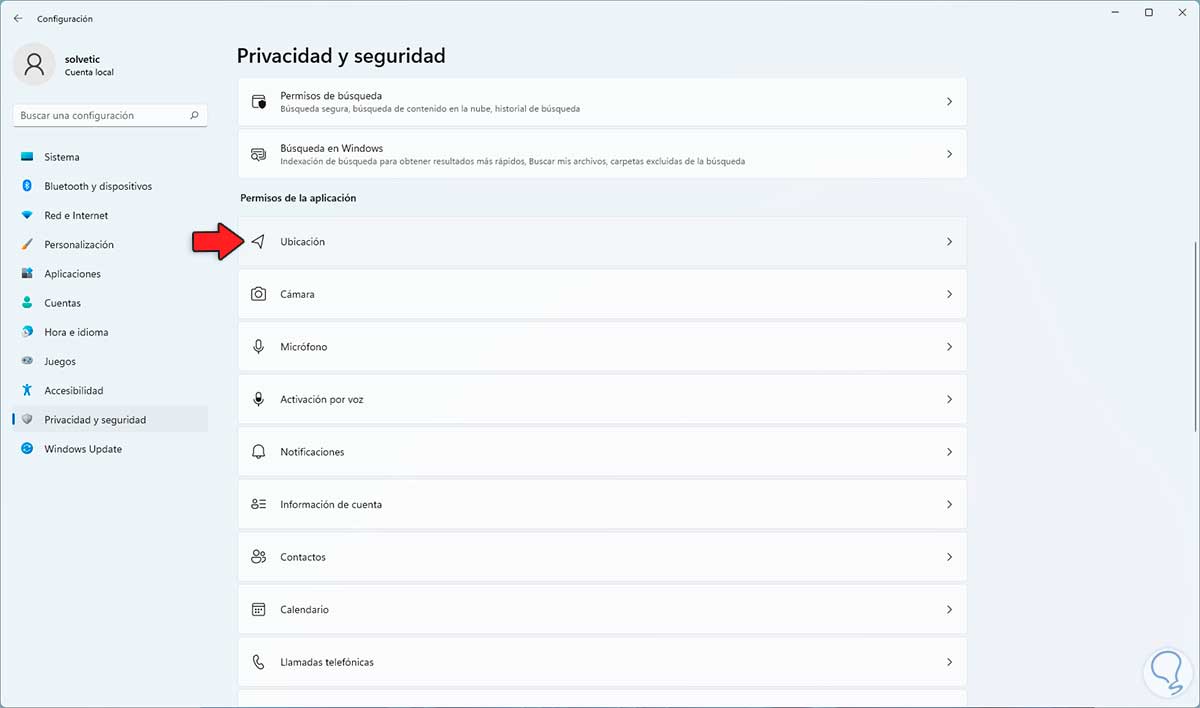
3 Free Cache Memory Windows 11 From Privacy and security (Location)
It is another of the critical points in Windows 11 but when activating the location for the system or for the applications, the cache will be saved locally to facilitate access to the location.
Step 1
To clear this type of cache we go to "Start - Settings - Privacy and security - Location":
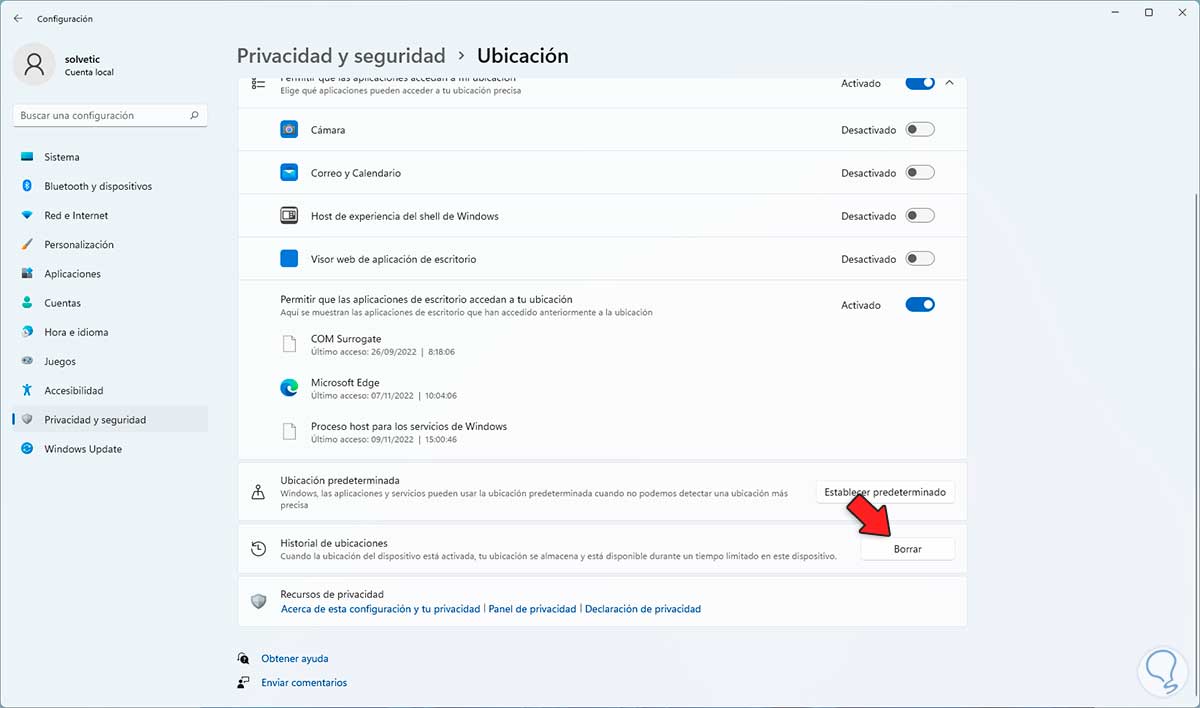
Step 2
When accessing "Location history" we click on "Delete":
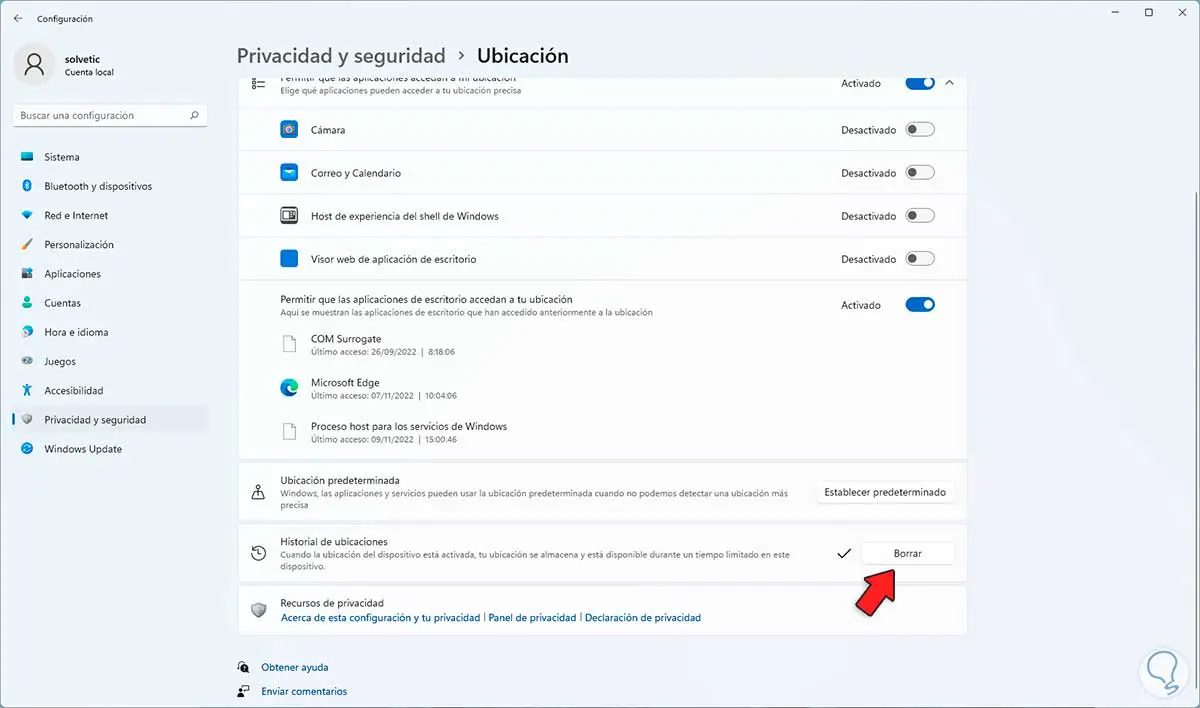
Step 3
We hope that this process is finished:
4 Free Cache Windows 11 From Drive C
Locally, when downloading updates, many of these files are stored in a special path, but this can not only store cache but also occupy unnecessary space on the hard disk.
Step 1
We can manage this folder, for this we open the File Explorer and go to the path:
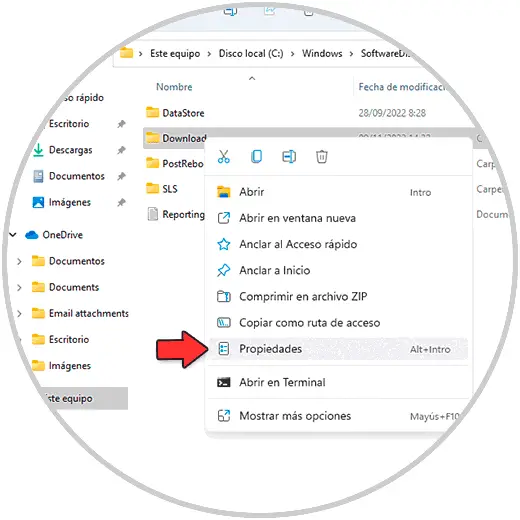
C:\Windows\SoftwareDistribution
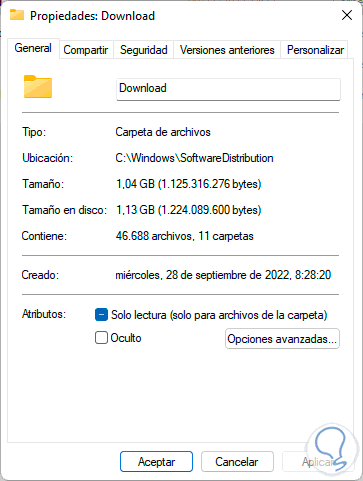
We right click on the "Download" folder, select "Properties" to see its size:
Step 2
We will see the current size:
Step 3
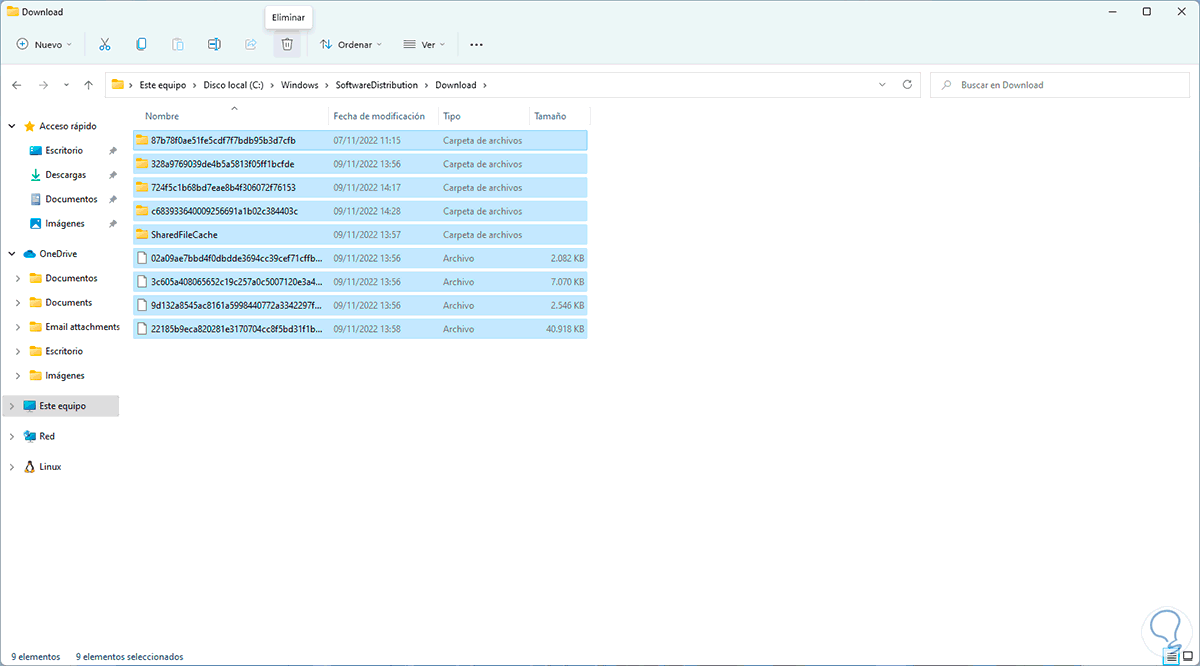
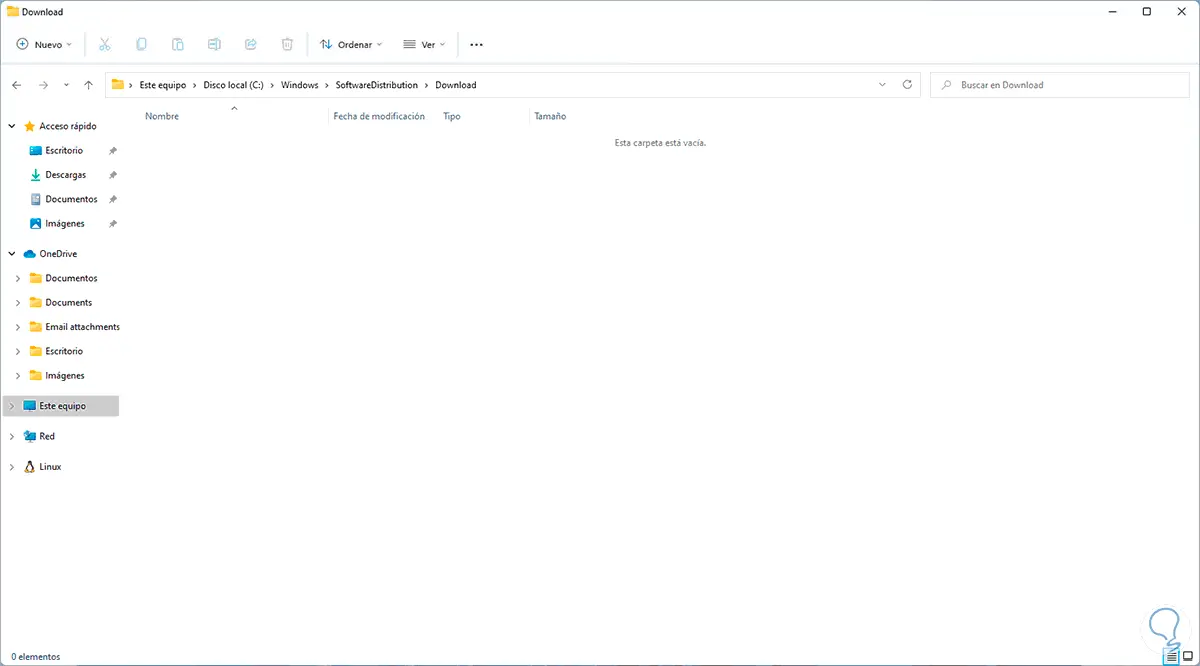
Now we delete the content of Download by selecting all the files and clicking on the Delete icon:
Step 4
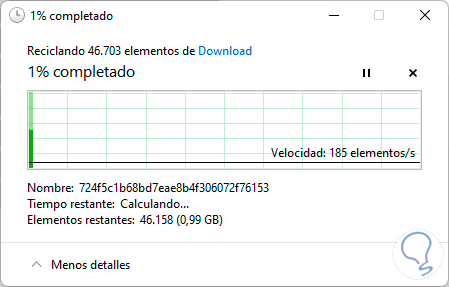
We expect this process to be completed:
step 5
In the end it is possible that some system files cannot be deleted:
5 Free Cache Memory Windows 11 Deleting temporary
Without a doubt, temporary files are one of the roots of more caching in Windows 11, it is something that is storing data there on a daily basis, so deleting them will help optimize this section.
Step 1
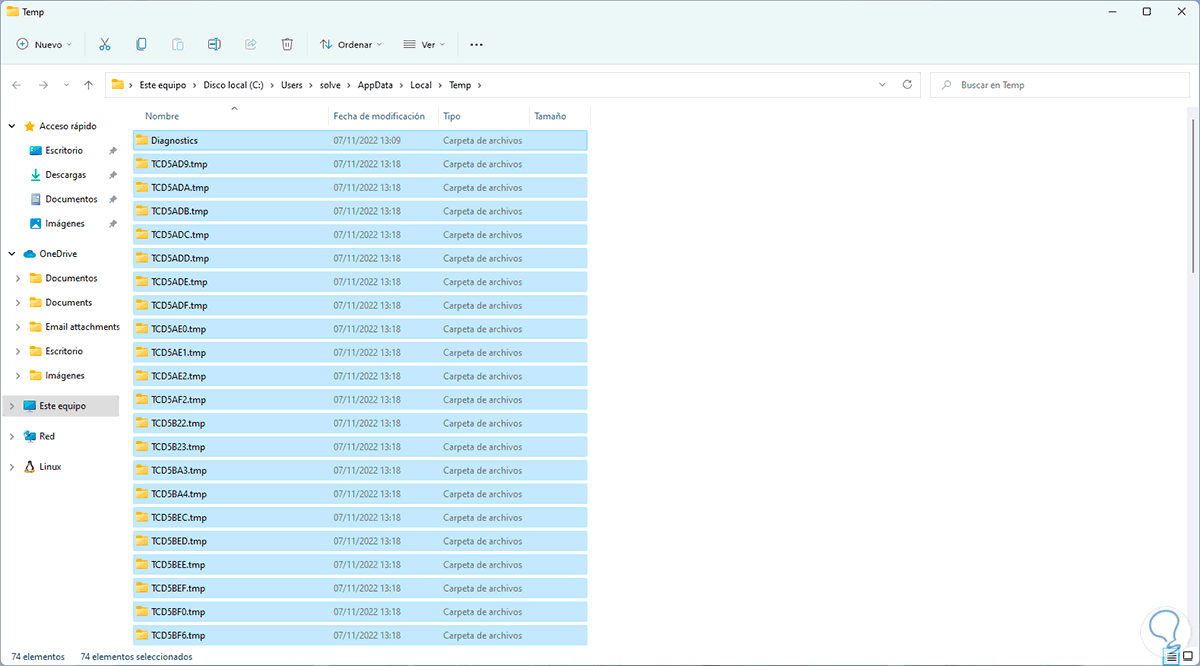
In the Start search engine we enter "%temp%" and open the folder:

Step 2
We delete the contents of the folder by selecting all the content and clicking on “Delete”:
Step 3
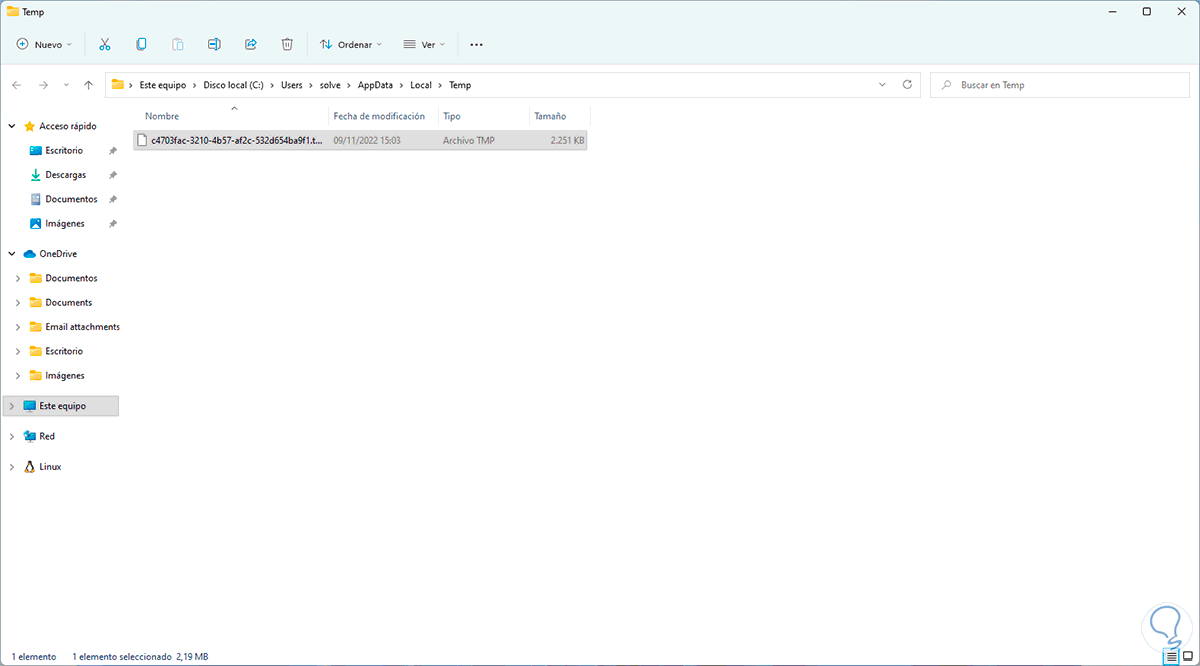
Some files may not be deleted:
6 Free Cache Memory Windows 11 From Cleanup
This is a tool built into Windows 11 with which it will be possible to delete some files from drive C.
Step 1
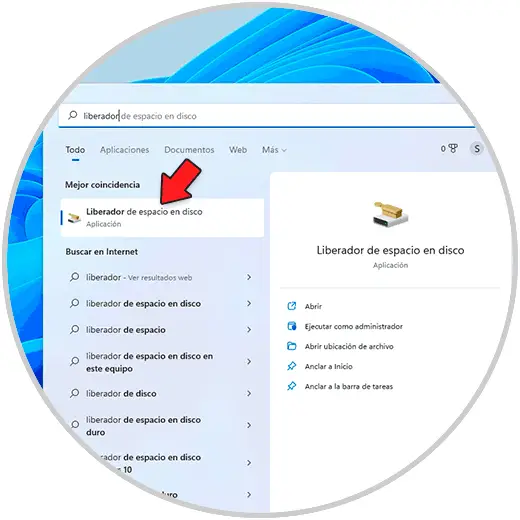
For its use in the Start search engine we enter "liberador" and select "Disk space liberator".
Step 2
In the pop-up window we select drive C:

Step 3
We expect the analysis to be carried out to see the following:
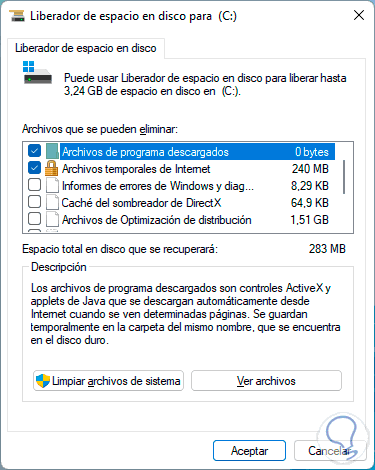
Step 4
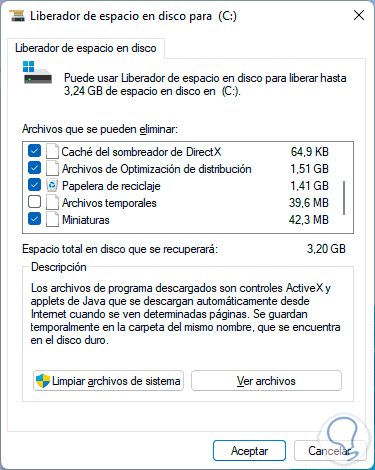
We activate the boxes of the content to be deleted:
step 5
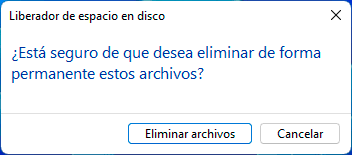
We click on "Accept" and we must confirm the process:
Step 6
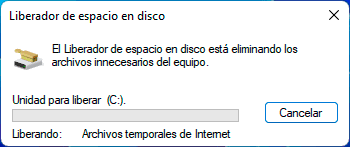
We click on "Delete files" and wait for the process to come to an end:
7 Free Cache Windows 11 Resetting Microsoft Store
Being the place from where applications are downloaded, installed or updated, it is logical that cache is stored locally on the disk, but deleting it is extremely simple.
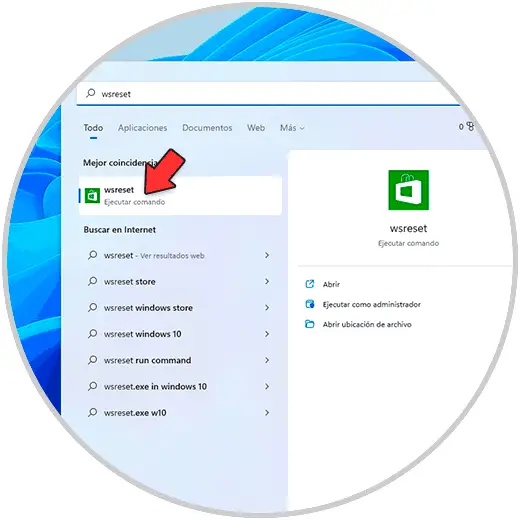
Step 1
In the search engine we enter "wsreset" and we must execute the command:
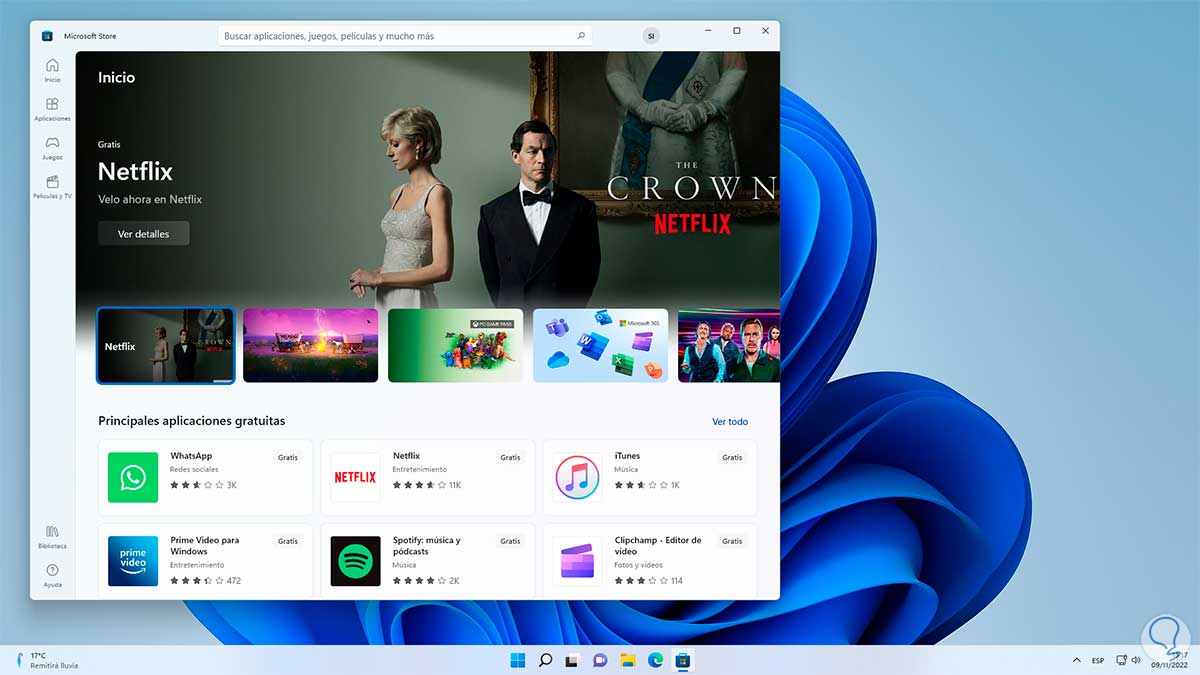
Step 2
The CMD console will open carrying out the process and then we wait for the Store to open:
7 Free Cache Memory Windows 11 From CMD
This is one of the traditional methods to clear the cache in Windows 11, and other versions.
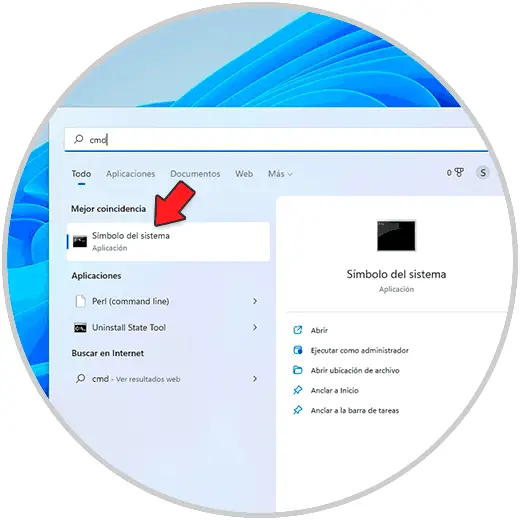
Step 1
Open CMD as administrator:
Step 2
We execute "ipconfig /flushdns":

8 Free Cache Windows 11 using Storage Sense
This is a tool built into Windows 11 that seeks to intelligently manage hard drive space by deleting various files and managing Libraries.
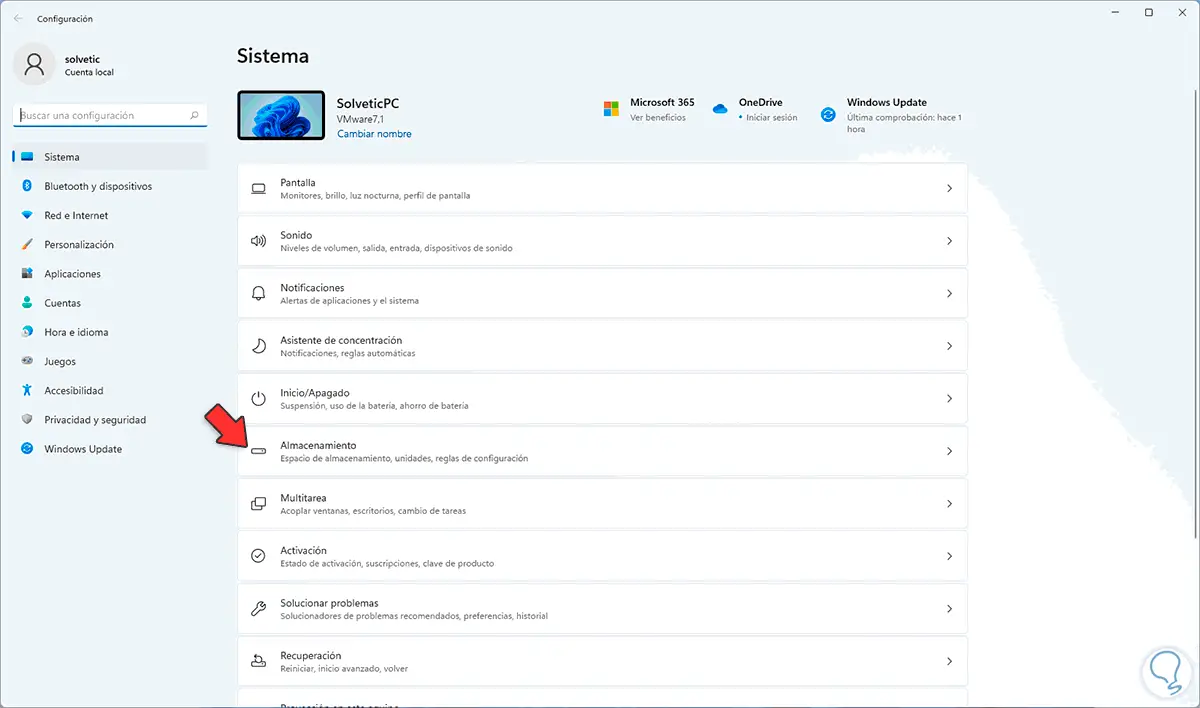
Step 1
For its use we go to "Start - Settings - System - Storage":
Step 2
We click on "Storage sensor":
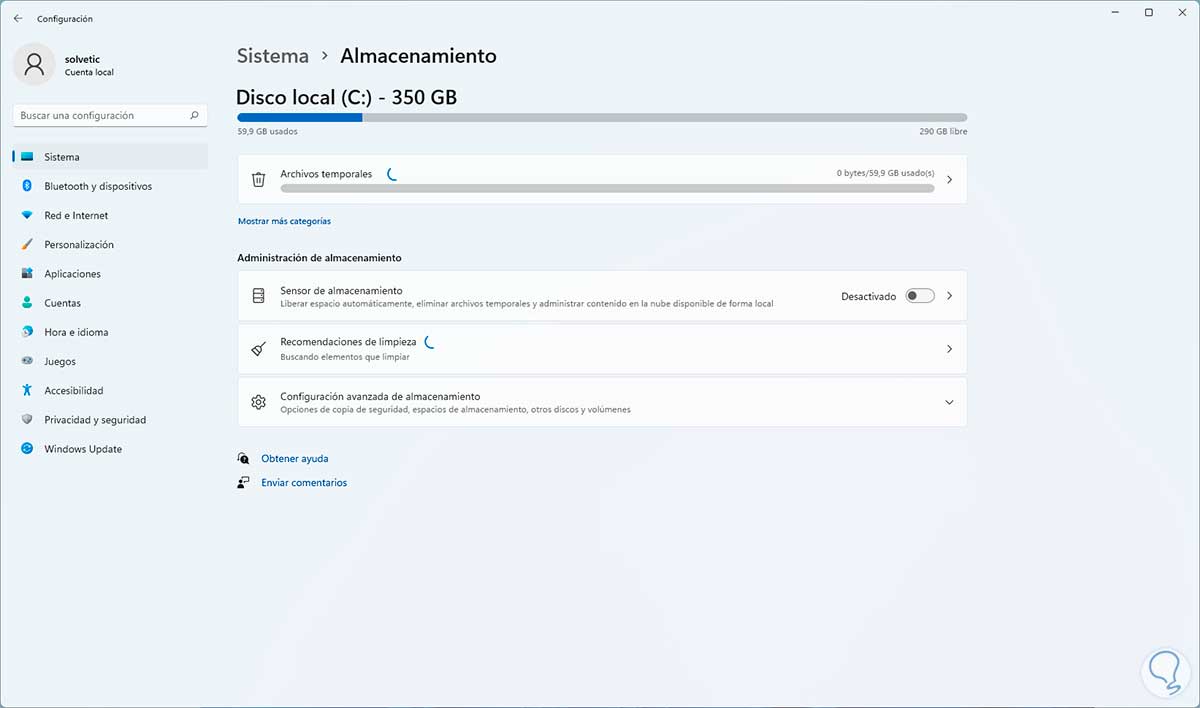
Step 3
You will see the following:
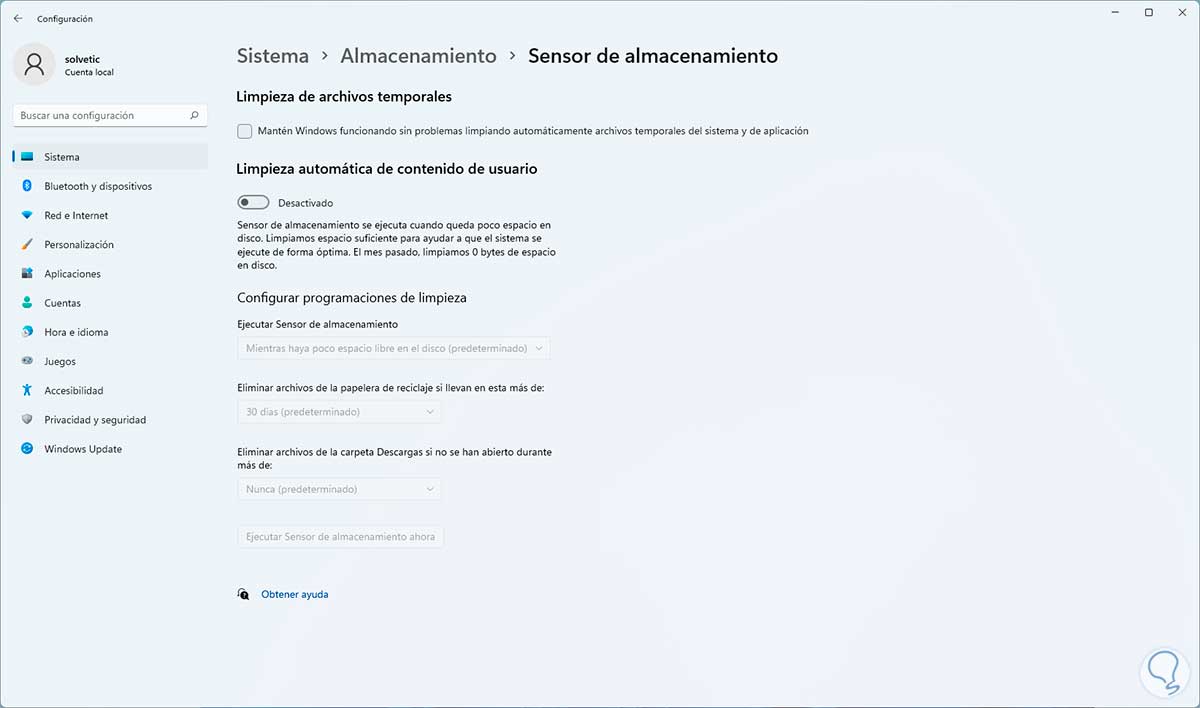
Step 4
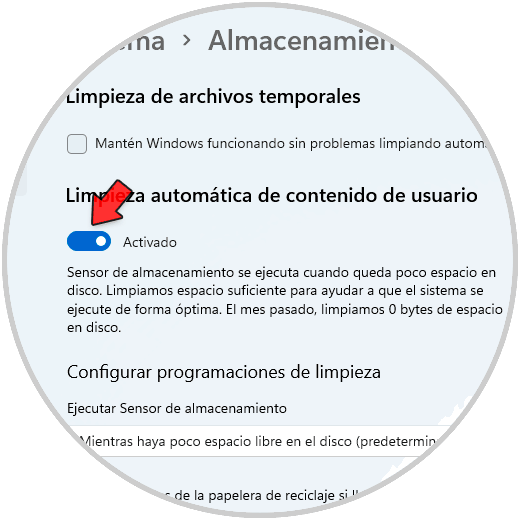
We activate the switch "Automatic cleaning of user content" and then configure the parameters as we consider in deletion times:
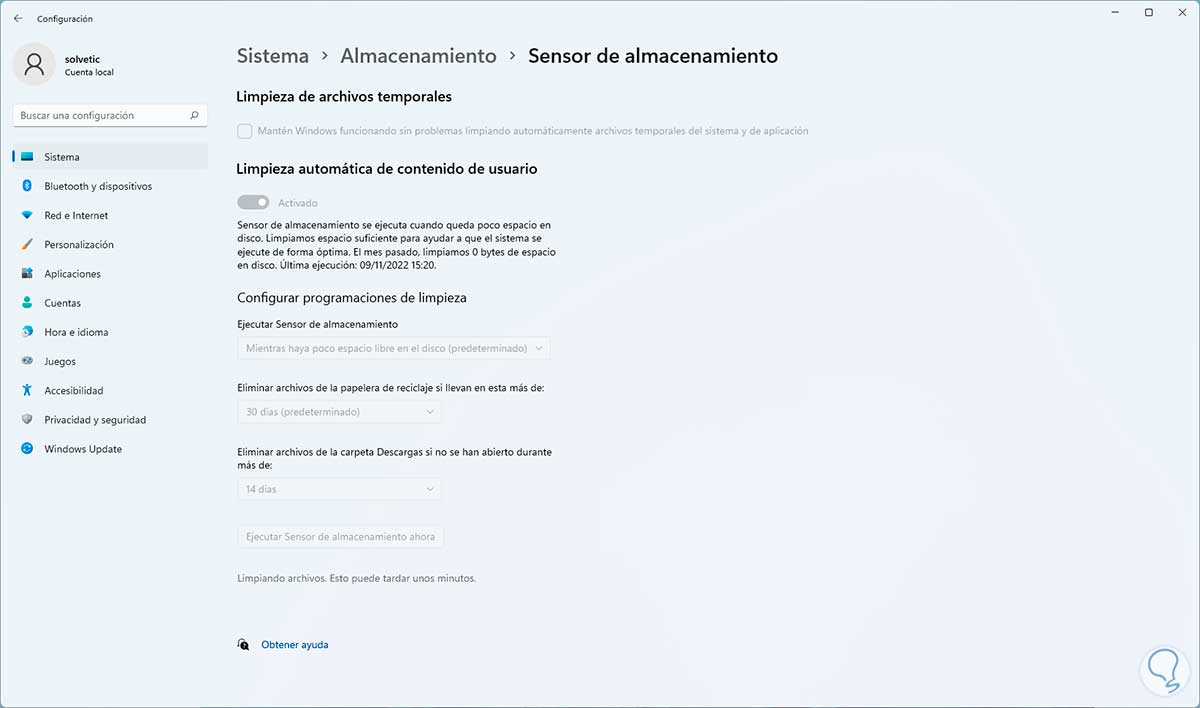
step 5
We click on "Run Storage Sensor now" and wait for it to finish:
Each of these options will be an ally when it comes to clearing the cache memory in Windows 11 through the various sections.