We usually store a lot of information on the computer, since most of us receive a lot of data and files every day, which we keep on the PC in different formats. There is no doubt that this information is surely important in most cases for us..
On our Windows 11 computers we handle various types of data which can be in files or folders and many of them are personal or contain confidential information, so it is key to be able to protect these files from unauthorized access.
Some of these files can be simultaneously compressed in ZIP format to optimize their space. ZIP is a compression format widely used for its various configuration options. In this tutorial TechnoWikis will explain how to protect a ZIP file with a password to increase its security..
To stay up to date, remember to subscribe to our YouTube channel!
SUBSCRIBE ON YOUTUBE
1. How to Password Protect a ZIP Archive using 7-ZIP
7-ZIP is one of the popular compression and decompression applications since it is totally free as it is open source, its download is available at the following link:
7-zip
Characteristic
Some of its features are:
- It has AES-256 encryption in 7z and ZIP formats
- Features a high compression ratio for 7z using LZMA and LZMA2 compression
- For compression it is compatible with 7z, XZ, BZIP2, GZIP, TAR, ZIP and WIM
- For decompression tasks we can use extensions like APFS, AR, ARJ, CAB, EXT, FAT, GPT, HFS, ISO, DI, VHD, VHDX, VMDK and more.
- Can integrate with Windows Shell
- Available in more than 80 languages
Step 1
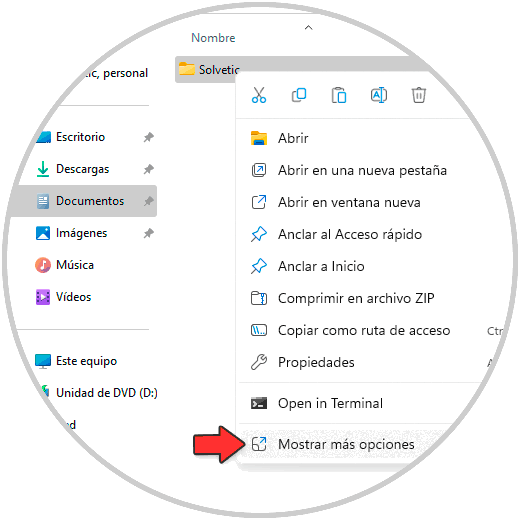
To protect the file with a ZIP password with 7-ZIP, we right-click on the file or folder to protect and go to "Show more options":
Step 2
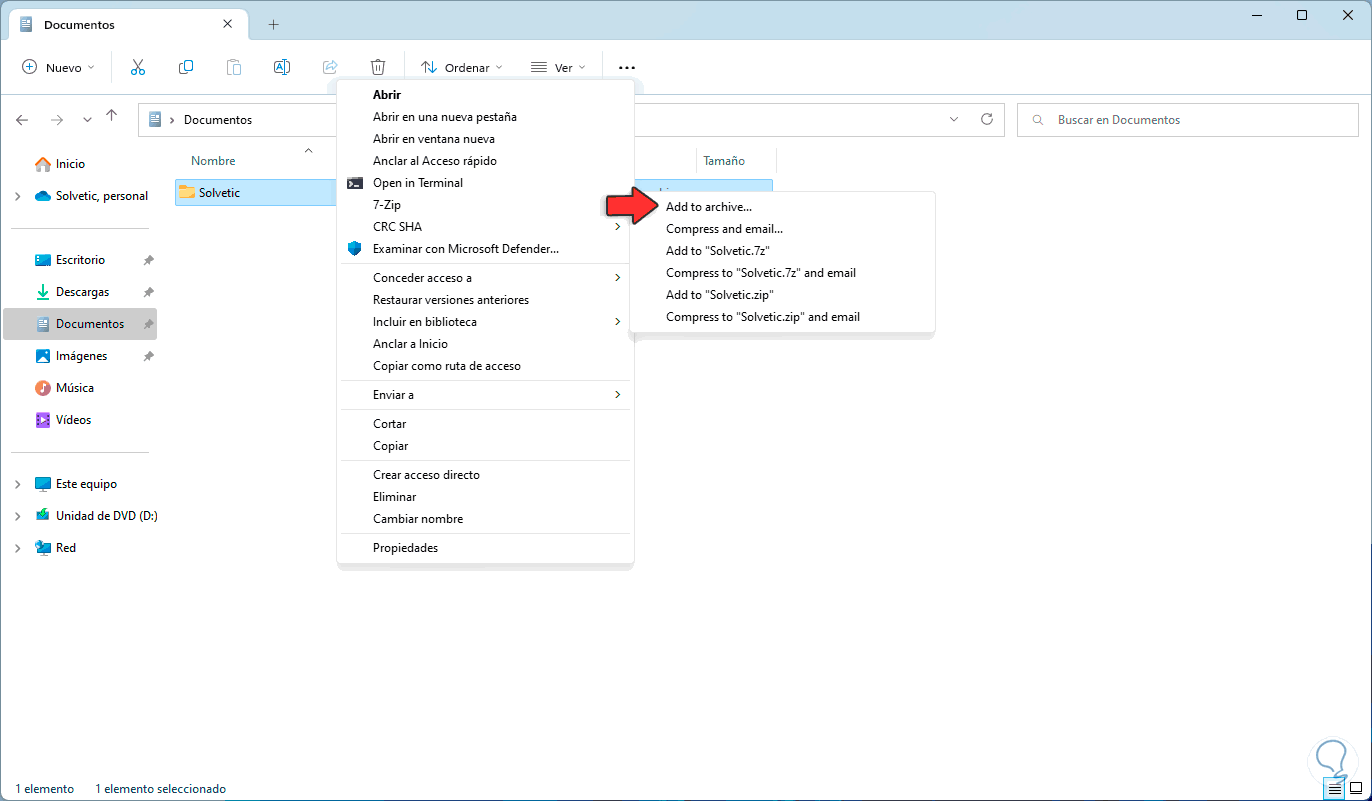
Then we go to “7-Zip - Add to archive”:
Step 3
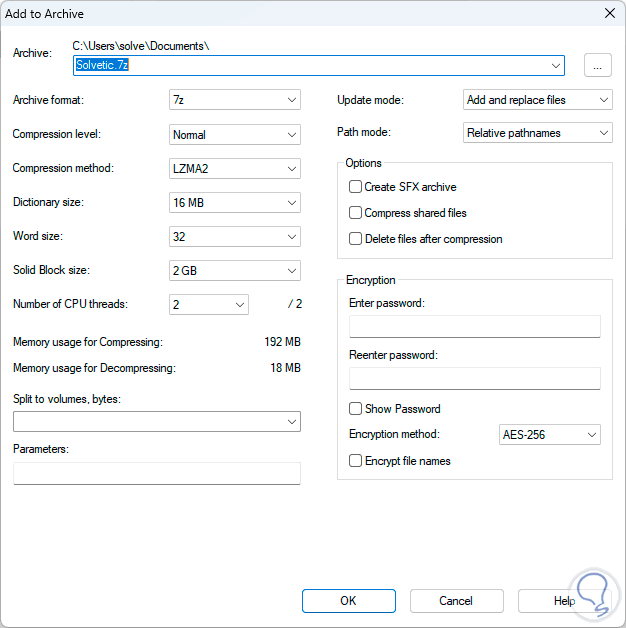
The following window will open:
Step 4
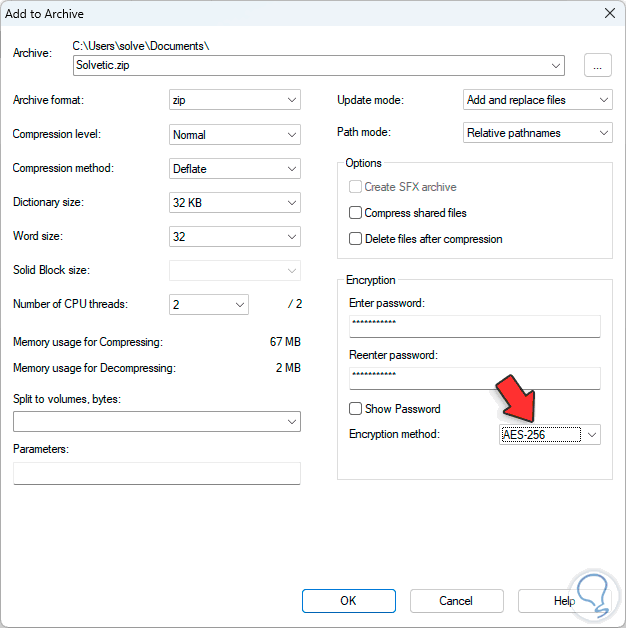
In "Archive format" we establish ZIP, in "Encryption" we assign the password to use and in "Encryption method" we assign the AES-256 encryption:
step 5
Apply the changes to have the file compressed in ZIP and protected:
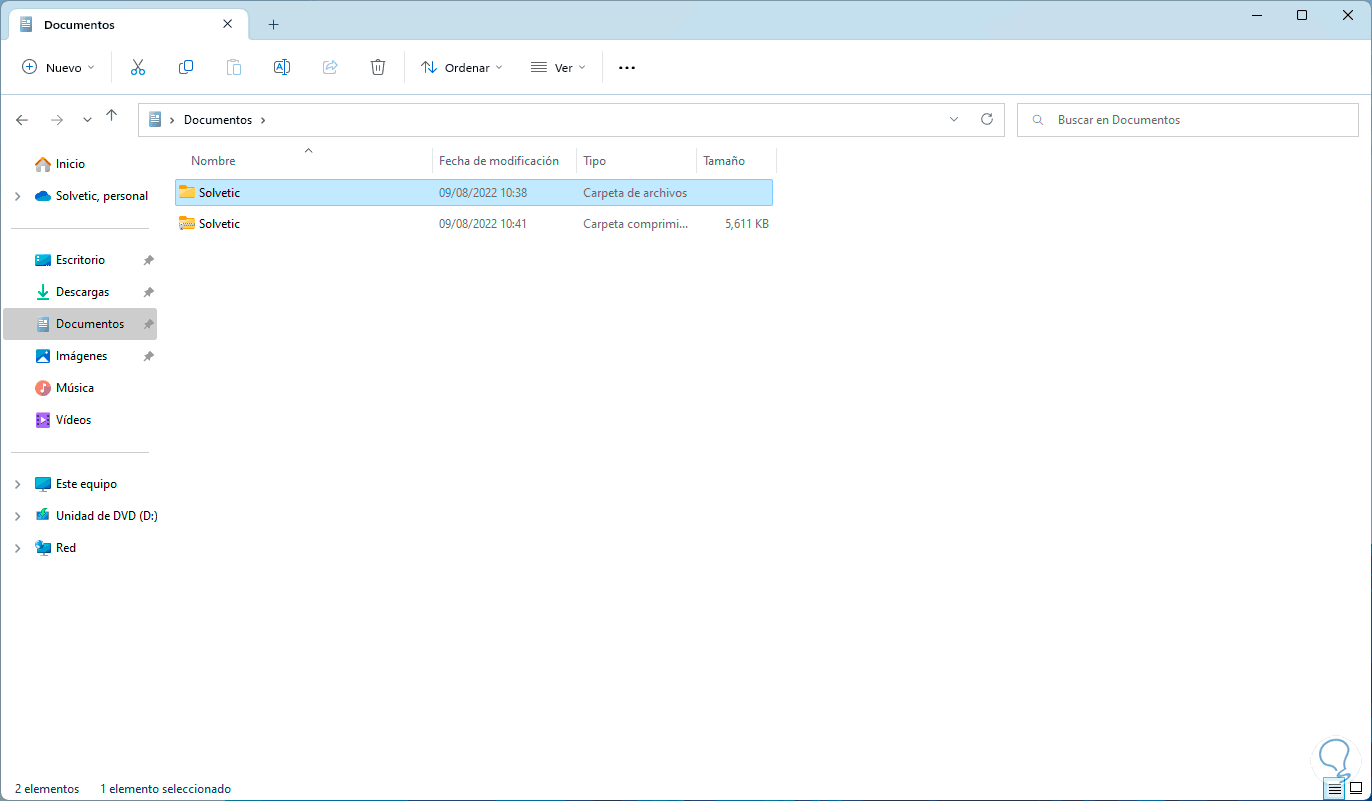
step 6
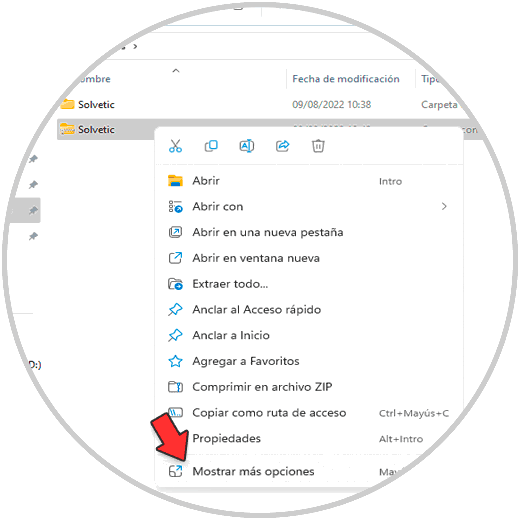
To see the use of the password, we right-click on the tablet and go to "More options":
step 7
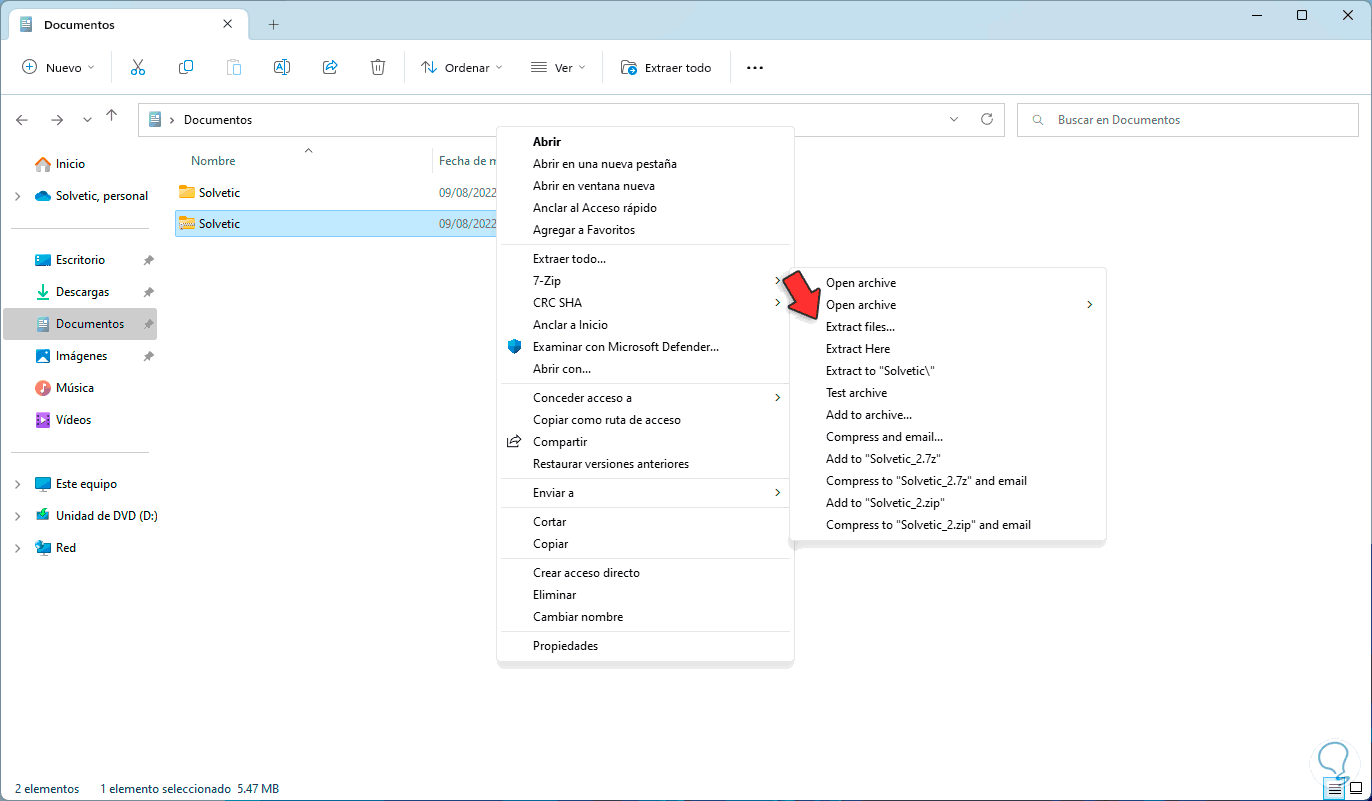
Then we go to “7-Zip – Extract files”:
step 8
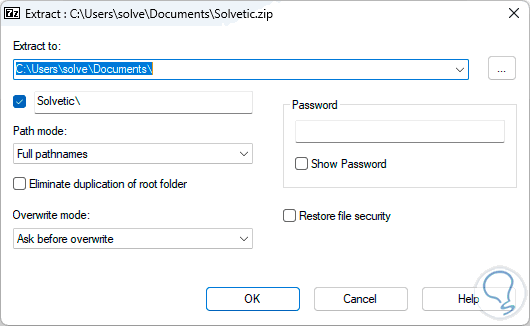
The following window will open:
step 9
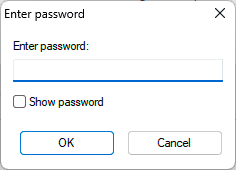
When trying to extract the contents of the ZIP, you must enter the password:
step 10
We enter the assigned password:
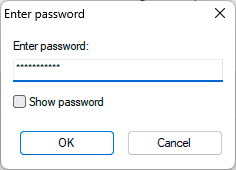
We click OK to access the information.
2. How to Password Protect ZIP Archive using WinRAR
Without a doubt, it is one of the most common applications for compression tasks and its free download is available at the following link:
WinRAR
Characteristic
Among its characteristics we find:
- It has an interactive graphical interface
- Makes use of 256-bit AES encryption
- Supports CAB, ARJ, LZH, TAR, GZ, UUE, BZ2, JAR, ISO, 7Z, XZ, Z extensions
- Can support files up to 8.589 billion gigabytes in size
- It is possible to create self-extracting archives
Step 1
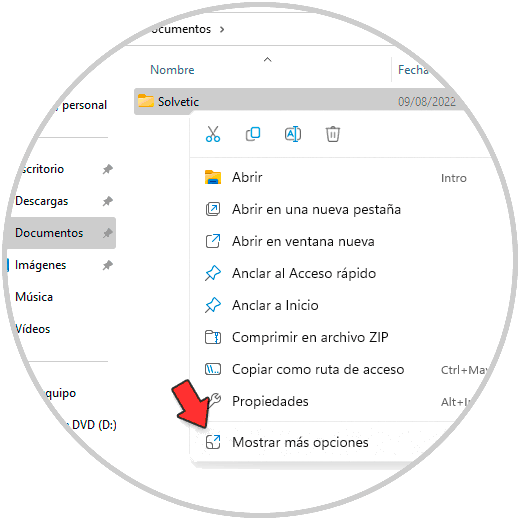
To protect a ZIP with WinRAR, right click on the file or folder to protect and then go to "Show more options":
Step 2
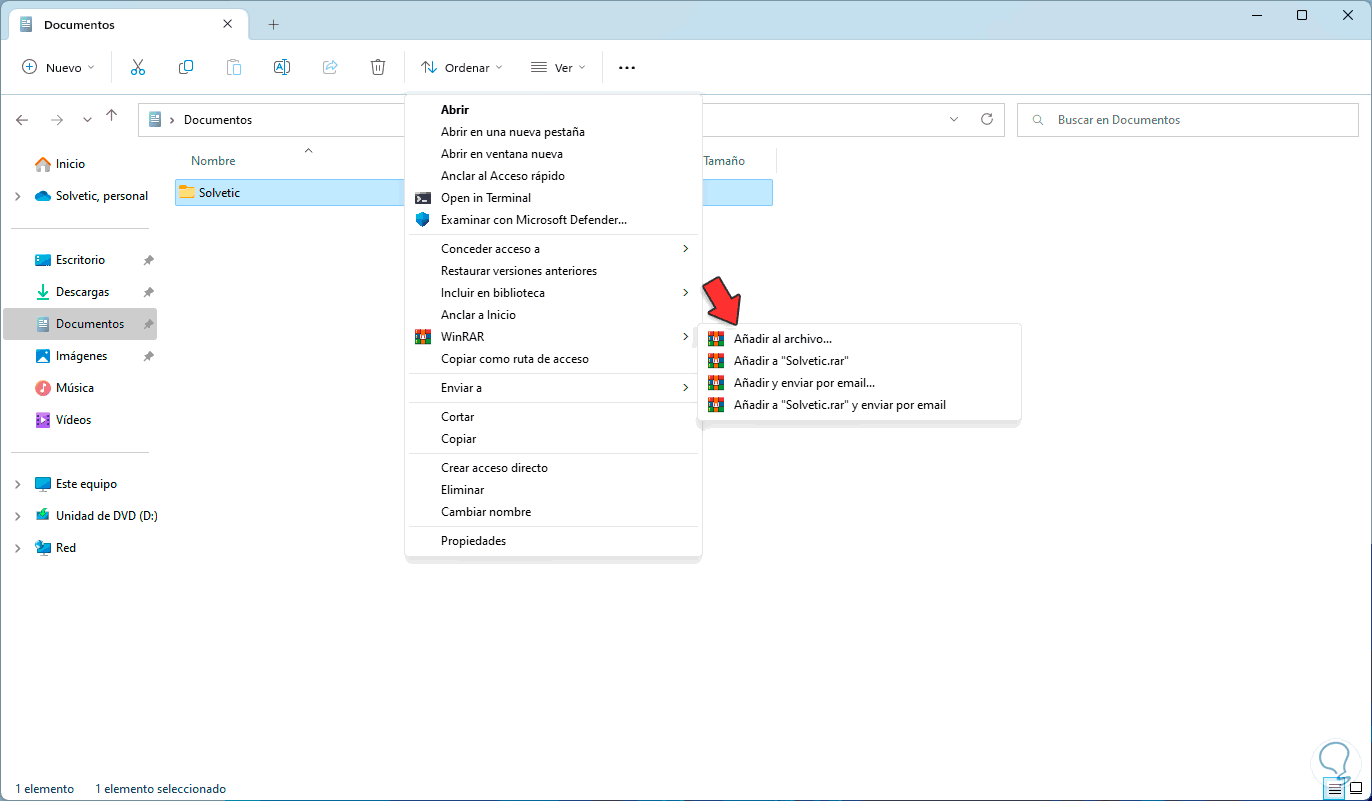
After this we go to "WinRAR - Add to the archive":
Step 3
The following window will open:
Step 4
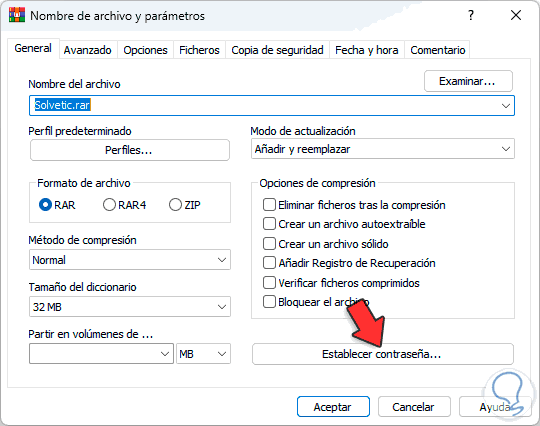
We click on "Set password" and then assign the password to use:
step 5
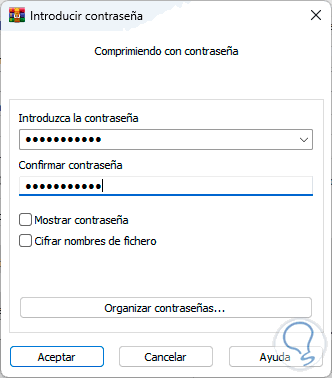
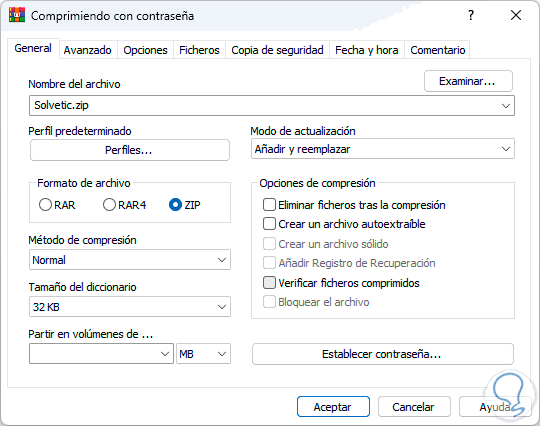
We click OK and now we activate the ZIP box. Apply the changes.
step 6
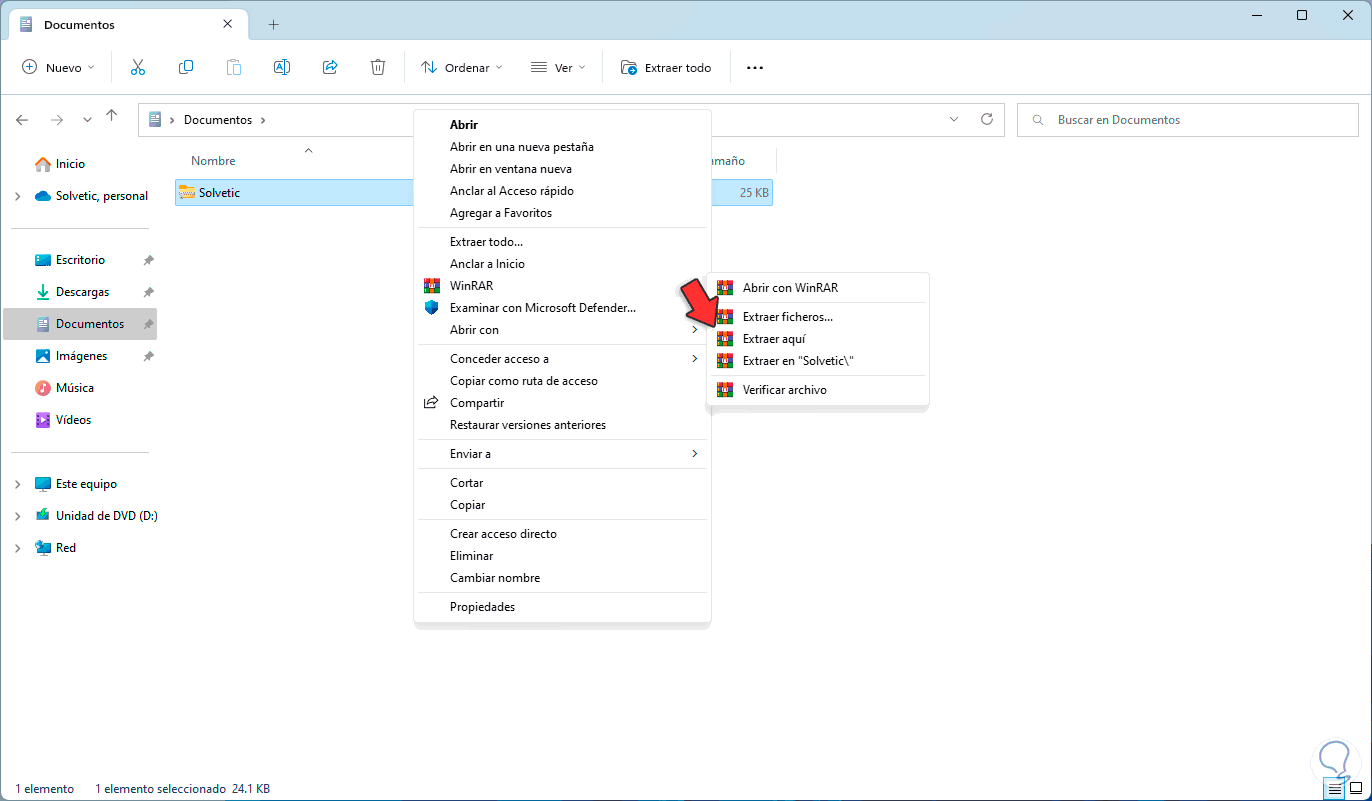
We will see the ZIP file created, to verify that it is protected, we right click on it and go to "More options - WinRAR - Extract here":
step 7
When trying to extract the content of the ZIP that has been created, the assigned password must be entered:
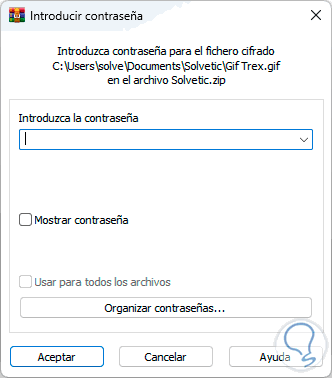
step 8
We enter the password:
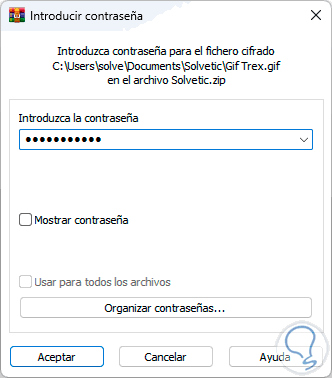
step 9
We click on Accept to access the content:
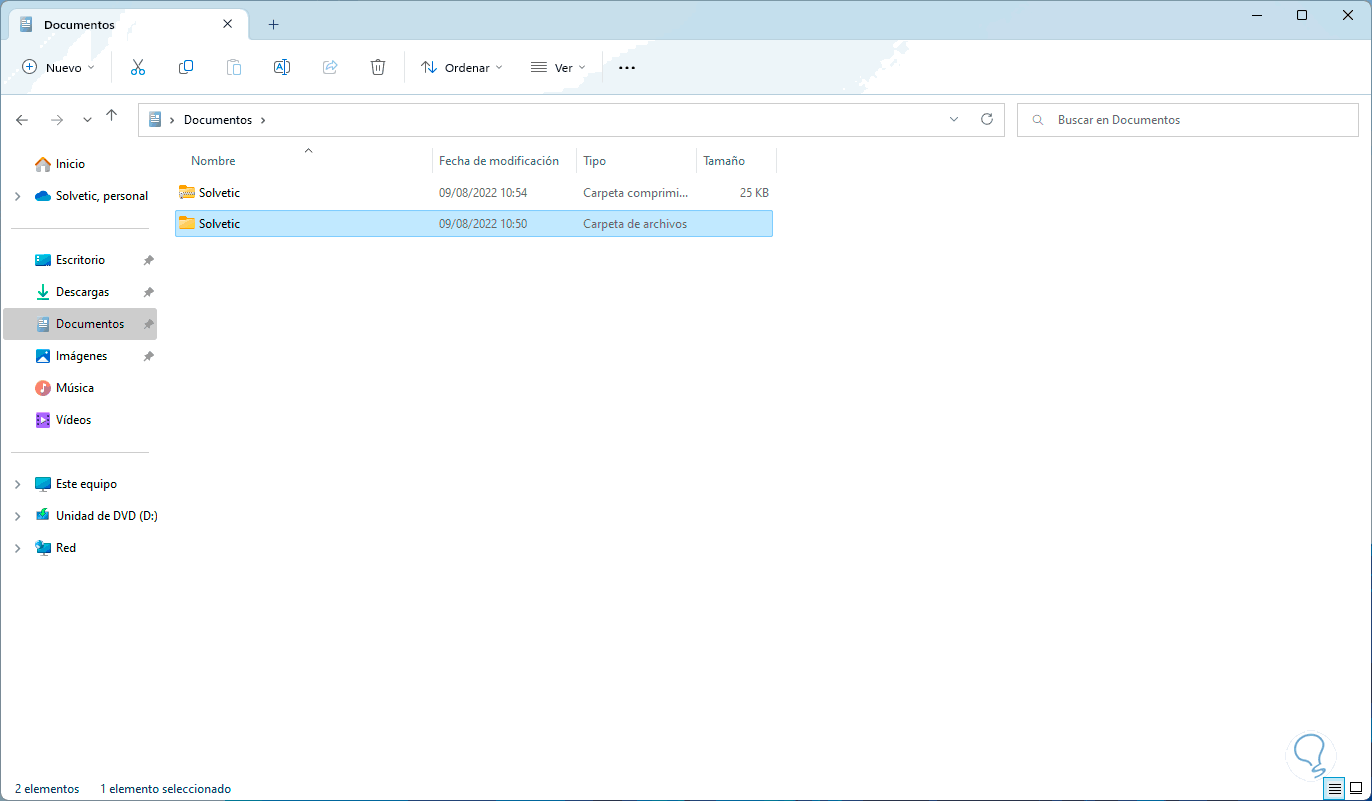
With these simple methods it is possible to protect a ZIP file with a password..