Windows 11 is an operating system that provides the user and administrator with direct management of the errors that appear in it and one of its advantages is that the error has a name and code for a direct solution, one of these is the "Unexpected Store" error. Exception" which refers to the fact that the kernel memory storage component encountered an unexpected exception, this error has a value of 0x00000154, the parameters used are:
- 1 – Indicates the context of the store or data manager
- 2: is the exception information
It is an error that, like all blue, green or black screens, affects user productivity and can be detrimental for extra tasks, TechnoWikis has a series of solutions to eradicate this error from our system or at least to gain access to the operating system..
To stay up to date, remember to subscribe to our YouTube channel!
SUBSCRIBE ON YOUTUBE
1 Blue Screen Unexpected Store Exception | Solution with WinDbg
This will be the most delicate method to correct this error but it is ideal to know with certainty the cause of the error, WinDbg is a debugger in kernel mode and in user mode which is integrated into the Debugging Tools for Windows, these debugging tools are in the directories:
C:\Program Files (x86)\Windows Kits\10\Debuggers\x64 C:\Program Files (x86)\Windows Kits\10\Debuggers\x86
WinDbg has fast windows, full scripting experience, and offers an extensible debugging data model for full debugging, for use we will go to the following link:
Windows SDK
SDK integrates the headers, libraries, metadata, and tools that allow us to build Windows applications. And with it you can develop Universal Windows Platform (UWP) and Win32 apps for Windows 11, version 22H2 as well as for older versions of Windows:
Step 1
We download the SDK based on the version of Windows used:
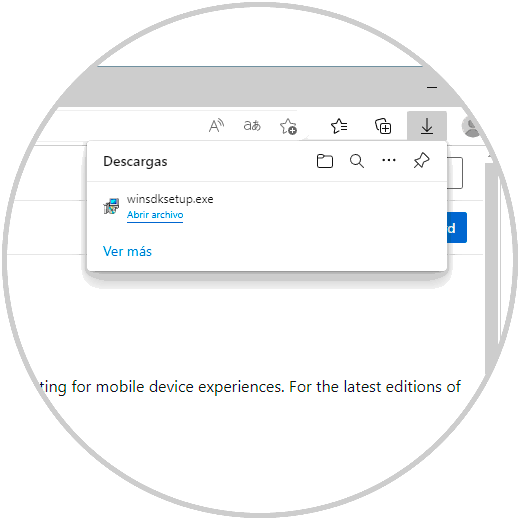
Step 2
Once downloaded, we execute the installer and we must confirm the process:
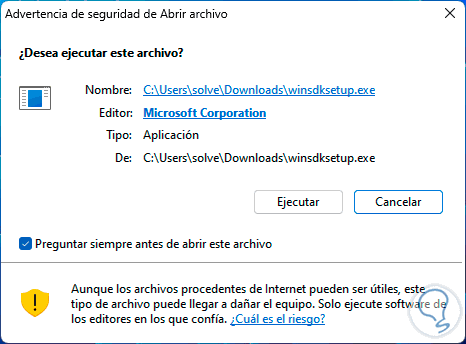
Step 3
We hope it loads the installer:
Step 4
Now we will see the following:
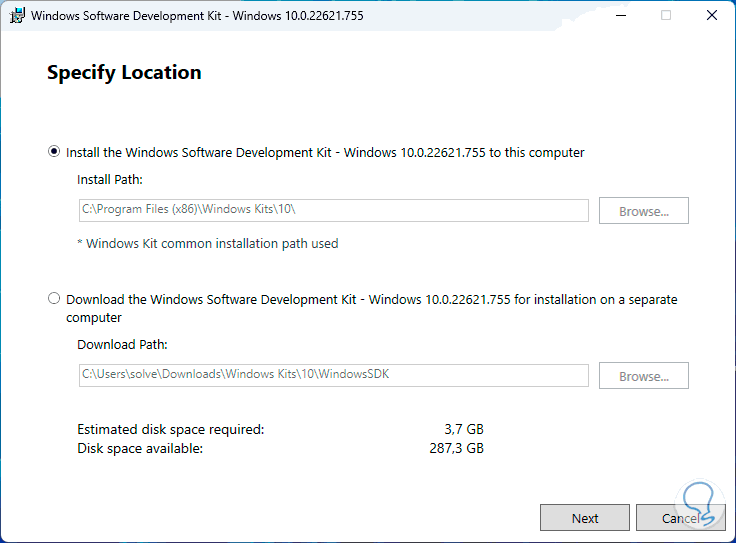
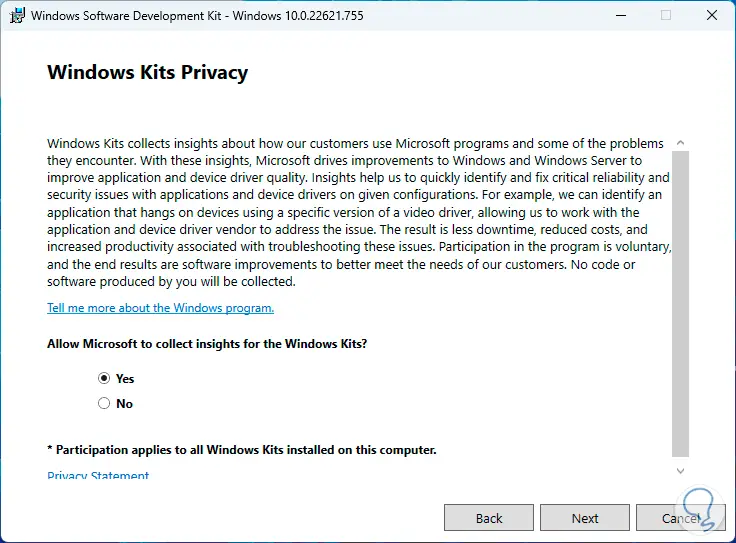
step 5
We select the installation path and then define the privacy of use:
step 6
Now we are going to accept the license of use:
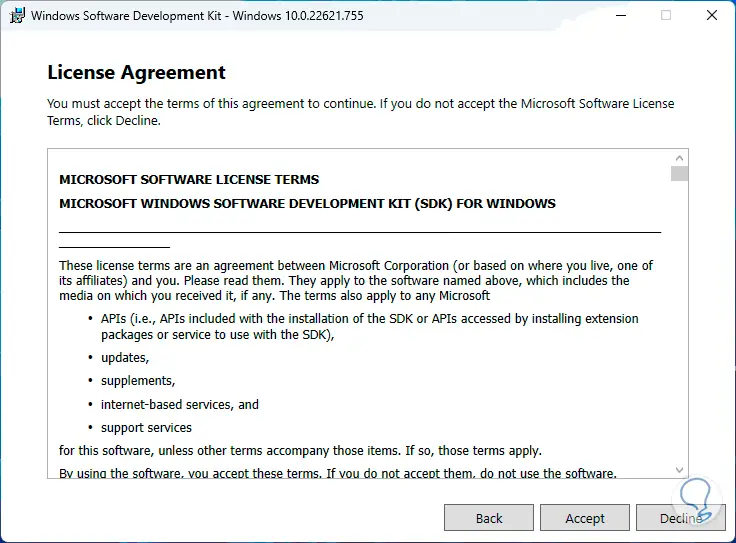
step 7
We click on "Accept" and now we will see all the available features:
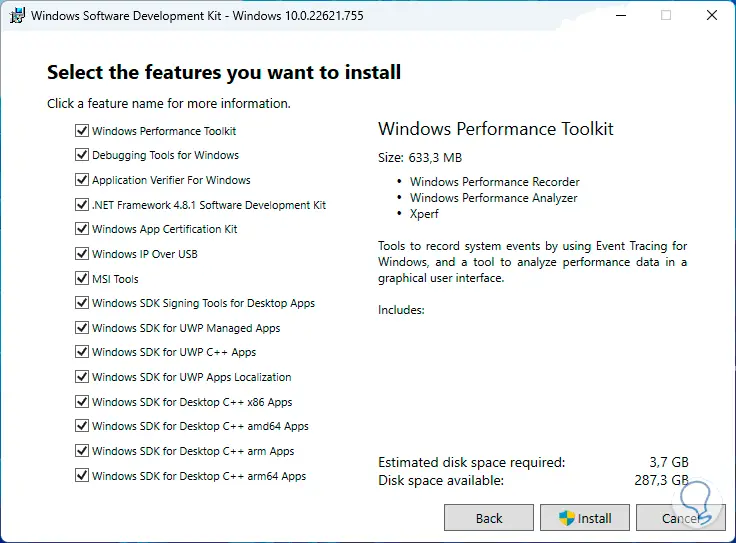
step 8
In the features we only leave the "Debugging Tools for Windows" box active:
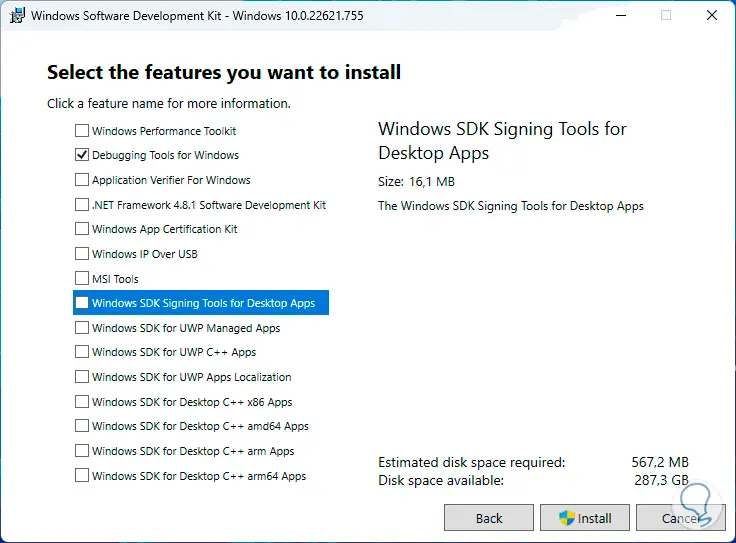
step 9
We click on "Install" to start the process:
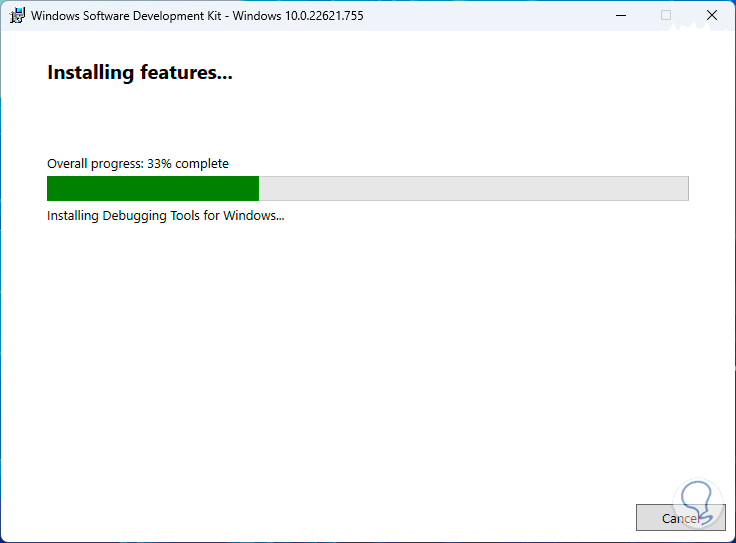
step 10
We wait for the process to finish:
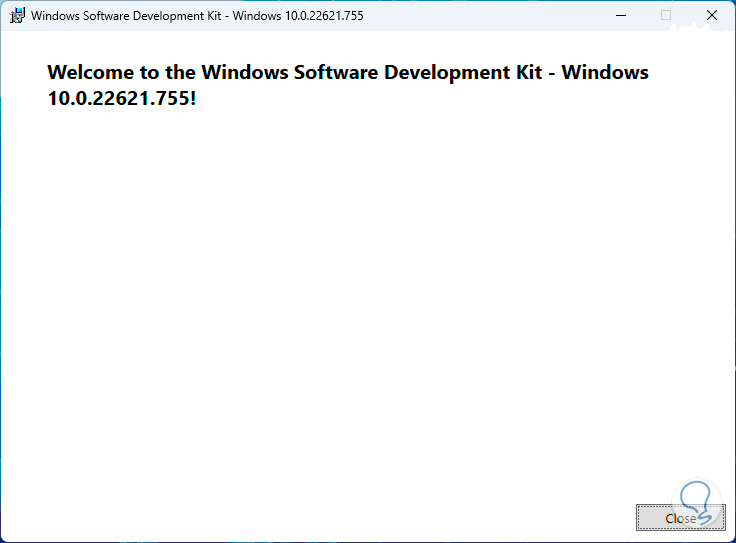
step 11
We open the File Explorer and go to the path:
C:\Program Files (x86)\Windows Kits\10\Debuggers\x64"

step 12
There we will locate the "windbg" executable:
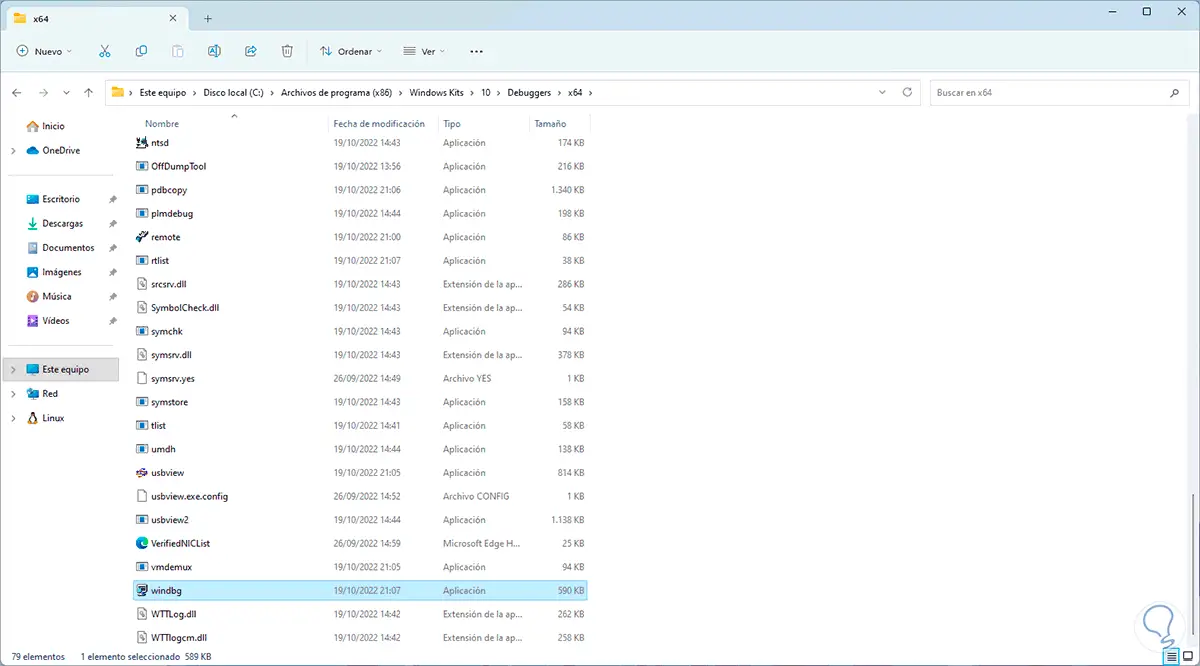
We double click on it to open it, and TechnoWikis advises you to run it as administrator so that the orders do not fail.
step 13
In the displayed console we go to the "File - Open Executable" menu:
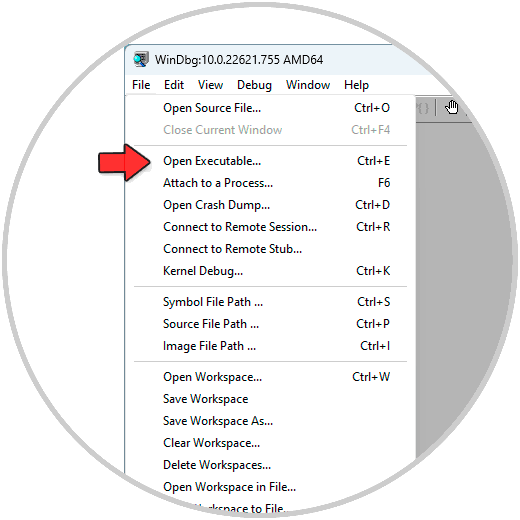
step 14
In the pop-up window we select Notepad:
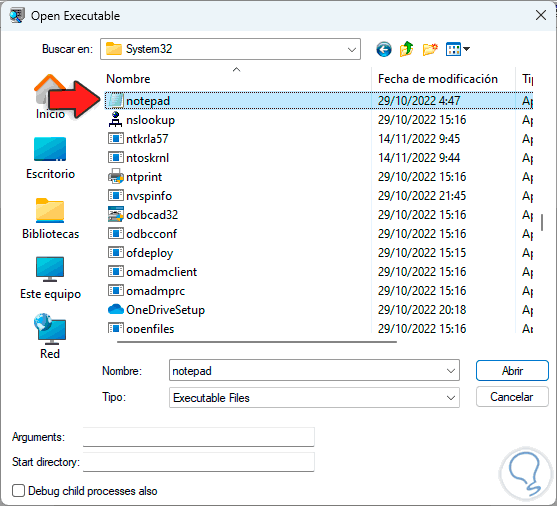
step 15
When opening it, in the lower field we enter:
.sympath srv*
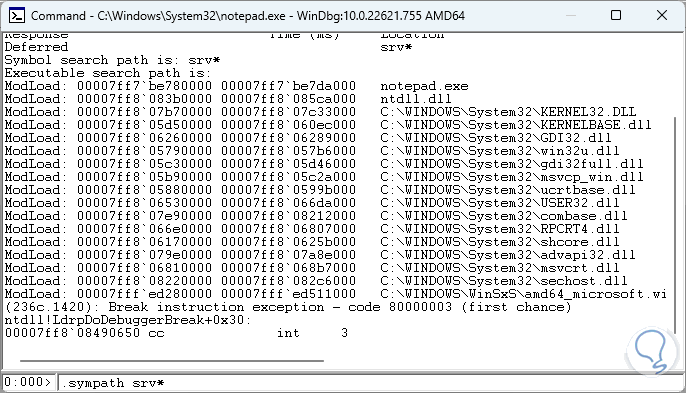
step 16
Hit Enter and this symbol search path tells WinDbg where to look for symbol files (PDBs):
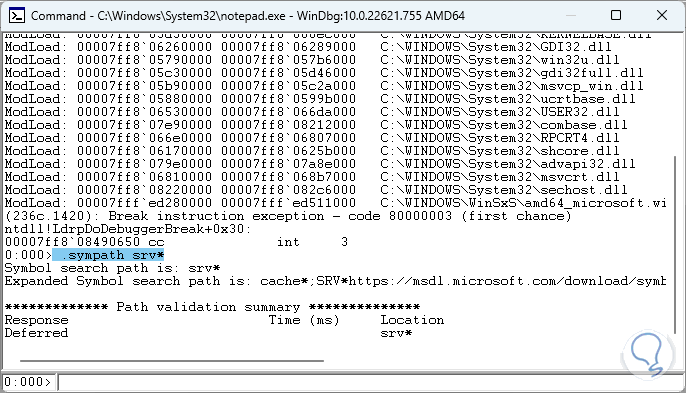
The .sympath command takes care of defining or modifying the symbol path which specifies the locations where the debugger will look for symbol files..
For WinDbg to carry out the initial search and load of the symbol files we can execute:
.reload
step 17
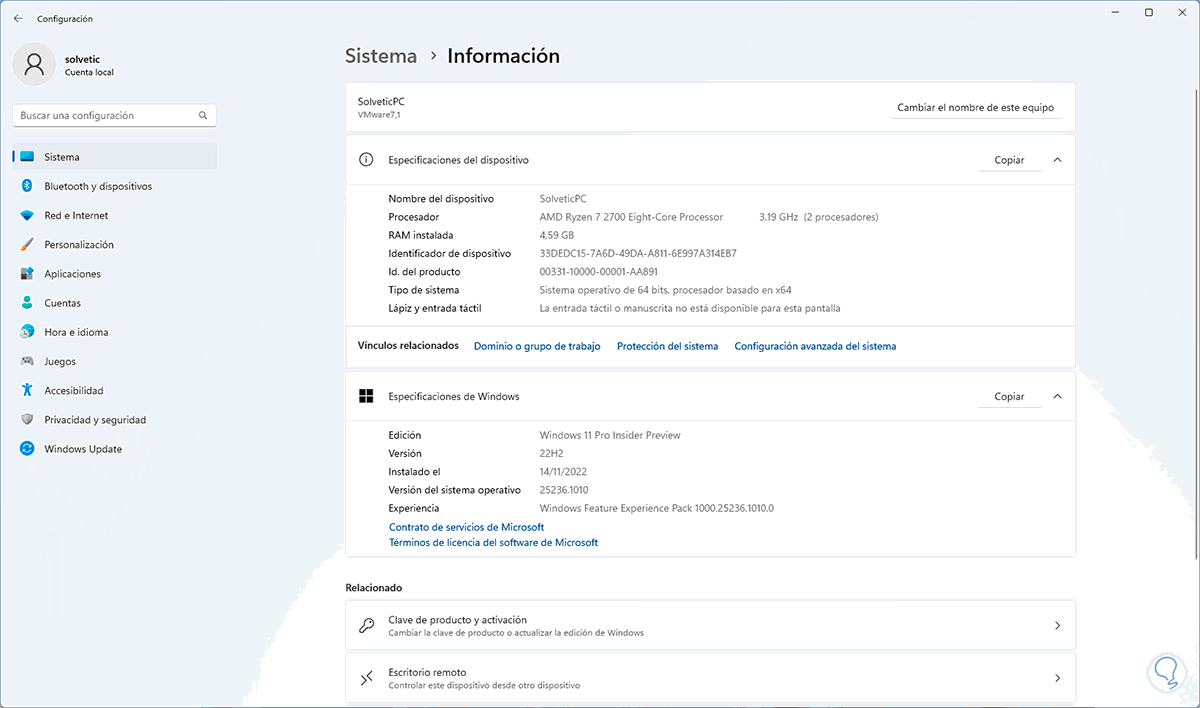
To create the DUMP file we go to "Start - Settings - System - Information":
step 18
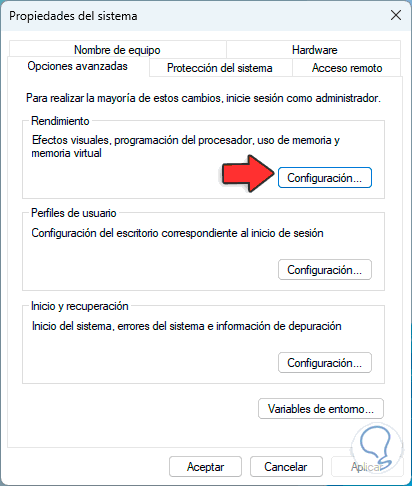
Then we click on "Advanced system settings":
step 19
We will see the following window:
step 20
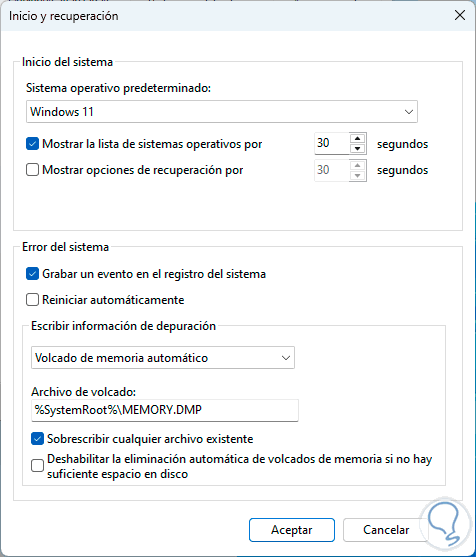
In "Startup and recovery" we click on "Settings" and in the following window at the bottom we will see the path of the DUMP dump file:
step 21
We open the notepad again from WinDbg and at the bottom we enter the following:
.dump [options] FileName
Press Enter for it to be loaded:
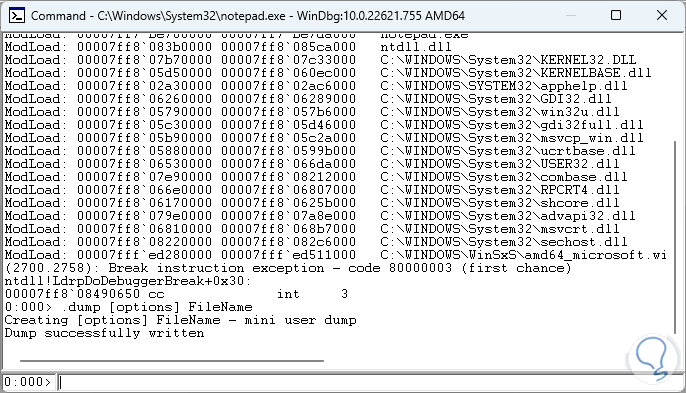
We see that DUM was spelled correctly.
step 22
Another way to find the cause of the error is by entering the following:
!analyze [-v] [-f | -hang] [-D BucketID]
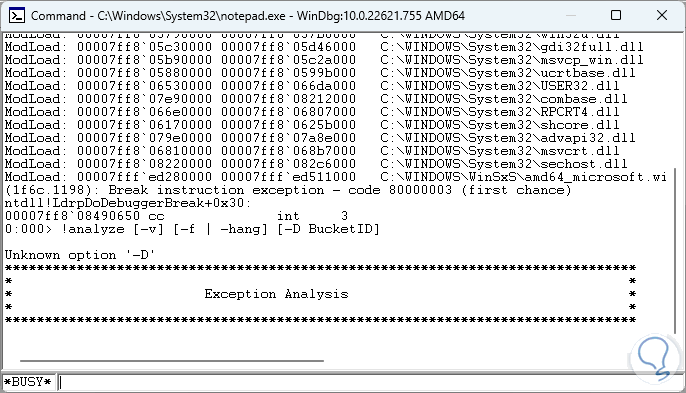
Step 23
The !analyze extension displays information about the current exception or system error checking, we press Enter to run the analysis:
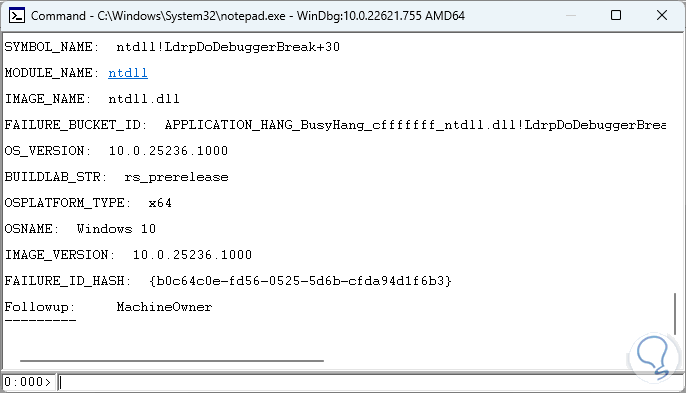
From here it will be possible to determine the cause of the error and work on it..
2 Blue Screen Unexpected Store Exception | Solution Using a Restore Point
Step 1
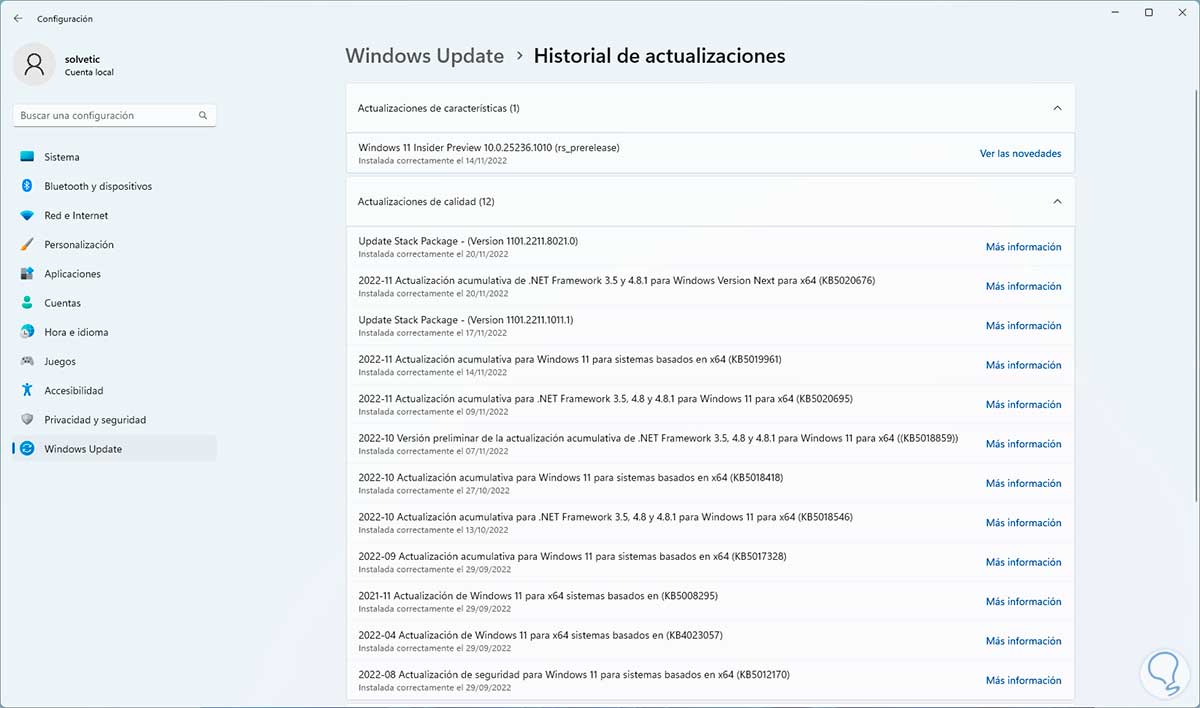
The restore point allows us to return to Windows 11 at a given time where everything worked correctly, first we go to "Start - Settings - Windows Update":

Step 2
In "Update history" we can validate if any update influences the error to uninstall it:
Step 3
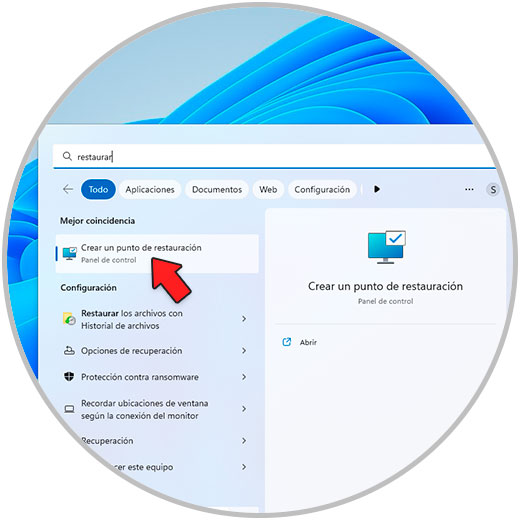
We validate if any update is linked to the Store Exception, if not, in the search engine we enter "restore" and select "Create a restore point":
Step 4
The following will open:
step 5
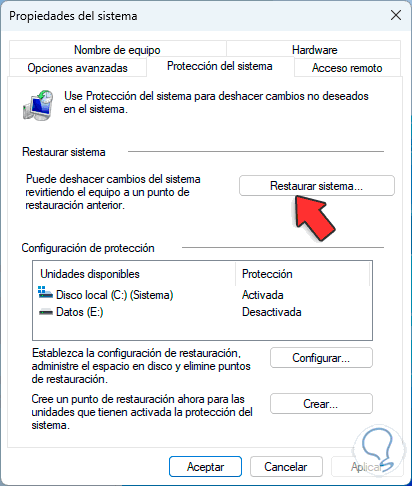
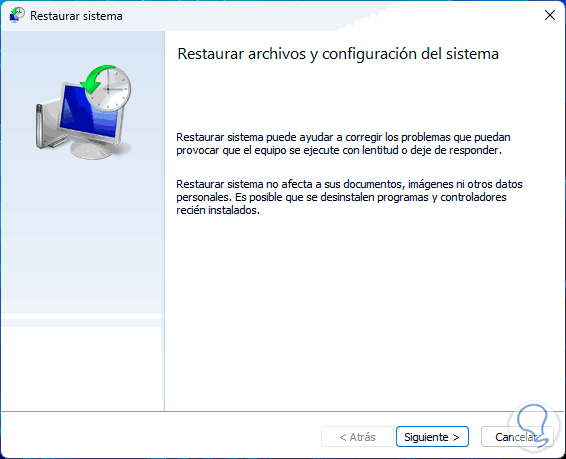
We click on "System Restore" and the following will open:
step 6
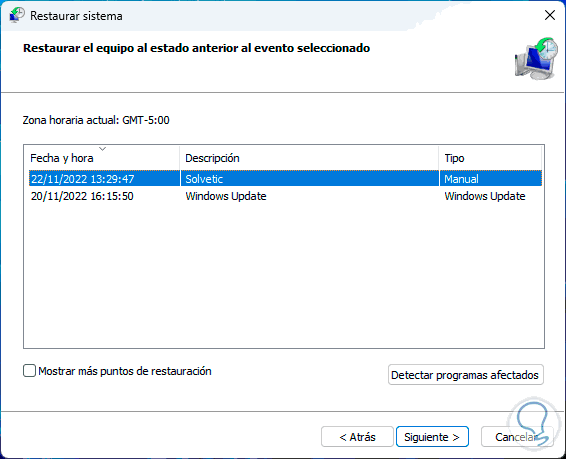
We select the desired restore point:
step 7
We click Next to see the summary:
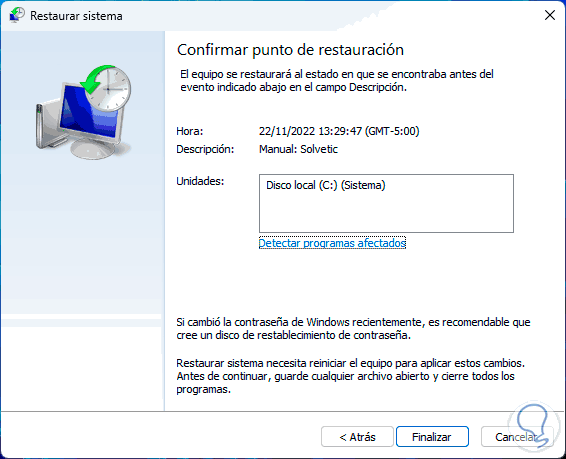
We click on "Finish" and wait for the system to be restarted to return to the established point.
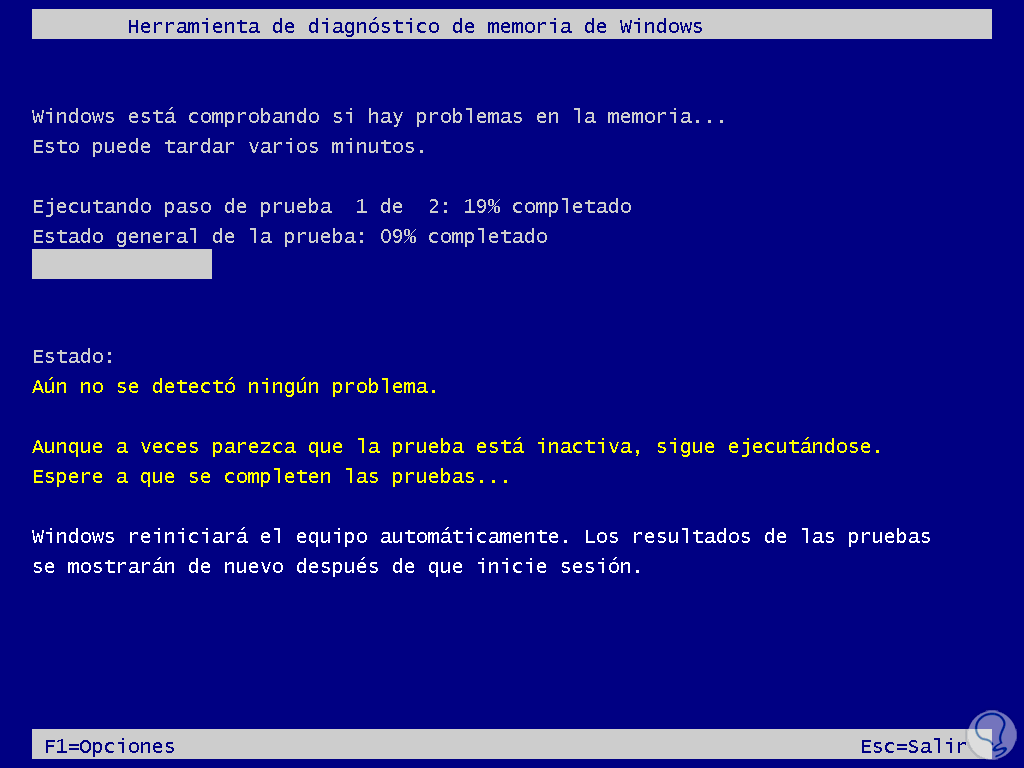
3 Blue Screen Unexpected Store Exception | Solution with Windows Memory Diagnostic
As we mentioned, the Unexpected Store Exception error is related to memory so we can resort to the diagnostic utility built into Windows 11.
Step 1
In the search engine enter "diagnosis" and click on "Windows memory diagnosis":

Step 2
We will see the following window:
Step 3
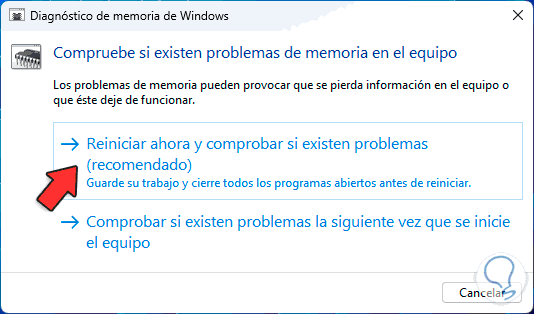
Confirm the system reboot for the scan to start:
Step 4
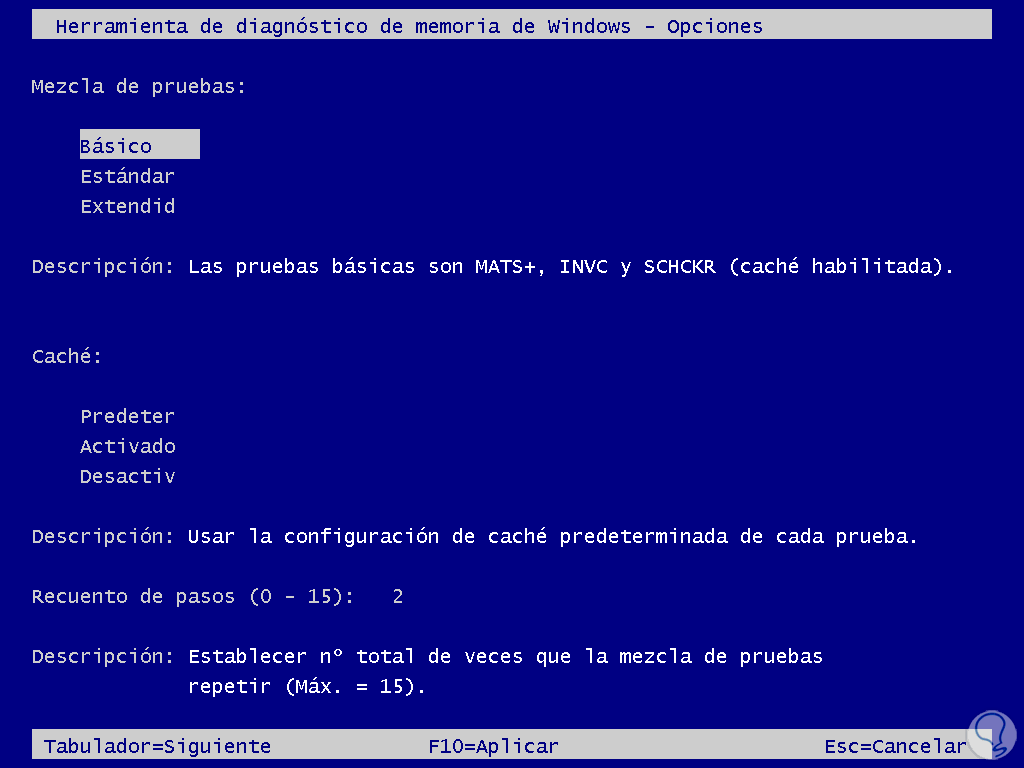
Windows will restart to run the diagnostic, press the F1 key to select the type of analysis to use:
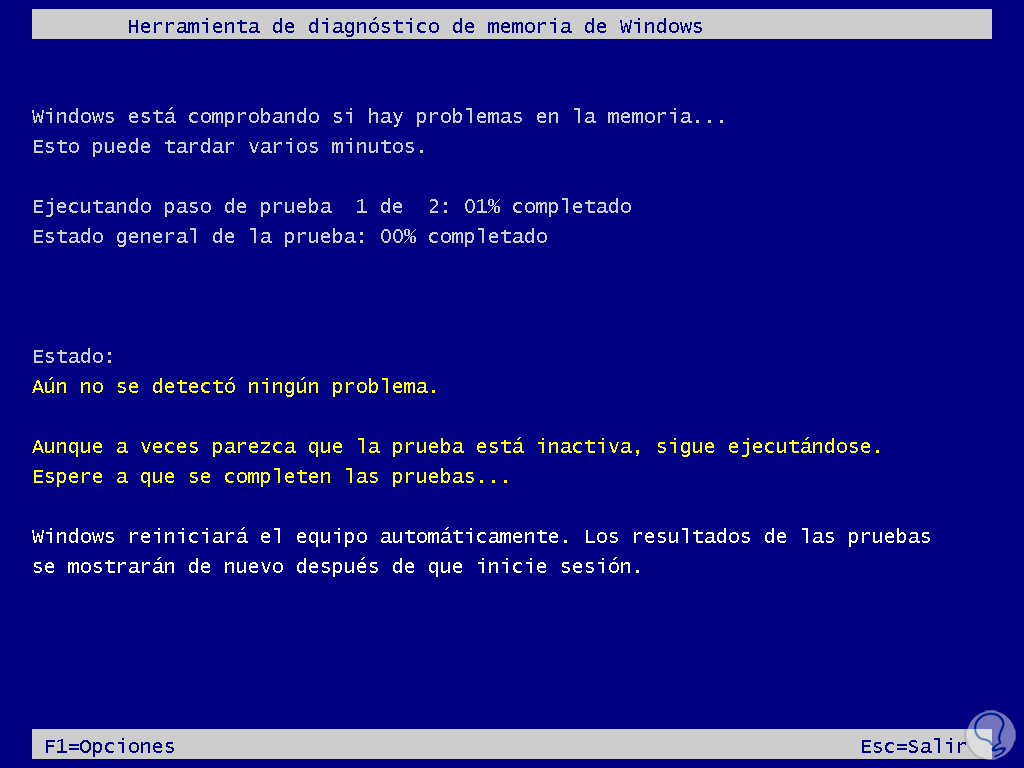
step 5
Wait for the analysis to finish:
step 6
We await the second phase:

step 7
The system will reboot:
step 8
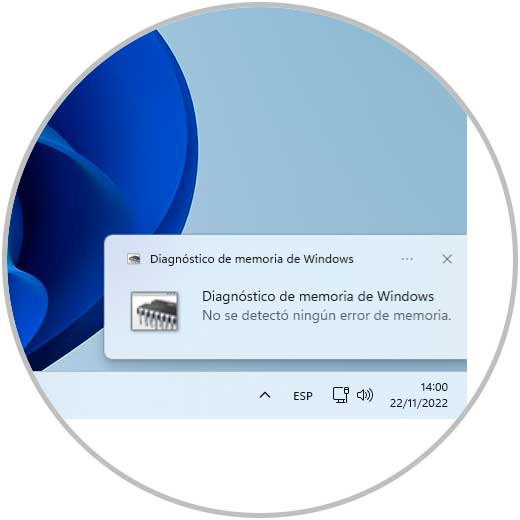
When logging in, we wait for the result of the memory diagnosis:
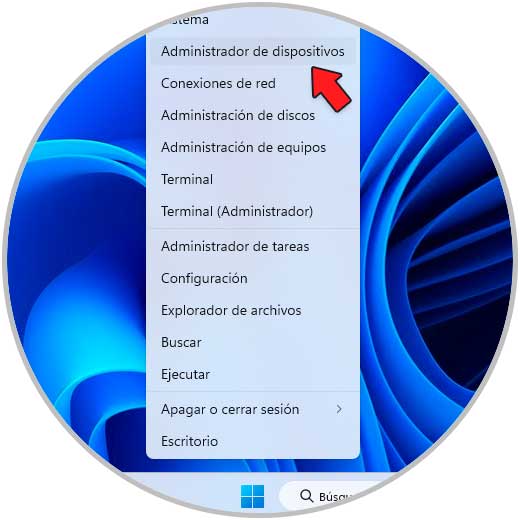
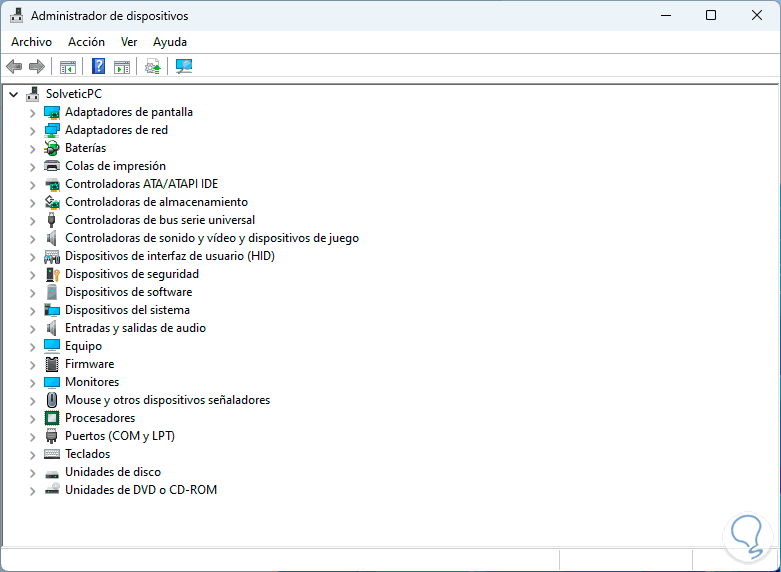
3 Blue Screen Unexpected Store Exception | Solution Checking for errors in Device Manager
Step 1
An error indicator is a warning sign in Device Manager, by seeing it we know there is a problem and we can work on it, to use this method open Device Manager:
Step 2
Check if there is an exclamation mark in any section for its correction:
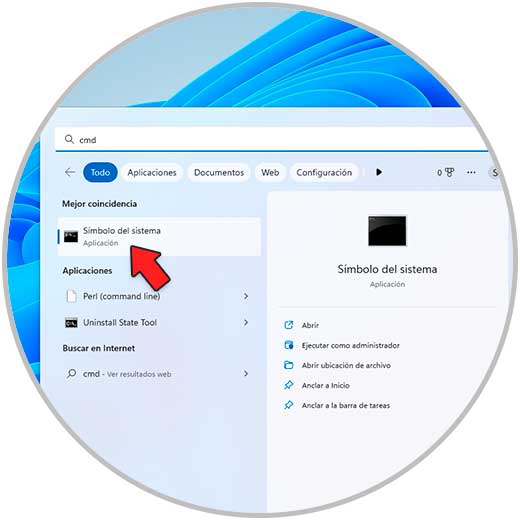
4 Blue Screen Unexpected Store Exception | Solution From CMD
Through the command prompt console, it is possible to execute some commands that allow us to correct system errors and that can generate the error.
Step 1
We open CMD as administrators:
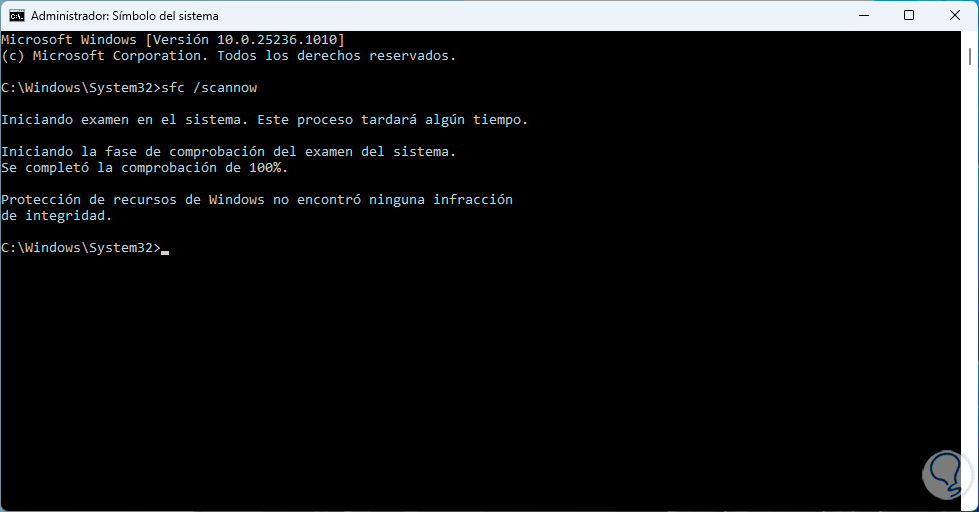
Step 2
We execute:
sfc /scannow
SFC (System File Checker) is a command that analyzes the file system to detect failures and proceed to correct them automatically, we wait for the process to end:
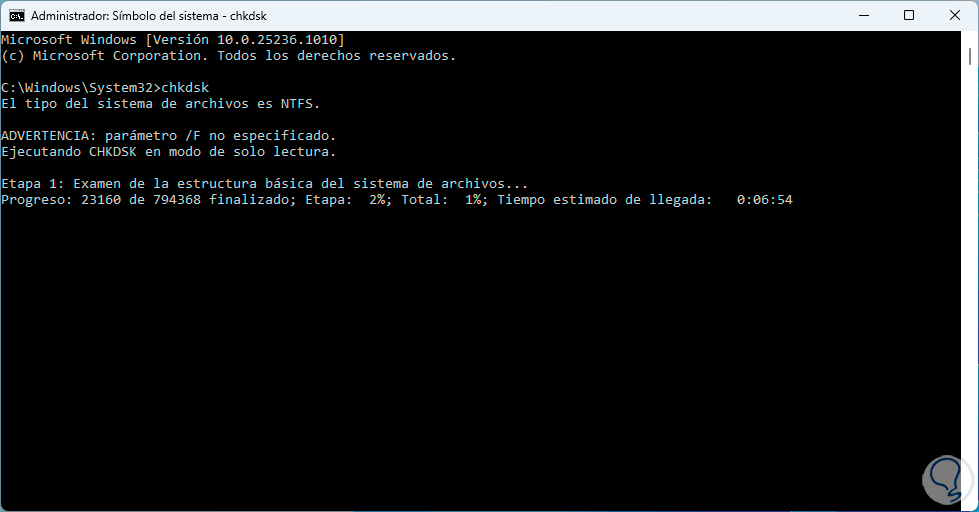
Step 3
Now we execute:
chkdsk /fc:

The chkdsk command is in charge of analyzing the file system and the metadata of the file system of a volume to detect logical and physical errors, in this case the /f value corrects the errors on the disk but the disk must be blocked.
Step 4
In case it is not possible to lock the drive, we will see the message indicating whether to scan at next reboot, we confirm whether to scan the system at next reboot or not, we can run "chkdsk" for disk scan in live:
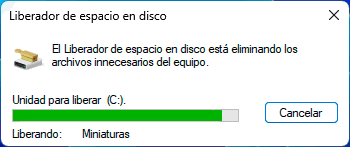
5 Blue Screen Unexpected Store Exception | Solution Deleting temporary files
Temporary files, as the name suggests, are files that can be automatically deleted and are used to have certain application settings saved to save time, but using these files or having a considerable amount of them can result in the Unexpected error. Store Exception.
Step 1
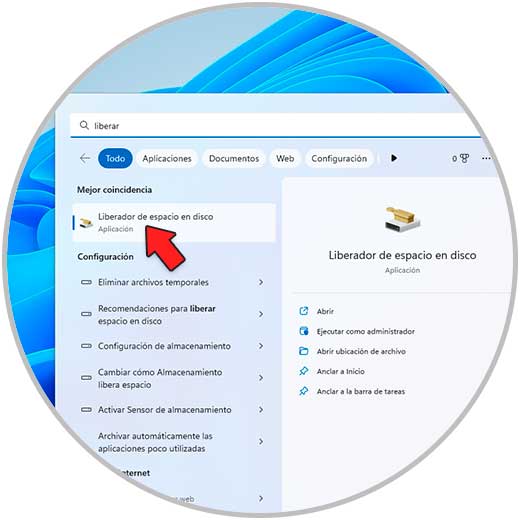
To delete these temporary ones in the search engine we enter "release" and select "Disk Cleanup":
Step 2
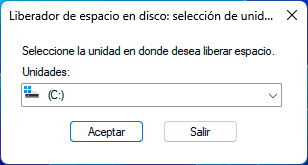
Select drive C:
Step 3
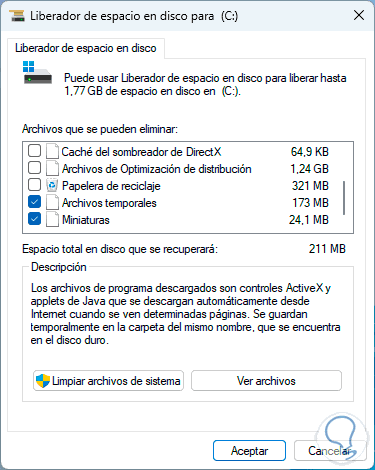
The following pop-up window will open:
Step 4
We activate the "Temporary Internet files" and "Temporary files" box, then click "OK" and confirm the process:
step 5
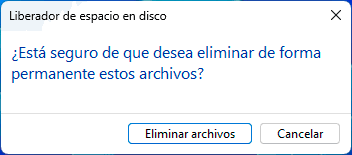
The temporary files will be deleted:
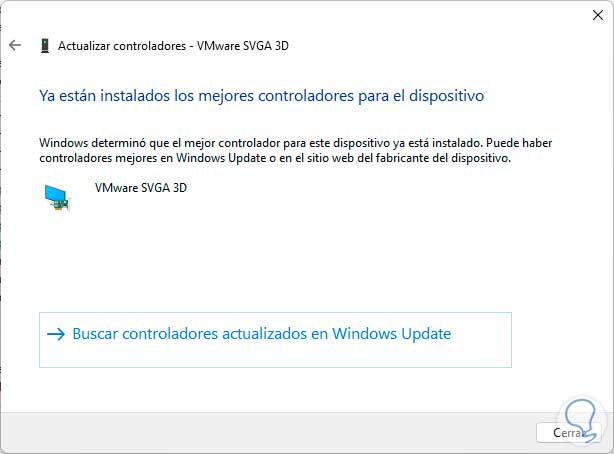
6 Blue Screen Unexpected Store Exception | Solution Updating display drivers
Step 1
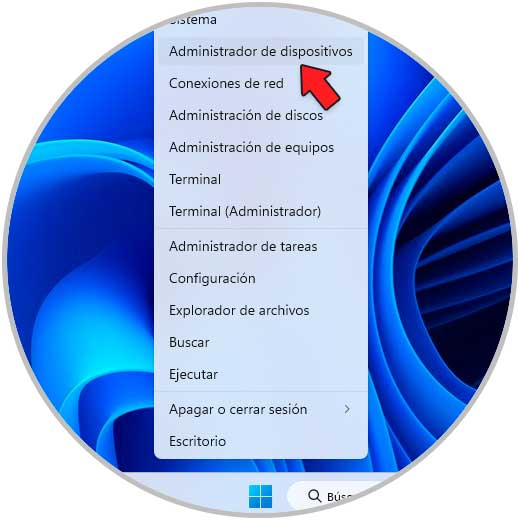
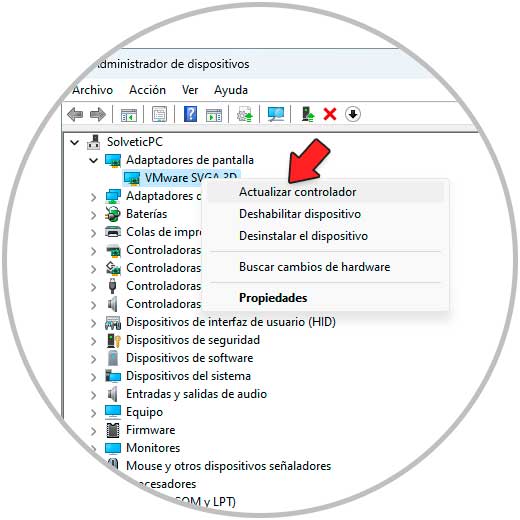
Another cause of this error may be having an outdated display driver that creates conflicts internally, to update it we open the Device Manager:
Step 2
In "Display adapters" we right click on the driver and select "Update driver":
Step 3
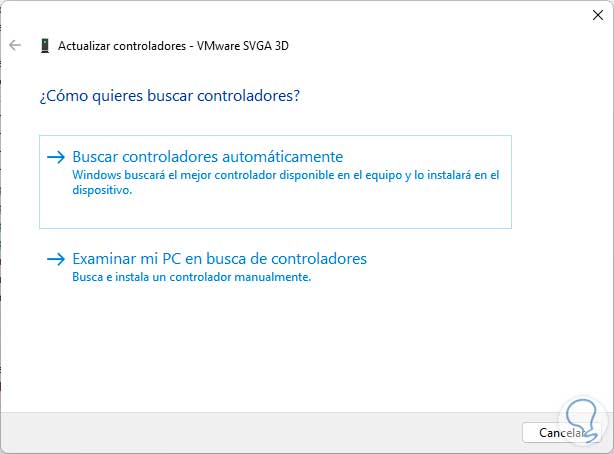
Now we select the automatic option to validate if there are updates:
Step 4
We await the availability or not of updates:
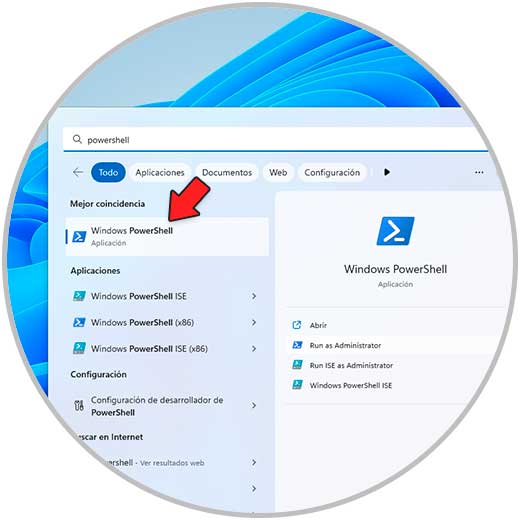
7 Blue Screen Unexpected Store Exception | Solution From PowerShell
Step 1
With this step we seek to reinstall the Windows 11 applications in order to rule out that any of them is the cause of the error, in this case open PowerShell as administrator:
Step 2
Execute:
Get-AppXPackage -AllUsers | Foreach {Add-AppxPackage -DisableDevelopmentMode -Register "$($_.InstallLocation)\AppXManifest.xml"} 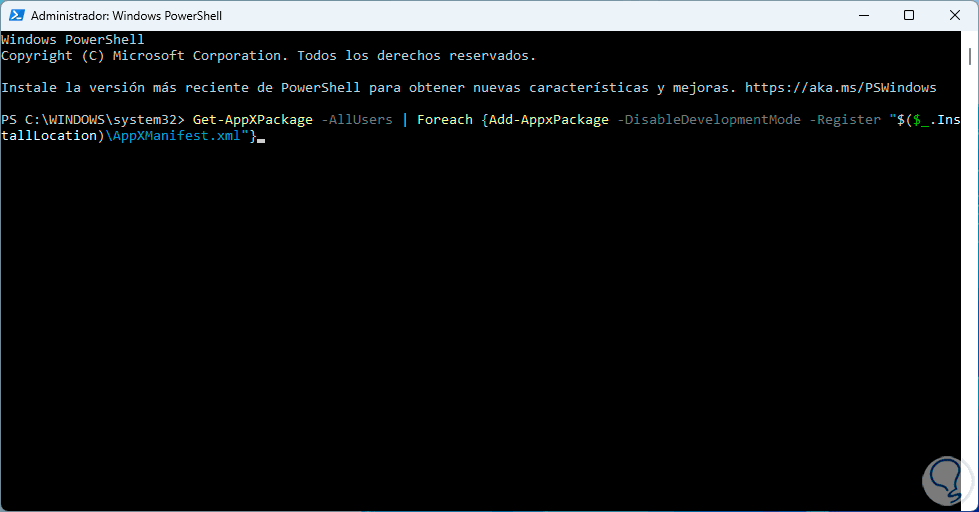
Step 3
Pressing Enter will start the process:
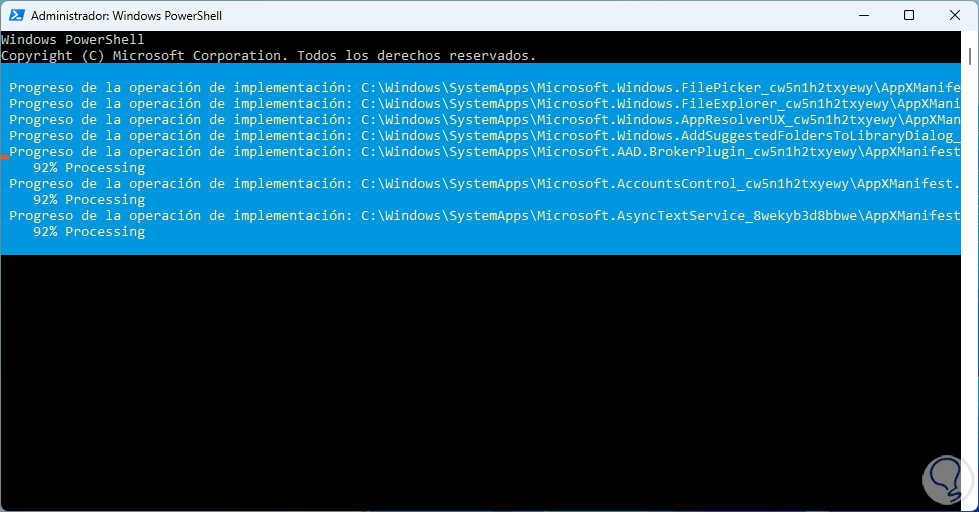
We hope that the applications will be reinstalled.
8 Blue Screen Unexpected Store Exception | Solution From System Configuration
Step 1
It is possible that a special service or an app that starts with Windows 11 is the cause of this error, we can rule out both by opening System Configuration from Start:
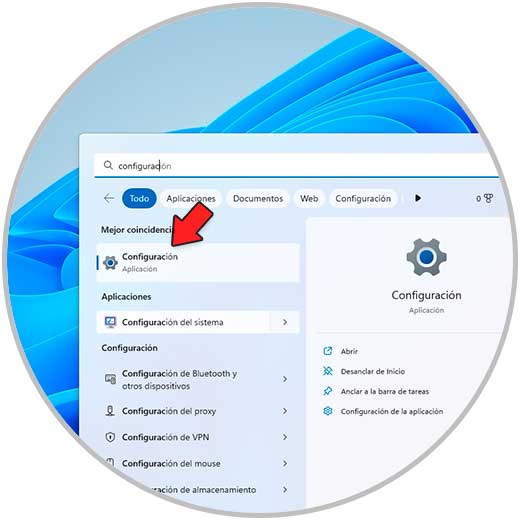
Step 2
In the window we go to the "Services" tab:
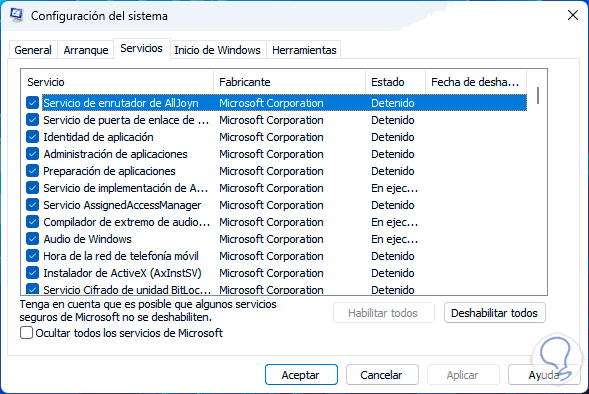
Step 3
We activate the "Hide all Microsoft services" box:
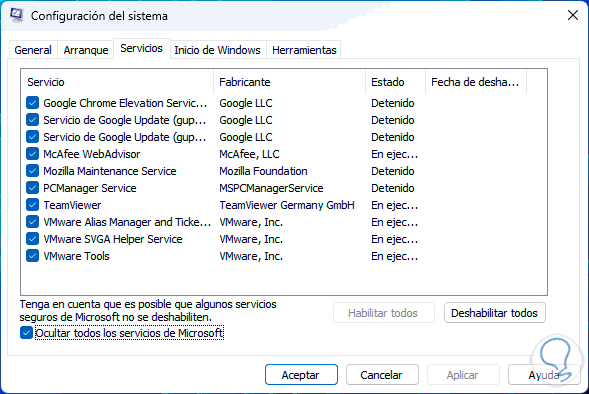
Step 1
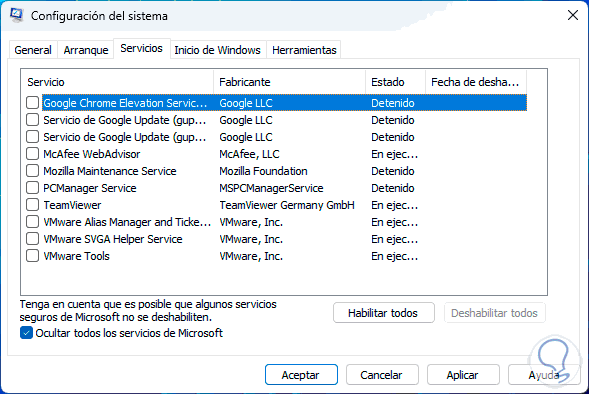
We click on "Disable all":
Step 2
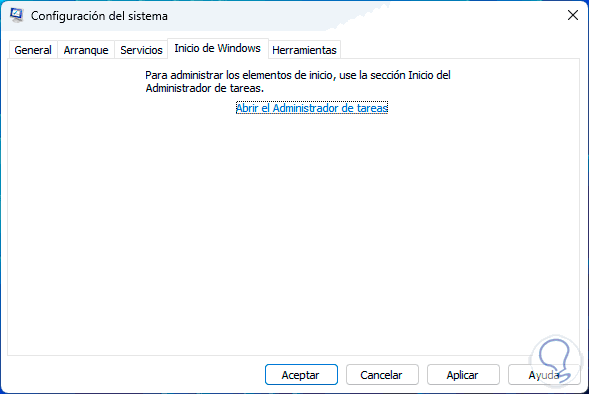
In the "Windows Startup" tab we will see the following:
Step 3
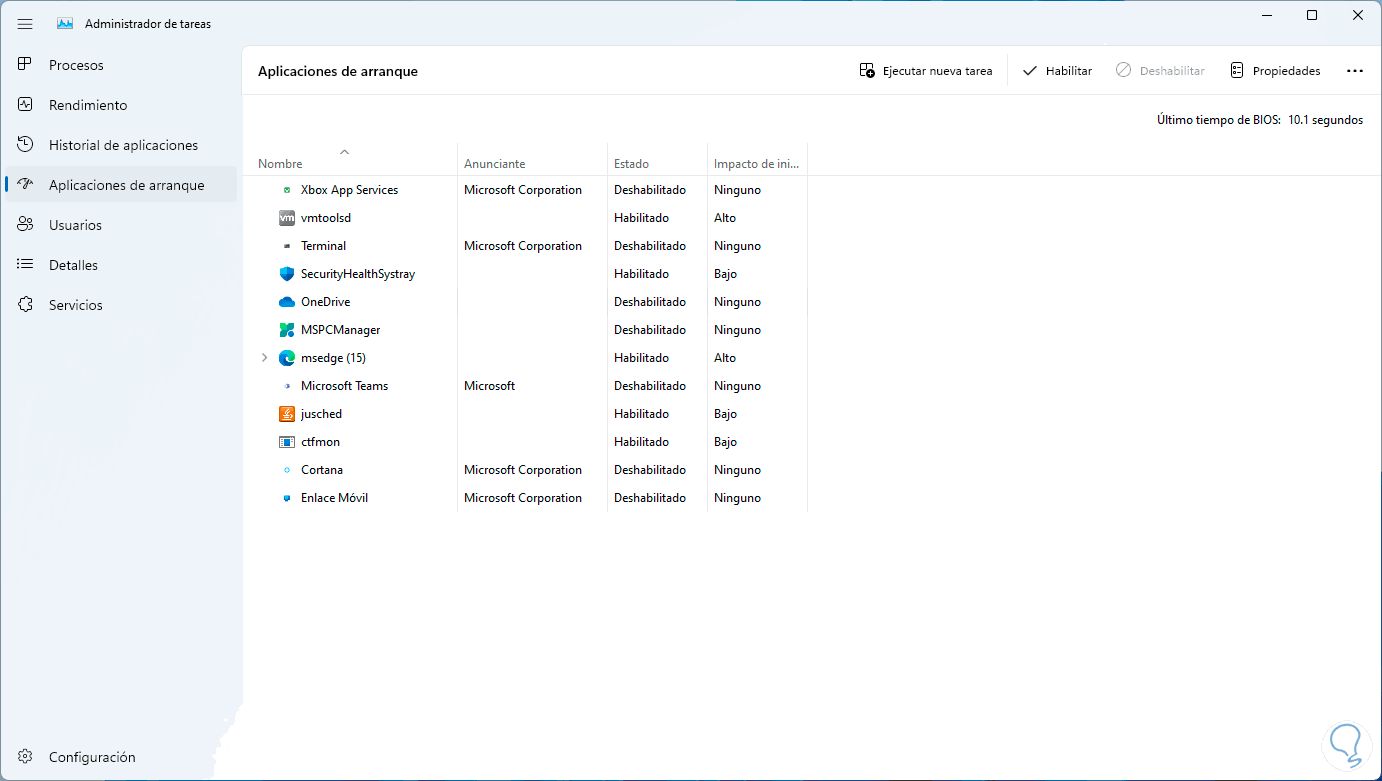
We click on "Open Task Manager" and then select the app or apps with conflict:

Step 4
We click on "Disable" so that it does not start with Windows 11:
Each of these solutions is integral to fixing the Unexpected Store Exception error and having a stable system.