Virtualization technology is one of the most useful alternatives that as administrators we can use to test all types of operating systems, applications and configurations without jeopardizing the structure already defined in the organization or at home. Thanks to virtualization, we save money by not requiring additional software, avoid malware or virus attacks and can share multiple operating systems on a single physical computer..
One of the best options to use virtualization is to test the new releases of operating systems which are in beta, that is, with the possibility of errors, and therefore if this is implemented in a virtual environment we will not lose real information nor hardware resources will be affected.
features
Currently, Fedora has announced the Fedora 29 edition which has several features such as:
- New updates for MySQL, GNU C Library, Python and Perl
- Full integration with ARM
- Hiding the GRUB menu when a single operating system is installed
- ZRAM support for ARM images
- Support SSE2 by default and more.
To safely test Fedora 29 Beta, we can use VirtualBox for this purpose..
The ISO image of Fedora 29 Beta is available at the following link:
Fedora 29
Through this tutorial, TechnoWikis will explain how to install Fedora 20 on these two virtualization platforms and thus learn more about this new edition of Fedora.
1. How to install Fedora 29 Beta on VirtualBox
features
[color = rgb (33,33,33)] VirtualBox is a virtualization platform for both x86 (32 bit) and AMD64 / Intel64 (64 bit) architectures, which is full of great features such as: [/ color]
- Clipboard integration bi-directional
- Compatibility with hardware such as USB, PXE and more
- Hardware virtualization is not required
- Ease to create VM groups and more
VirtualBox is available for download at the following link:
Virtualbox
Step 1
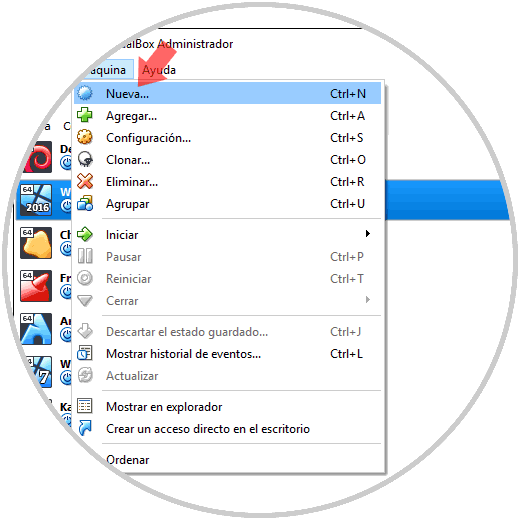
Once downloaded and installed VirtualBox, we proceed to its execution and to create the Fedora 29 virtual machine we have the following options:
- Go to the Machine / New menu
- Use the key combination Ctrl + N
- Click on the New icon located at the top of VirtualBox
Step 2
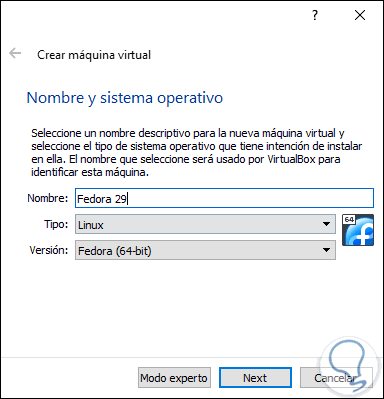
The following window will be displayed where we will enter the desired name, in this case Fedora 29, and VirtualBox automatically identifies the type and version of the system to use:
Step 3
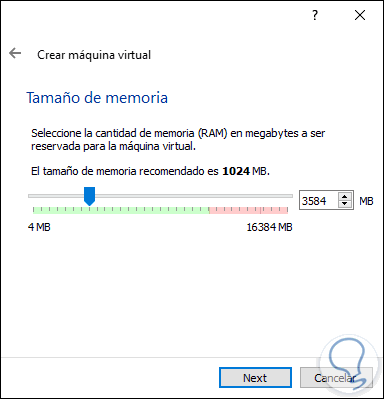
Click on the Next button and then define the amount of RAM to be implemented in the virtual machine, by default it is 1024 but we can enter the new value with the slider:
Step 4
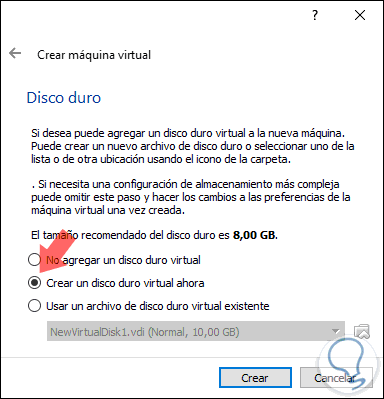
Pressing Next will now be necessary to specify the hard disk to use, there we have options such as:
- Do not add a virtual hard disk: With this option we can add the hard disk later
- Create a virtual hard disk now: it is the default option and allows you to specify the type and size of the disk
- Use an existing virtual hard disk file: This option allows you to select a hard disk with the Fedora 29 configuration already set.
Step 5
Click on the Create button to manage the disk and then define the type of hard disk that will be created:
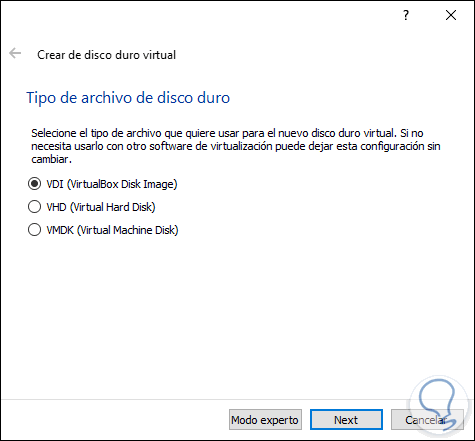
Step 6
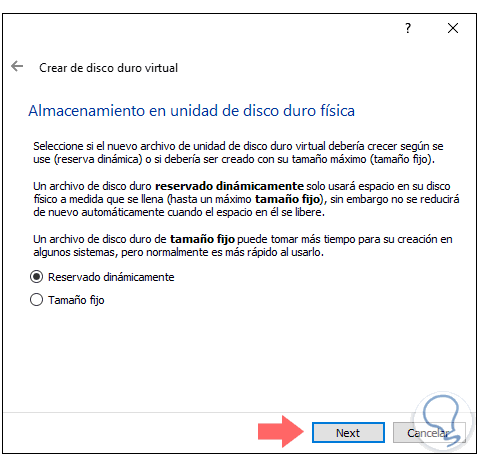
Click Next and now we must define the disk storage conditions, there we can select:
- Reserved dynamically: this option allows the hard disk to be filled as information is added to the
- Fixed size: As the name implies, it sets a single size for the virtual disk
Step 7
Once this is defined, click Next and now configure the following:
- Path where the virtual machine is to be saved
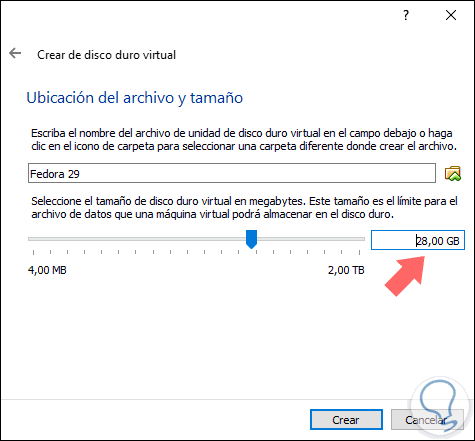
Click on Create to apply the changes..
2. How to configure Fedora 29 in VirtualBox
Step 1
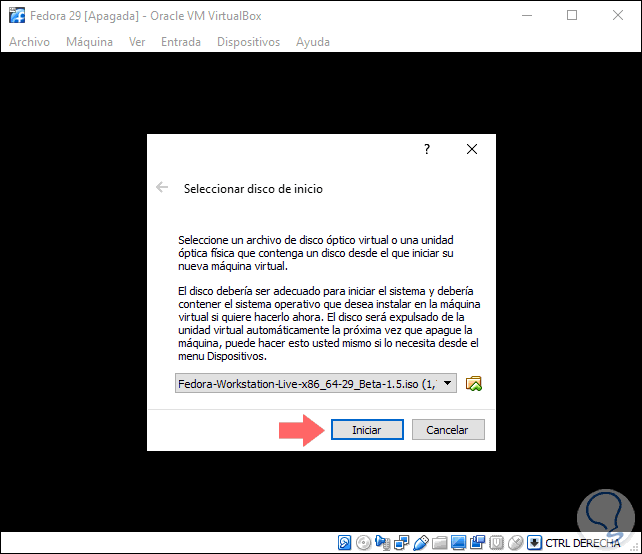
If we want to configure this machine, we can access the Configuration section and there define new parameters for memory, CPU, disks, etc. Click on the Start button to start the virtual machine and we will need to select the ISO image of Fedora 29 that we have downloaded:
Step 2
There we click on the Start button and the following will be displayed:
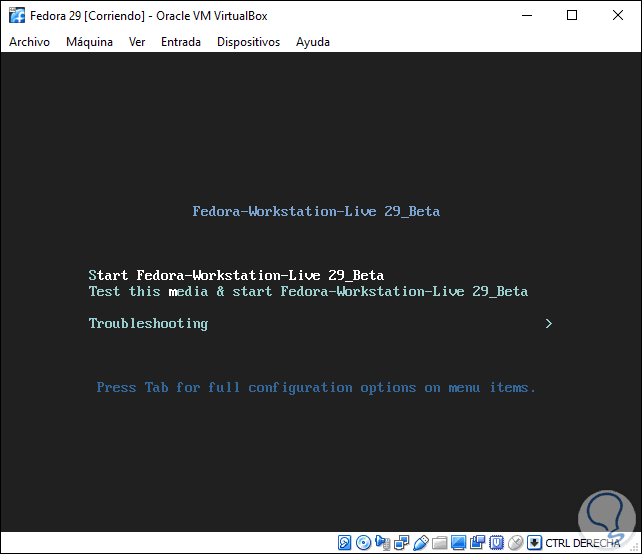
These options are:
Start Fedora-Workstation-Live 29 Beta
With this option it is possible to perform the Fedora 29 test before its installation locally, it is the option that we will select for this study.
Test this media & start Fedora-Workstation-Live 29 Beta
With this option it will be possible to check the basic system requirements and proceed to run Fedora 29 if everyone passes the test
Troubleshooting
This option allows us to solve problems associated with the hardware of the equipment
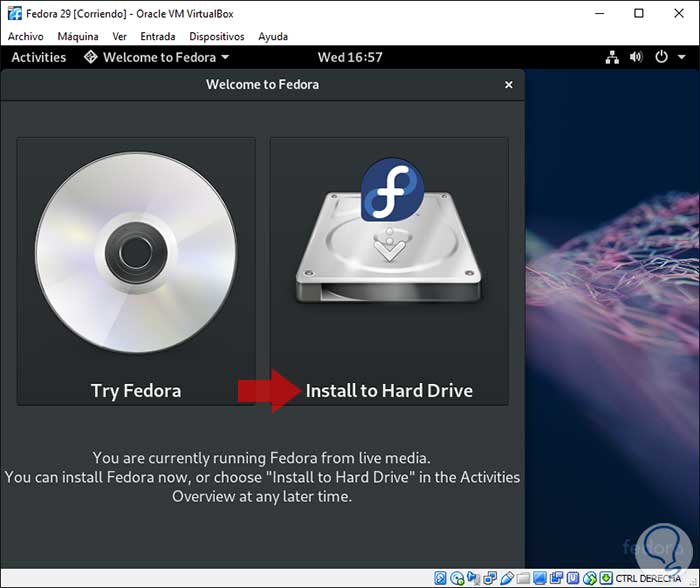
Step 3
Selected this the following window will be displayed where we can test Fedora 29 Beta to know its functions or click on the Install to Hard Drive option to perform the local installation:
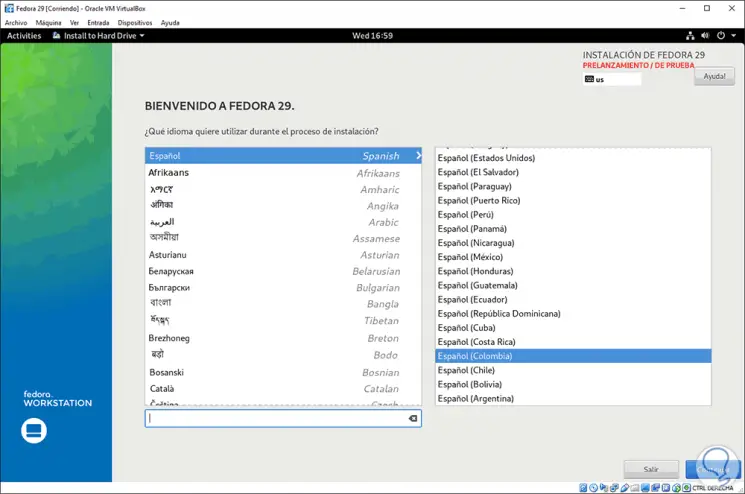
Step 4
If we select the Fedora 29 installation, we will be redirected to the following window where we define the installation language:
Step 5
We will see a warning message indicating that it is a beta edition and may contain errors:
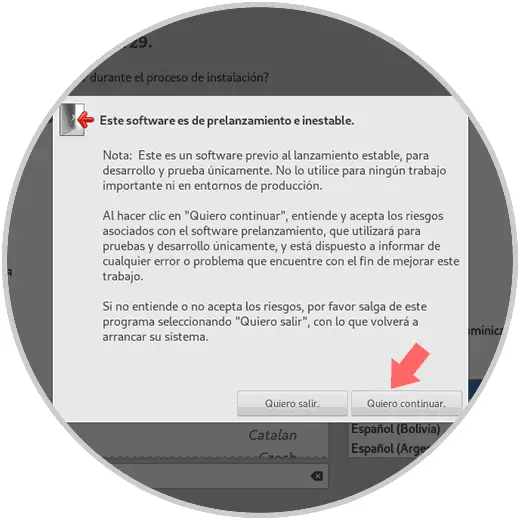
Step 6
Click on the I want to continue button and the following will be displayed:
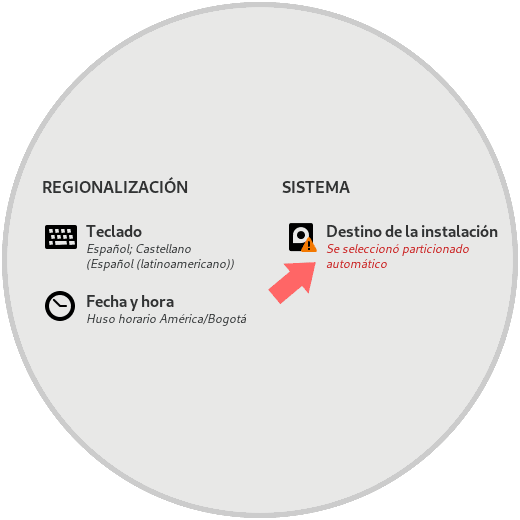
Step 7
There we click on the Destination section of the installation to select the disk on which Fedora 29 is to be installed:
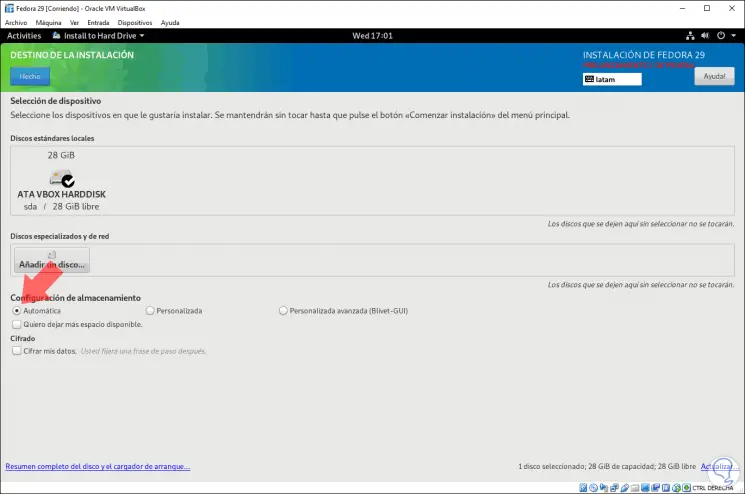
Step 8
We can choose the Automatic option for the system to distribute the entire disk or activate the Custom box where we must define each partition and mount point to use in Fedora 29:
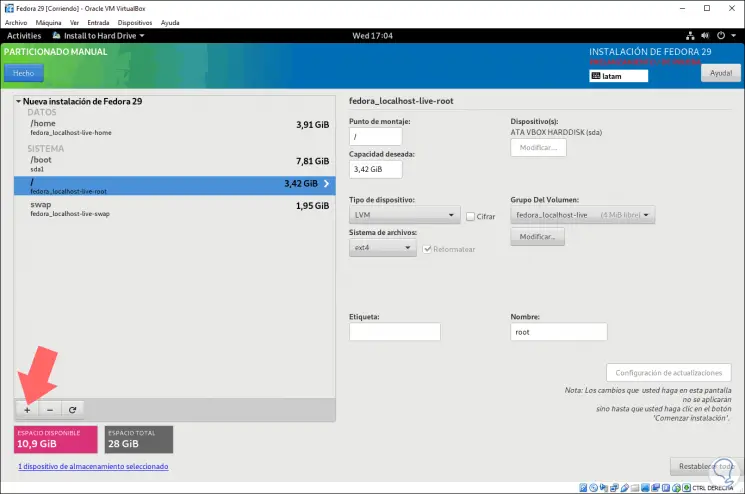
Step 9
We achieve this by clicking on the + sign and defining each mount point with its size. If we choose this option, the following message will be displayed indicating the changes to be made:
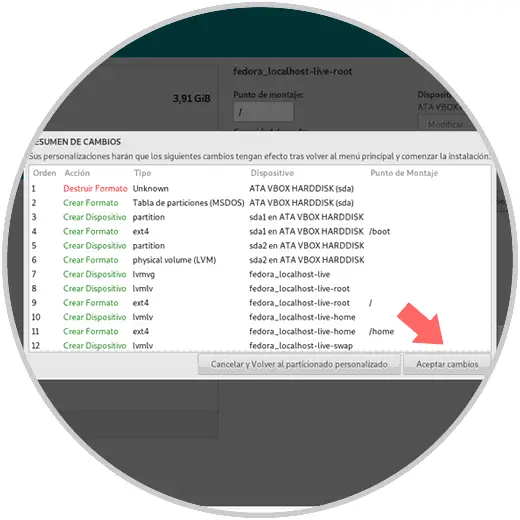
Step 10
Click on Accept changes and we will see that we are ready for the installation of Fedora 29:
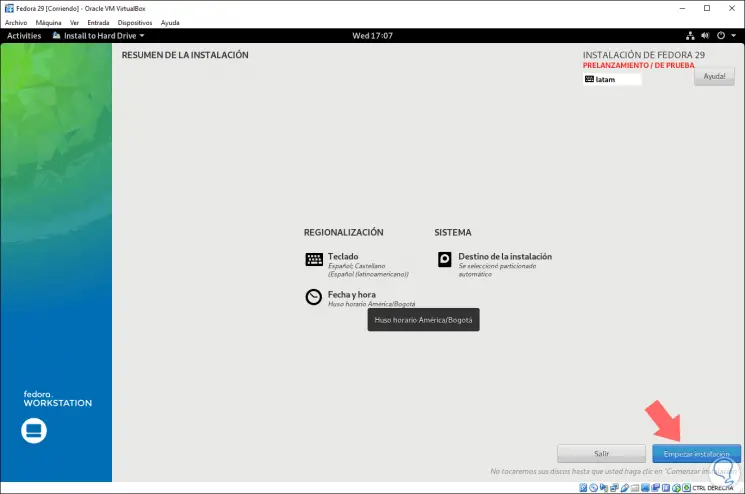
Step 11
Click on the Start installation button and this process will begin:
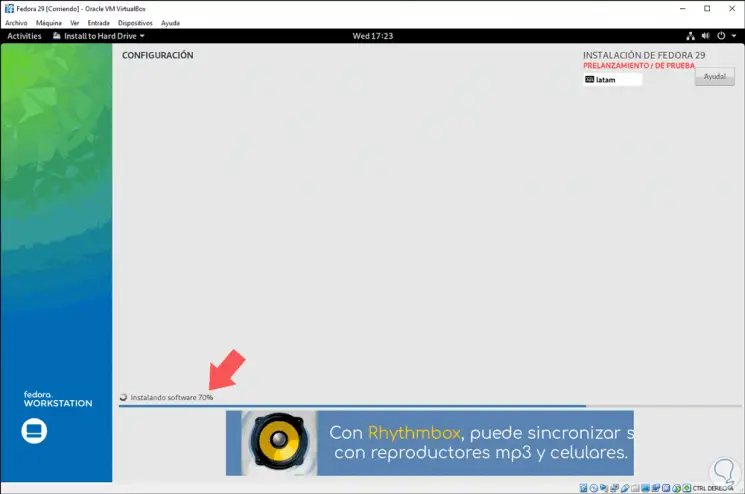
Step 12
Once this is finished we will see the following message:
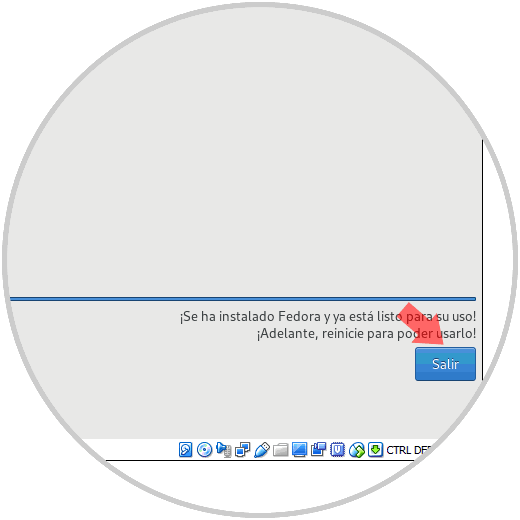
Step 13
Click on Exit to restart the system and start loading Fedora 29 Beta:
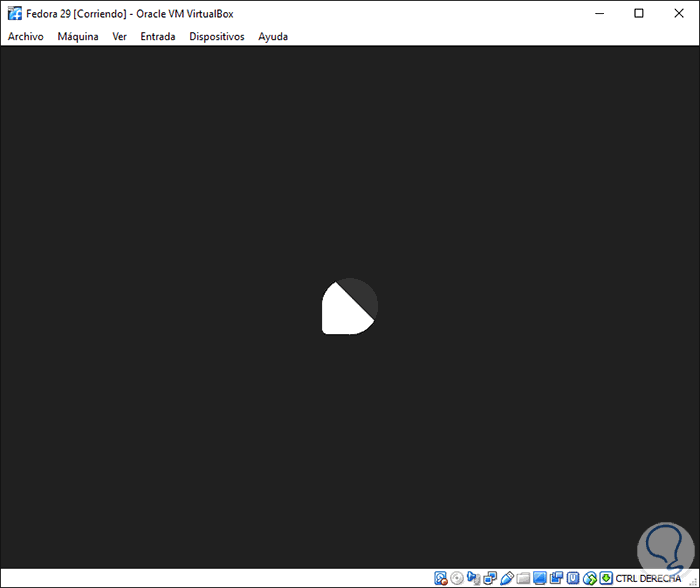
Step 14
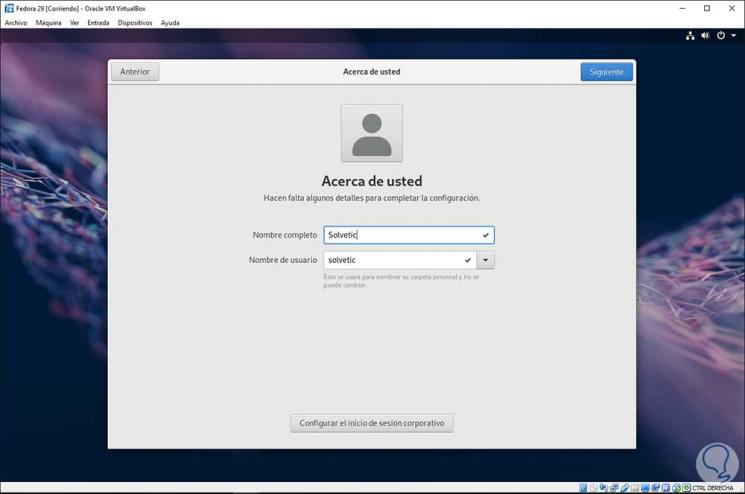
Once we log in, the following wizard will be displayed where we can define username and password:
Step 15
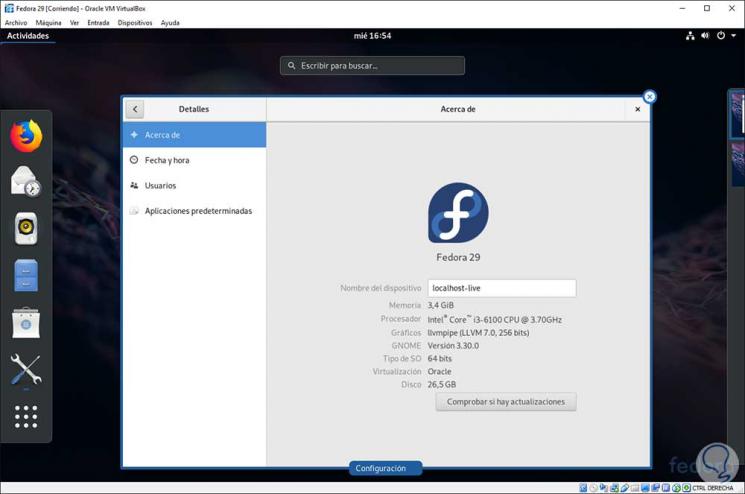
Once this is defined, we will have access to enjoy all the features of Fedora 29:
This way you will have been able to configure and install Fedora 29 in VirtualBox step by step.