When we look at a Reel, the first impact it has on us is that of the cover; since this serves as a letter of introduction for what we are going to see next, in addition to making a first contact between the Reel and the person who is looking at it..
For this reason, choosing a good cover is so important in the process of creating a Reel, since it will serve the person who is looking through the screen to get an idea of its content and that through it we can draw attention to the user to make him come to visualize it. If we take into account the large amount of content of this type that circulates on Instagram, this aspect becomes vital to differentiate ourselves.
Some reasons that make the cover we choose for a Reel so important are the following:
Importance of choosing a good cover for your Reel
- It helps you differentiate your content from that of other creators on Instagram, being able to provide your hallmark on it.
- They help you get more people to click on your Reel.
- It serves as an informative way as a small preview of what your Reel is going to deal with, that is, the theme that it encompasses.
- It will help you to attract the viewer's attention: For this you can use a striking image, text or combine both (for the last option you will need an editing tool, and throughout this chapter of the course we are going to explain how to do this using the application itself. from Instagram.)
- In the Reels tab, the covers do not use the square format of the posts, but use the vertical format, taking up more space on the screen and making them more visible. This makes it more striking.
- You can use colors that create a harmony with the other elements of your Feed so that your profile remains cohesive.
For these reasons, the covers of our Reels are one of the elements that are worth taking care of in detail, since in addition to serving as a preview of what we are going to see, it causes a first impact on the viewer that can be positive or negative. . For this reason, in this chapter of the course it will be necessary to delve into how to put a cover on your Reel in different ways, how to create it and other important aspects related to this point, which we are going to explain below..
In this chapter we will delve into the following aspects of Instagram Reels covers:
- Cover Reels Instagram size.
- How to change Reels Instagram cover (video clip).
- How to put a cover photo on Instagram Reels.
- How to make a cover for custom Instagram Reels.
- How to edit Reels cover already uploaded on Instagram
1 Cover Reels Instagram size
One of the aspects that we must take into account when we talk about the covers in Reels is the size they use and the one that we must use so that they are perfect in the Instagram application.
Therefore, now we are going to tell you the size used by the Reels covers depending on the Instagram section from where you are viewing. Although Instagram will readjust the size, knowing this information will be important to be able to correctly position the image and/or text when we publish a Reel.
Reels tab
The size you use in the Reels tab is 1080 x 1920. This is what the Reel covers look like when viewed from the Reels tab or when someone clicks on the Reel to view it.
feed
The size in which the covers of your Reels are displayed from your Instagram Feed or wall is 1080 x 1080, there being no difference between the Reel and the rest of the publications that appear on your wall.
news section
If a user clicks on the news section and your Reel appears, the size in which the other person will see it will be 1080 x 1350.

Why is it important to know this information when creating the cover of our Reel?
It is important that you know this information so that the cover of your Reel looks perfect regardless of the Instagram section in which it is being displayed. For this, keep the following aspects in mind if you are going to create your custom cover in Reels.
Aspects to take into account when we are going to create a cover in Reels regarding size:
- The cover has to be the size of the full Reel, that is, 1080 x 1920.
- Elements such as image and text should be centered in this space, leaving the top and bottom spaces free.
- Therefore, even if the cover size is 1080 x 1920 try to have the elements centered in a space of 1080 x 1080 in the total space.
2 How to change the cover of Reels Instagram
When we upload an Instagram Reel, it is on the last editing screen where the options regarding the cover appear. You should know that Instagram by default selects a clip from the Reel to establish it as the cover, but this is somewhat editable and for this reason in this section we are going to explain how to change the cover of Instagram Reels for another clip in the form of text and video.
To stay up to date, remember to subscribe to our YouTube channel!
SUBSCRIBE ON YOUTUBE
Step 1
The first thing you will have to do is create and upload your Reel to Instagram, and the procedure may vary depending on the type of Reels you want to create. During the course we already explained the different procedures for creating Reels:
How to make Reel with photos on Instagram
How to make Reel with videos on Instagram
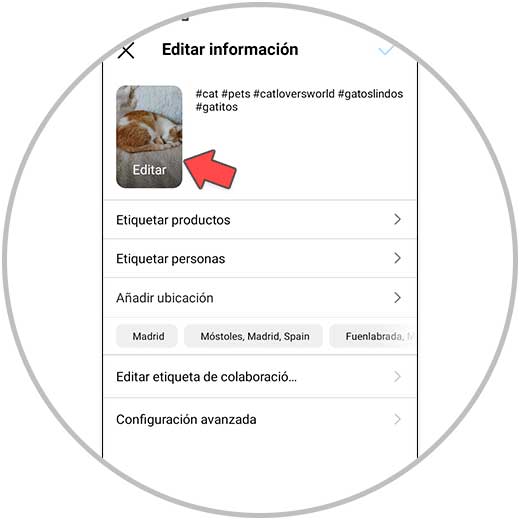
Step 2
Once the Reel is created, on the last screen you have to click on the thumbnail in "Edit cover".

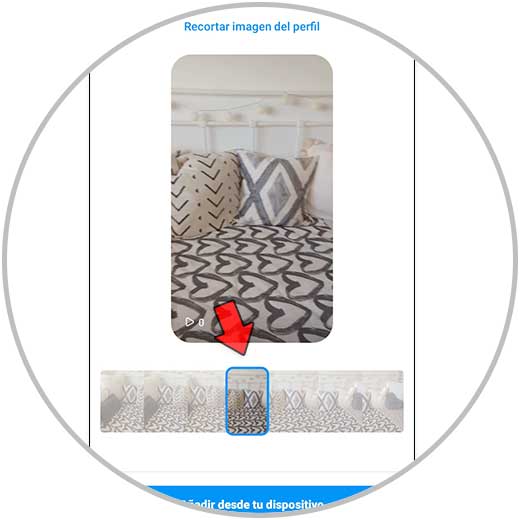
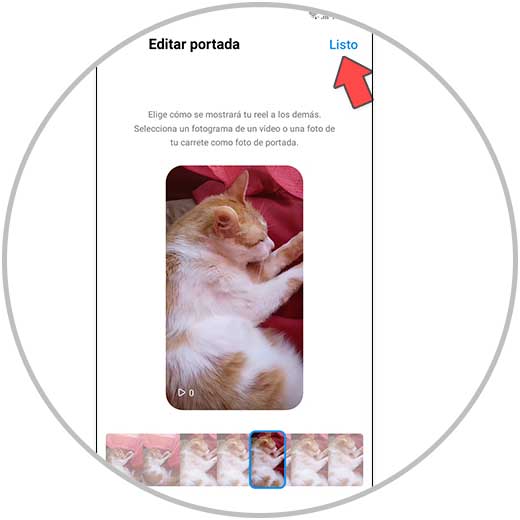
Step 3
In the bottom bar, select the Reel clip you want to set as cover by swiping over it.
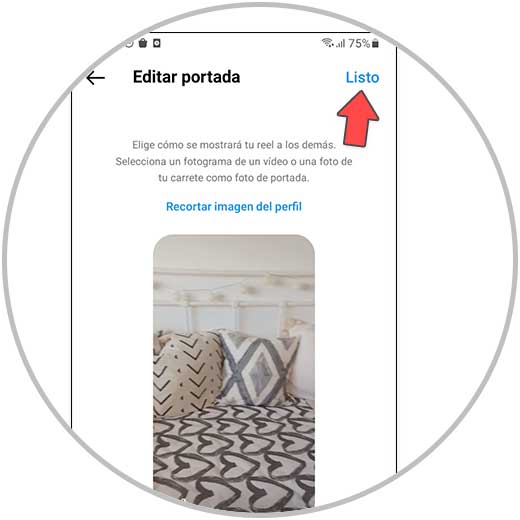
Step 4
Once selected, press “Done” in the upper right corner of the screen.
With this simple procedure you can change the video clip that appears by default in WhatsApp for a different one..
3 How to put a cover photo Reels Instagram
In addition to changing the cover image of a Reel video clip for another one that we like more, on Instagram we have the possibility of putting a photo that we have taken or saved before doing the Reel in our gallery. For this, the steps to follow are the ones that we will indicate below:
Step 1
As we have explained in the previous section, the first thing will be to create our Reel. And depending on the type of Reel that we create, the process may vary slightly. At this point we remind you how to create Instagram Reels as we already showed you in previous chapters of the course:
How to make Reel with photos on Instagram
How to make Reel with videos on Instagram
Step 2
When we get to the last screen before uploading our Reel, we find the following. And here we will have to click on "Edit cover".
Step 3
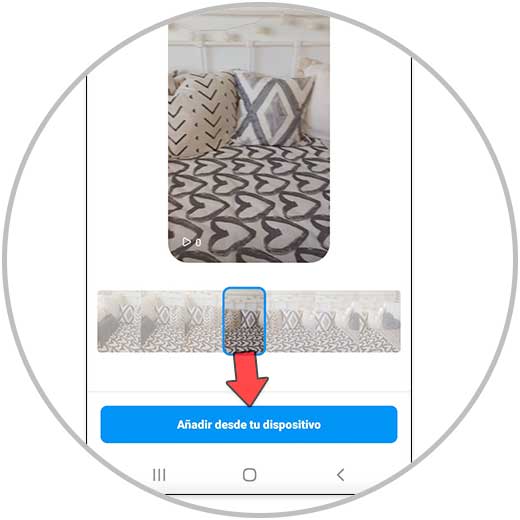
At the bottom of the screen, select “Add from your device”.
Step 4
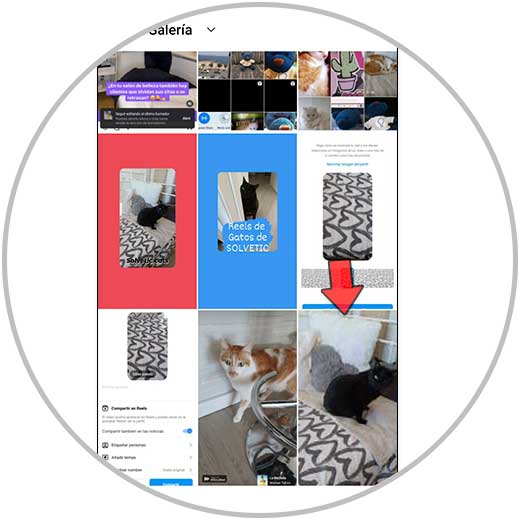
Here you will see the photos that you have saved in your terminal. Click on the one you want to put as cover.
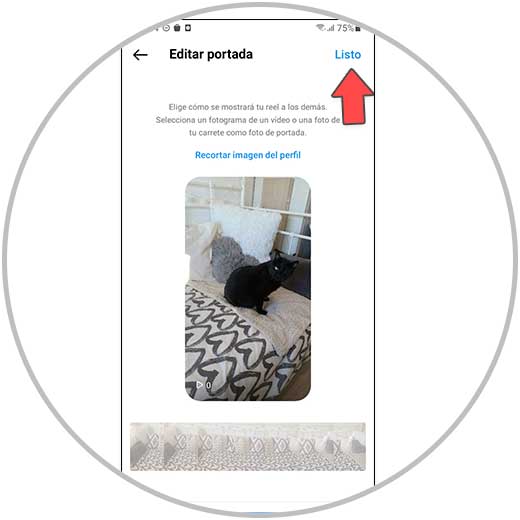
step 5
Once selected, press "Done" and you will be done. So you will have put this image as a cover photo in the Reel.
4 How to make custom cover for Reels
If instead of putting a photo from the gallery, you want to put a personalized photo, you can create it from Instagram Stories. The advantage of this is that you can add an image and text from here and customize the cover to your liking without the need to use applications outside of Instagram.
For this, the steps that you will have to follow are the ones that we are going to explain below:
To stay up to date, remember to subscribe to our YouTube channel!
SUBSCRIBE ON YOUTUBE
Step 1
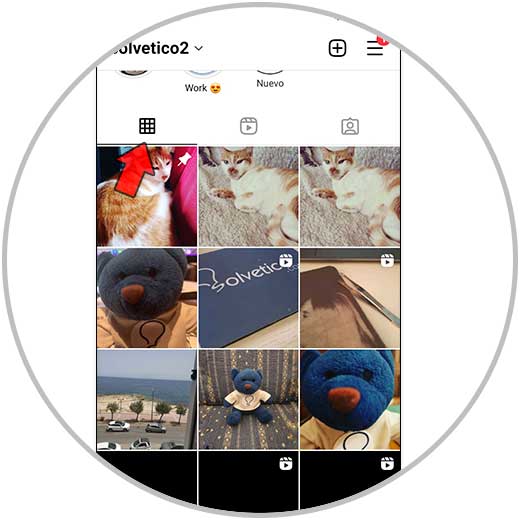
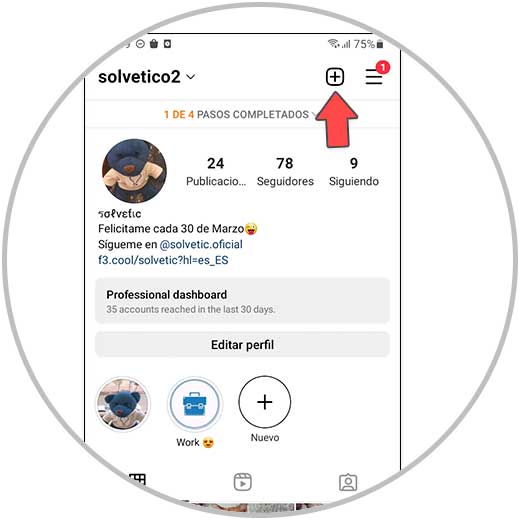
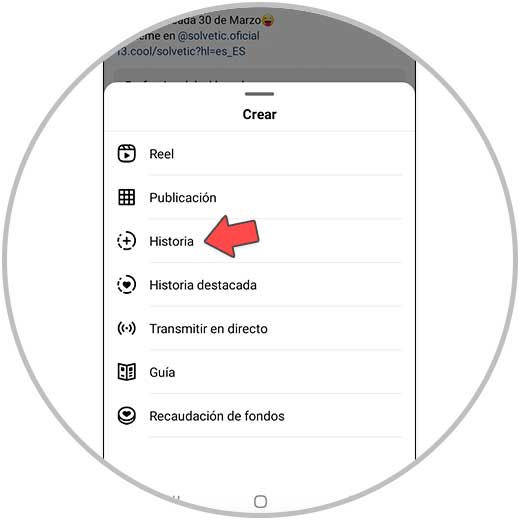
From your Instagram profile, click on the “+” icon in the upper right corner.
Step 2
In the options dropdown, select “History”.
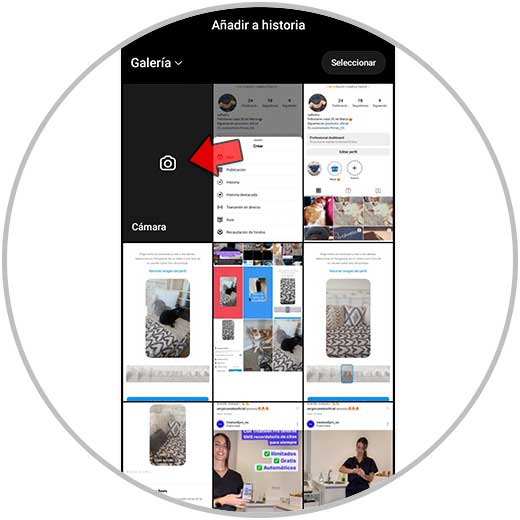
Step 3
Click on camera and take any photo. It doesn't matter as none of this will appear on the cover.
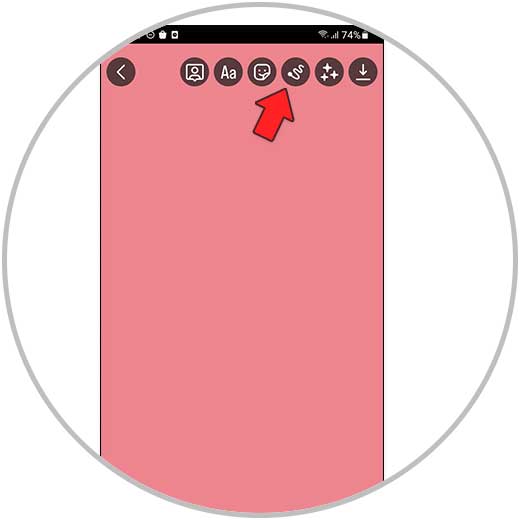
Step 4
Put the background color you want for the cover of your Reel. To do this, click on the line icon and choose the color. Hold down the screen and the whole background will turn this color. Confirm at checkout.
step 5
Now add an image to the cover that you must have already saved in the gallery. To do this, click on the “Stickers” icon and select “+” (add image). Place the image on the cover of the Reel.

step 5
The next thing will be to add the text to the cover. Here you have all the information on how to do it:

Note
You can add more elements, but remember that it must be clear and that at a glance the viewer must have an idea of what the content of the Reel will be, so you should not load the cover too much.
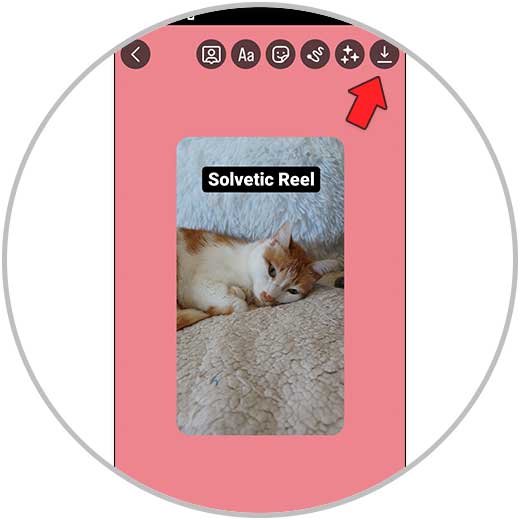
step 6
Now, to download the cover of the Reel to your gallery, click on the "Download" button in the upper right corner.
Note
Now, to put it as the cover of the Reel, all that remains is to follow the steps that we have explained to you in section 3 of this chapter of the course.
6 How to edit Reels cover already uploaded
Once you've uploaded the Reel and selected a cover, this is not a final decision. That is, you can change the cover as many times as you want once the Reel has been published.
This is really useful when we want to change the appearance of the Reel, or when we see that it is not performing as well as we would like. On these occasions it seems quite useful to change the cover but for this we have to know the procedure to carry out. In this section we explain it to you step by step in the form of text and video:
To stay up to date, remember to subscribe to our YouTube channel!
SUBSCRIBE ON YOUTUBE
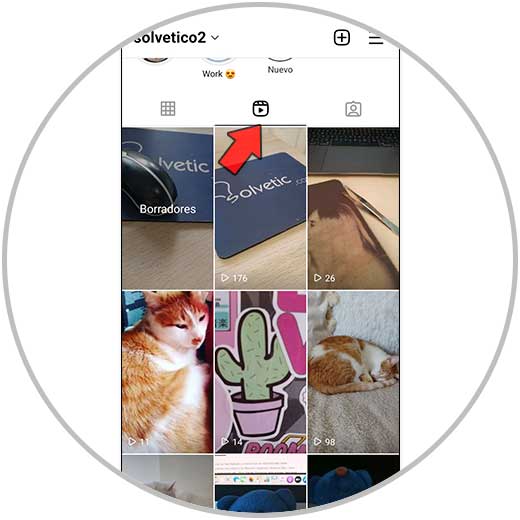
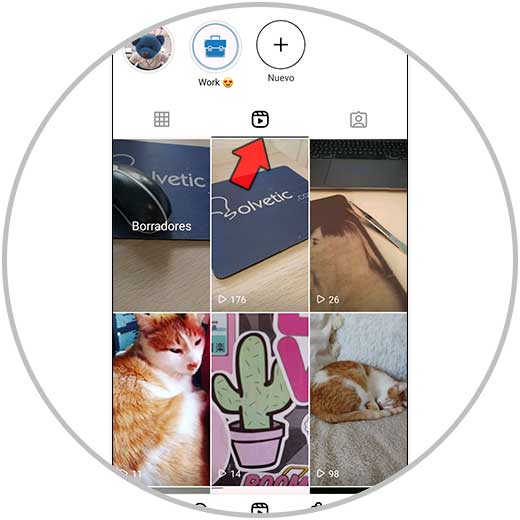
Step 1
From your Instagram profile, click on the Reels icon. Once done, click on the Reel in which you want to edit the cover.
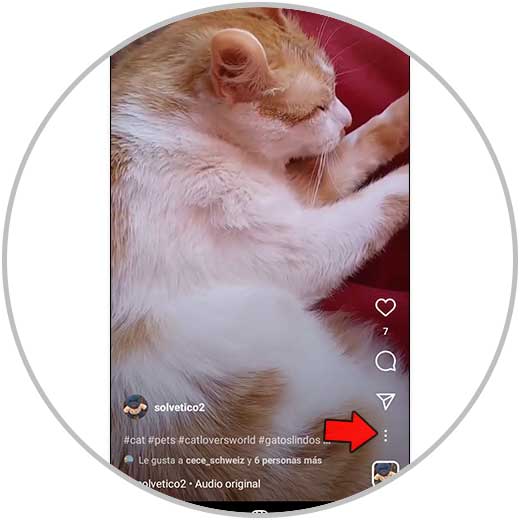
Step 2
Now, click on the 3-dot icon in the lower right corner.
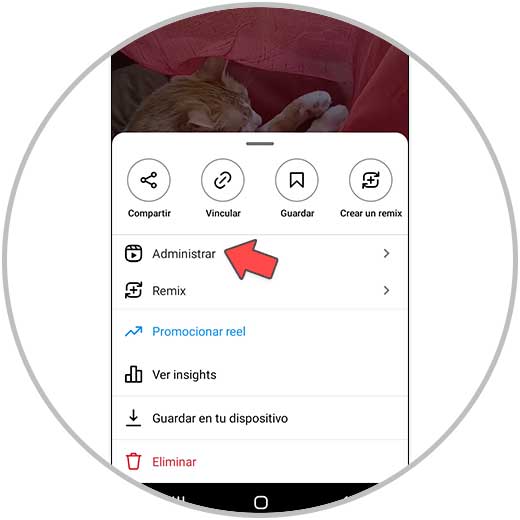
Step 3
In the options dropdown, select “Manage”.
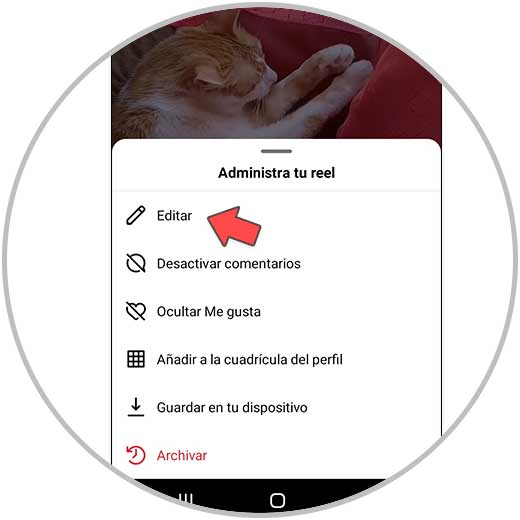
Step 4
Now, in the new options that appear on the screen, click on "Edit".
step 5
You will now see the cover thumbnail in the upper left corner of the cover. Click "Edit" again.
step 6
Now, to select the new cover, select a new video clip in the bottom bar or select an already saved image by clicking on “Add from your device”. Once you have selected the new cover image, press “Done”:
With this, you already know everything you need to know to master the creation of covers in Reels and know what elements it should contain, what is the ideal size and how to arrange them on the cover so that it looks good regardless of the Instagram section from which we are looking
You also already know the different ways to put covers and how to create your own custom cover in Reels. Observe how the covers of the Reels that obtain a greater number of views are like to replicate the arrangement of the elements, the font, etc.
Finally, you also know how to change the cover of Reels that have already been published, which is tremendously useful if this type of image no longer matches the rest of the elements of our profile or when we are not getting the expected results with our Reel. Now that you have mastered this aspect, all that remains is to get down to work and start putting the best covers for the Reels that you create on Instagram following the tips in this section of the course.