Lightroom Mobile is an ideal tool when we want to put our artistic skills into practice through the use of photography and video. Thanks to tools like this we will be able to expand our creativity and put into practice all those ideas that we have in our heads and that even without having it we will discover throughout the edition and its multiple possibilities. Lightroom Mobile is a perfect tool to be able to carry on our mobile devices and achieve editions with professional results without having to resort to more complex devices such as computers. If what you want is to show the world your artistic ability and express your vision of the world through the creation of attractive visual content, software tools like this will be a great ally for you..
Lightroom Mobile has a multitude of options that at TechnoWikis we are discovering little by little, thus allowing you to have in your hand the necessary elements so that your photos and videos have professional results. Having an application like this means being able to make exponential that vision of the world that we wanted to capture in an image, well, a specific moment within a video, and for this reason, knowing the Lightroom Mobile application in depth will allow you to put into practice and, above all, improve your creative skills. and artistic in The Audiovisual World.
When we are inside editing applications such as Lightroom Mobile, we have various options that will allow us to modify and adjust a large number of parameters that will directly influence our photo or video file and that will allow us to explore different results in function of our choices. But imagine that after trying various settings you come up with a configuration of light, color, effects... that you love and that you would like to apply to more images without having to make those editions one by one. This is where the concept of presets or presets comes into play, a very useful option that will allow us to generate editing profiles with specific parameters that we can then apply with a single click..
What is a Preset or Preset Adjustment
a preset a preset is a set of development actions or adjustments that we will be able to apply in one go without having to make manual configurations each time we want that adjustment. Normally, artists look for a style in which they feel comfortable and identified, which they will then normally apply evenly to their pieces and that is why you will see profiles of photographers where they have a predominant style. This is achieved by looking for a series of the same or very similar settings. they want that look of uniformity to all content.
Here, having our own presets or preset adjustments allow us that once we find a final style of development for our photographs or videos, we can store it and use it quickly at any other time. Although it is true that a preset that fits very well in one content does not always have to do so in another, there will be no problem since these presets can be modified manually. A preset will ensure that we do not start from scratch in our edition that we only have to make small final readjustments.
That is why today we want to teach you how to work with those presets or presets and that you yourself are able to save those that you like the most and that you want to use again at some point and even how to share them with other people or install presets that already exist and put them in our app. In this way we will learn how to use presets in Lightroom Mobile in a complete way.
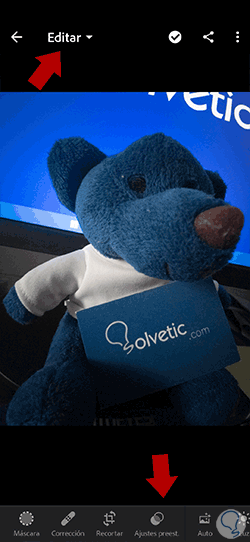
1 How to save a preset in Lightroom Mobile
The first thing we are going to want to see today is the creation of those presets or preset adjustments on our part. The Lightroom Mobile application includes a gallery of presets by default, both in its free version and in its premium version. This will make it easier for us not to have to start from scratch when we want to apply touch-ups to our photo and video files. Many times we do not need to have our own style to upload an image, for example, to social networks quickly and we just want to give it a different style than the original image. Hence, it is very useful to know these presets that Lightroom Mobile shows us in its application.
What we always recommend is that you constantly do tests that you investigate within the Lightroom Mobile application and you shouldn't because of its different options and menus, always finding a comfortable workflow where you feel identified with the results. In this case, we invite you to follow the steps to know how to create presets or preset adjustments in this tool and, even if it takes you some time, try to find a style that identifies you and that from now on can help you see, but a homogeneous appearance. to your creative pieces. Let's see how we can add presets to Lightroom Mobile or create Lightroom Mobile Presets..
Step 1
Being inside the photograph that we want to edit, we are going to make the different adjustments until we find a combination that gives us a style that we like.
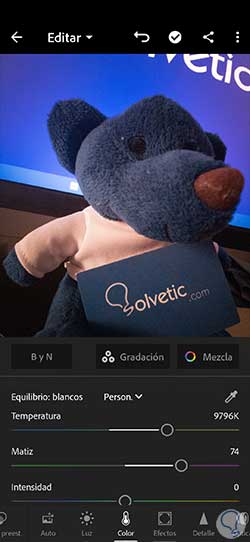
Step 2
When you have an established configuration that you like, we can create our preset. To do this, click on the three upper points of the drop-down menu.

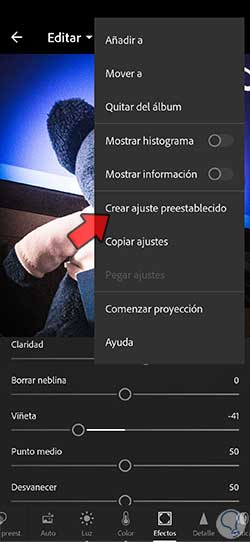
Step 3
Here we will choose “Create preset” from among the options that appear.
Step 4
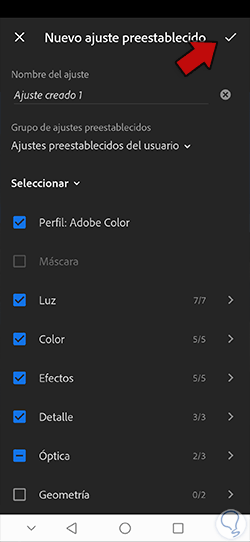
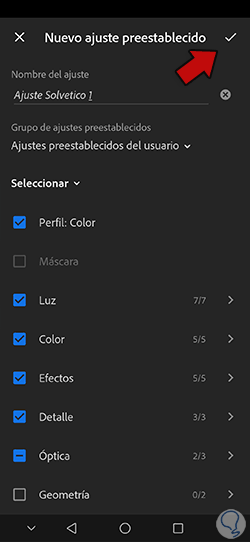
The next thing will be to give a name to this preset, select a group of settings or create one and also select which settings will go into the preset.
When you finish customizing, click on the upper check icon.
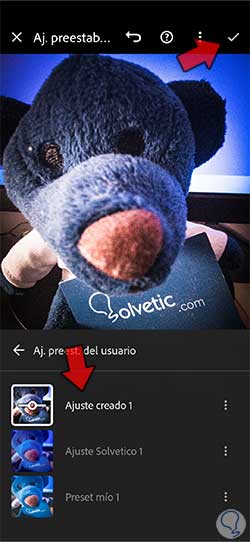
step 5
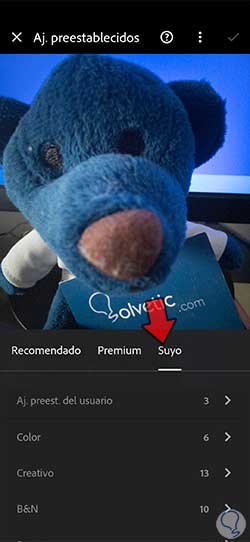
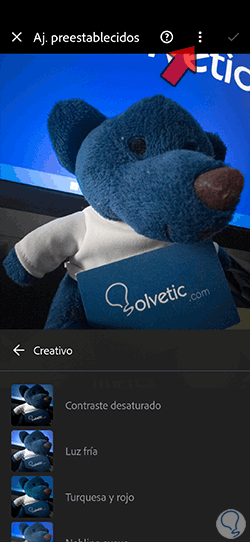
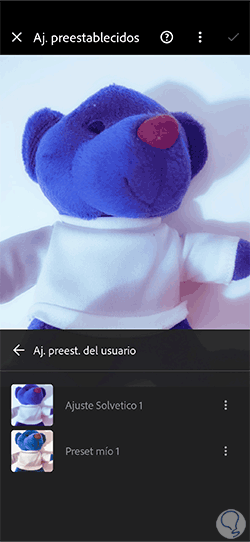
If you want to see your preset settings when you open any image, you will see the “Preset Settings” section below:

step 6
Within the "Yours" category we will have to click on the group of presets where we have saved the one we created before. In this case, within “Aj.preest. of the user”.
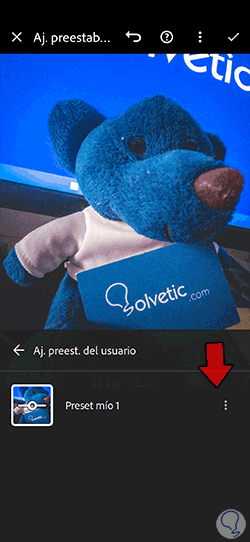
step 7
Here we will see the preset created and we can click on it to apply it to the image we want. Click on the upper check to apply the changes.
Note
Even though it is a preset you can still edit all image settings after applying it.
2 How to share Lightroom Mobile presets
We have seen how we can create our presets within Lightroom Mobile and thus have our own collection and catalog of development settings that we like the most to apply to our creations. Having a good collection of these presets will be very practical and useful, since it will facilitate your editing in time and effort, and your workflows will be much reduced. Not all your editions will be able to have the same settings with this attitude, but they will help you not to always have to start from scratch to do your editing work.
When you have a synchronized account within Lightroom Mobile, you can easily synchronize settings from one device to another where you have the application installed, but if this is not the case or you simply want another person to be able to use and see your presets, let's see how we can export these presets or presets and that you can use them on another device using Lightroom Mobile or share them with another person who also uses the same application. We will see that we will work with DNG files, so if you want to know more about it you can visit the official Adobe website:
DNG files
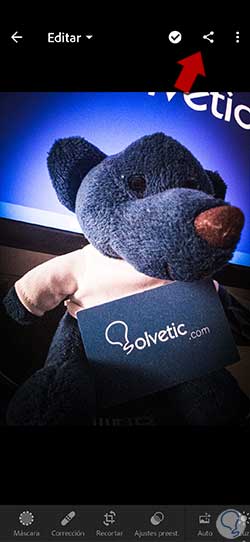
Step 1
We enter our image where we already have it ready with its editing or preset adjustment completed. What we will do next to share this preset is click on the upper share icon.
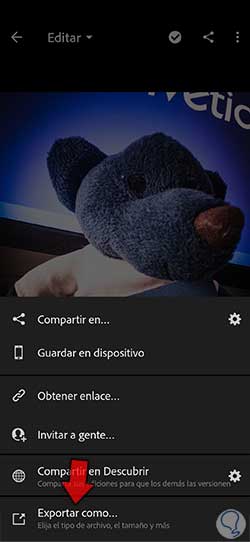
Step 2
In the drop-down menu that appears, click on the "Export as" option to choose the options:
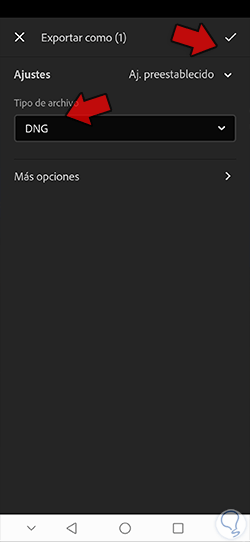
Step 3
Here we are going to choose in "File type" the DNG format to be able to export the image with its preset data.
We will apply the changes by clicking on the upper check.
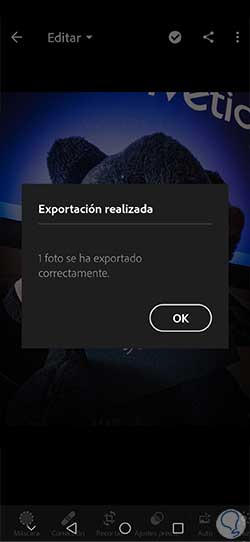
Step 4
We will see that once it is exported it will indicate that the export has been carried out correctly.
step 5
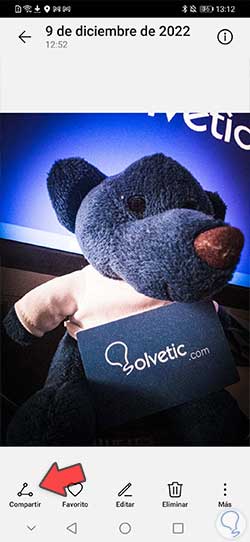
Once we have the export ready we will go to our file manager on the phone to search and find our image in DNG since surely this format will not appear from the gallery.
Once we find it, click on the icon that will appear for "Share"
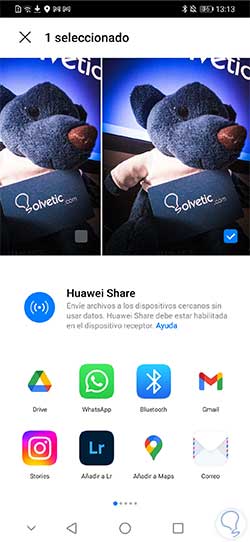
step 6
Then we will only have to select a method to share our image with the preset created.
Then we will only have to import or install the preset on another device or have the person to whom we have sent it do it. You can see what this process would look like in the following section on installing presets.
3 How to install presets in Lightroom Mobile
We have already seen how to create our own presets within our Lightroom Mobile tool as well as how to export it to take it to another device or share it with more people so they can see our creations. Although sharing is a good learning base within a community like Adobe's, I know that we advise you that once you find a style that you want to promote and even want to market, do not share its preset in full view of the world or do it knowingly that people will be able to see and use it.
In the end, working under presets is to use modifications that we or other people have made at some point and although they can make our workflow much easier, we must always try to add something personal to them to make them even more unique. If you have found a preset or preset that you like and that you want to add to your personal catalog, in this section you can learn how to install presets or presets that we can find on the Internet, in applications, from ourselves or from someone who has shared it with us. .
Let's see how we can import presets in Lightroom Mobile and thus create our personal catalog of presets within the application.
Import presets from Lightroom Mobile Menu
We will use this option when our presets normally come in a compressed file, although it can also be a file only. These types of presets or presets are used more in the PC version, but we can also use them on the mobile, although it is not the most comfortable version to use.
If what you have is a compressed file, you will have to unzip it on your mobile device or, if you prefer, store it in the cloud. Use any free app you can find in your store to unzip it.
Unzip on Android
Now we are going to open the photo that we want to edit or any other that you prefer. You can go to the folder or album where it is imported or import it from the lower icons for it.
We check that when opening the image we are in Edit mode. You can see it in the upper drop-down options of the image.
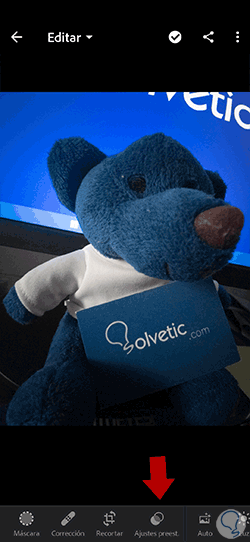
Once here we will click on the "Presets" option at the bottom of the options bar.
The next thing will be to go to the top to see a drop-down menu represented by three points, click on it.
Here we will find the option "Import presets" where we will have to click.
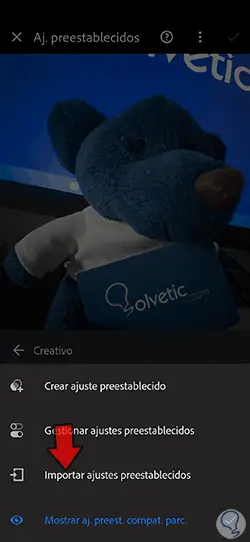
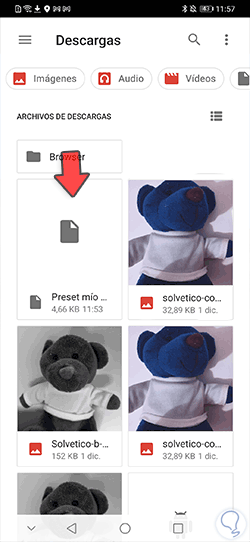
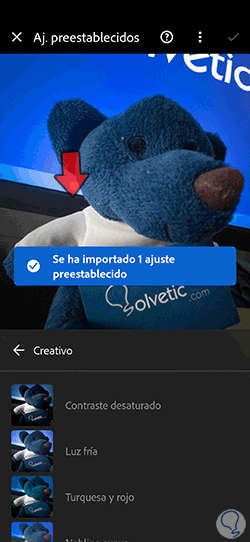
Clicking on this option will open the file manager of our phone. We will only have to search for the preset settings file that we have unzipped or that we have transferred to our phone and click on it.
We will see that the preset or preset that we have selected is imported.
Now we click again on the lower option of "Presets" of our image.
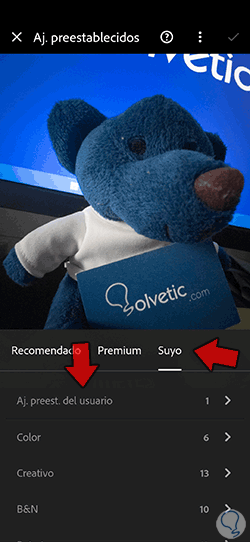
We will see that we have different sections or categories. In this case we are interested in the one called “Yours”. Inside here we will see the created category of “Aj.preest”. of the user”, click on it.
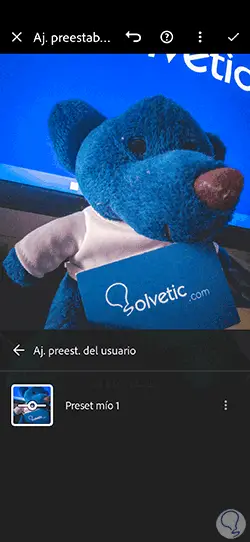
Here we will find our created or imported presets and we can click on it to apply it directly to our image.
Import presets from Photo Lightroom Mobile
Another option when importing some presets is to do it with an image that has been exported as we have seen in the previous section. By passing it to a Lightroom Mobile application we will be able to see and save its configuration. This option is perhaps the easiest to be able to import and export presets from the mobile version of Lightroom, so it is the most recommended, although not the only one as we are seeing.
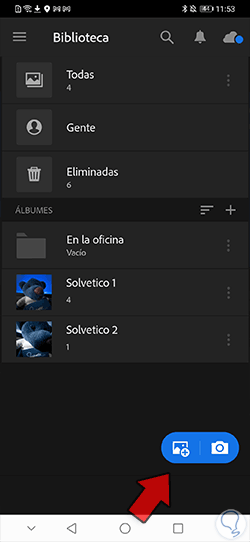
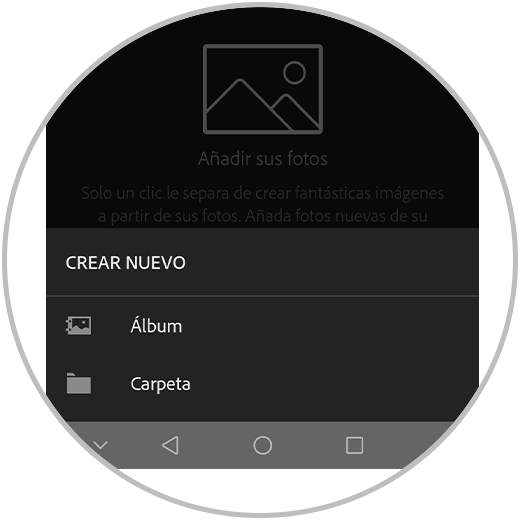
We are going to recommend that for this type of import you always have a specific album where you can import the images that contain presets or preset adjustments. To do this we go to the initial screen of Lightroom Mobile and click on the "+" button to add a new Album or on "New element".

Now we will choose the "Album" option to create a new one.
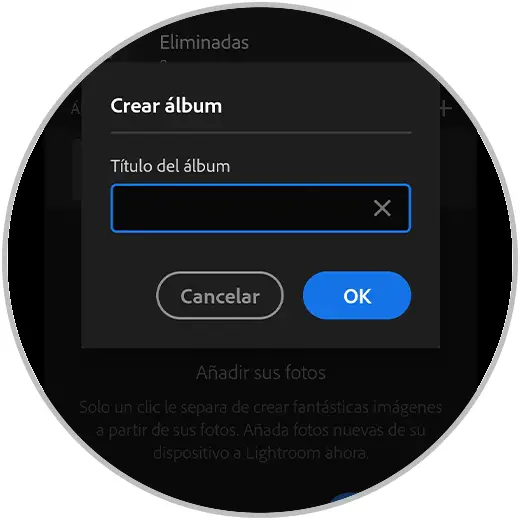
We will give it a name such as "Presets" and save changes with the "OK" option
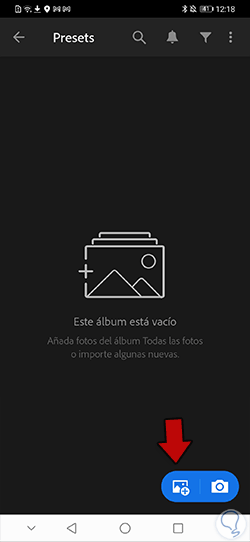
Click on the new album created. Here we are going to click on the add photos icon that we see at the bottom.
We will now choose a source for the import based on where our photo is with the settings. In this case, as we have it in the Drive cloud, we are going to click on “Files”.
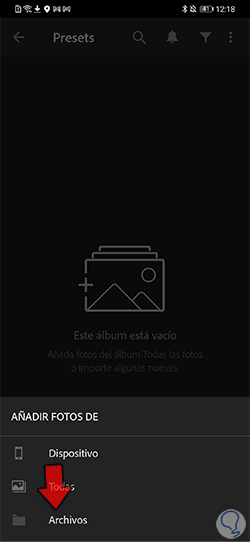
We look for our file with the presets that is in DNG format and click on it to import it.
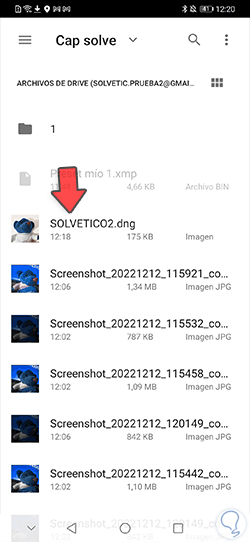
The image will be imported and will appear in our newly created album.
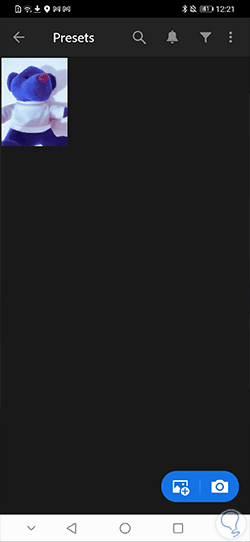
Now click on the image to open it in “Edit” mode. Here we will click on its upper three-point drop-down menu:
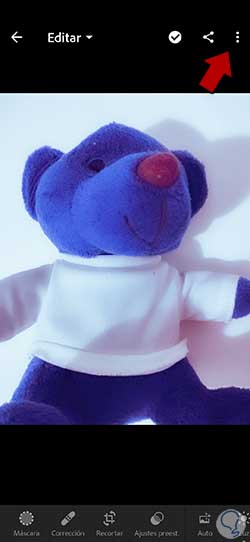
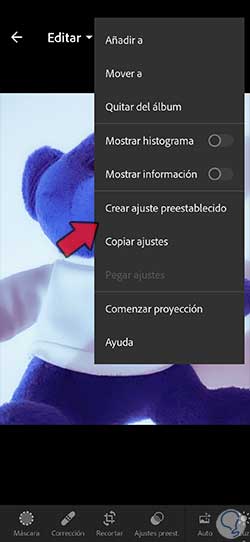
Here you could use two options. The first would be to use the "Copy settings" option and then paste them into another image whenever you need it. The second option that we recommend if you want to store this preset is to click on the "Create preset" option.
In the next window we will only have to give a name, choose the group of settings and select which one will include this preset.
When you finish, click on the upper check box for confirmation.
Once stored, we will be able to see the preset created within the group that we have chosen to save it.
We have seen how we can manage our presets in Lightroom Mobile and thus be able to have our personalized catalog of presets. In case at any time you need to delete a preset created or imported, we also leave you the way in which you could delete a preset in Lightroom Mobile or change its name if you need it.
Delete or rename Lightroom Mobile presets
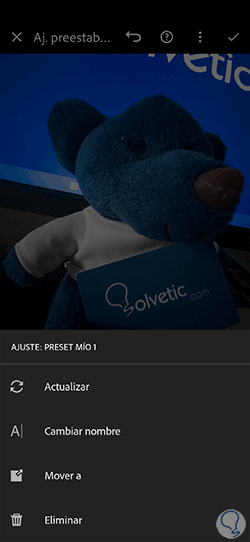
If at any time you need to remove a preset that has already been created from your list or manage it, such as moving it or changing its name, you just have to go to the “User preset settings” section and click on the three dots of your preset.
Here you will see different options of your preset where you can manage it and among which it will appear to delete it with "Delete".
In this way we will be able to install, save or export a preset in Lightroom Mobile and have our favorite presets to speed up our photo and video editing tasks.