Lightroom Mobile is a mobile photo and video editing tool that will accompany you throughout your creative process from taking a photo or video recording to its professional editing that will allow you to export it with the best possible settings. Although many times when we look through the lens of our Camera it seems to us that we are taking the best photographs and videos, once we start reviewing all that material we see certain defects that do not quite convince us and we feel a little dissatisfied with the result. Hence, complete tools that allow us to conscientiously edit our content are necessary if we want good results in our work. One of the problems that we can often find is that our image is out of frame and has not acquired the proportions and composition that we initially thought we had configured. The good thing about post production is that it will allow us to restructure the appearance of our photography and even adapt it to the final needs of the publication, because depending on the proportion that our image has in the end, there are things that fall within our frame or that should remain. outside. Lightroom Mobile is going to allow us to be able to modify all these aspects in a complete and satisfactory way, thus correcting the rotation angle of our image, as well as its rotation position. The good thing about post production is that it will allow us to restructure the appearance of our photography and even adapt it to the final needs of the publication, because depending on the proportion that our image has in the end, there are things that fall within our frame or that should remain. outside. Lightroom Mobile is going to allow us to be able to modify all these aspects in a complete and satisfactory way, thus correcting the rotation angle of our image, as well as its rotation position. The good thing about post production is that it will allow us to restructure the appearance of our photography and even adapt it to the final needs of the publication, because depending on the proportion that our image has in the end, there are things that fall within our frame or that should remain. outside. Lightroom Mobile is going to allow us to be able to modify all these aspects in a complete and satisfactory way, thus correcting the rotation angle of our image, as well as its rotation position..
When we are inside the cropping interface of our Lightroom Mobile tool, we are going to find different possible options when it comes to reframing our image in a personalized way. This will allow us to rectify possible orientation problems in our photography that we have not been able to do well or that we have not noticed. Among the possibilities that we will find in the Crop and Rotate tasks are the following:
Lightroom Mobile Cutout Panel
- proportions. Here we can choose the aspect ratios that our image will also apply to the crop.
- Locked. Clicking on it will prevent a configured aspect ratio from being applied when cutting.
- Straighten. It allows us to straighten our photograph.
- Rotate. Every time we click on our image it will rotate 90 degrees.
- Flip H. It will flip the image horizontally.
- Flip V. It will flip the image vertically.

Next, we are going to see how we can rotate a photo in Lightroom Mobile and thus rectify the framing of our image completely from a mobile device such as a smartphone or tablet.
To stay up to date, remember to subscribe to our YouTube channel!
SUBSCRIBE ON YOUTUBE
How to Rotate Photo in Lightroom Mobile
The Edit panel within Lightroom Mobile we will be able to find different possible options with which to change the appearance of our photographs. And it is that many times when we take the photographs they do not always have the final appearance that we are looking for and that can end up ruining the artistic purpose of our work. That is why having tools within our reach even on mobile devices such as Lightroom Mobile helps us to correct the different aspects of our visual content, even generating professional final positions. 1 of the elements that we can find that does not convince us in our photographs is the subject of framing. And I know that within our composition the framing that we select will be a fundamental part in the sense that we want to find with all of this.
Many times we are taking the photograph and we go to a frame that we like through the objective, it will be there when we press and make our image. But we can find that the result is not what we expected and the image has come out crooked as the one provided within that frame that we had visually established. Well, a lot of care and methodology that we apply when taking our photographs, it is very likely that there are always aspects that we can improve and that is why a good subsequent edition can exponentially enhance your results..
Having a badly framed image can be a problem since it is not only not showing what we want, but even that framing configuration is not attractive at all. For this reason, knowing alternatives that allow us to reconfigure that position of the image within a certain proportion redirect our work towards the idea that we had established. In this sense, the Lightroom Mobile application will allow us to have different cropping and rotation options to frame our image and rotate it according to our needs, thus solving possible framing problems that we have encountered.

Step 1
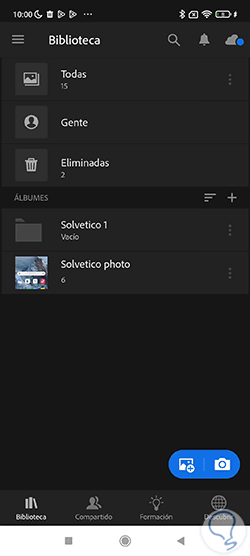
The first thing we will have to do is find the image we want to work with. That is why first we will find the main interface of Lightroom Mobile. Here we will enter any album or folder where we have our image to edit.
Step 2
If you do not have it imported, you can also do it from the lower icons that appear in any album or on the main screen. You can import an image or do it directly with the camera.

Step 3
Once we have the image with which we want to work imported, we will have to click on it directly.

Step 4
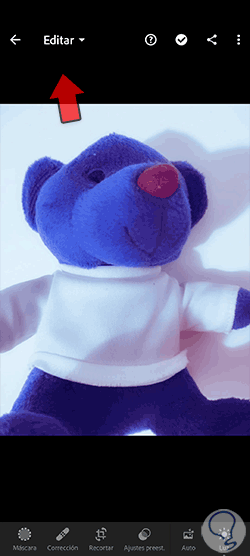
Once we open it, we make sure that we are in the "Edit" mode of our image from the upper right drop-down icon.
step 5
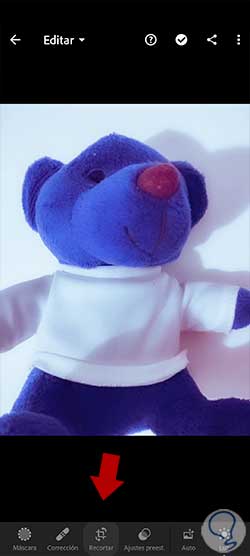
Now we will look at the lower panel of options that we have and we will look for the option called “Crop”. We will click on this option to be able to edit our image:
step 6
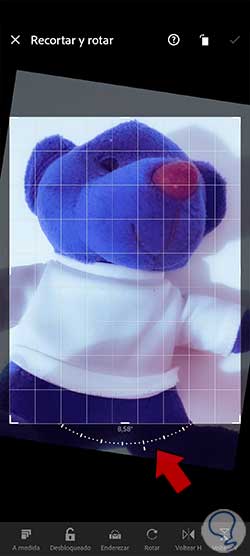
Here we will see that the mode of our screen changes since we are in the "Crop and rotate" mode.

step 7
To rotate our image within the bounding box you will see that you have a curved slider based on degrees that we can move with our finger from right to left. We will rotate the image based on specific degrees of rotation, including a margin between -45 to 45 degrees.
We will see that our image will rotate and we will see the visible part within the established proportion box..
step 8
If you want to rotate the image 90 by 90 degrees we will use the lower option called "Rotate". Each time you press it will rotate the entire image 90 degrees apart.
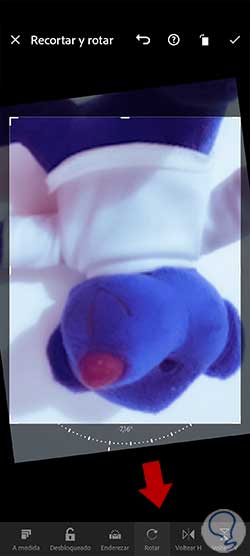
step 9
If what we are looking for is to rotate the image in mirror mode, we can use the Flip options both horizontally and Flip vertically. The image will be rotated to flip it horizontally or vertically.
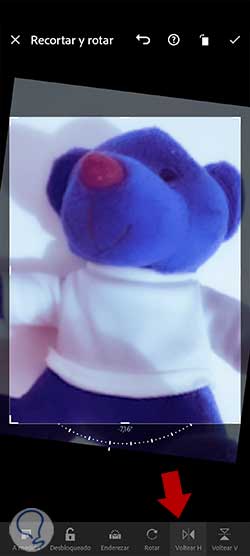
step 10
If at any time you need your image to be able to be straightened with a more square position, you can press the "Straighten" option and your image will be placed proportionally on the screen.
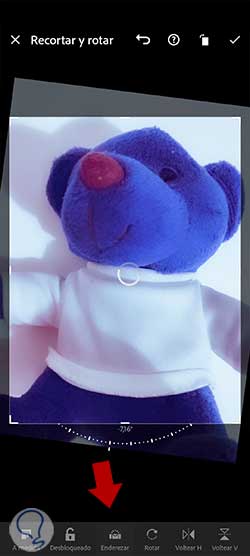
step 11
If you also want to change the proportion with which the appearance of the final image will be cropped, you can click on the lower left icon to be able to Customize the proportion.
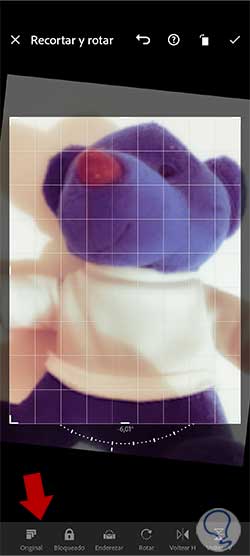
step 12
Here we will see a list from which we can choose the proportion that we prefer for the cropping of the appearance of our photograph.
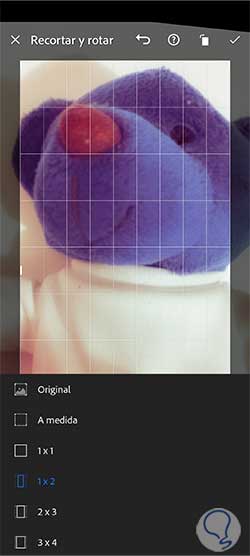
step 13
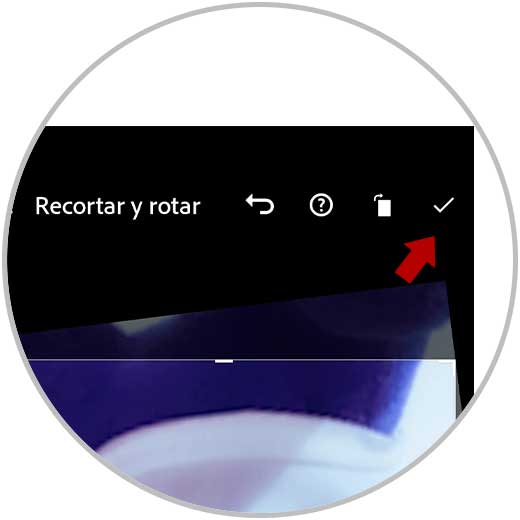
When you finish, click on the upper right check box to apply the crop changes to your image and be able to continue editing it with the rest of the options.
In this way we will be able to rotate our photography in Lightroom Mobile and thus give it the final appearance that we want according to our needs. You will no longer have a problem in rectifying those bad turns and positions that sometimes appear when we take our photos without realizing it, since you will be able to edit it completely with the Lightroom Mobile tool.