Instagram Reels are one of the sections within the application and social network that has the most editing tools; and therefore, when we create a Reel there are many customization options to make it unique as well as striking and attractive in the eyes of the person who is looking at the other side of the screen..
One of these customization options and the one that occupies this section are the transitions, and that is why we are going to explain here in detail what they are and what they are for within the Instagram Reels.
What are Instagram Reels transitions?
As you already know, Instagram Reels are made up of several short videos or clips that alternate throughout the Reel. In this case, the Reels transitions are a way to unite these clips that make up the Reel in an attractive and striking way through an effect that is practically imperceptible to the eyes of the receiver.
Including transitions in your Reel, either by making them yourself or by including the ones provided by Instagram itself, makes the created Reel much more exclusive, and it will attract much more attention from the person who is looking at having changes of a clip to another, which often gives the sensation of doing "magic"
These Instagram Reels transitions can be of two types: The first type would be that of adding the effects that Instagram offers us within its application to make separations between clip and clip of the Reel. The second type of transition, very popular on Instagram, would be to make a gesture that ends when one clip ends and begins when the next one begins, so that when playing it and watching it often, you notice a change in the Reel in general that calls the attention. attention in the eyes of the user..
In this section we are going to talk about both types of transitions. In this section we will delve into how to put transitions in Instagram Reels (of those that are made by default to add between the clips of a Reel) and we will also explain how to make transitions in Instagram Reels (movements at the end of a clip and the beginning of the following in Reels) and examples.
1 How to put transitions in Instagram Reels
There are many editing options offered by the Reels application, and one of them is the transitions that are predetermined in the application and that we can add to separate the different clips of a Reel.
These transitions will be about different effects that the camera does and that we can add to our Instagram Reels when they consist of different clips to separate them. The Instagram application within its Reels section offers us the following transitions already created by default:
Zoom
It would be an effect of the camera in which it would zoom in quickly.
blur
In this transition, the camera blurs the camera and then refocuses.
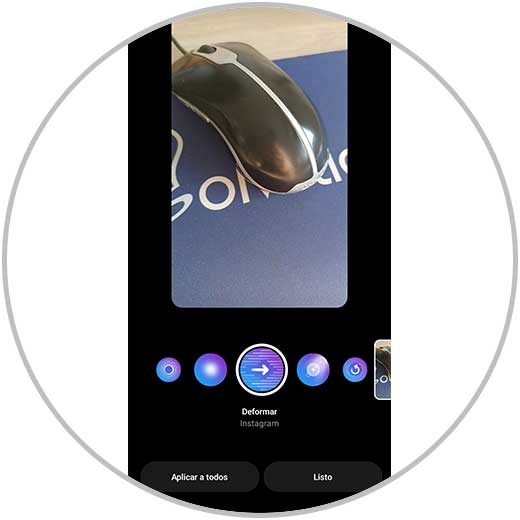
Deform
In this transition, the image is warped as the camera quickly moves to the right, then back to the same point.
Flash
In this transition, the camera does like a photo "Flash" effect.
Spin
In this transition, the camera quickly rotates 360 degrees on itself to return to the same position.
Distortion
In this transition, the camera glitches back to its normal state.
Now that we have explained to you and you know the different transitions that are by default within the Instagram Reels section, you just need to know how to add them to your Reel, and we will explain this to you in detail and in the form of text and video below:
To stay up to date, remember to subscribe to our YouTube channel!
SUBSCRIBE ON YOUTUBE
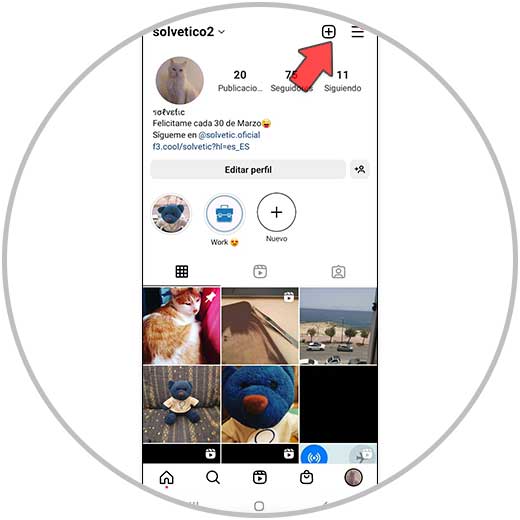
Step 1
The first thing we will do, within the Instagram application, will be from our profile, click on the "+" icon in the upper right corner of the screen.
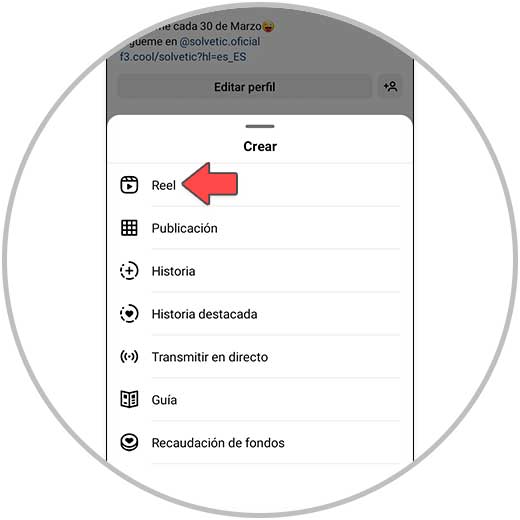
Step 2
Once done, among the available options, we select Reels.
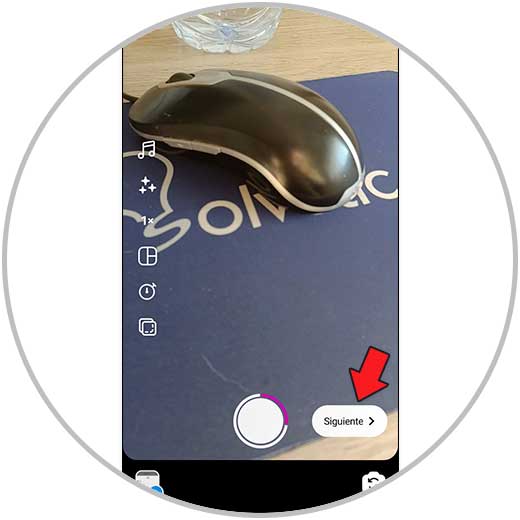
Step 3
Now, use the center button to record the different clips of the Reel. Once done, click on "Next" in the lower right corner.
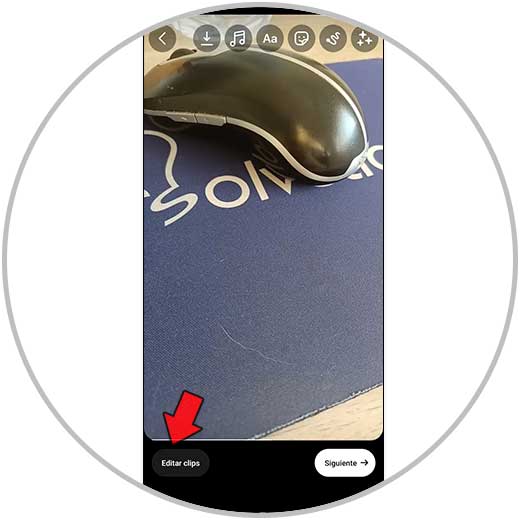
Step 4
Select “Edit Clips” at the bottom of the screen.
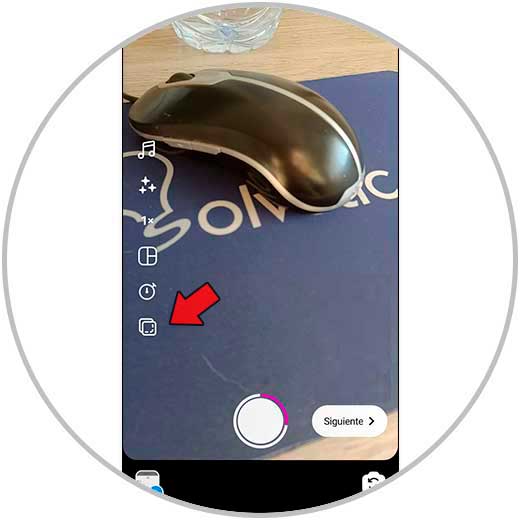
step 5
Now, you have to click on the “Transitions” option.
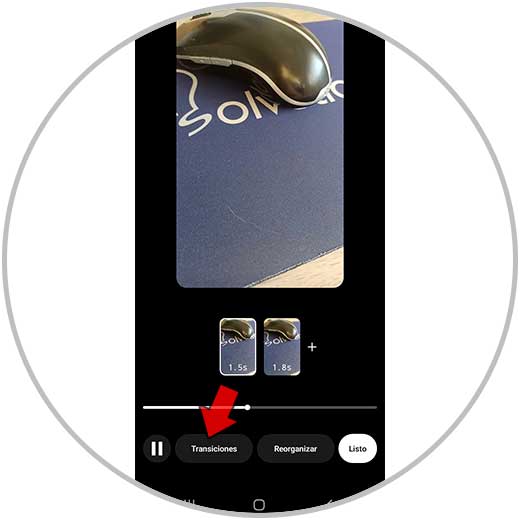
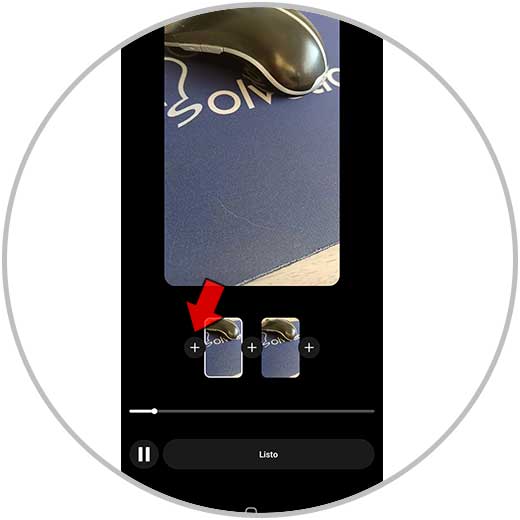
step 6
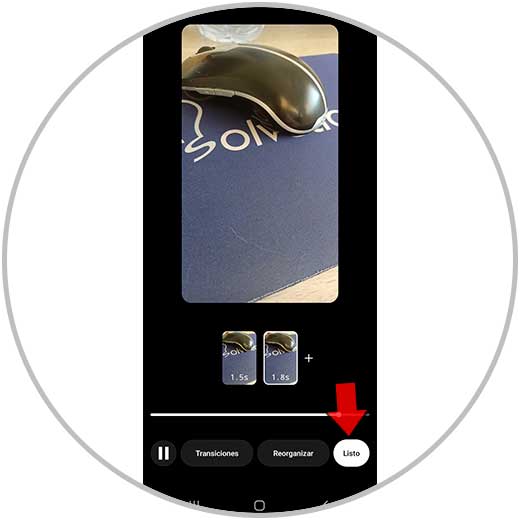
Between the different clips on the Reel, a “+” sign will appear at each place where a transition can be placed. Click on one of them to place a transition in this place.
step 7
Sliding to the left you can select between the following transitions:
When you have selected the transition you want to put, click on “Done” at the bottom of the screen.
Note
Repeat the process doing this to add transitions between each clip on the Reel. You can add transitions by pressing "+" between the different Reels although it is not mandatory, since you can also leave the space between clip and clip without any transition.
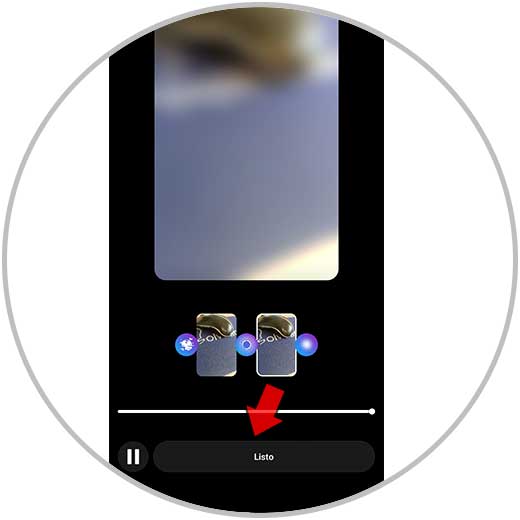
step 7
Once the transitions between the different clips of the Reel have been added, click on “Done” at the bottom of the screen.
step 8
Select “Done” again to continue.
step 9
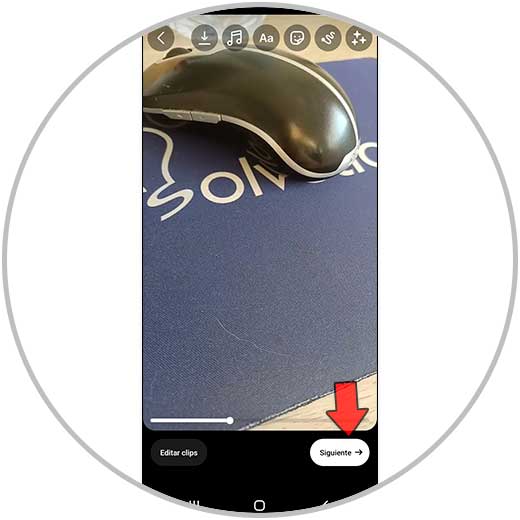
At the top of this screen, you will find the following options:
Add the effects you want to your Reel and once done, click “Next”.
step 10
Now, on the last screen, you can perform the actions of editing the cover, tagging people, etc... Once done, click "Share" to publish your Reel with transitions.

2 How to make transitions in Instagram Reels
The transitions that we have explained in the previous section are the ones that we can add from the Reels tool to make separations between the different clips of the same, but in addition to putting transitions, from gestures that we make during the end of a clip and the beginning otherwise we can make our own transitions in Reels.
These types of transitions, in addition to being super striking in the eyes of the people who are viewing our Reel, give it a much more elaborate appearance. In addition, when we create a transition ourselves, we are giving our Reel our hallmark, since even if different people make the same transition, it will never be exactly the same and therefore we will be giving a unique touch of personality to our Reel..
For this reason, it is worth knowing some types of transitions that you can do and that are succeeding in Instagram Reels.
Note
To do some of them, you will need a tripod since you will not be able to do them holding the phone with one hand. For this reason, for the creation of Reels it will become a great ally.
Keep in mind that some of the transitions that we are going to explain in this section are more basic and others have a more complex level of creation. Like everything in life, with practice you will be able to make all kinds of transitions in your Reels, and here we are going to show you some examples of the most used within the Instagram social network so that you can start practicing when you create your Reels within the social network.
Reach hand to camera
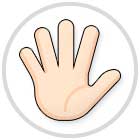
This is one of the simplest transitions, but at the same time the most used in Instagram Reels. It consists of bringing your hand closer to the camera until it is covered, and here we will just cut the clip. We will record the following clip that will begin by just uncovering the camera, but this time we will have changed our location, our clothing, the company….
This creates a very striking effect in a very simple way since the black fade of covering the camera makes a transition between both clips that make up the Reel. You can see an example by clicking this link:
HAND TRANSITION
Some examples of Reels in which you can make this type of transition with very good results are:
- Change of location (travel, vacation...)
- Being alone VS Showing up with a lot of people
Zoom an object to the camera
It is the same thing that we have explained in the previous example, but instead of covering the camera with our hand we will do it with an object: a book, a glass, a plane ticket... Anything that occurs to you and that is related with the second part of the Reel or what will appear in the second clip of the Reel.
The black fade of covering the camera with this object is what will create the transition in the Reel, but in this type of transition the object with which we cover has a fundamental role, since what appears before and after the transition must be related to this.
You can see an example at this link:
OBJECT TRANSITION
Some examples of Reels that you can make using this transition are:
- Use a glass and make before and after a toast
- Use a brush and do before and after makeup
- Use a plane ticket and do before and after traveling to a certain place
- Use a tool and do before and after assembling a piece of furniture
zoom in

This type of transition consists of making it during the first clip and cutting it when it is very close to a person or object, without what we are seeing being visible on camera. Here we cut the first clip and start recording the second clip with the same zoom but zooming out and showing a completely different situation than what was shown in the first clip.
Watch it in motion at the following link:
ZOOM TRANSITION
Some examples of Reels that you can create using this transition are:
- From the airport to the destination
- At home VS in a restaurant, a nightclub...
distort the image
To make this type of transition, we must make a quick and abrupt movement with the camera while recording with the aim of deforming the image and we just cut the recording of the first clip at this point. When starting the recording of the second clip we will do it by making the same quick movement in the opposite direction or even in the same direction, to later leave the normal camera and we can see the second part of the Reel.
You can see an example by clicking on the following link:
IMAGE WARP TRANSITION
Some examples of Reels in which you can apply this type of transition are:
- Same type of Reel in different locations
- Change location while walking
- Change clothes while we walk
Give a slap
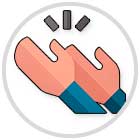
In these types of Reels, slapping will join the end of one Reel clip and the start of another. In this way, when reproducing the Reel, between claps and claps we will see changes in costumes, location, etc... It is a resource widely used to make transitions in Reels.
Here is an example to see it live:
CLAP TRANSITION
Some examples of Reels that you can perform with this type of transition are:
- Same action performed in different locations
Finger snapping
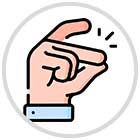
This type of transition that we are going to explain is very similar to the previous example explained, but in this case instead of clapping the clip changes will be made at the moment that the protagonist of the Reel snaps his fingers.
If you want to see an example, click the following link:
TRANSITION SNAP FINGERS
Some examples of Reels in which you can apply this transition are:
- All of the previous section
- Dressed everyday VS Dressed for a party
- change different locations
making a turn
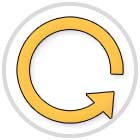
It is another resource to make transitions that is super used within Instagram Reels, and consists of making the first clip rotating 360 degrees and cutting just at the moment that we have made the turn. We will start recording the second clip of the Reel in a completely different situation but in the same way: Making a 360 degree turn on ourselves. This can also be done by doing a semi-twist on each clip.
In this example you can see it:
TURN TRANSITION
Some examples of Reels in which you can use this type of transition are:
- Show what is seen on camera VS what is not normally seen
- Show the same place messy VS tidy
Emulating a conversation with ourselves

In the first clip, we'll record ourselves showing the right side of our face and saying something. In the second clip we recorded ourselves showing the left side of the face and responding to the first clip. We can repeat this several times and the result will be the appearance that two identical people (which will be us) are having a conversation. It is another of the transitions that you can do most used in Reels.
See an example here:
CONVERSATION TRANSITION
Some examples in which we can use this type of transition in Reels are:
- Talk about curiosities that people do not know
- Give discount codes or tricks to save
toasting

This type of Reel consists of recording a clip and finishing the recording at the moment that we offer two drinks. The recording of the second clip is done in another totally different environment or landscape and ends when we toast another drink. Thus we can link all the clips of the Reel leaving a very striking effect.
See an example here:
TRANSITION TOAST
You can use this type of transition in Reels like:
- Show the same scene in different years: birthday, anniversary...
- Show different vacation stays
- Show something at the beginning VS at the end
Throw clothes on the floor and appear dressed
This type of transition is also super popular on Reels. In this type of video, the protagonist of the Reel must appear full-length. It consists of taking the different garments that are going to be part of an outfit and throwing them on the ground in front of us. Once you have thrown away all the clothes. In the second clip, the person will already be wearing all the clothes that she threw on the ground, creating a very original effect.
Look how it looks in this example:
TRANSITION CLOTHING
You can use this for Reels related to the world of fashion, such as the following:
- Daily dress VS Dressed for an event
- Bride and bridesmaids before and after
- How I dress on different days of the week
Leaving one site and entering a completely different one

For this, we will need a door, window, etc… located in the same place in the first and second clips. It consists of the first clip to leave a place and just cut here, in the second clip that we record we keep the situation of the door or window through which we have left but we enter a place that has nothing to do with it.
See the result in this link:
TRANSITION EXIT AND ENTER
You can use this type of transition in Reels like:
- Show different locations within a country
- Show different rooms of a house
- At the airport VS At the destination
Note
A trick to make perfect transitions and for the second clip to start just as the first one ended is to use the "Align" option that Reels offers us in its editing options.
Using this option you can create the perfect transition by following these steps:
1) Record the first clip of your Reel.
2) Use the "Align" option to fit the end of the first Reel exactly with the beginning of the second through the translucent image displayed with this option.
3)Once the image is embedded, the recording of the second clip begins.
In this video you will be able to see this process in motion, explained step by step, to learn how to use the "Align" mode in Reels to achieve perfect transitions:
To stay up to date, remember to subscribe to our YouTube channel!
SUBSCRIBE ON YOUTUBE
These are just a few examples of transitions, but surely on Instagram you can get inspiration for many more transitions to do. By clicking on the Reels icon and scrolling up you can see the Reels that people are posting right now and I'm sure you can think of more examples.
Remember that making transitions is a matter of practice and if they are not perfect at first you should not worry. With practice and the help of tools like the tripod you will get better results every time when creating your transitions for Reels.