Photography editing has been enhanced over time thanks to the inclusion and prominence of social networks. More and more people are looking to make a complete edition of their photographs to distinguish themselves from the rest and provide attractive content. That is why we will also see the continuous creation of tools that make this task possible, such as Lightroom Mobile. With this editing tool we will be able to make professional editions from our mobile devices at any time and the tools it provides are really interesting..
Color is one of the fundamental elements in photography and that is why it must always be taken into account since it can go from a supporting role to a truly leading role with just a few editing steps. With color we can achieve different effects on the end user and that is why we can try different shapes and styles with which to get our image to transmit in a different way. When we are creating our own content profile, we will normally look for a style that distinguishes us from the rest and here working on color will be one of the fundamental steps to achieve it.
If we talk about social networks, for example, now you have found content creators whose work is quickly identified thanks to very marked styles and this is thanks to making dedicated editions. That is why today in this chapter we want to tell you how you can change colors in Lightroom Mobile, thus making the overall appearance of our photography change completely or, if you prefer, only modifying the color of a specific area of the image. Whether you need a global color adjustment or a specific one, today we will show you the different options you have to change color from your mobile devices and thus achieve more professional and differentiating images..
Let's see then different examples where we will be able to configure the color of our photographs using Lightroom Mobile and achieving more personalized and original results. We encourage you to invest time in this process, thus finding results that can even identify your brand as a professional.
To stay up to date, remember to subscribe to our YouTube channel!
SUBSCRIBE ON YOUTUBE
1 How to change colors in Lightroom Mobile
The first option that we want to show you is the one that will make changes to the colors globally in your photograph. If you are looking to give an effect or configure a certain filter for your images in Lightroom Mobile, in this section you will see what options this application provides us to be able to customize the color in our images. In addition, this process will include two possible options, one in which we will change the color of the shadows and highlights of our photograph and another in which we can make an individual segmentation of each color and attack each of them in a unique way. This last option is really useful when we have a fairly defined color in our image that we want to customize without affecting the rest of the colors.
With the adjustments that we have within Lightroom Mobile we can be able to modify the general color of an image or only a specific area using the color configuration by different tones. This is useful since we can apply a unique style to our image if we work on the highlights, Shadows and Midtones or modify a color in the entire image only if we prefer. This allows us a very interesting edition of the color in our photographs and that is why we are going to see how to change the colors in general of our image..
Do not worry if the final color of your image does not convince you, since you can return to each of the settings at any time and make the changes you need without any problem. Due to the variety of possibilities that you have within the chromatic range, you can try different options until you like the final result.
change global colors
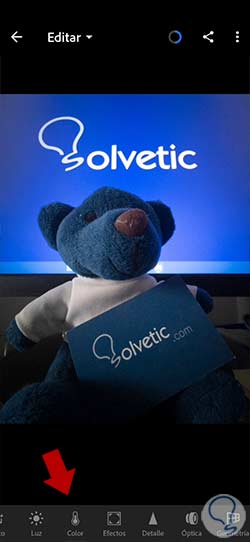
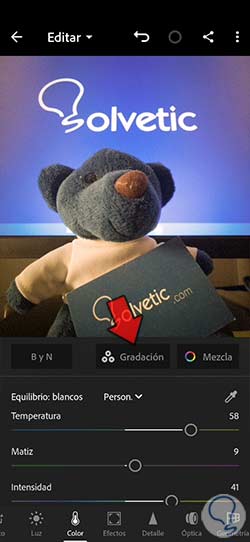
We are going to start working on our photography the color that predominates in the Lights and shadows of our image or colors individually. To do this, we open our image in Lightroom Mobile and click on the lower “Color” category.
We are going to start by adjusting the first parameters that we found for the color of our image and that will configure the overall color temperature of the photograph. To do this we are going to modify the parameters of:
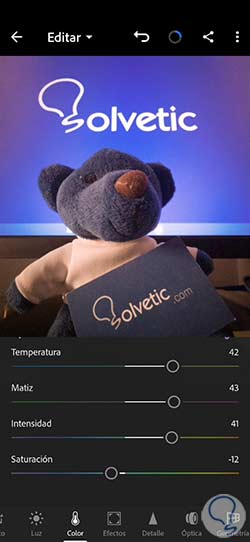
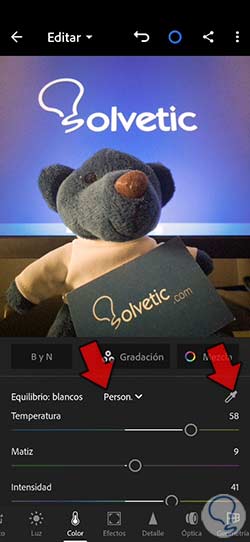
You can modify the white balance of our image through options in the dropdown that appears or using the dropper that is there. Then we will only have to click on a color or area of the image to use it as a reference color for the white balance.
We are going to continue editing the general color of our image and for this we will work on the shadows and highlights. To do so, click on the “Gradation” option that appears.
From here you can choose the option of "Shadows", "Medium tones" or "Illuminations" to modify the predominant color in each of them. Click on each icon to later modify the color with the color roulette that appears, manually configuring the Hue and Saturation.
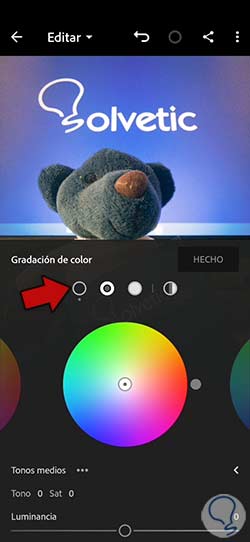
If you want, you can directly click on the “Global” icon and configure a specific color there according to the Hue and saturation chosen.

Apply the changes with “Done” when you are done.

When we return we will see our image with the general color completely modified. You can modify this again at any time by re-entering the same settings.

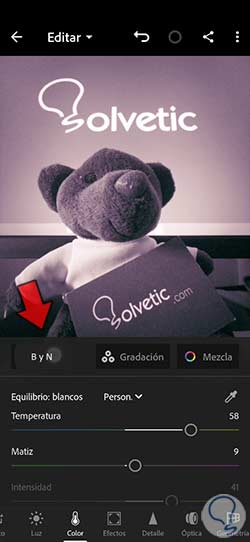
If what you want is to suppress the color information directly from your image, click on the B and W option and your image will turn black and white. If you press again you will return to color mode.
change specific colors
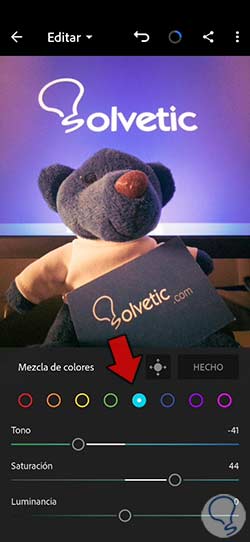
Another option that we can use to change the colors of our photography is to use the segmentation that Lightroom Mobile offers us. So we can work on a specific color if we want to give it a different look. For this we enter the section of "Color" again
Here we will enter the option that you see of "Blend" that Lightroom Mobile allows us to use in our configuration.
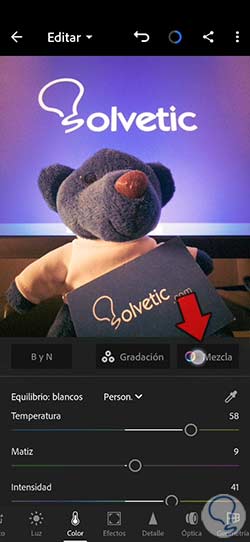
We will see a color segmentation that will allow us to only modify the color that we prefer without affecting the rest. For example, in this case we only want to work on the blue ones, so we can click on them and modify their three components using the slider:
- Tone. We can change the tone linked to the color.
- Saturation. We will be able to modify the vividness of the color that we select.
- luminance. With this we can achieve a color with more light or brightness or darker.
In this way we can only change the color that we want, yes, keep in mind that the color that you select will be changed but that it is present in the entire image. This option is useful when we have isolated or localized colors in the photograph that we want to modify.
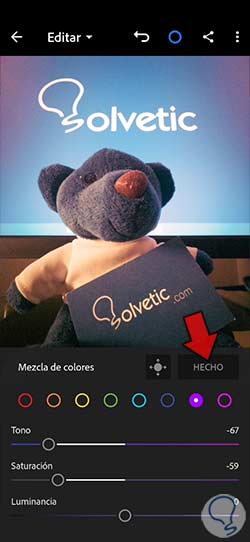
Click on “Done” when you have finished your color editing in your photo.
2 How to change the colors in Lightroom Mobile of a zone
It is possible that we do not want to affect the global color of our photograph and that we simply want to modify the color of a specific area or element of the image. In the previous section we have seen that with the segregation of colors this is possible, but it may be that it is a color present in several areas of the photograph and when we change it we are affecting various parts of the photograph. That is why there is a perfect option in Lightroom Mobile that will help us to work by areas in the image without influencing the rest, the Masks.
Imagine that you want to change the color of an object like a cap, but since it is blue and you use color segregation, you would also change the blue, for example, of the sky. You wouldn't be achieving the goal of just changing the color of that cap and hence working with masks is the smart thing to do in Lightroom Mobile.
Working on specific areas is quite useful in photo editing since on many occasions we need to make modifications in only one part and not make changes globally. Masks are the ideal vehicle to achieve local corrections, being able to make modifications such as the tone and color of specific areas with Lightroom Mobile.
The application gives us different mask options that will allow us to make automatic, manual or range selections as we prefer. In this case we are going to want to manually change the color of the shirt using a mask that only applies changes to this area. We will help ourselves using the brush option that Lightroom Mobile offers us.
Step 1
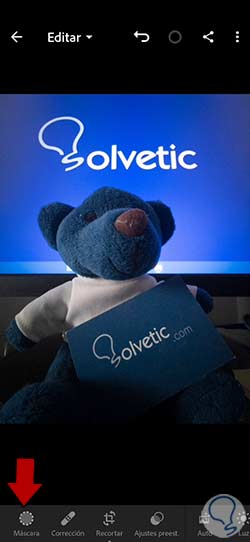
We are going to enter these editing options by clicking on the "Mask" tool that we will see in the lower panel of tools.
Step 2
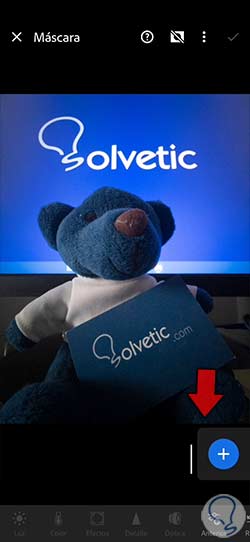
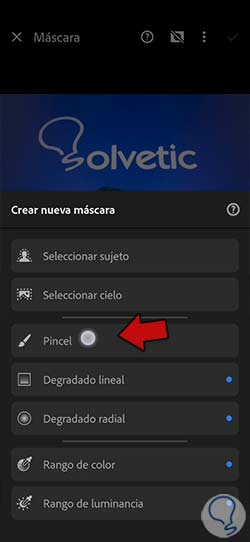
We start by adding a new mask and for this we click on the icon that we see of "+" and that consists of "Create new mask".
Step 3
We will now see a drop-down of different possibilities of working with a mask. Depending on the area that we want to modify, we can use one or another possibility. In this case, since we want to work on the t-shirt, we are going to use the “Brush” option.
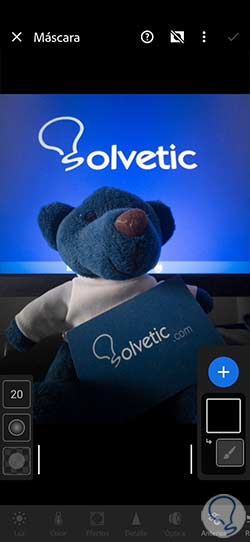
Step 4
We will now find two panels. On the right you will have the panel of your associated layer mask, being able to do actions on it and even create new additional masks.
On the left side you have the configuration panel of your brush from where we can define aspects such as: Size, Fade and Flow. Surely you need to change these values depending on the area where you are painting.
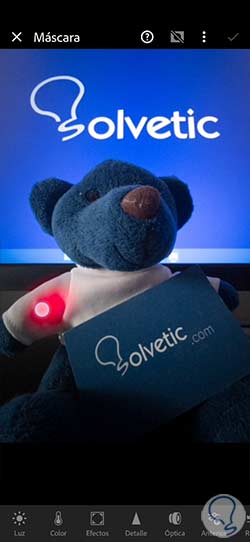
step 5
Once our brush is configured, we can paint over the area that we are interested in modifying. As you will surely change to more or less difficulty, you can change the settings of your brush from the panel that we have indicated.
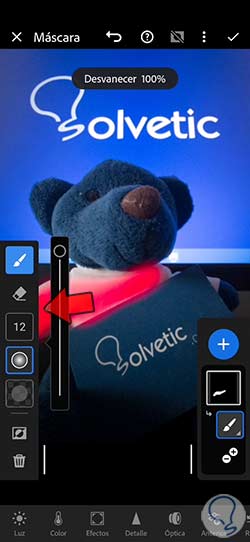
step 6
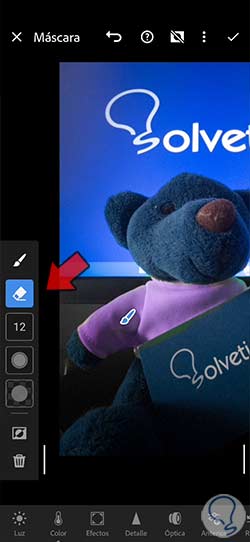
If at any time you have to rectify an area painted with your mask, don't worry because the configuration panel of your brush offers you the Eraser option to eliminate parts that you have painted.
step 7
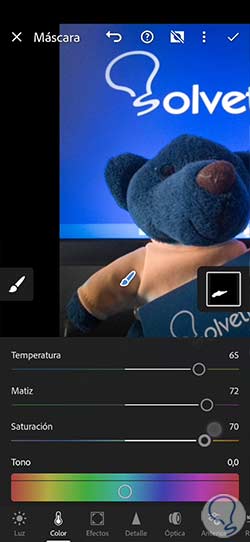
Once we have our area defined, we can begin to make the changes we want. In this case we want to modify its "Color" so we click on that option at the bottom.

step 9
From here we will be able to modify the different color parameters that appear to modify the color of the area that we have defined with our mask. We see moving the different regulators.
step 10
As it is a mask made by selection with a brush, we can return to its options panel and make changes to it, such as painting more area or removing some if we need it, thereby rectifying the mask.
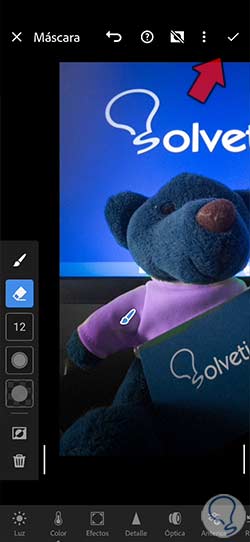
Once we finish our edition, we will click on the upper check to apply the changes. Remember that you can not only make color changes but you can use other lower adjustment options if you want to apply more settings to your selected area.
We will already have our photograph with the colors changed only in the area that we wanted to change. This way we will avoid making changes to the entire image and have a well-defined area of action.

We propose other additional options so that you can change the color in Lightroom Mobile and that will help you with your learning in the tool:
Color profiles in Lightroom Mobile
How to Change the Color of Clothes in Lightroom Mobile
Change Sky Color in Lightroom Mobile
Enhance Color in Lightroom Mobile
With these different options we will have been able to change the color completely within Lightroom Mobile, thus ensuring that our edition adapts to the needs. The variety of Lightroom Mobile options will be a valuable tool to make changes to our photography in a professional way.