The use of videos is something that we often do when opening users in Windows 11 for various tasks from our work to personal and one of the characteristics of the videos is their size, this depends on the type of content as well as the file extension but There are other factors such as the format used, the audio quality, etc., that have an impact on the size of the video. TechnoWikis will explain how we can lower the size or weight of a video but without affecting its video, audio and playback quality..
If we have very large video files, we will end up filling up the storage unit where we have it stored faster and it will be more expensive to transfer it since it will take longer. Many times we need to send a heavy video by means such as mail or WhatsApp and if it is too heavy it will not leave us or it will take too long. That is why it is really useful to know how to compress or Weight Down a Video without losing Quality.
To stay up to date, remember to subscribe to our YouTube channel!
SUBSCRIBE ON YOUTUBE
How to lose weight of a video without losing quality
Step 1
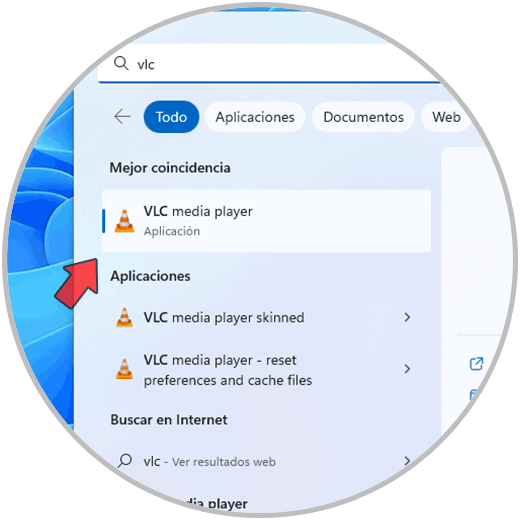
For this process we will use the VLC utility which we can download for free at the following link:
VLC
Step 2
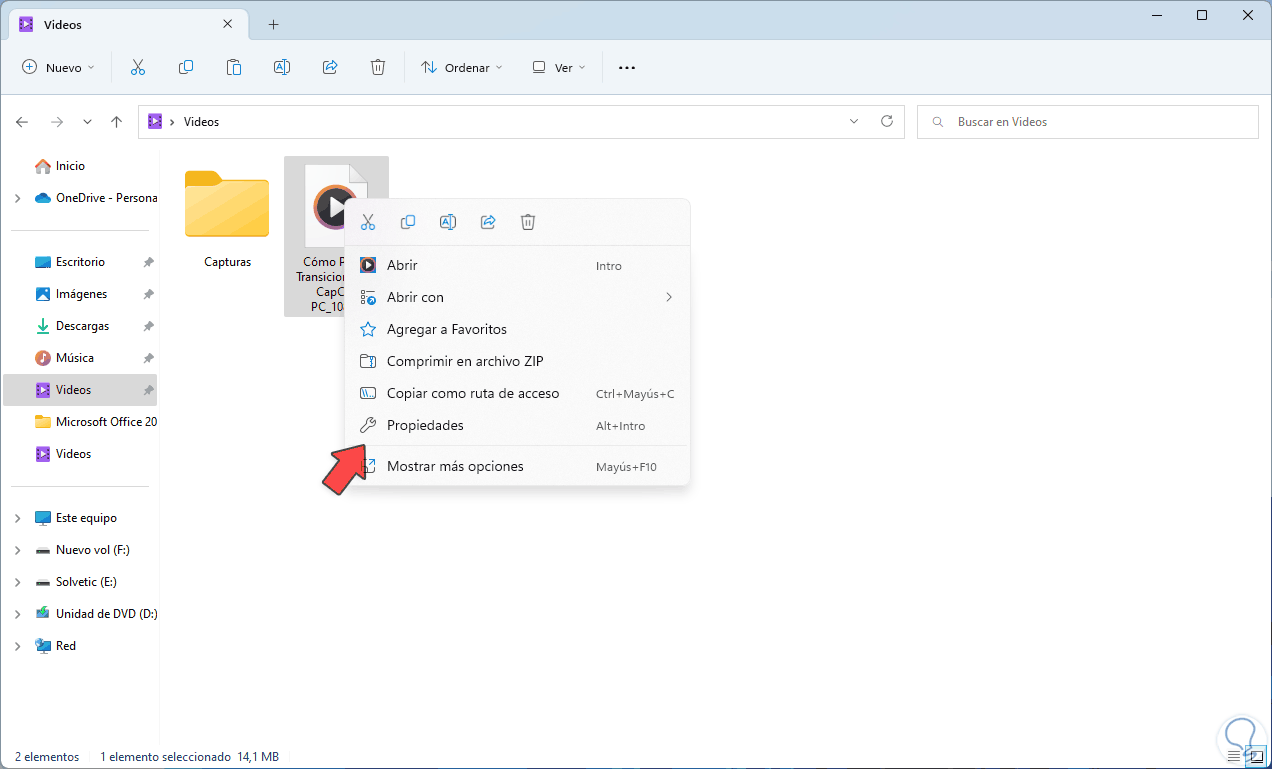
Open File Explorer, right click on the video and then click on “Properties”:
Step 3
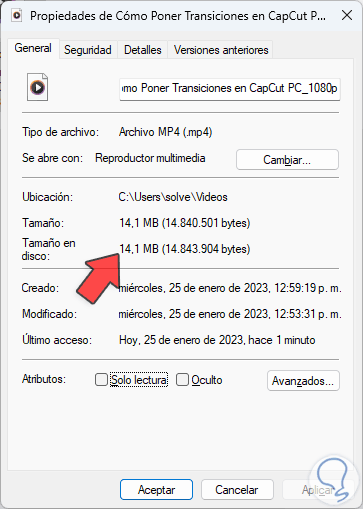
Validate the current size of the video:
Step 4
Open the VLC app:
step 5
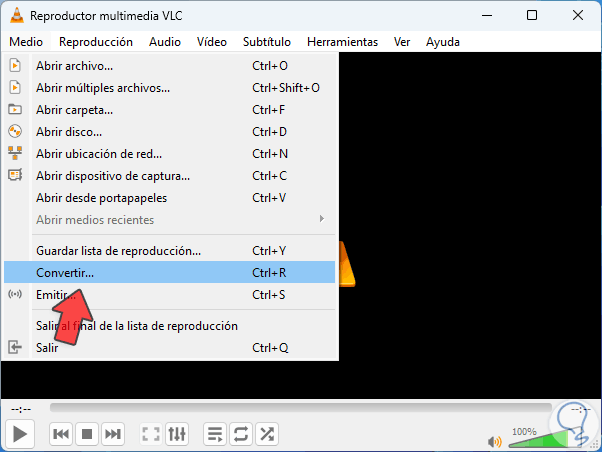
In the VLC console we will go to the "Media - Convert" menu:
step 6
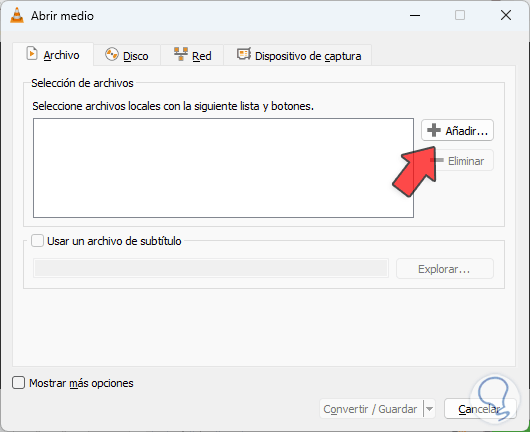
The following window will be displayed. We click on "Add"
step 7
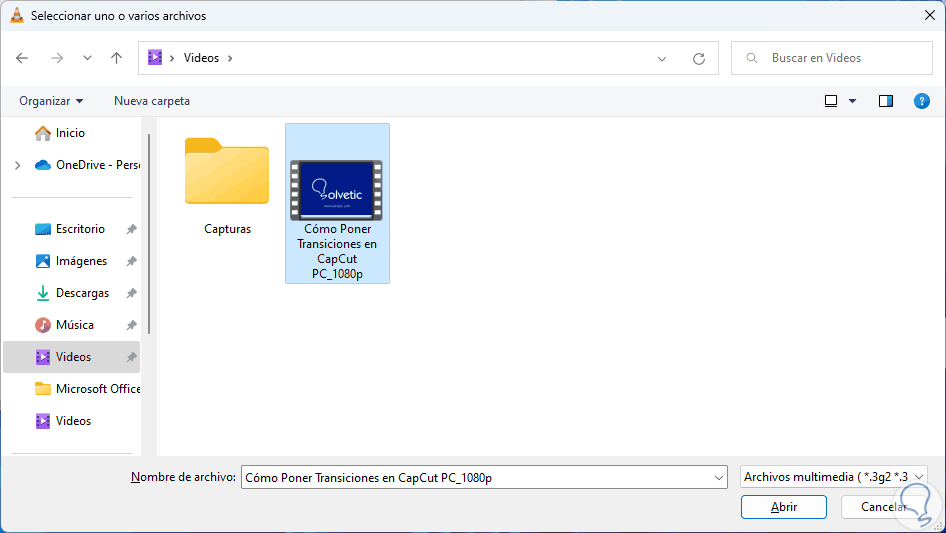
Now we add the video:
step 8
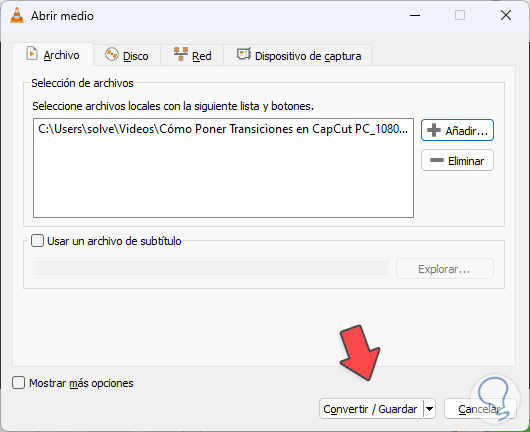
We will see the added video:
step 9
We click on "Convert / Save" to open the following:
step 10
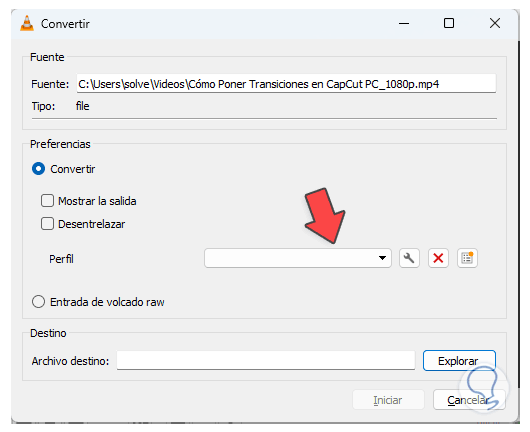
In "Profile" we select the option "Video - H.264 + MP3":
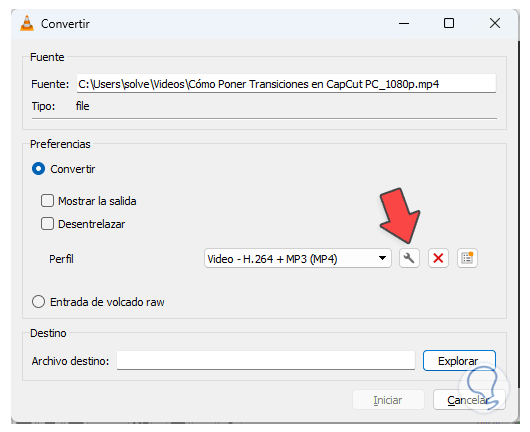
step 11
We click on "Edit selected profile" (key icon next to it) and in the next window in the "Video codec" tab we will see this:
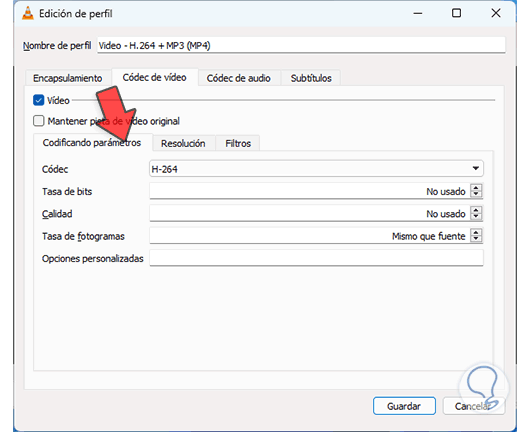
step 12
In "Bitrate" enter 1500:
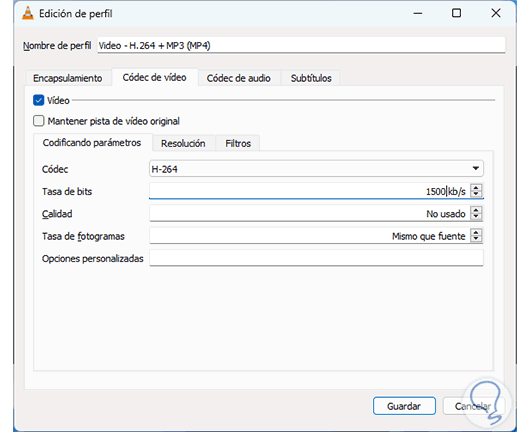
step 13
We leave the other default values, now we go to the "Resolution" tab:
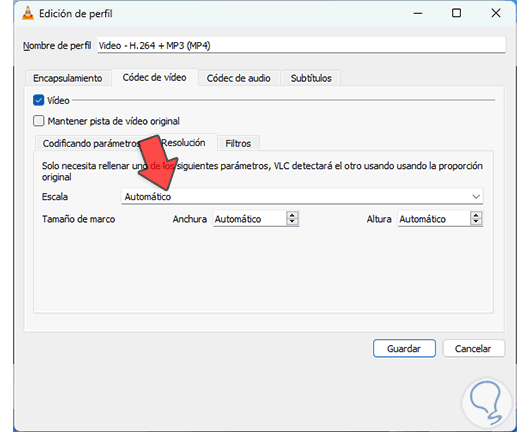
step 14
In "Scale" we leave the value 1:
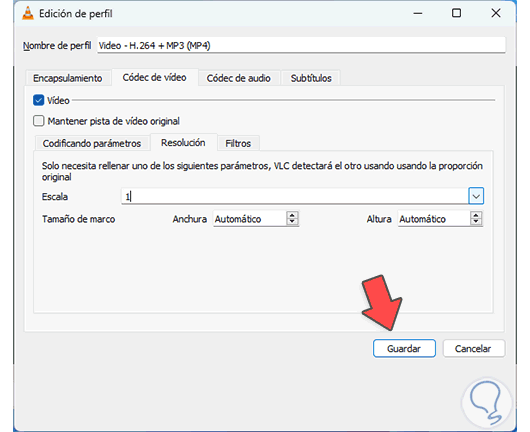
step 15
Now we will go to the “Audio codec” tab:
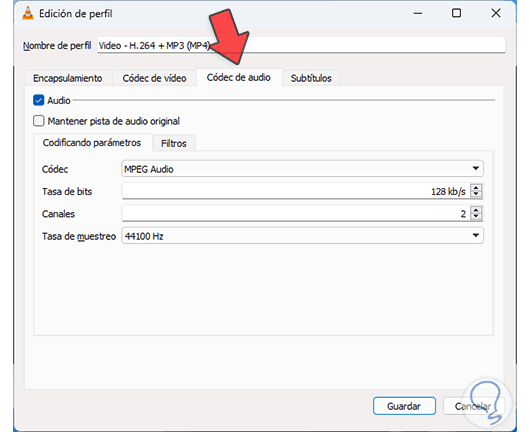
step 16
In "Codec" we set "MP3" so that the audio preserves the quality:
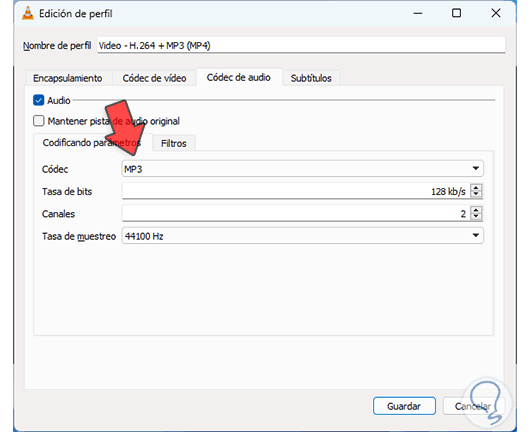
step 17
We leave the other values as they are by default, click on "Save" to apply the changes and return to the initial window:
step 18
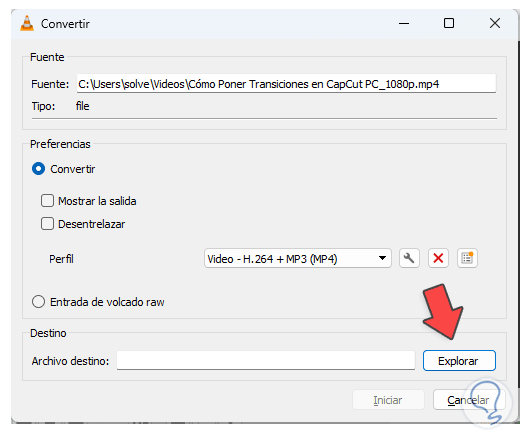
We click on "Explore" in "Destination file" to indicate where the video will be saved:
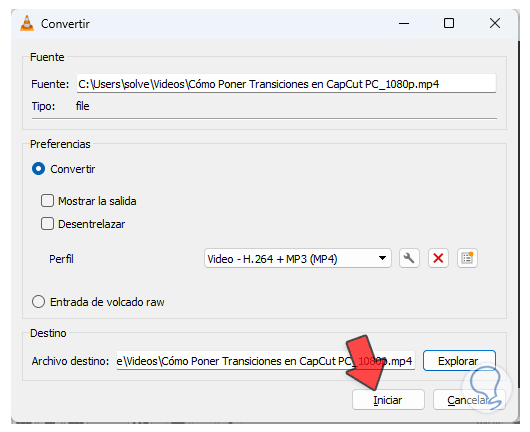
step 19
We click "Start" and wait for VLC to complete the process:
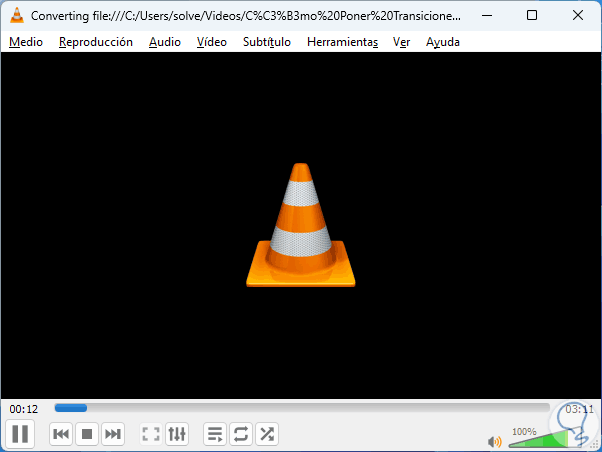
step 20
When the bar reaches its end we can close VLC, now we open the File Explorer and validate the current size of both videos to notice the difference:
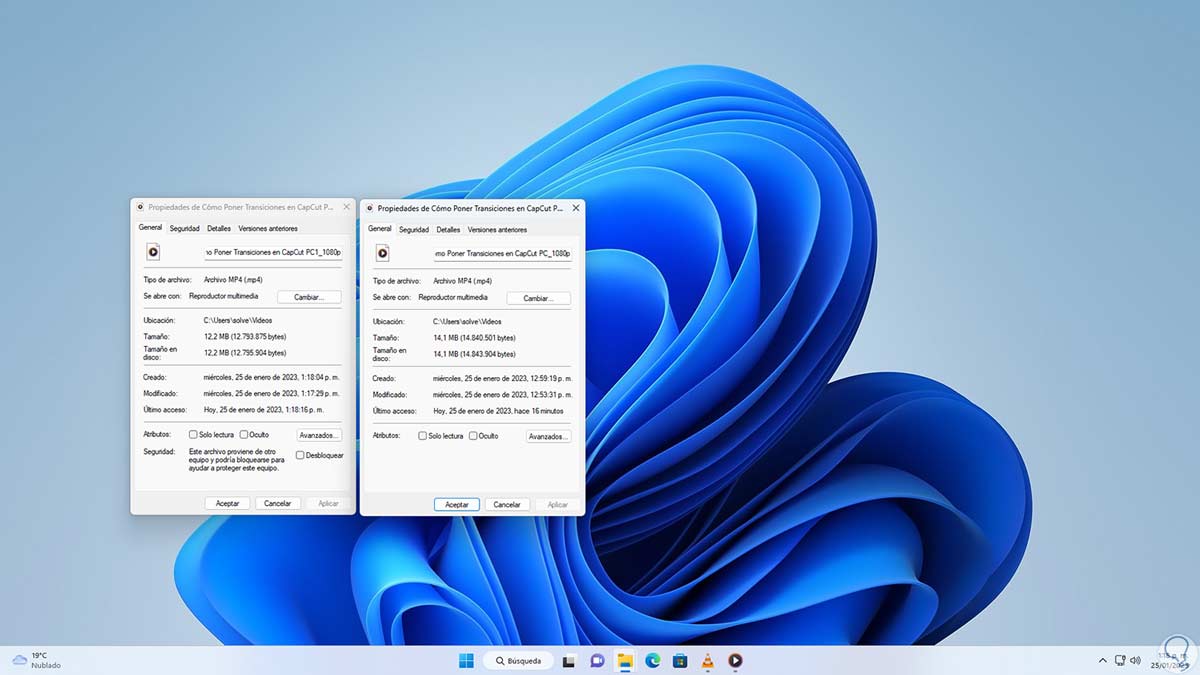
step 21
In this case the reduction was around 11% but everything will depend on the videos used.
Play the video to see that it has not lost quality:
Thanks to VLC it is possible to reduce the size of our videos and thus manage them in a better way..