Microsoft Office is one of the most complete office suites thanks to which it is possible to perform in an integrated way and with the best functions every action on data, files , images and databases. Many times when we buy the Office package, in others because it comes preinstalled, it can come in a language different from our native one which makes a total change at the menu level and in the case of Excel 2019 it changes the way to execute formulas and functions affecting The optimal use of the application..
TechnoWikis will explain how we can change the language with which Excel 2019 is currently in order to take advantage of each of its features.
Note
This same process applies to Excel 2016.
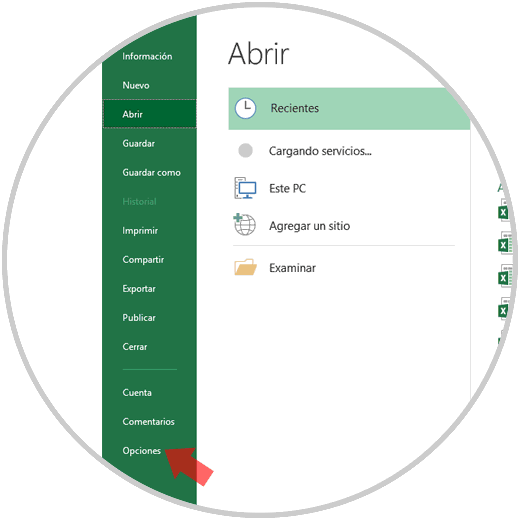
Step 1
To start this process, we access Excel 2019 and go to the "File" menu where we will see the following. There we click on the "Options" line.
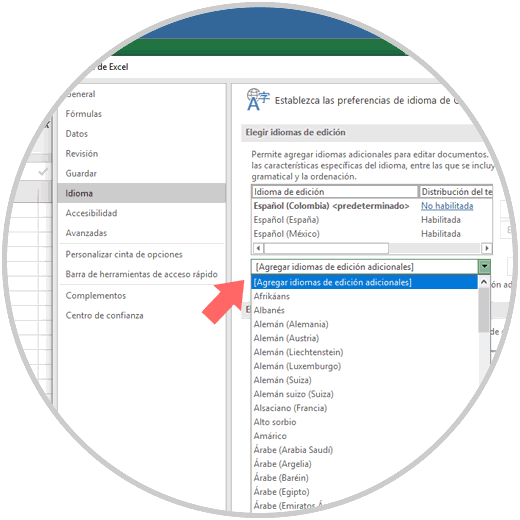
Step 2
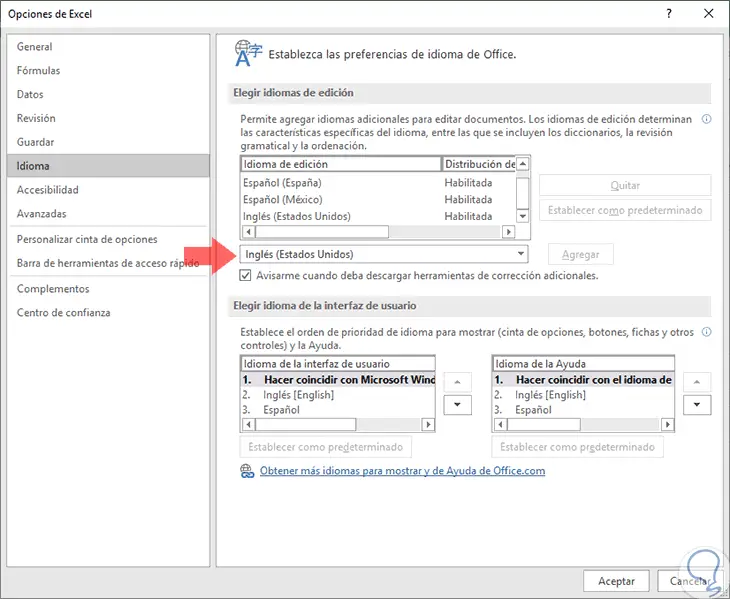
The following window will be displayed where we will go to the "Language" section and there we can click on the "Add additional languages" field and we will see a wide list of available languages:
Step 3
Once the desired language is selected we will see the following. There we must click on the "Add" button.
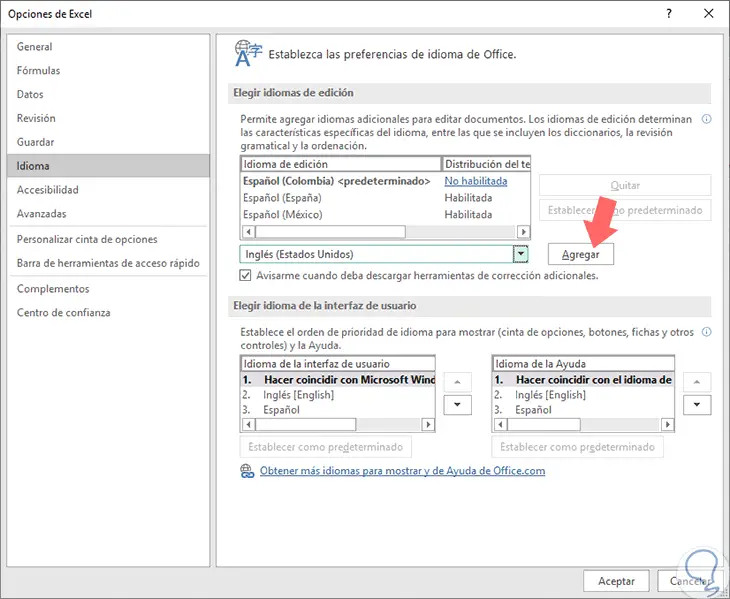
Step 4
We will see that the language is added to the upper field Edit language, in this case "English" (United States):
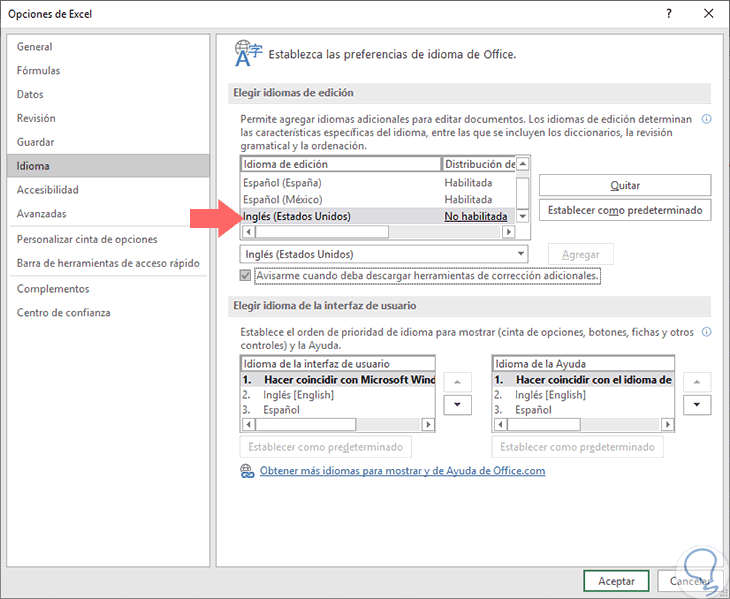
Step 5
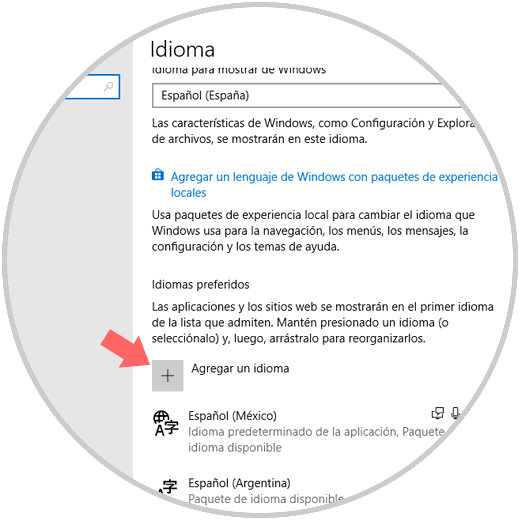
Now we must click on the line "Not enabled" and we will be redirected to the next section of the system configuration utility. We click on the "Add a language" option.
Step 6
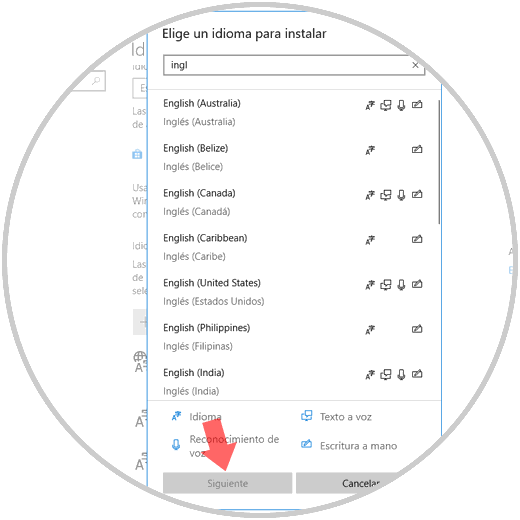
In the next window we will locate the desired language for Excel 2019. We click on the language and click on "Next".
Step 7
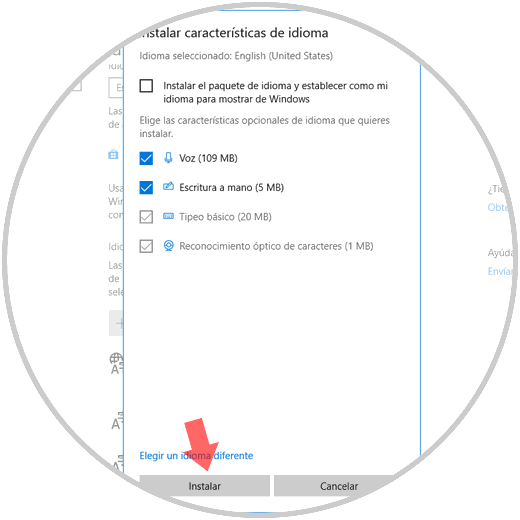
This window will be displayed. There we have unchecked the box Install the language pack and set as my language to display Windows since we do not want to change the general language of the system. Click on the "Install" button.
Step 8
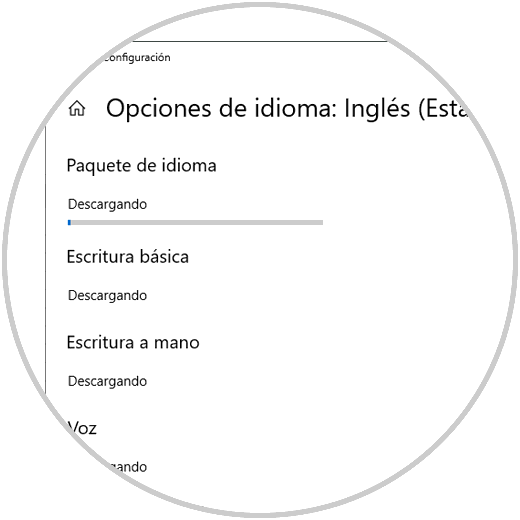
To start the download process of the selected language:
Step 9
Once this process is finished we can see that the language is enabled in Excel 2019:
Step 10
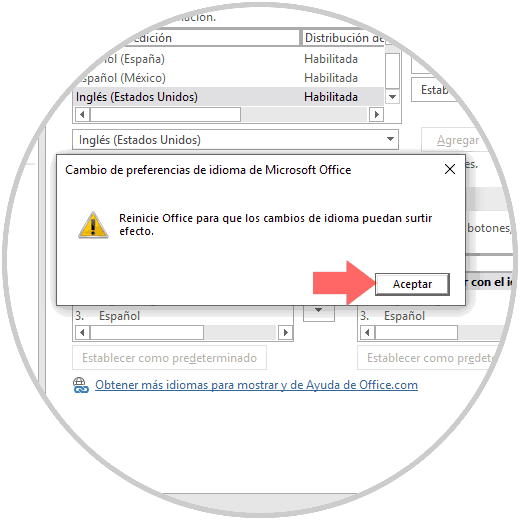
There we select the new language, in this case "English" and clicking on the "Accept" button will display the following message. There we click on "Accept" so that Office is restarted and the new language is applied.
In this way it will be possible to have additional editing languages ​​for Excel 2019 and use them based on the need that arises, remember that each language uses its own syntax and settings so that we must be careful about what type of data we should use the new editing language since this implies new keyboard shortcuts, new revision and new formulas and if we are not used to it it can become a problem for information management.
Step 11
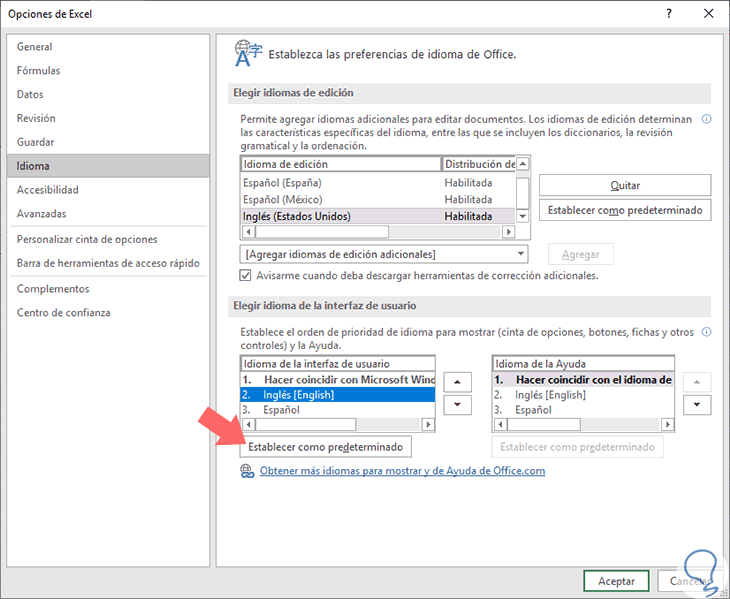
If we want the new language added to be the one present in all of Excel 2019, we must go back to the Options / Language section, and there in the Language field of the user interface select the language and click on the " Set as default. " Then click on "Accept".
Step 12
We must restart Office so that the new language is defined in all Excel functionality of both menus and formulas and functions:

At the desired time we can define the default language again..