Windows 11 has been developed with an improved approach to offer the user a complete and modern user experience, but for this to be possible, some criteria are required that can affect the performance of the system and we are talking, for example, about animations, effects and processes. ..
When Windows 11 is updated or installed for the first time, we will see a stable system and in optimal conditions, but with the passage of time, the installation of applications and other tasks, this performance can be affected and it has a direct impact on our work and using Windows 11.
For these reasons TechnoWikis will explain various reasons to clean and optimize the operating system in a detailed step by step each one of them..
To stay up to date, remember to subscribe to our YouTube channel!
SUBSCRIBE ON YOUTUBE
1 How to clean, optimize and speed up Windows 11 to the maximum without deleting temporary programs
Temporary files are files that are created, as their name says for a short period of time, and are generated by applications and programs with certain attributes for faster access, but an accumulation of these temporary files causes the system to be slow. by tasks that can be run in the background with temporary ones.
Step 1
To delete them we open Run:
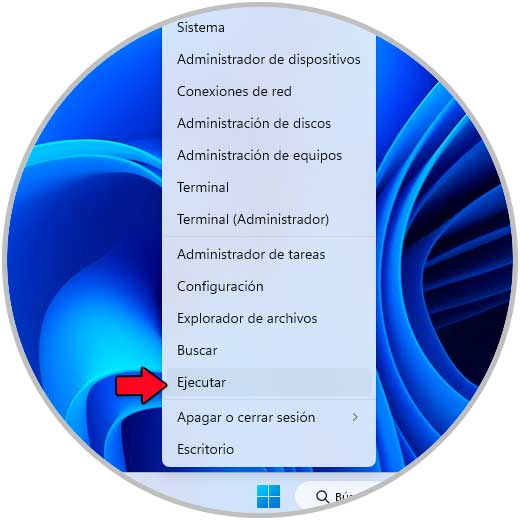
Step 2
We enter "% temp%" and with this command the files of the local user who is logged in Windows 11 will be opened:
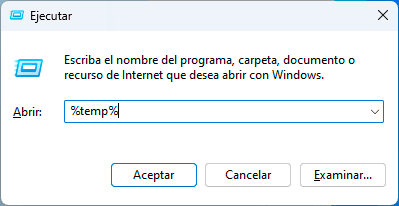
Step 3
In the window with the temporary we select all the elements:
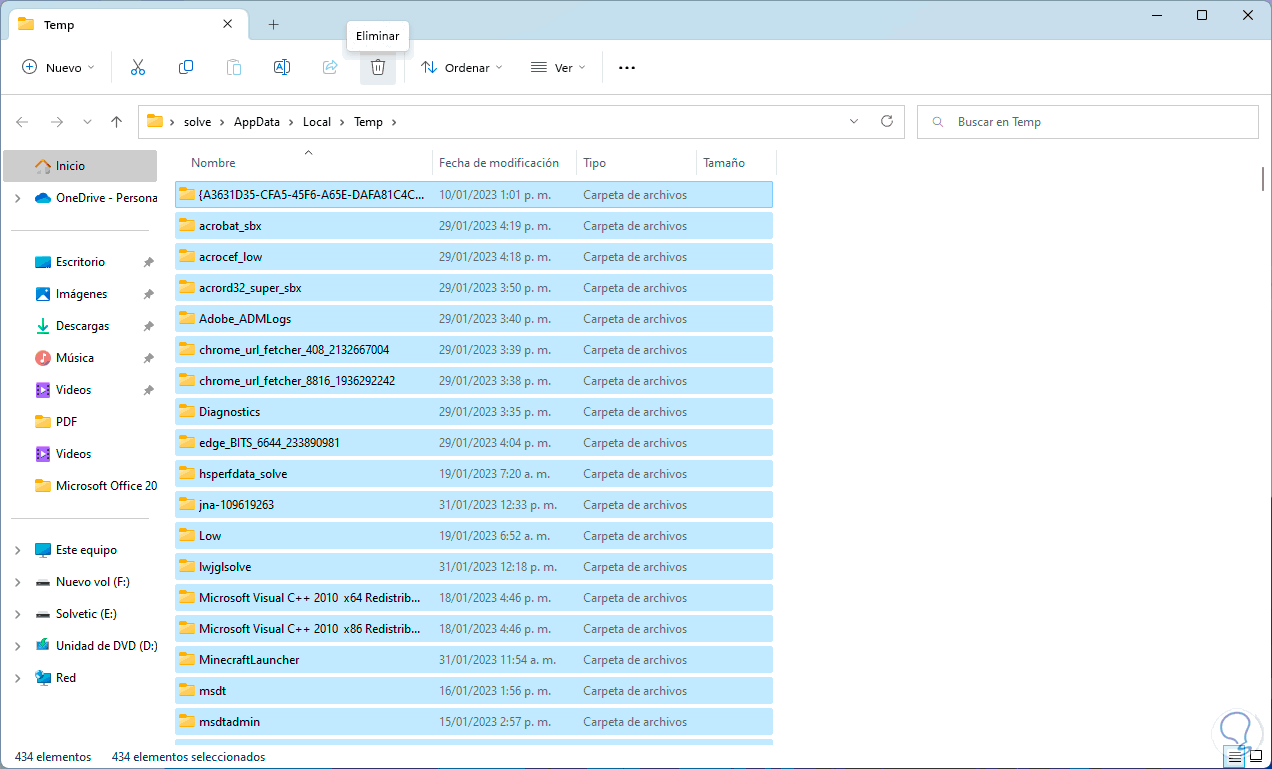
Step 4
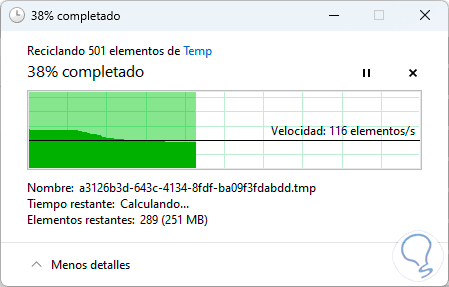
We click on "Delete" and during the process it will be possible to see the following:
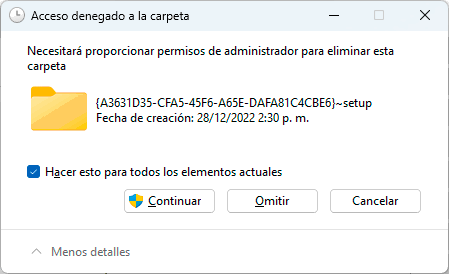
step 5
We click on "Continue" and the elimination will proceed:
step 6
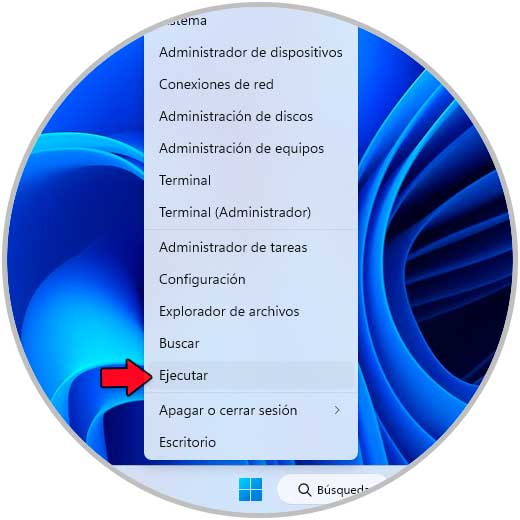
Now it is time to delete the temporary ones of the entire system, for this we open Run:
step 7
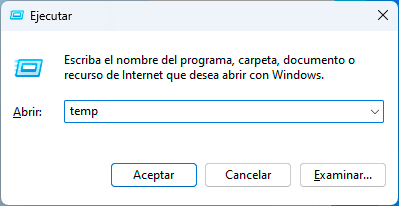
We enter "temp":
step 8
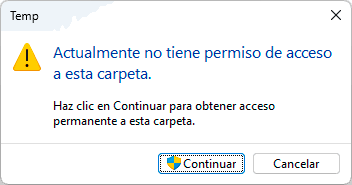
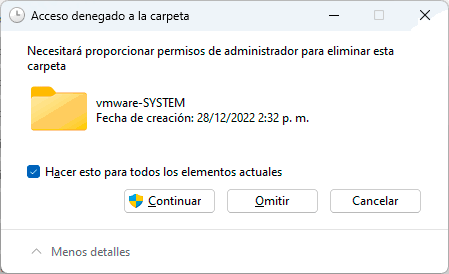
Click on Accept and it will be necessary to click on "Continue" to access the folder:
step 9
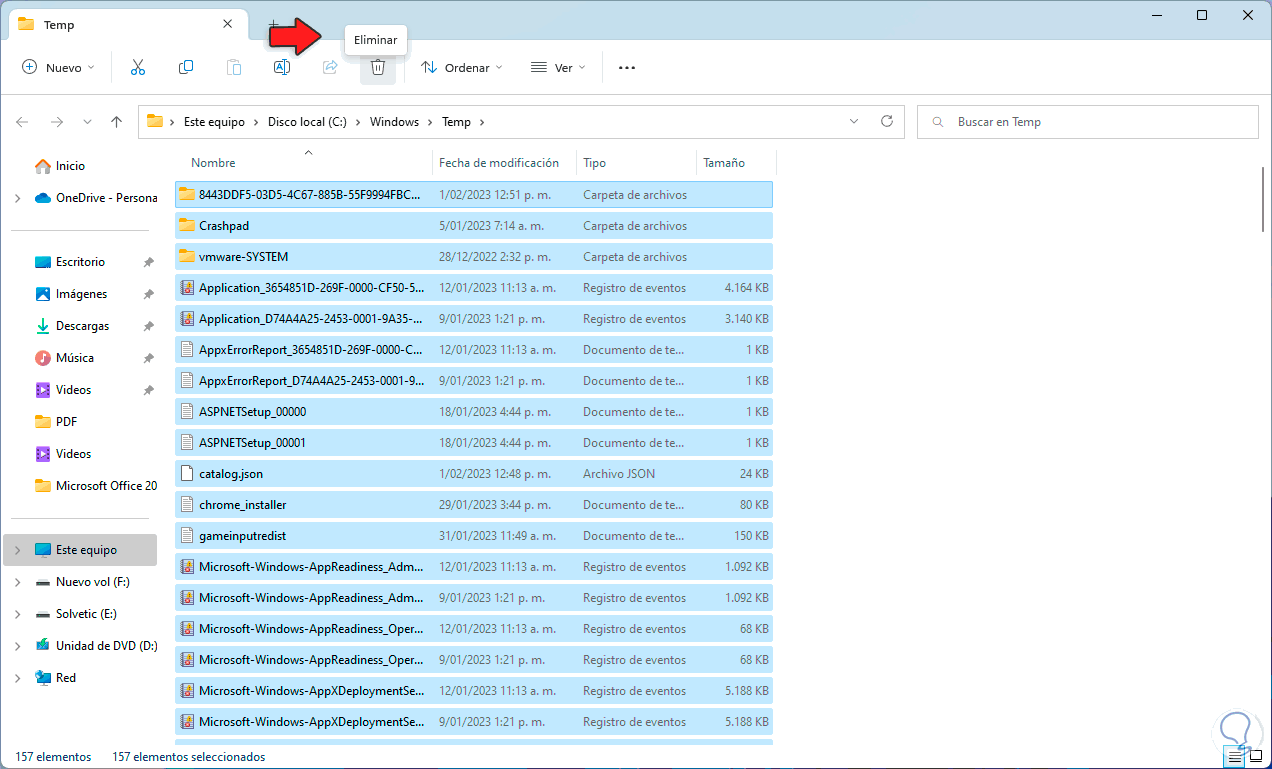
Now we select all the elements:
step 10
We click on "Delete" and it will be necessary to confirm this process:
2 How to clean, optimize and speed up Windows 11 to the maximum without programs from Event Viewer
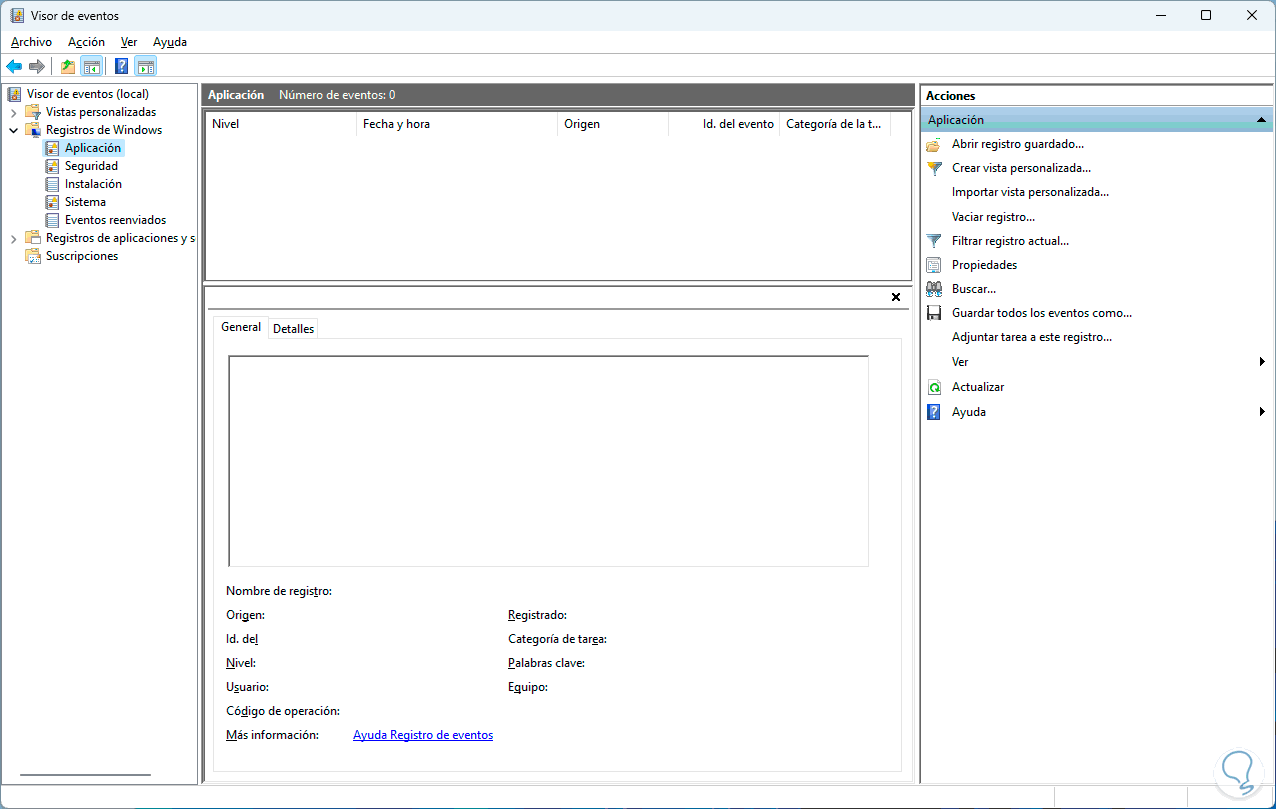
The Event Viewer in Windows 11 is responsible for collecting all the events that occur on the PC and in the system, from when you log in to when you shut down the computer, these events are key for administrative tasks but when collecting thousands of events they are It can lead to system crashes and slowness.
Step 1
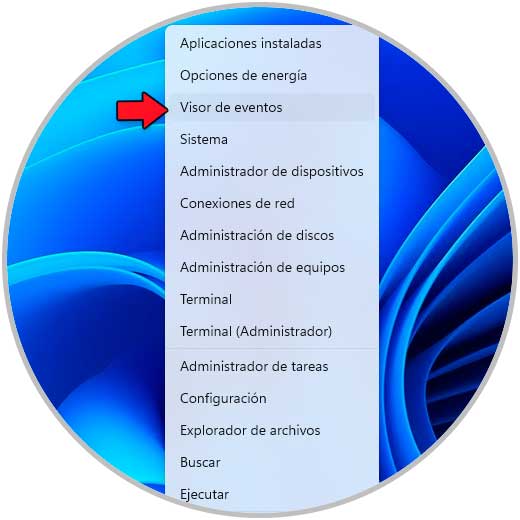
We can delete the stored events in a simple way, we open the Event Viewer:
Step 2
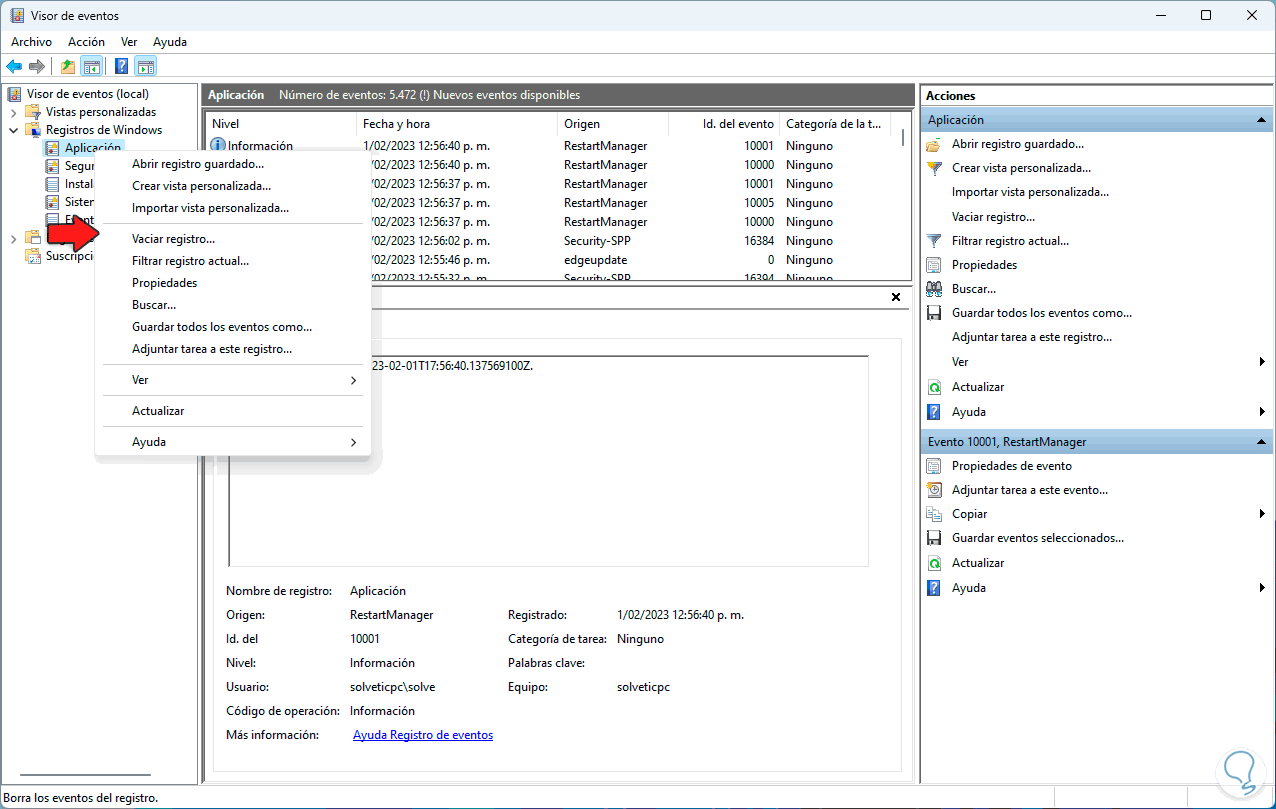
We go to "Windows Logs", right click on "Application" and select the "Empty registry" option:
Step 3
We will see the following message:

Step 4
Click "Clear" to clear those records:
step 5
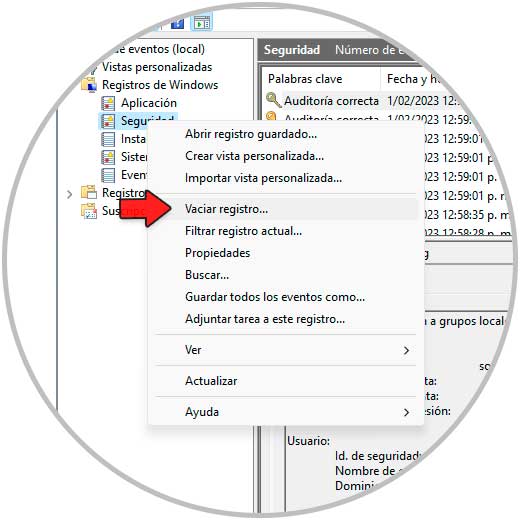
We right click on "Security" and select the "Empty registry" option:
step 6
Now we click on "Delete":

step 7
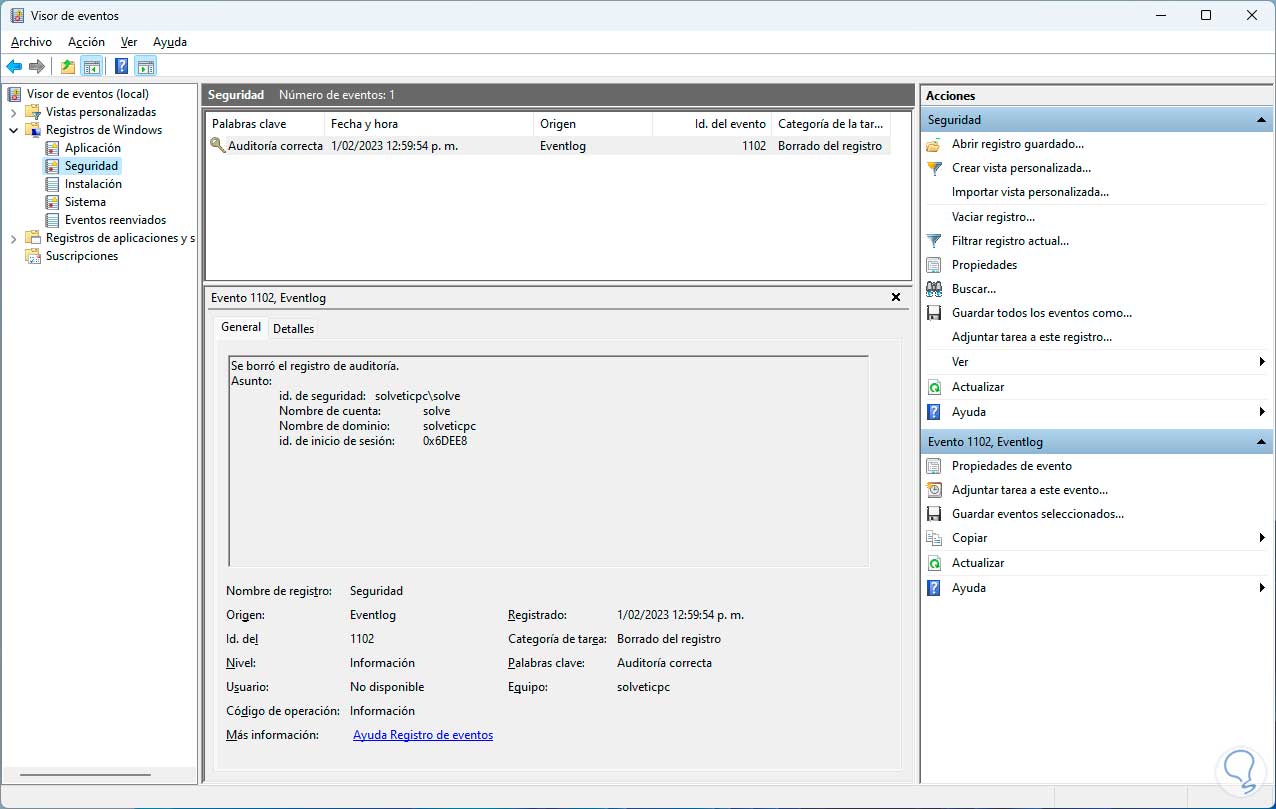
These events will be deleted:
step 8
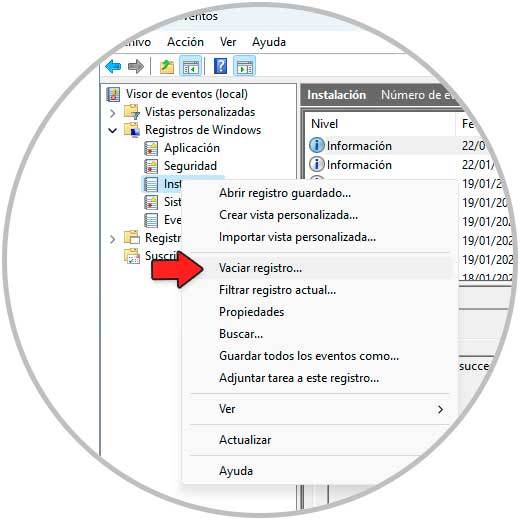
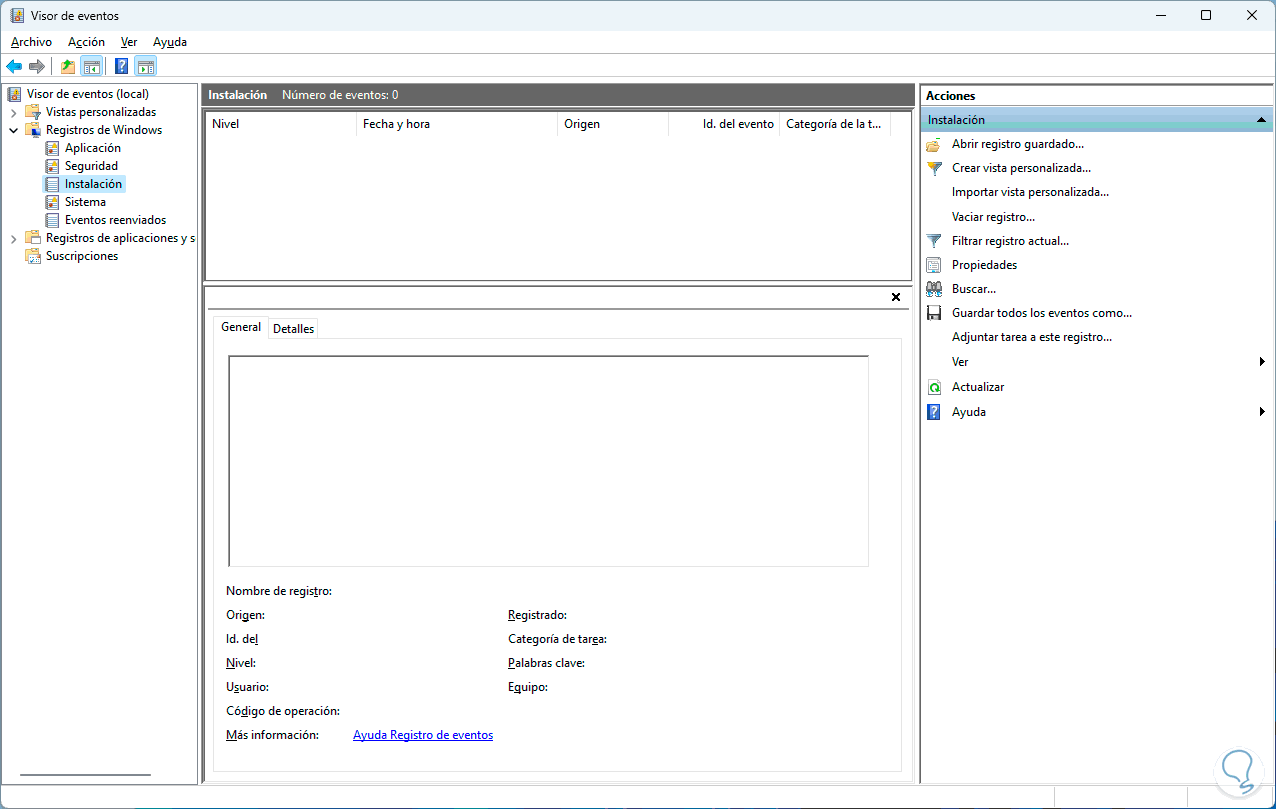
We right click on "Installation" and select the "Empty registry" option:
step 9
We click on "Delete":

step 10
These events will be deleted:
step 11
Now we right click on "System" and select the "Empty registry" option:
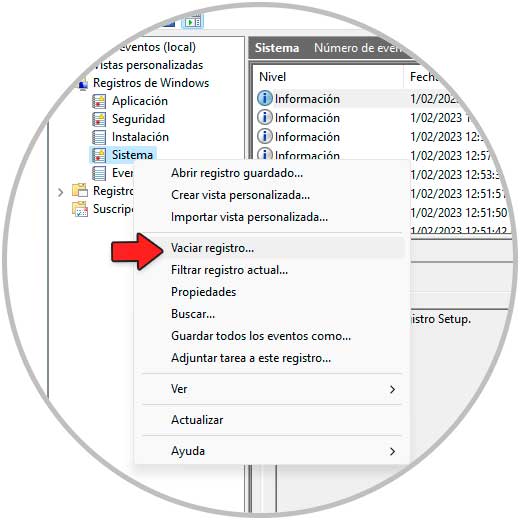
step 12
In the pop-up window we click on "Delete":

step 13
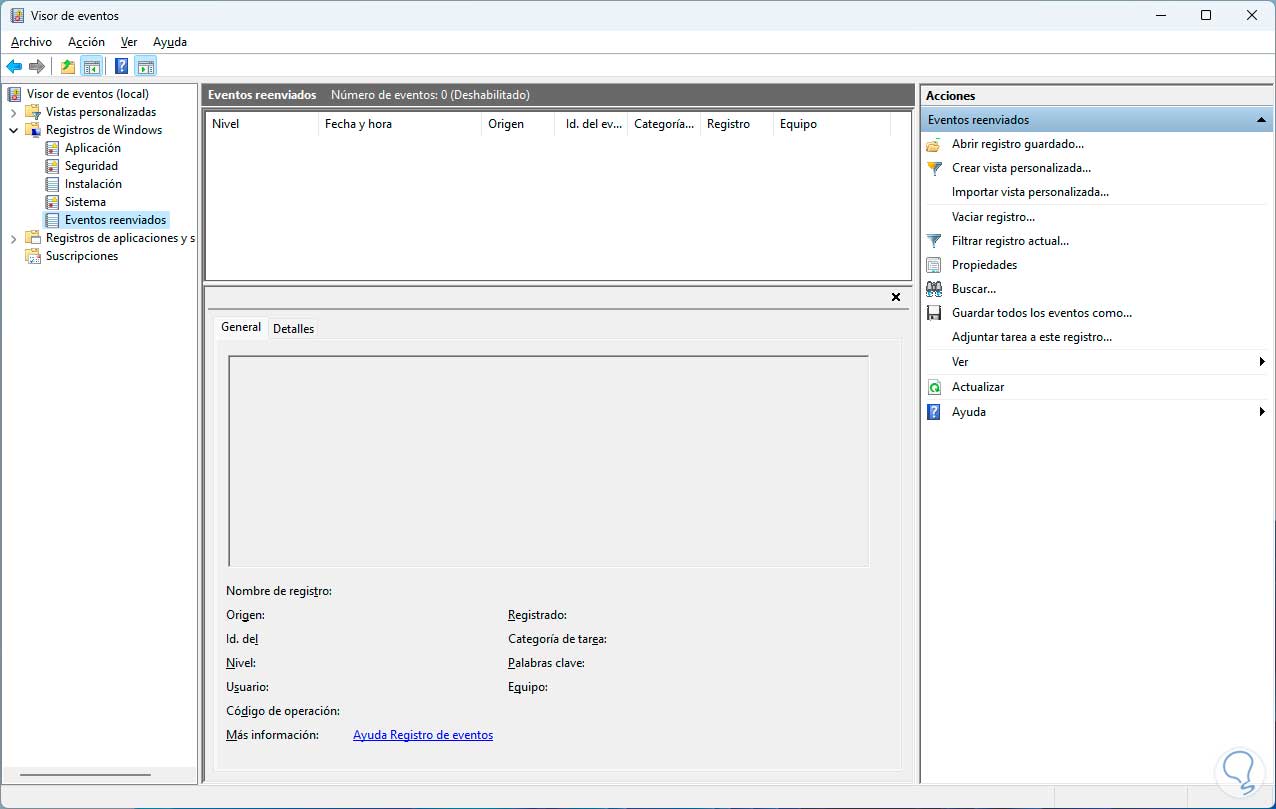
We confirm the deletion and it is possible that some events do not have data:
3 How to clean, optimize and speed up Windows 11 to the maximum without programs by deleting Prefetch
Prefetch is a folder created and added from Windows XP and in which direct data from the applications that are executed in Windows 11 are stored so that when they are opened their loading process is much faster, but this can trigger the opposite effect by lowering the system performance so it is possible to delete these files.
Step 1
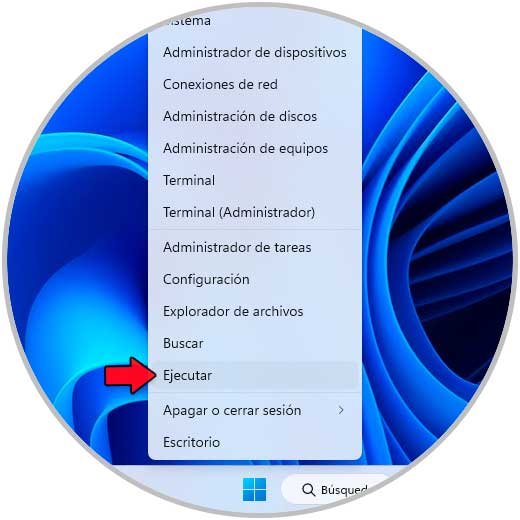
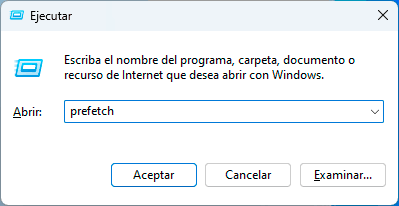
We open Run:
Step 2
Enter "prefetch" and tap OK:
Step 3
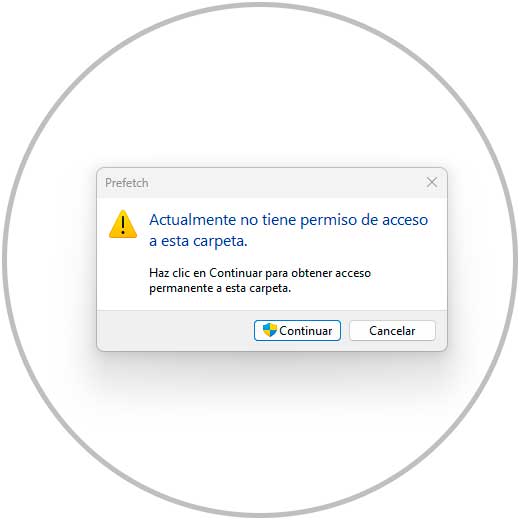
We click on "Continue" to access the folder:
Step 4
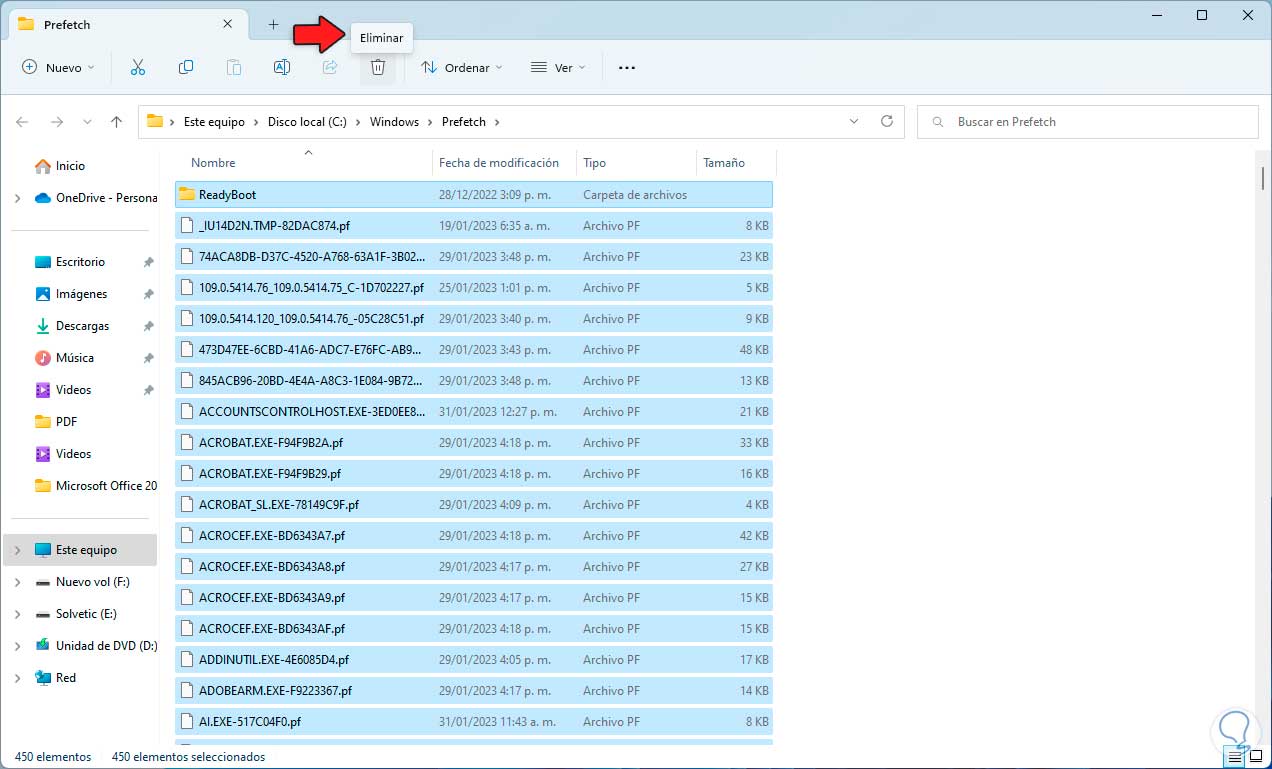
Now we select all the elements:
step 5
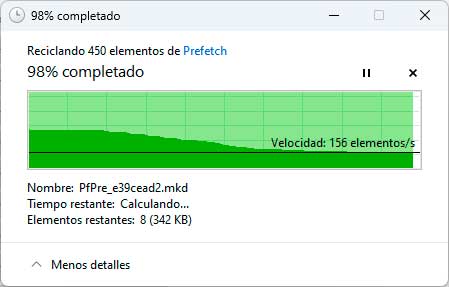
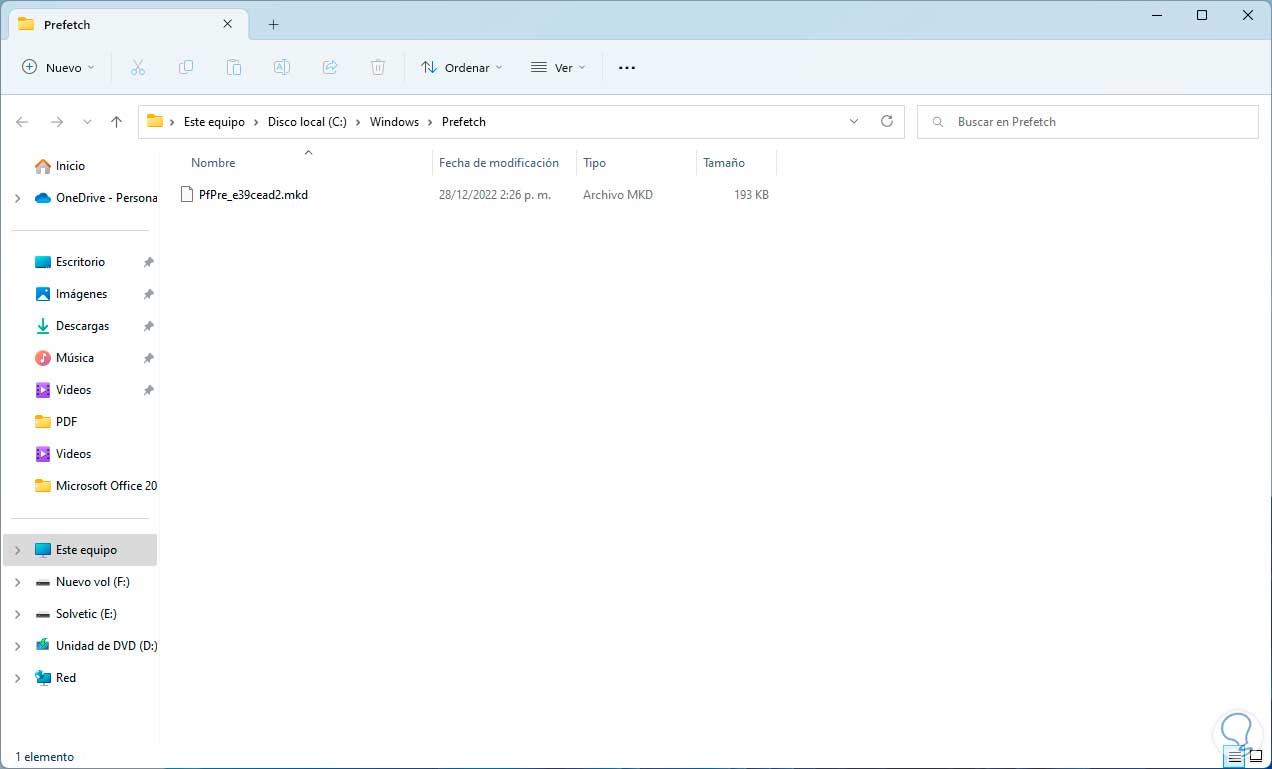
We click on "Delete" and wait for them to be deleted:
step 6
We expect the elements to be deleted:
4 How to clean, optimize and speed up Windows 11 to the maximum without programs freeing up space
This is one of the common options to improve performance in Windows 11 since freeing up space on the hard drive will improve reading and writing tasks at a general level of Windows.
Step 1
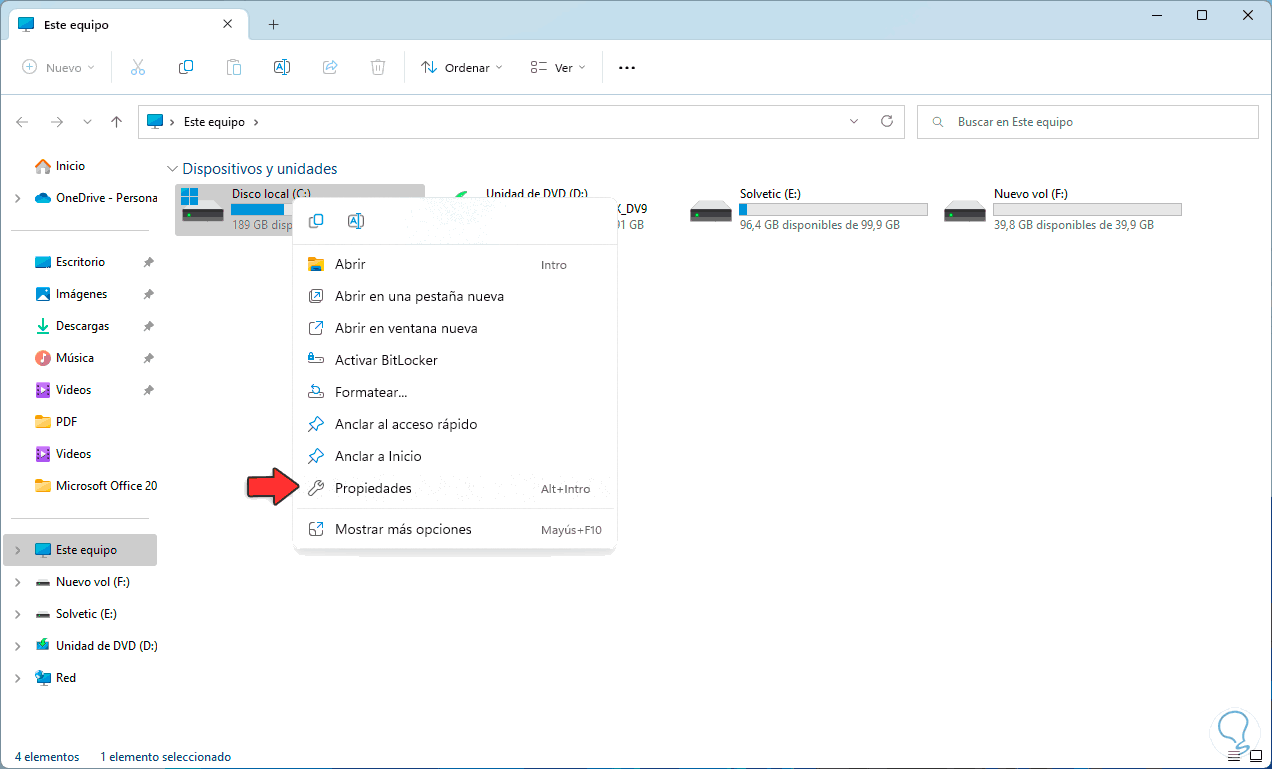
For this case we open the File Explorer and right click on drive C to select "Properties":
Step 2
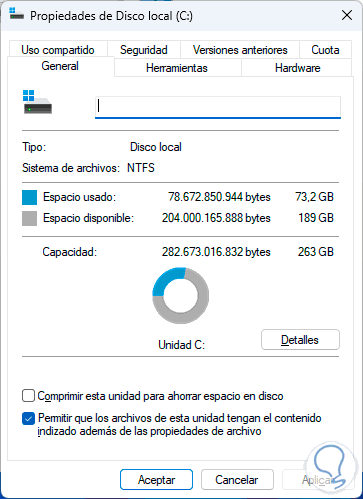
We will see the following:
Step 3
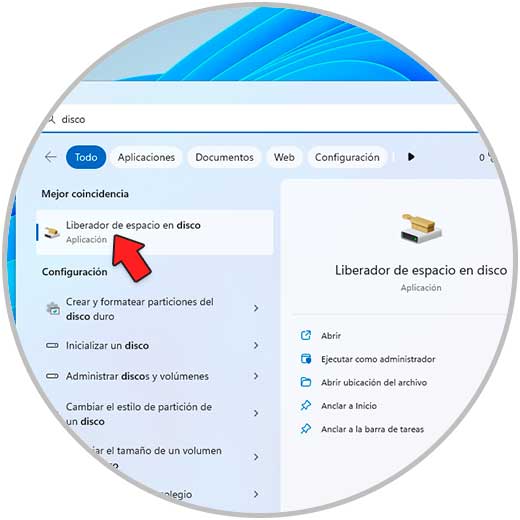
We validate that the "Free up space" option is there, if it is not, in the Start search engine we enter "disk":
Step 4
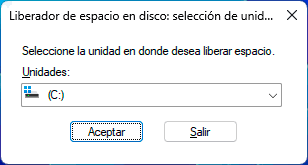
We click on "Disk Cleanup" and select drive C:
step 5
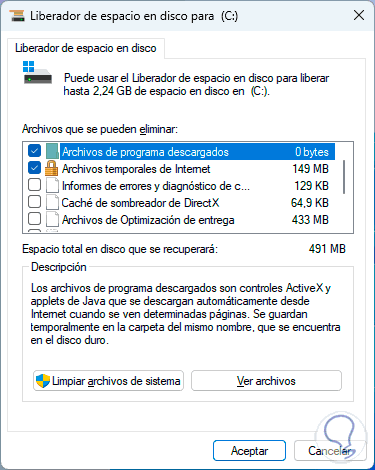
After the analysis we will see the following:
step 6
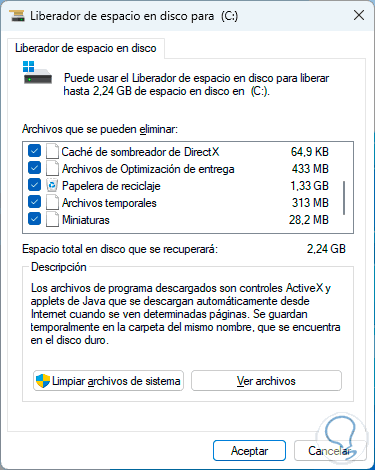
We activate the desired boxes where we can see the space they occupy on the disk:
step 7
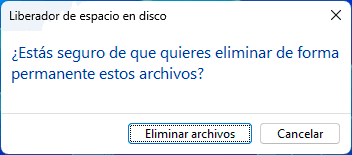
We click "OK" and confirm the deletion:
step 8
We expect each element to be deleted:
step 9
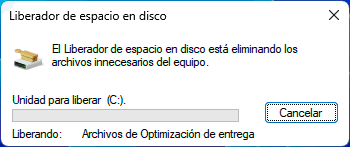
We open the utility again and this time we click on "Clean system files":
step 10
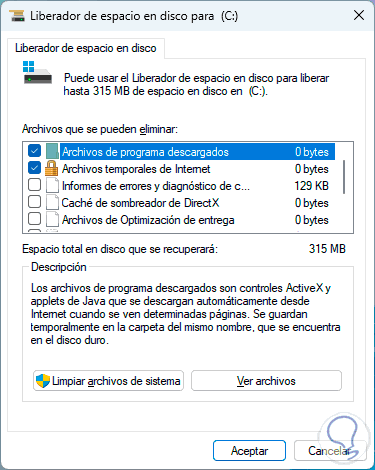
We select drive C and wait for the analysis:
step 11
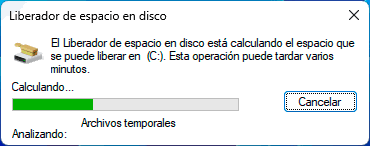
We activate the desired boxes:
step 12
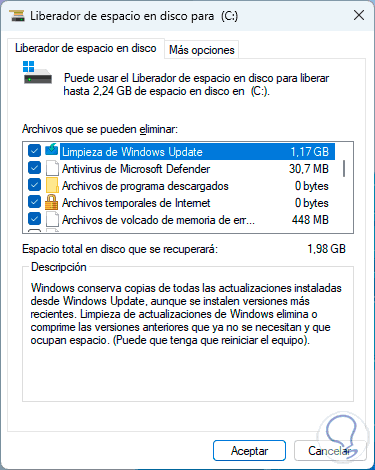
We click "OK" and confirm the deletion:
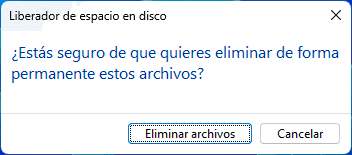
step 13
These objects will be deleted:
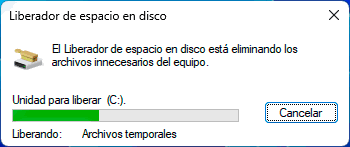
This will free up space on the hard drive.
5 How to clean, optimize and speed up Windows 11 to the maximum without programs from Msconfig
This is the Windows configuration utility and in it it will be possible to make various changes to improve the overall use.
Step 1
In the Start search engine we enter "msconfig" and execute the utility:
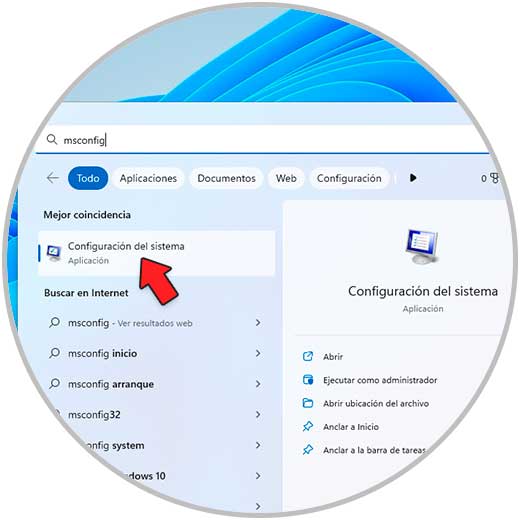
Step 2
In the "Startup" tab we click on "Advanced Options":
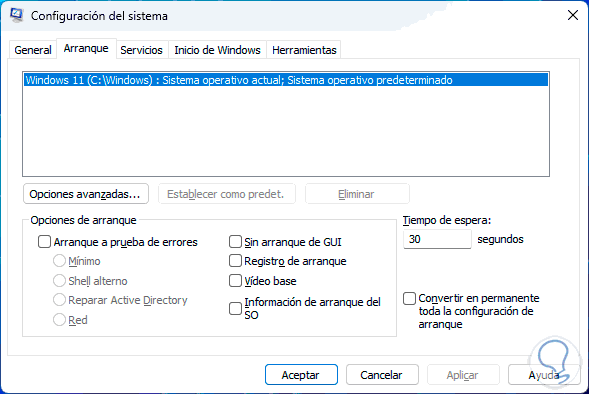
Step 3
By clicking there we will see the following:
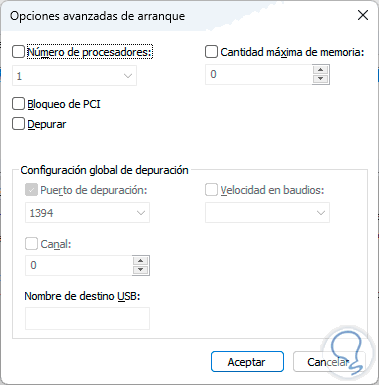
Step 4
We activate the "Number of processors" box and select the available processors based on the physical CPU of the equipment:
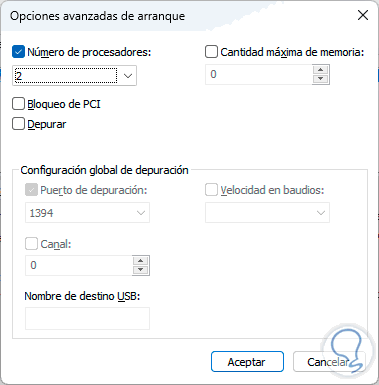
step 5
Apply the changes.
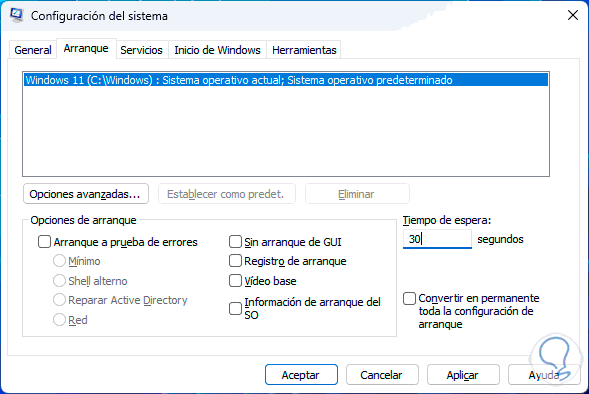
step 6
In "Waiting time" we enter the value 15:
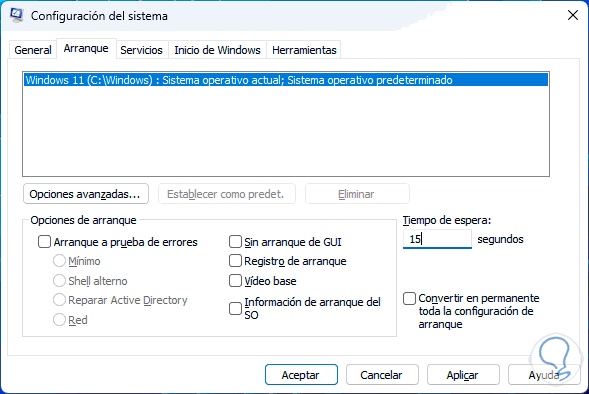
Click "Apply."
step 7
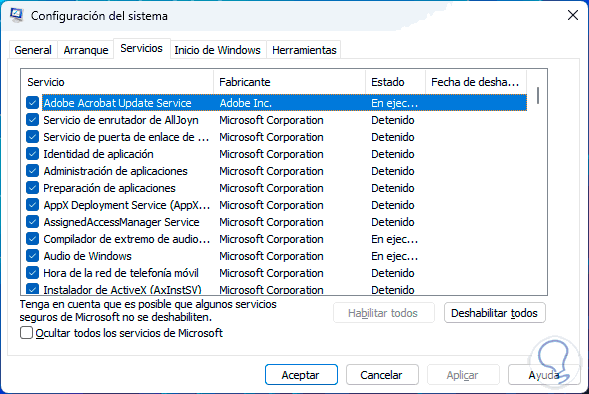
In the "Services" tab we will see the following:
step 8
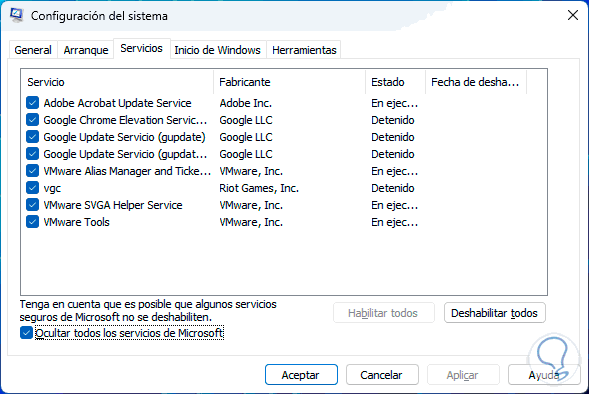
We activate the "Hide all Microsoft services" box:
step 9
We deactivate non-essential services:
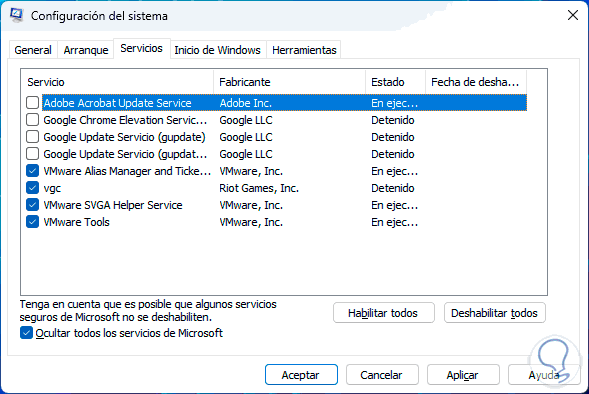
Click "Apply."
step 10
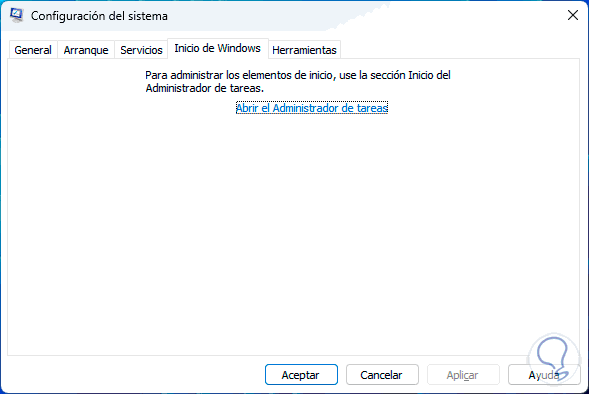
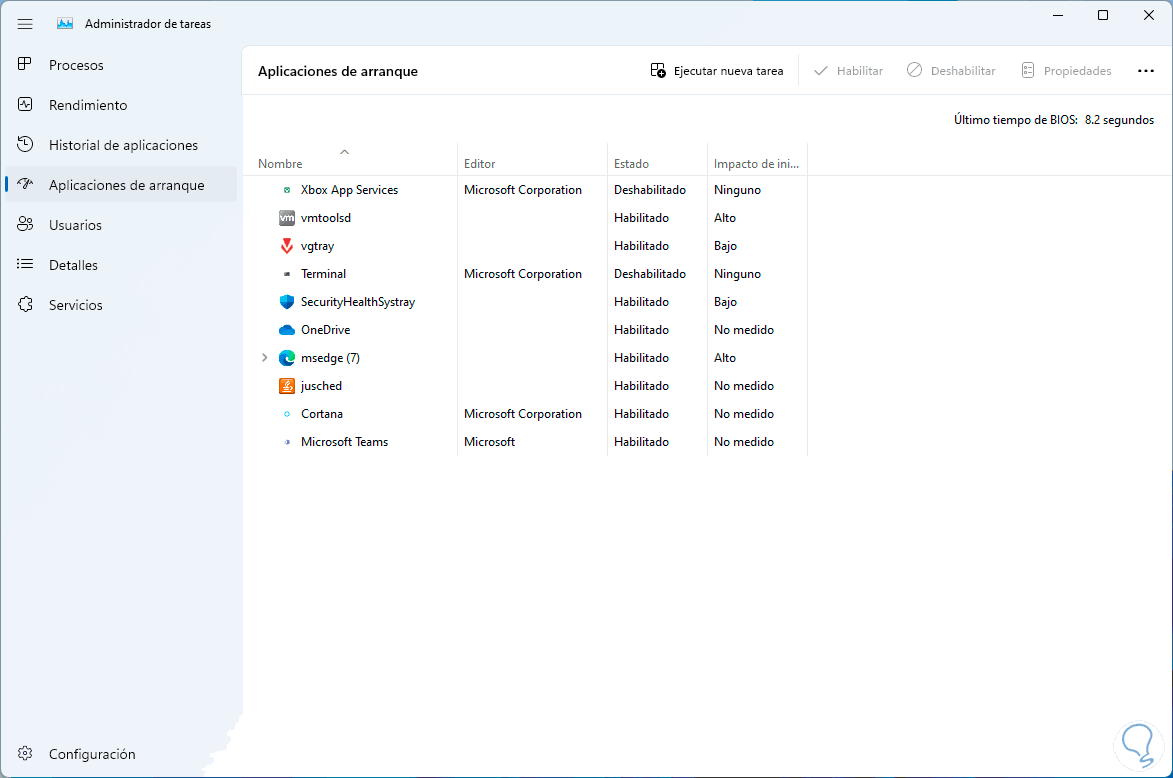
In the "Windows Startup" tab we click on "Open Task Manager":
step 11
The Manager will open in applications that start next to Windows 11:
step 12
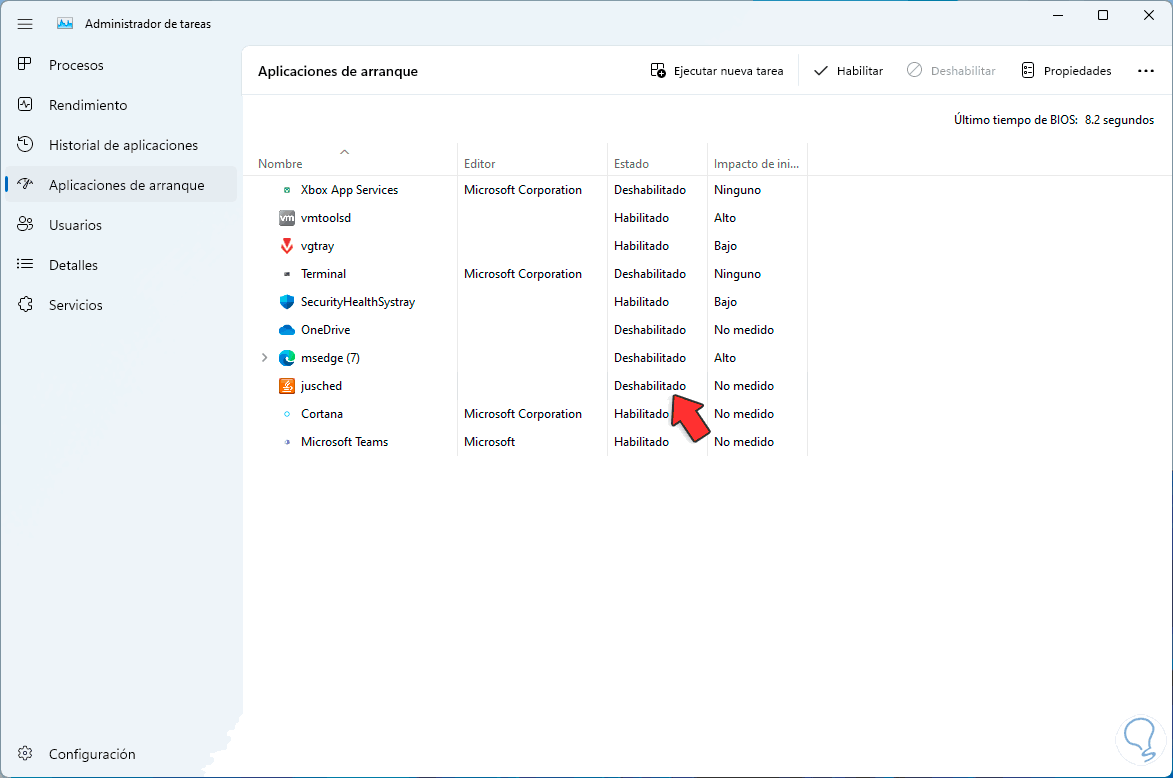
We select the programs that start with Windows and click on "Disable":
step 13
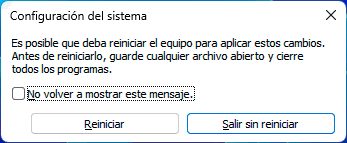
Again in the system configuration window we click "OK" and we will see this message:
step 14
Restart Windows 11:

6 How to clean, optimize and speed up Windows 11 to the maximum without programs by disabling effects
However, the effects and animations, as well as other actions, are directly related to the performance and speed of the system and that is why it will be possible to make some changes.
Step 1
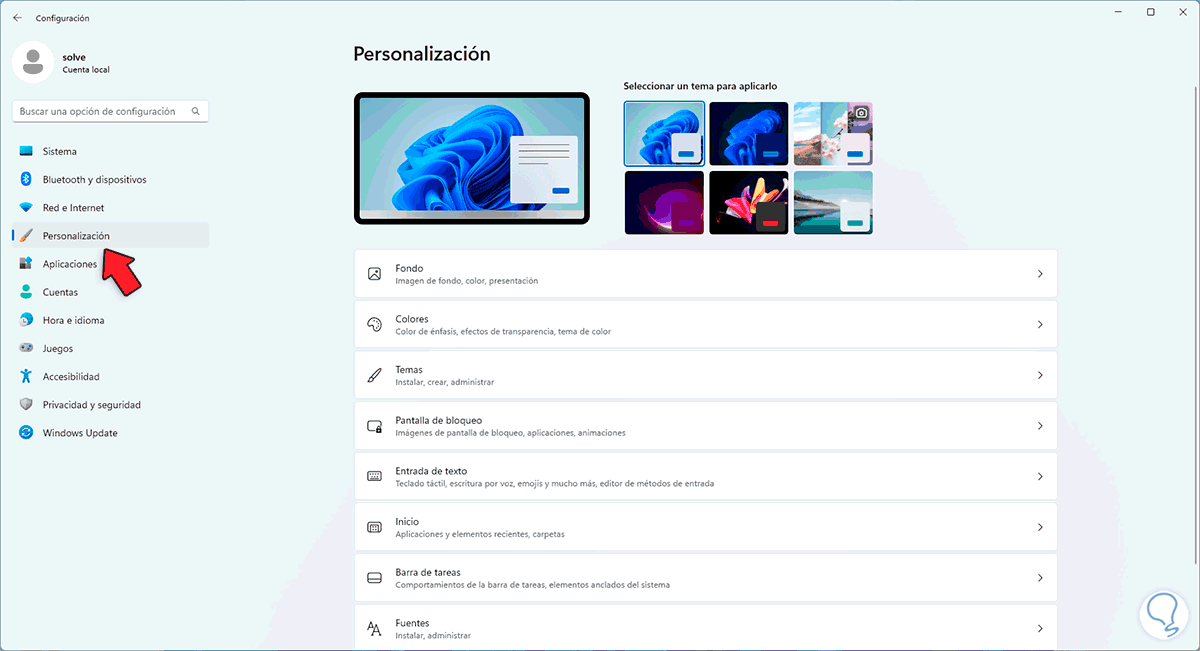
First of all we go to "Start - Settings - Personalization":
Step 2
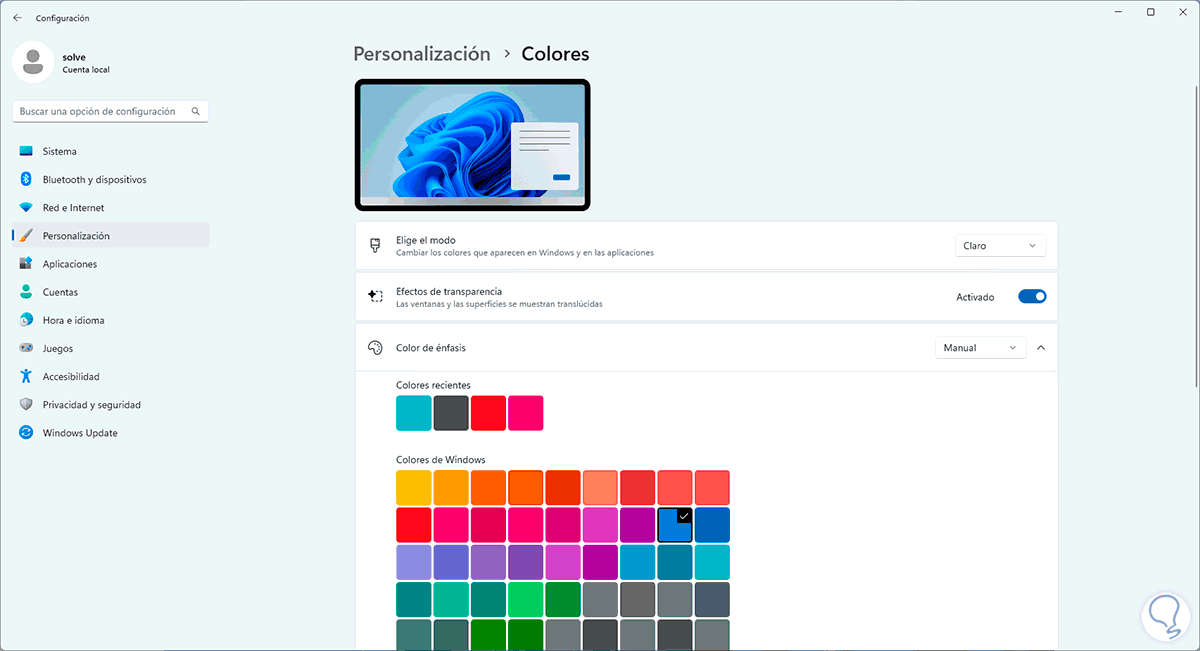
In "Colors" we will see the following:
Step 3
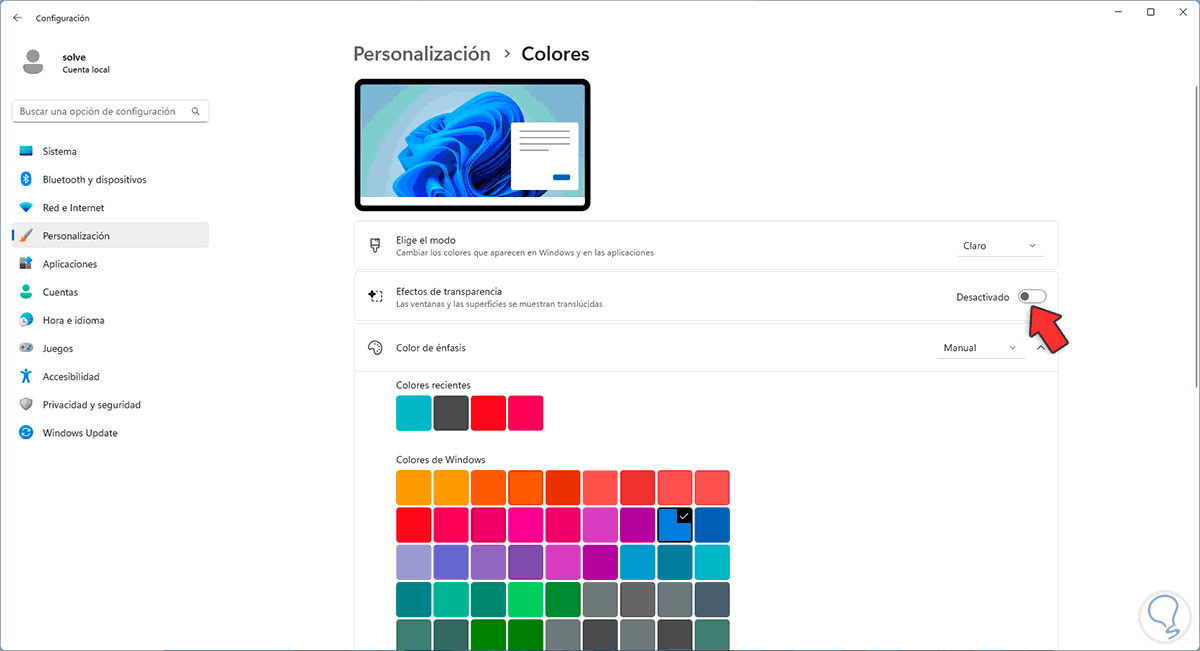
We deactivate the "Transparency effects" switch:
Step 4
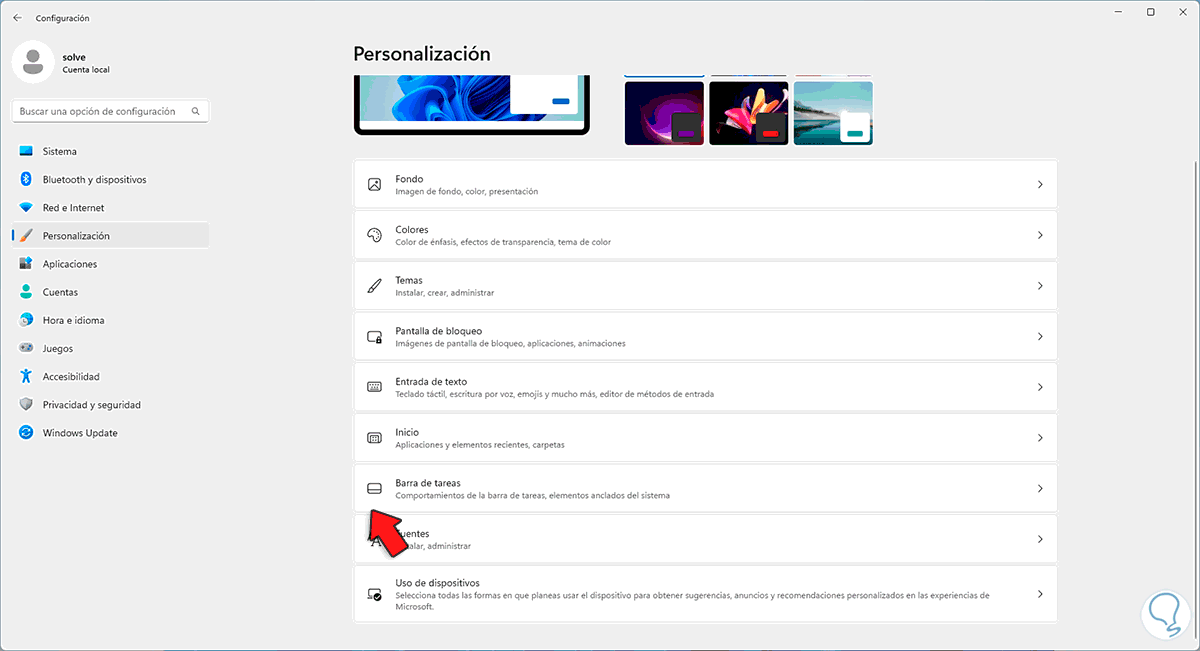
Again in "Personalization" we click on "Taskbar":
step 5
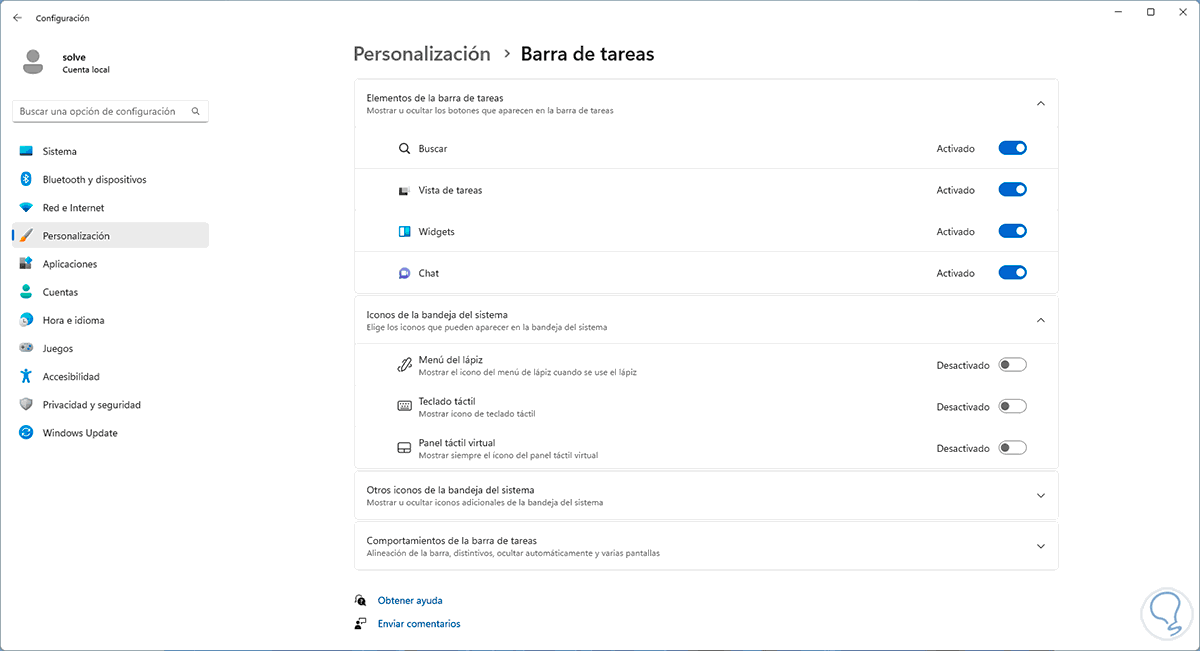
We will see the following when accessing there:
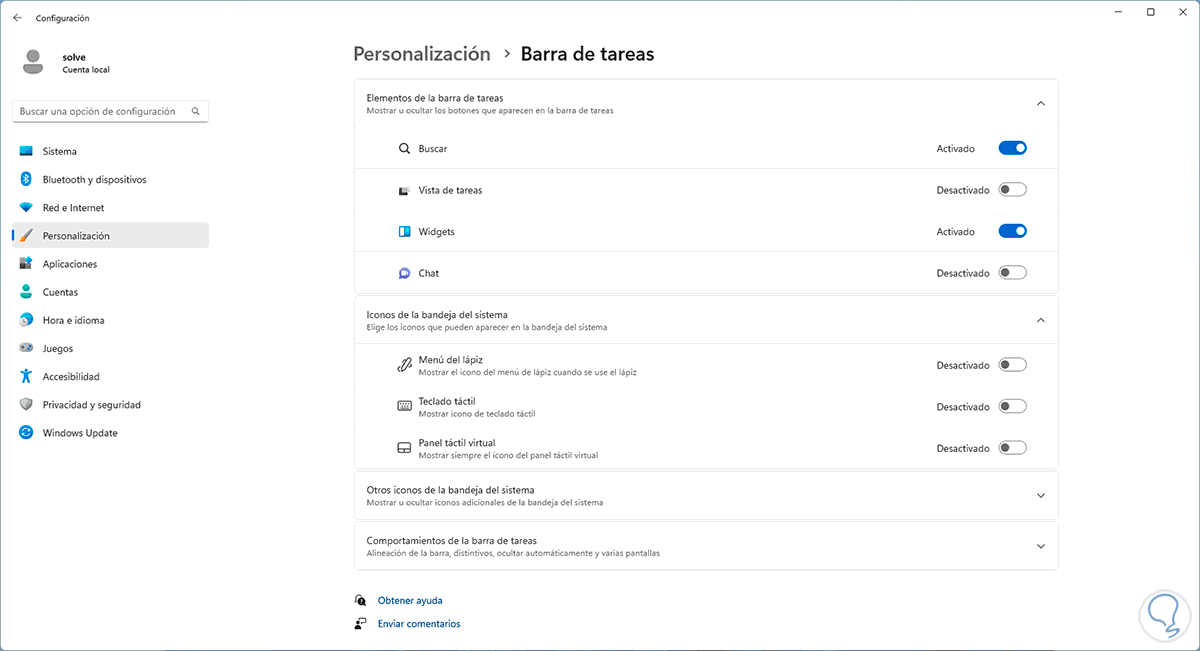
step 6
We deactivate the switches of the unused functions, many times we do not use the widgets, the search engine or the chat and these are running in the background:
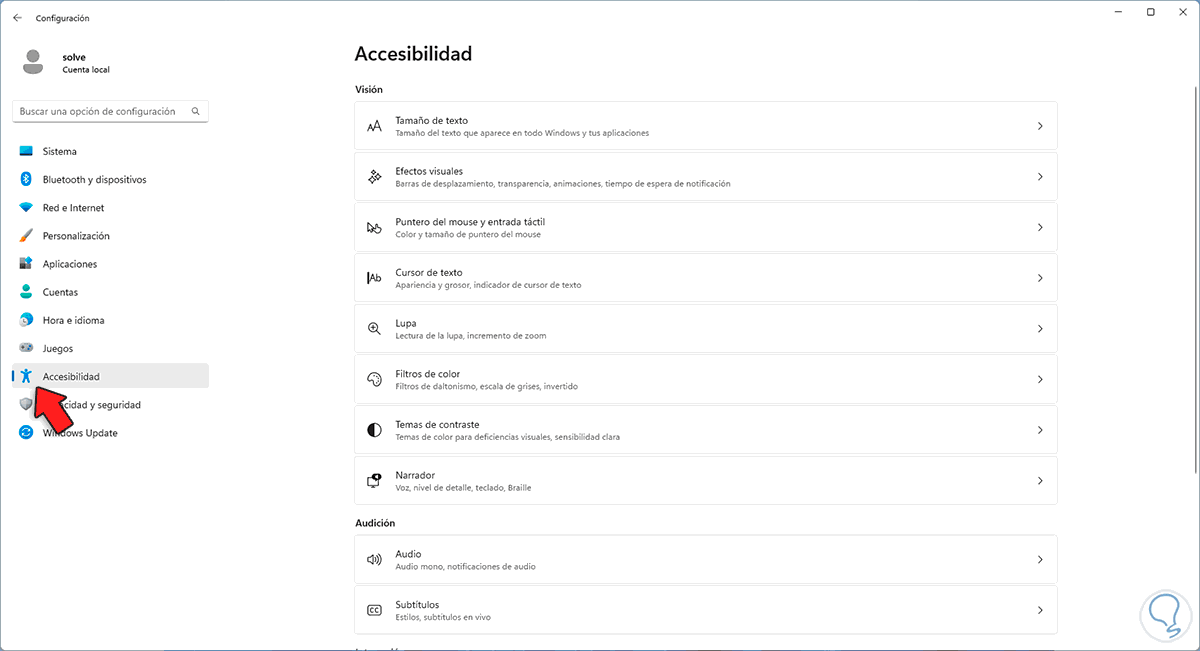
step 7
Let's go to "Accessibility":
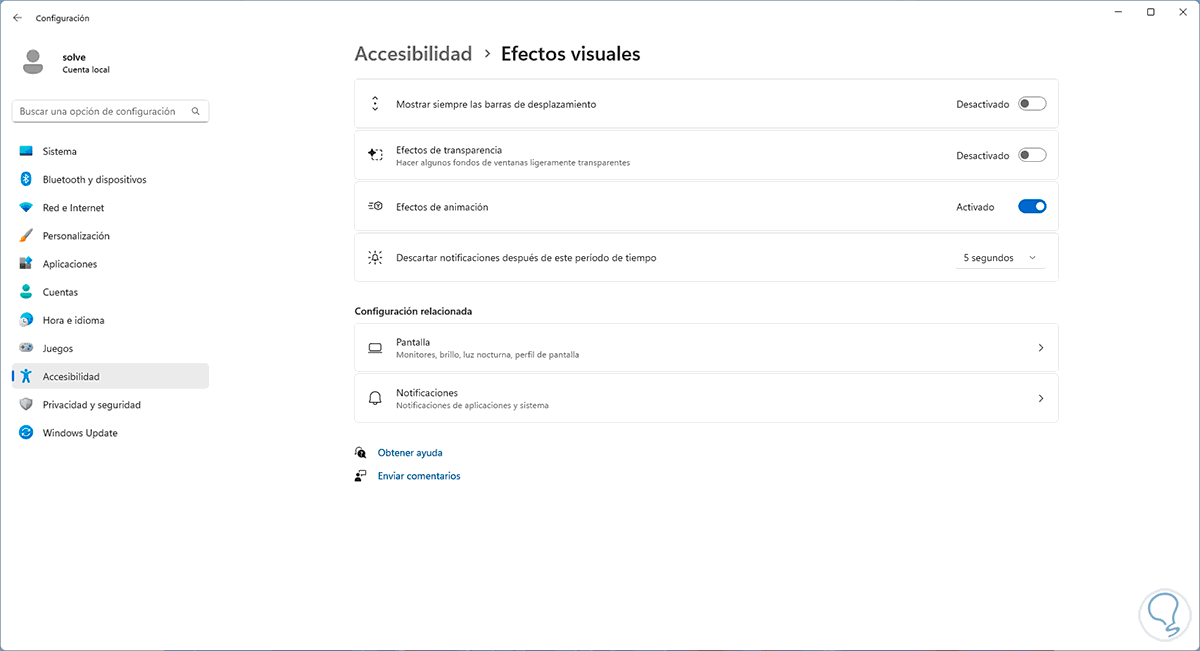
step 8
In "Visual effects" we will see this:
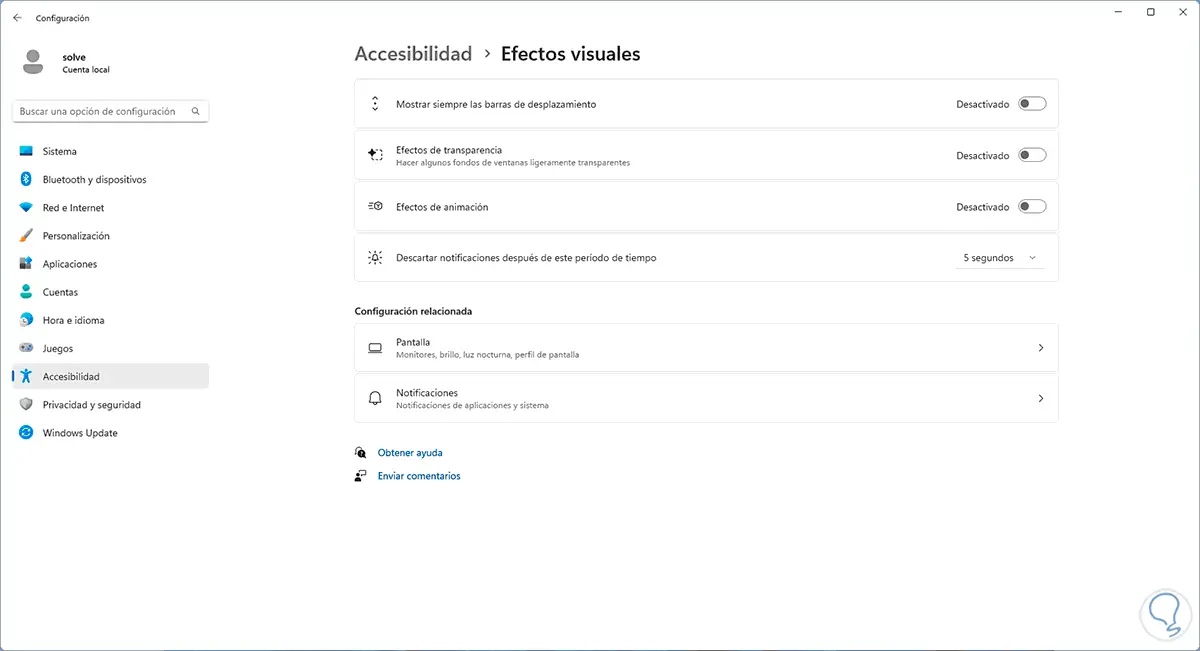
step 9
We deactivate the necessary switches:
step 10
We go to "Privacy and security" and look for the "Location" section:
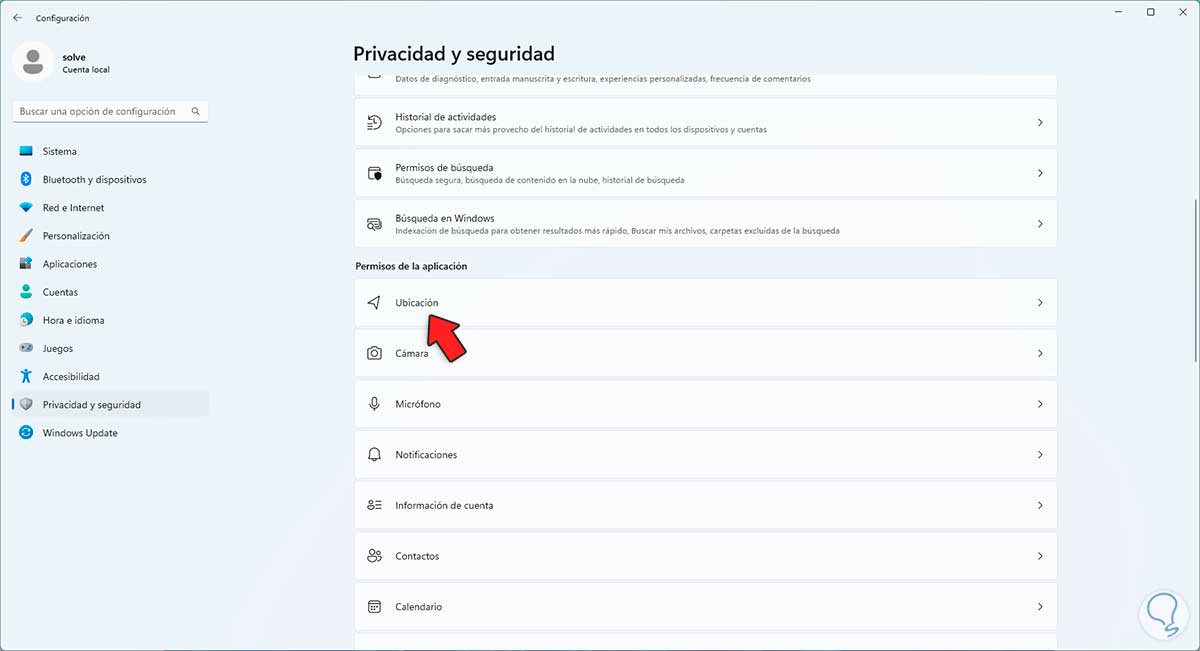
step 11
When accessing there we will see this:
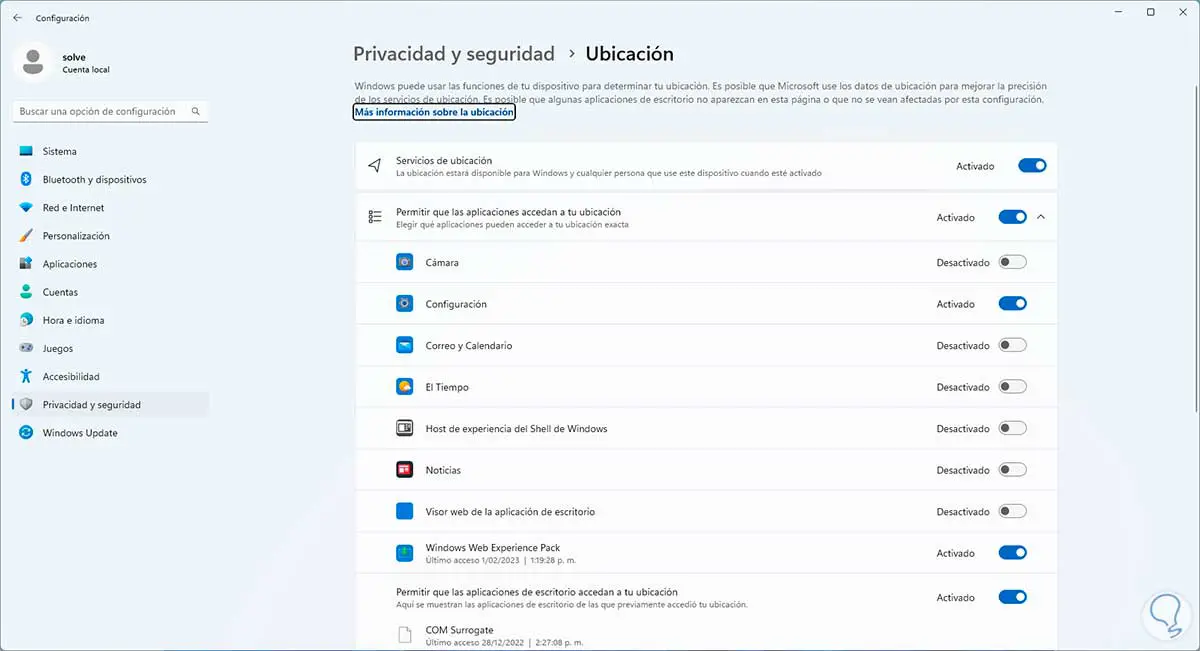
step 12
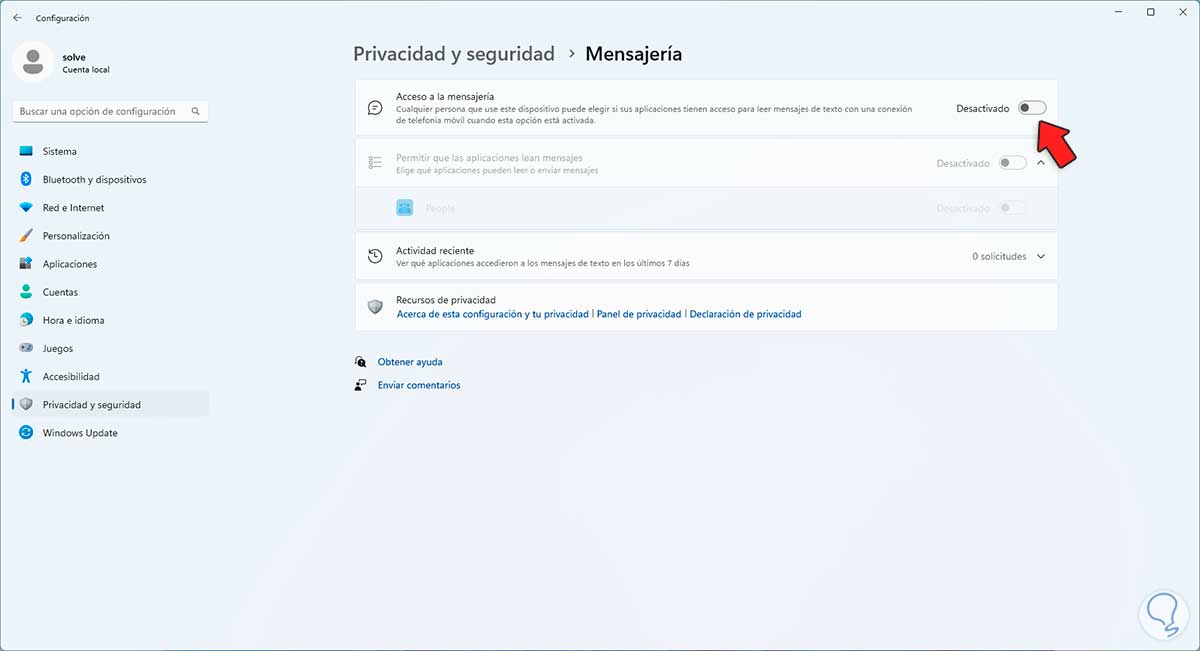
We deactivate the switches of the desired apps so that they use the location, after this we go to "Messaging":
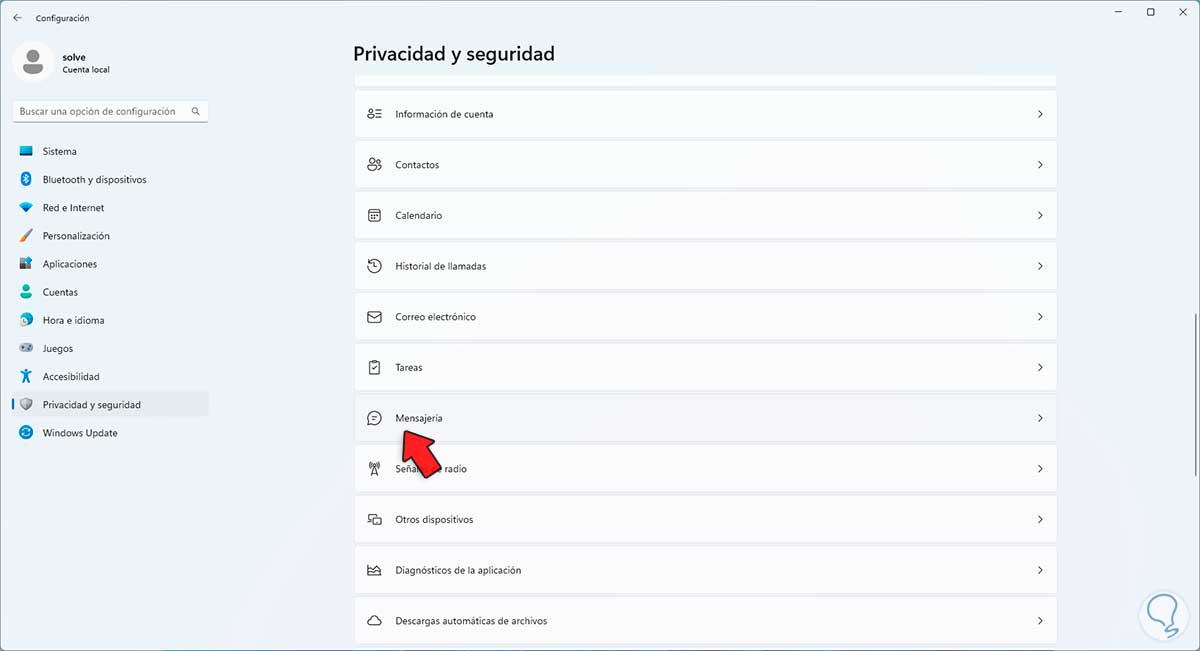
step 13
We click there to see its configuration:
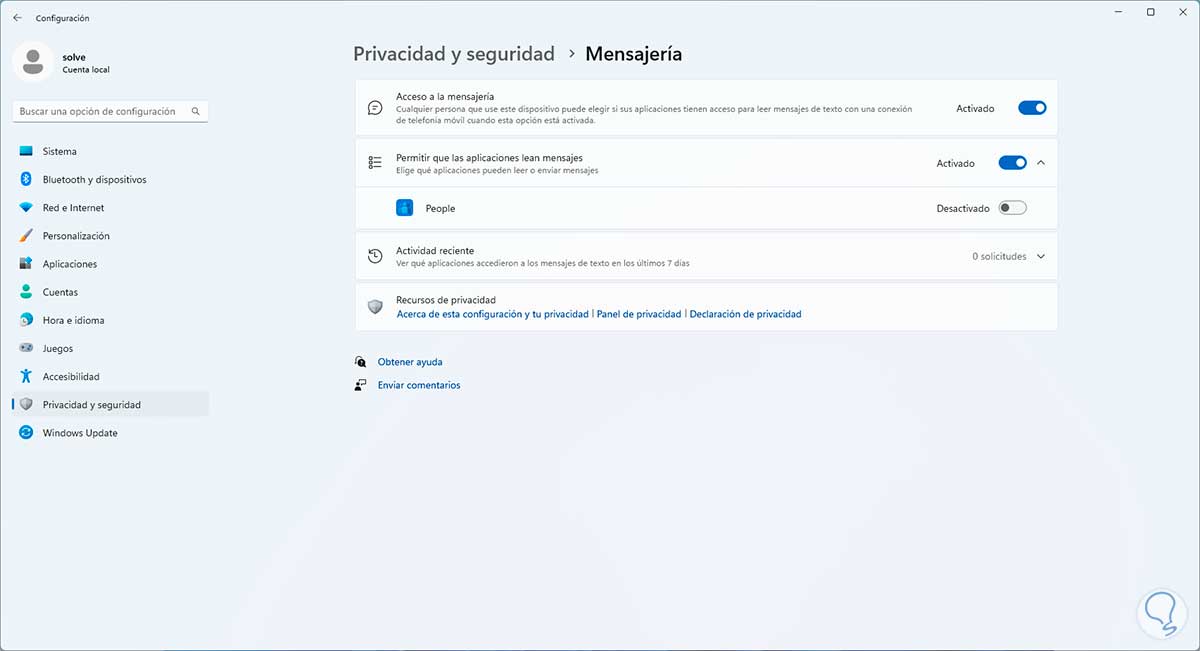
step 14
We deactivate the "Access to messaging" switch:
7 How to clean, optimize and speed up Windows 11 to the maximum without programs by configuring performance
This is a function integrated into Windows 11 with which adjustments will automatically be made to the system at the level of animations, attenuations, shadows, etc.
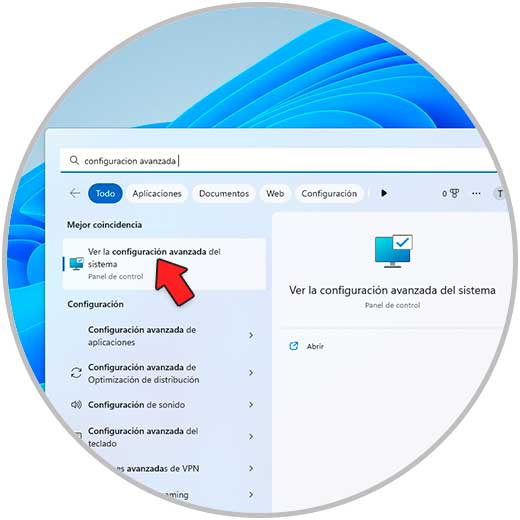
Step 1
For this, in the Start search engine, we enter "advanced settings" and click on "View advanced system settings":
Step 2
The following window will open:
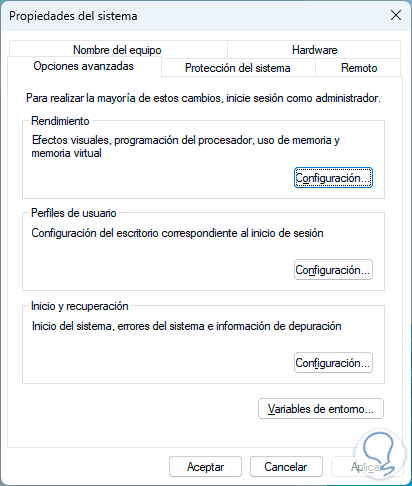
Step 3
We click on "Settings" in "Performance" to see the following:
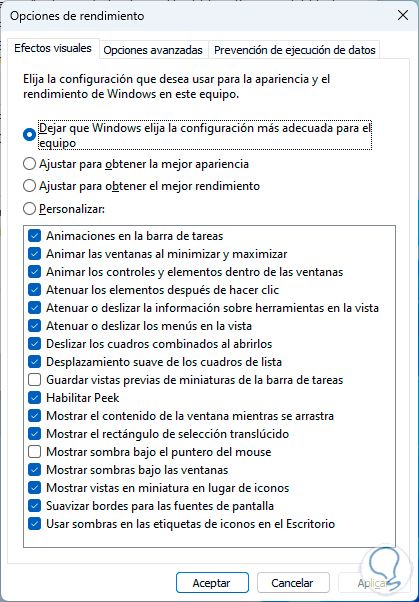
Step 4
Check the "Adjust for best performance" box:
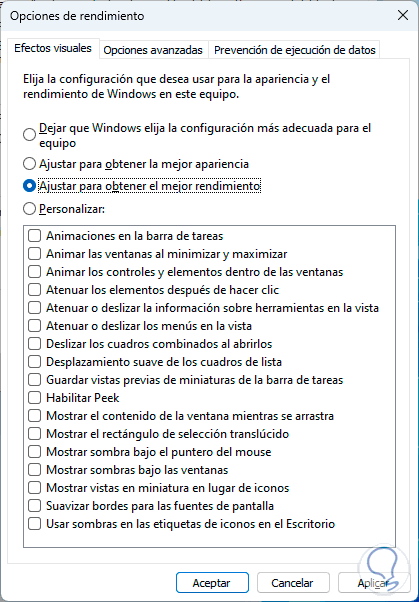
Apply the changes..
8 How to clean, optimize and speed up Windows 11 to the maximum without programs by optimizing the hard drive
Finally we can resort to the option to optimize the hard drive but this is a function that is only available for mechanical hard drives or HDD and does not apply to SDD solid state hard drives (due to its security and performance attributes).
Step 1
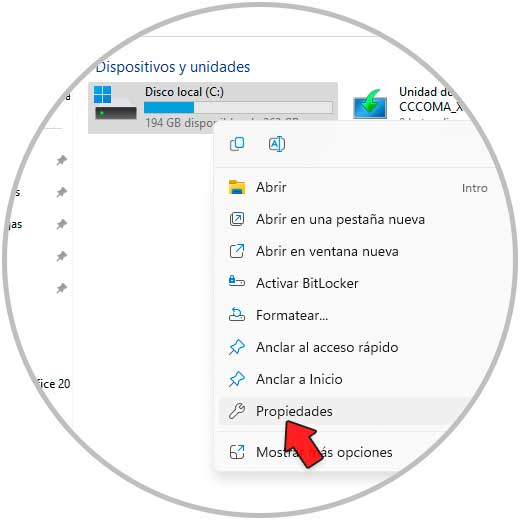
In this case we open the File Explorer, right click on drive C and select "Properties":
Step 2
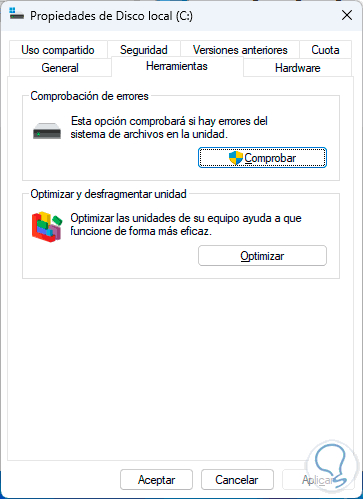
In the pop-up window we go to the "Tools" tab:
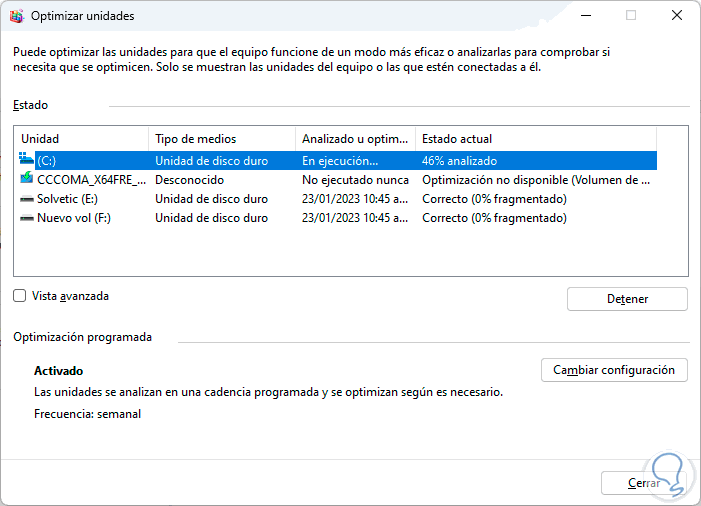
Step 3
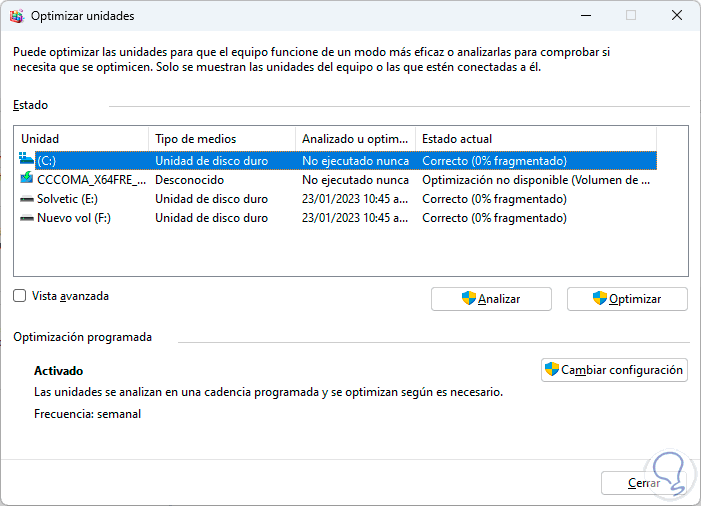
We click on "Optimize" and the following window will open:
Step 4
We select drive C and click "Optimize" to start the process:
Each of these options will give us the opportunity to improve the performance of Windows 11 at a much higher level.