We use the mouse every second when we work in Windows 11 since with it we can drag objects, select many others, open applications and files and many more tasks, but an error that we can see in Windows 11 with some frequency is not seeing the mouse pointer, this naturally has a negative impact since we will not have the possibility to carry out the required tasks, this error can be caused by multiple failures and in TechnoWikis we will provide a solution using various alternatives..
It is a bit annoying to see how the mouse disappears in Windows 11 and we cannot interact with our interface correctly. If we find ourselves with this type of error where we see that our mouse does not move, you can sign up for the solutions that we offer you today to be able to repair it in Windows 11.
Note
As we do not have the mouse pointer, it will be necessary to use our keyboard to access the configuration options.
To stay up to date, remember to subscribe to our YouTube channel!
SUBSCRIBE ON YOUTUBE
1 Fix Windows 11 mouse pointer by updating the driver automatically
An outdated driver can cause not only the pointer but other mouse options and features to fail, hence the importance of updating it.
Step 1
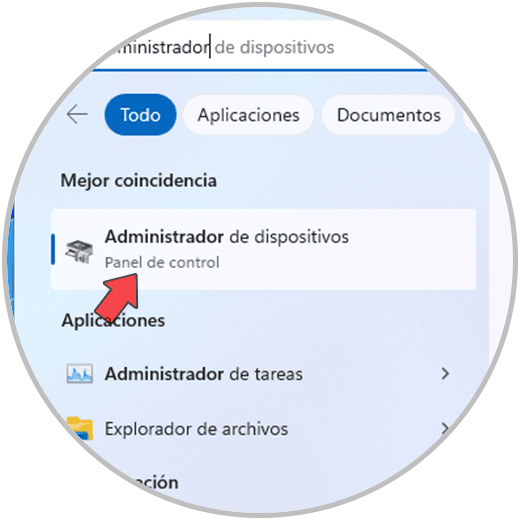
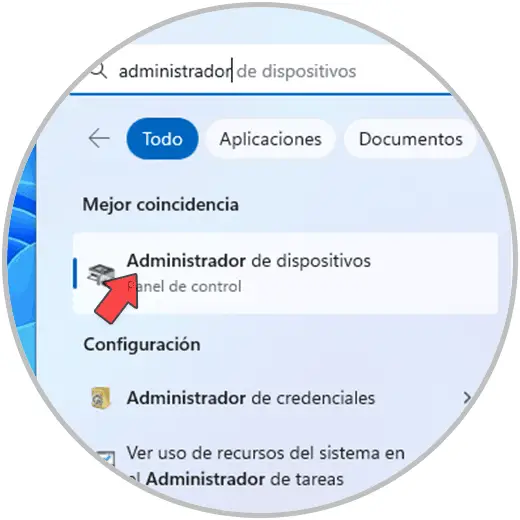
To carry out the automatic process, press the Windows key and enter "administrator" in the search engine:
Step 2
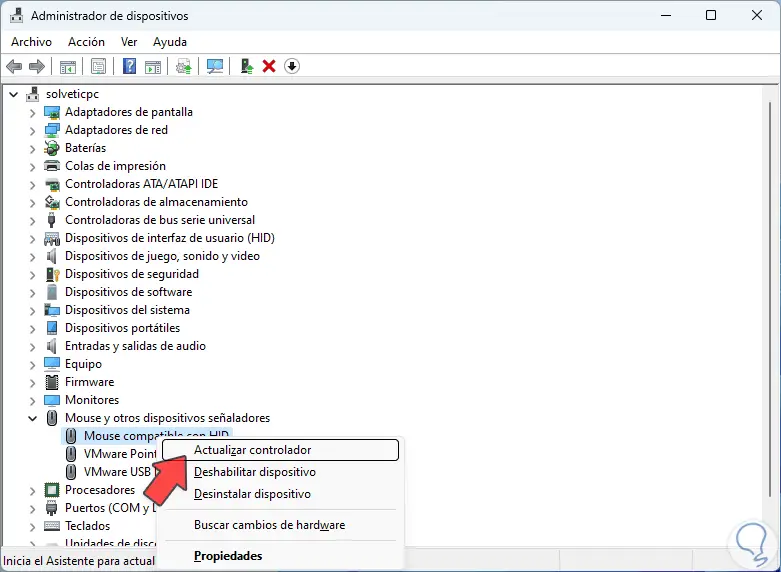
Press Enter on "Device Manager" which is the option that appears first by default, if it were another, with the scroll arrows we will go to the Device Manager, now we press the Tab key to access the options, with the arrow With the arrow down we go to "Mouse and other pointing devices", there we press + to display the options and with the arrow down we select the controller, we use the Shift + F10 keys to access the available options:
Shift + F10
We select and press Enter on "Update driver", we will see the following:
Step 3
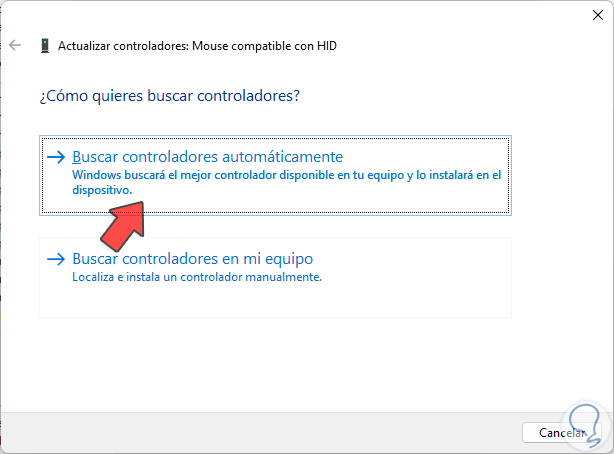
Press Enter on the default option (Search for drivers automatically) and wait for the process to finish:
Step 4
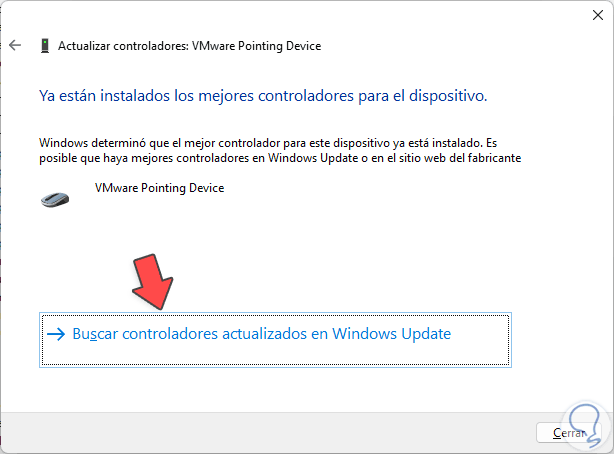
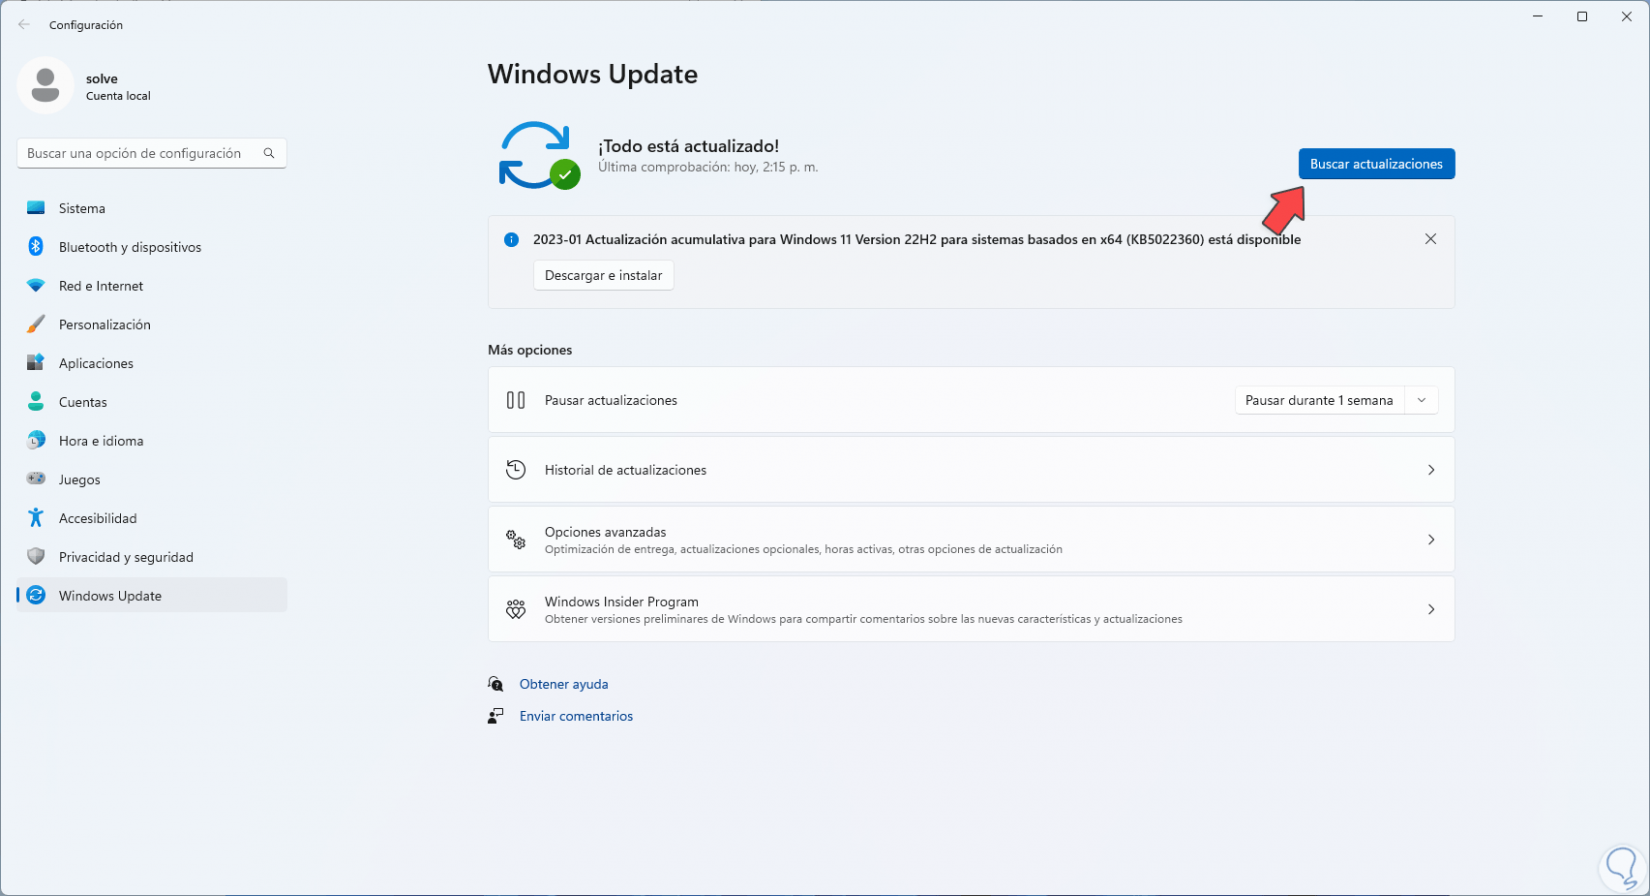
Press Enter on "Search for updated drivers in Windows Update" which is already active and confirm if there are updates:
step 5
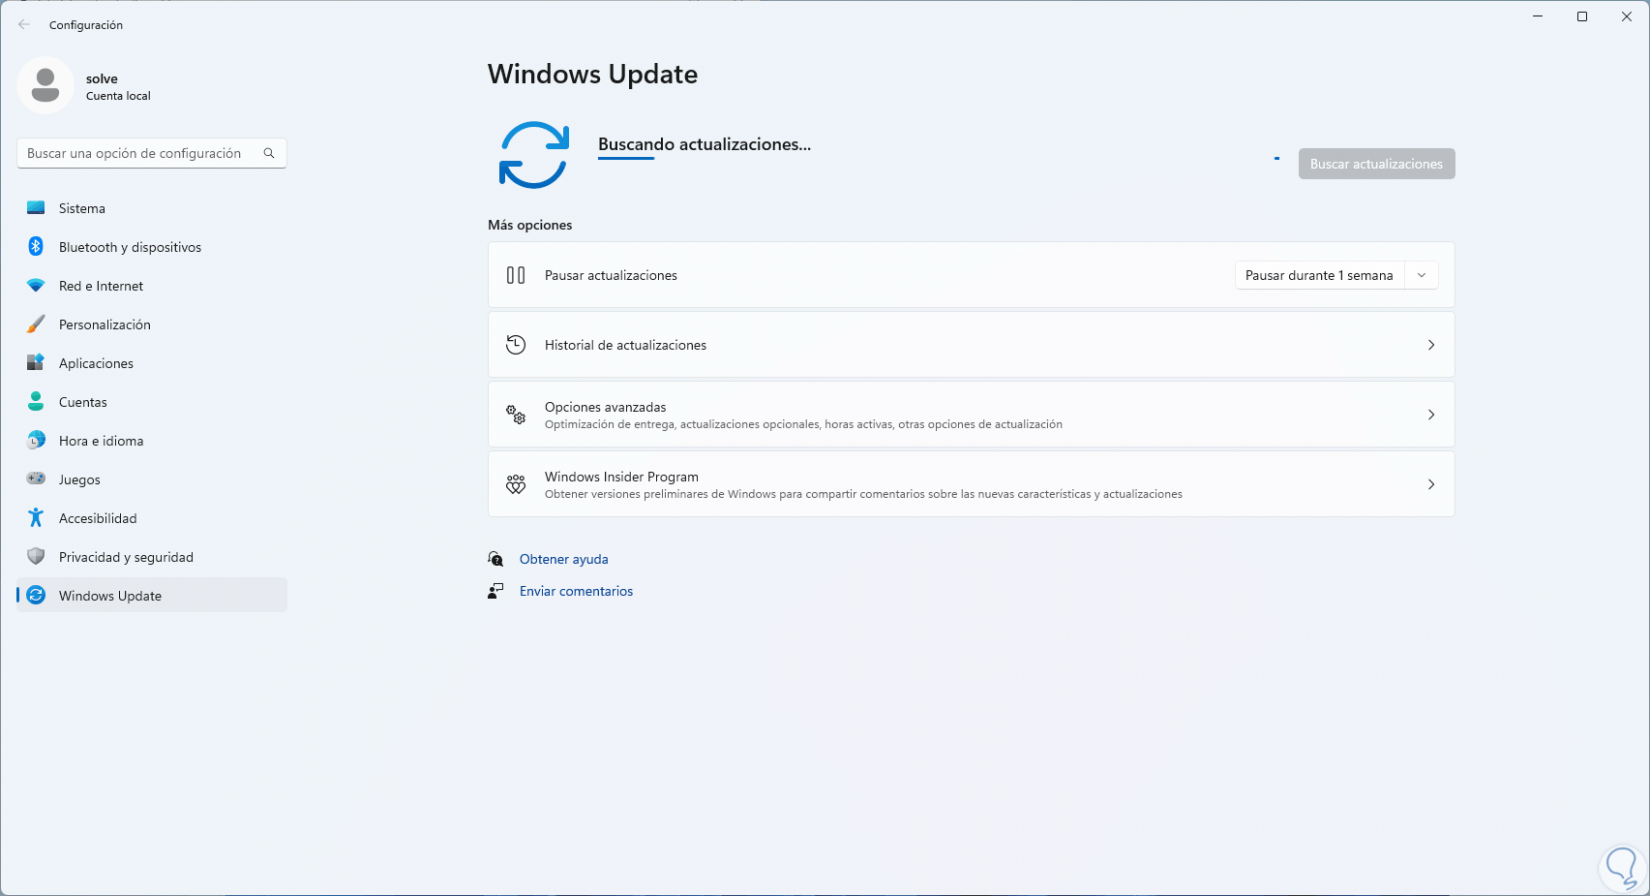
With the Tab key we select "Check for updates" to execute the process:
step 6
After this we will use the following keys to close the Device Manager.
Alt + F4
2 Fix Windows 11 mouse pointer by updating the driver manually
Continuing with the updates we may want to carry out the process manually using the drivers available in Windows or downloading them from the manufacturer's website.
Step 1
For this method we press the Windows key and in the search engine enter "administrator":
Press Enter on "Device Manager".

Step 2
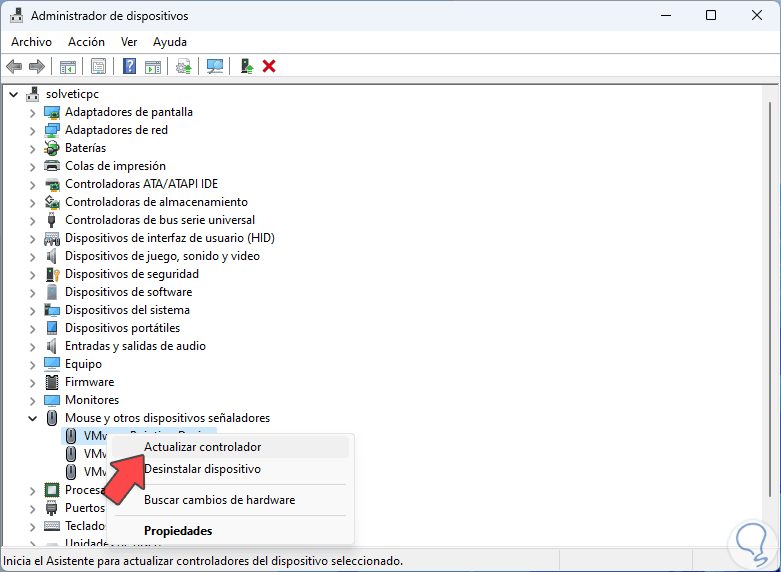
Again we press the Tab key to access the options, using the down arrow we go to "Mouse and other pointing devices", we press + to display the options and with the down arrow we select the controller, with the Shift + keys F10 we will see the options to use:
Select with the arrow keys and press Enter on "Update driver":
Shift + F10
Step 3
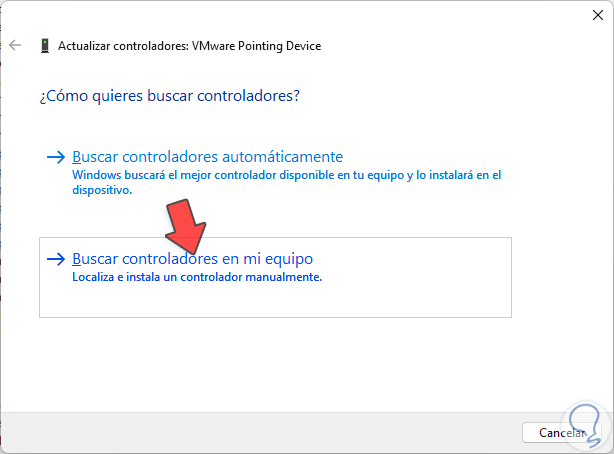
With the down arrow select "Search for drivers on my computer"
Step 4
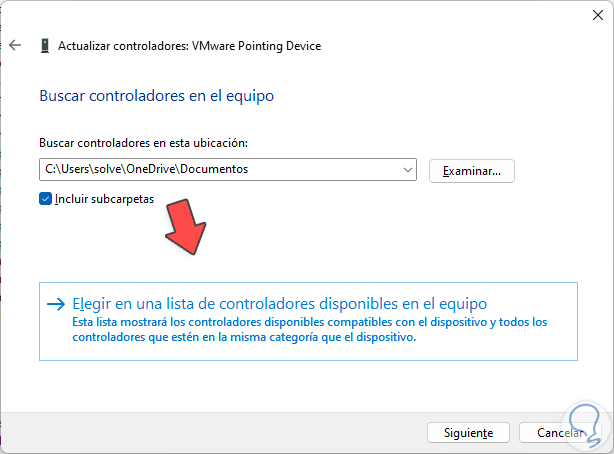
Hit Enter and then Tab to select "Choose from a list of drivers on my computer":
step 5
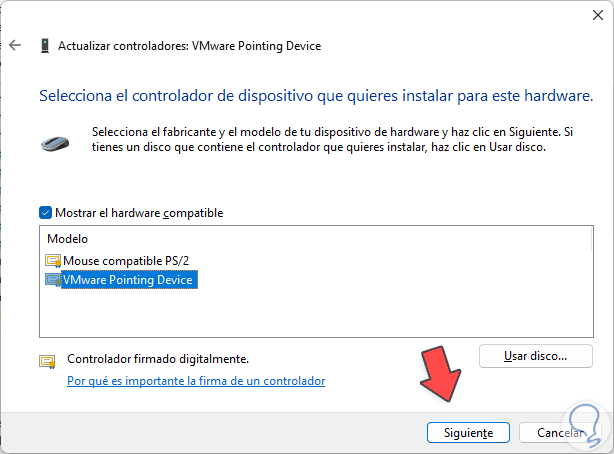
Press Enter and now with the directional arrow select the controller to use:
step 6
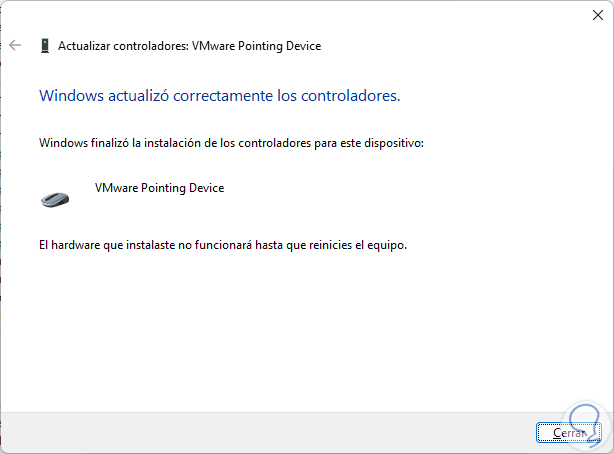
With Tab select "Next" and press Enter to apply the change:
step 7
Press Enter to close this window and we will see the following. Press Enter to restart Windows.

3 Fix Windows 11 mouse pointer by rolling back the driver
This option allows us to revert the mouse driver to a previous version and the reason is that many times new updates can generate operating errors, this option will not always be available.
Step 1
To check it, press the Windows key, in the search engine enter "administrator" and press Enter on "Device Manager":

Step 2
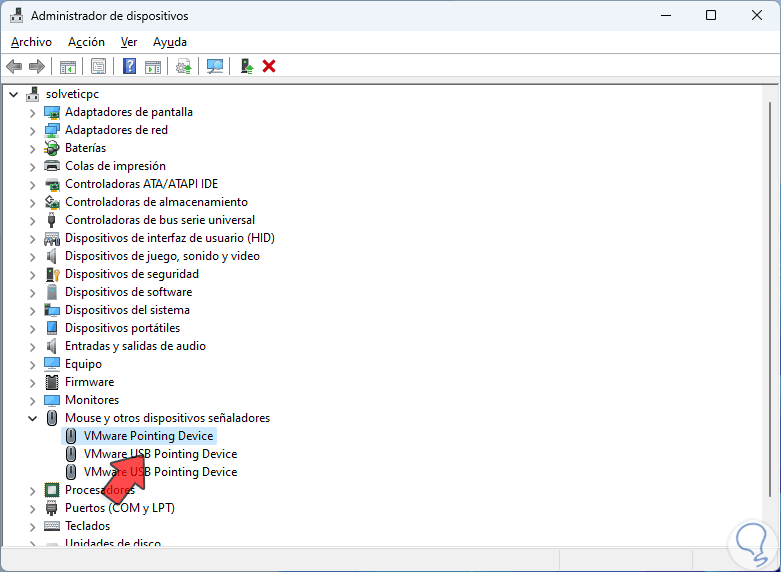
Press the Tab key to access the options and with the arrow down we go to "Mouse and other pointing devices", with the + sign we will display the options:
Step 3
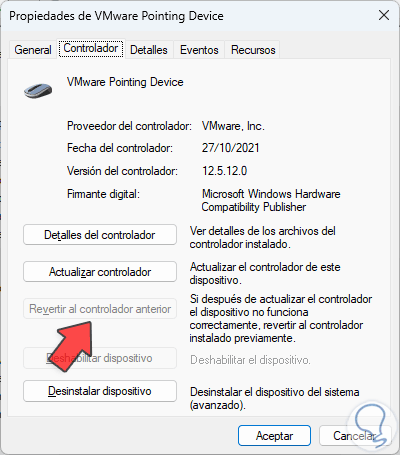
Select the controller and then press Enter to open its properties:
Step 4
With the Tab key we go to the tabs and there select the "Driver" tab, check if the option "Revert to the previous driver" is active.
step 5
Close the Device Manager window with this combination.
Alt + F4
4 Fix Windows 11 mouse pointer by reinstalling the driver
Finally it will be possible to reinstall the mouse driver to be able to see our pointer, in this case we press the Windows key.
Step 1
In the search engine we enter "administrator" and then press Enter on "Device Manager":

Step 2
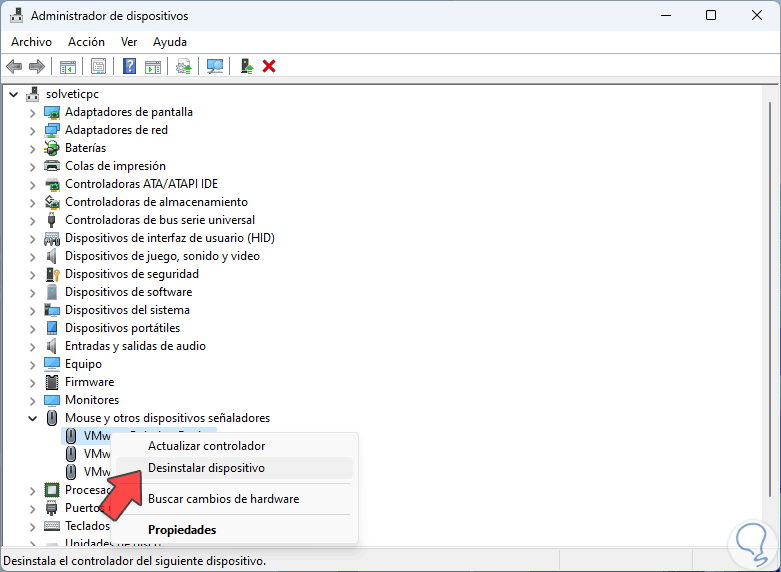
Press the Tab key to access the administrator options, with the arrow down select the controller and with the keys Shift + F10 we can select and press Enter on "Uninstall device":
Shift + F10
Step 3
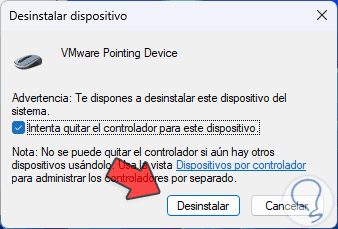
The following message will open:
Step 4
With the Tab key we select "Uninstall" to see the following:
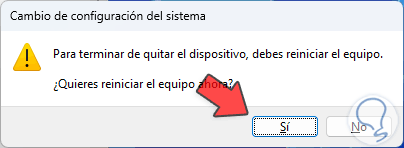
step 5
Press Enter to restart Windows:

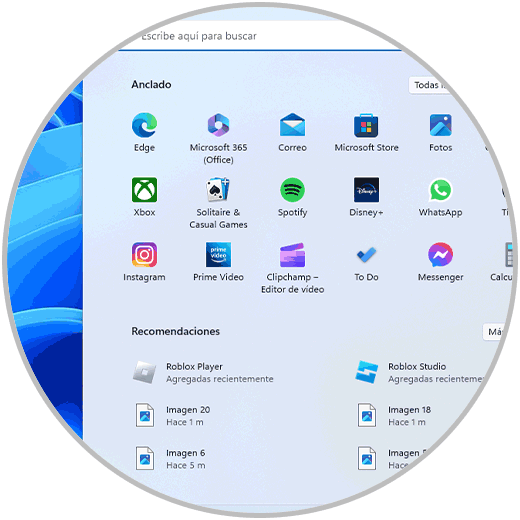
step 6
When logging in the mouse pointer will be available:
These steps are essential to recover the mouse pointer so essential for tasks in Windows 11..