To stay up to date, remember to subscribe to our YouTube channel!
SUBSCRIBE ON YOUTUBE
In laptop computers, and in PCs where there is a Wi-Fi adapter, the connection to wireless networks, Wi-Fi, is a key element when it comes to establishing Internet access, with a wide growth in portable equipment. Wi-Fi networks are a fundamental solution to have access to networks without having to be in a single fixed location..
An error that is currently present is that the Wi-Fi network access icon is not visible on our devices, which prevents us from searching for networks in the distance range and therefore connecting to any of them.
TechnoWikis brings a series of solutions to correct this error in Windows and thus be able to access Wi-Fi networks without any problem..
1 Repair WiFi laptop error by enabling adapter
Step 1
One of the most common causes for not seeing Wi-Fi on our devices is because the adapter is disabled, this can happen accidentally with some configuration or update, so by enabling it we will have access to Wi-Fi again, We right click on the network icon in the task bar and there we click on “Diagnose network problems”:
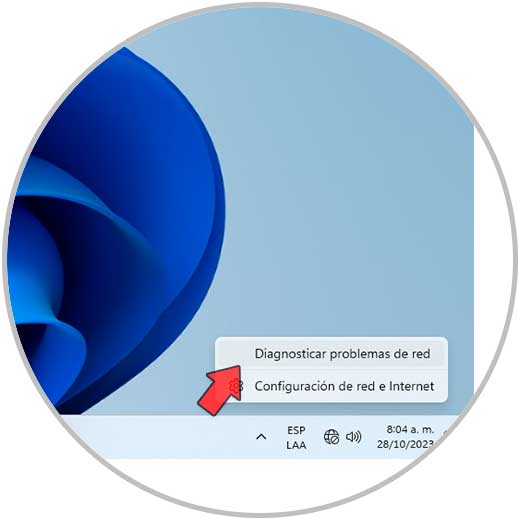
Step 2
In the displayed wizard, we can validate if it gives us the option to enable the Wi-Fi adapter:
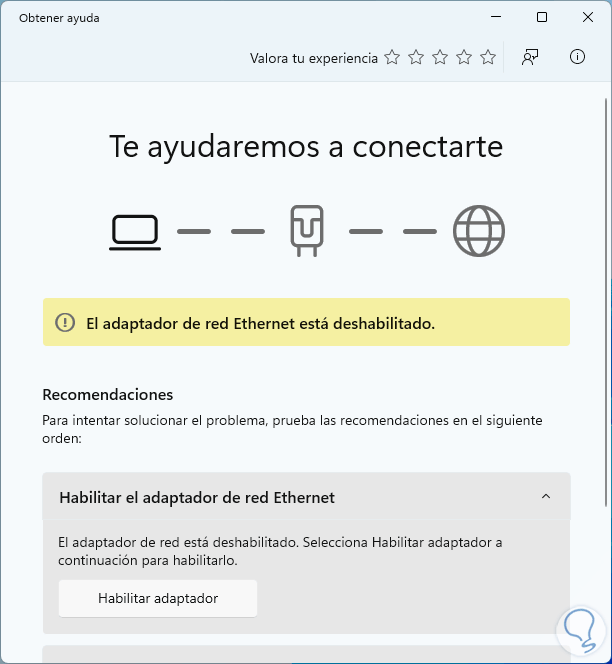
Step 3
In case we only see the Ethernet adapter (wired), we are going to right-click again on the network icon in the taskbar and this time we click on “Network and Internet settings:

Step 4
The following will open. We click on “Advanced network configuration”:
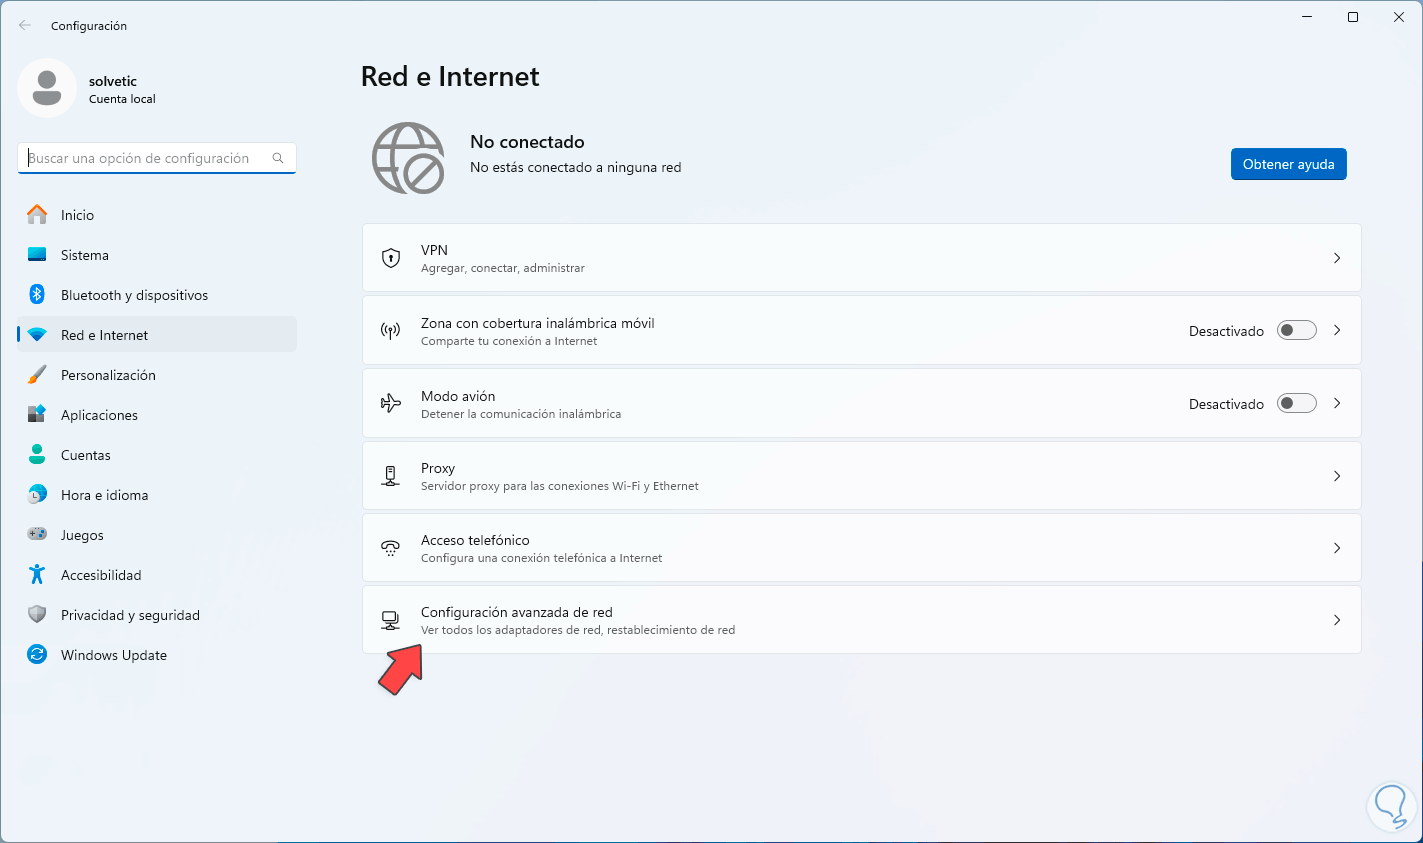
Step 5
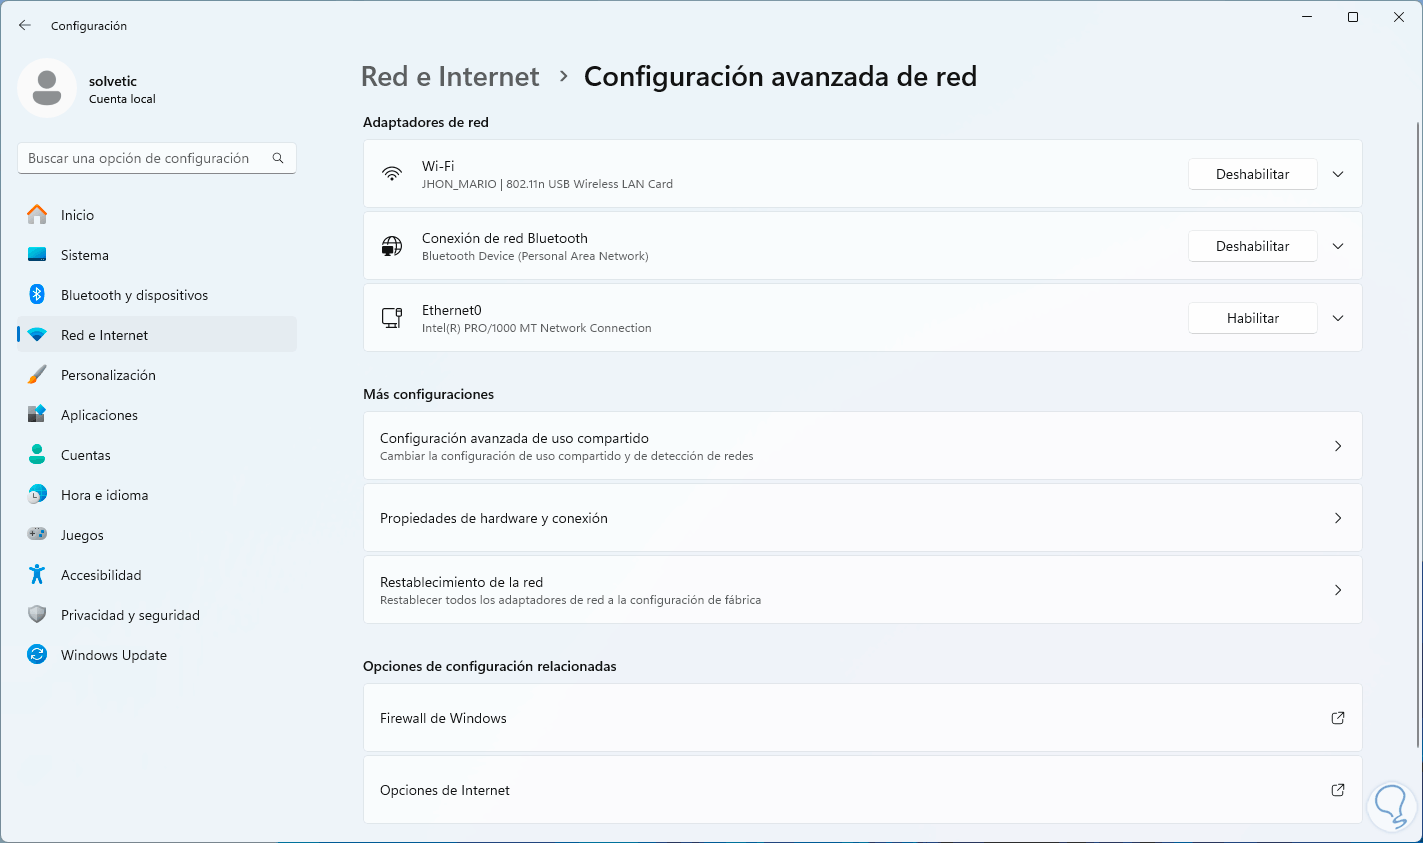
and then we will see the following. Here, we click on “Enable” on the Wi-Fi network adapter
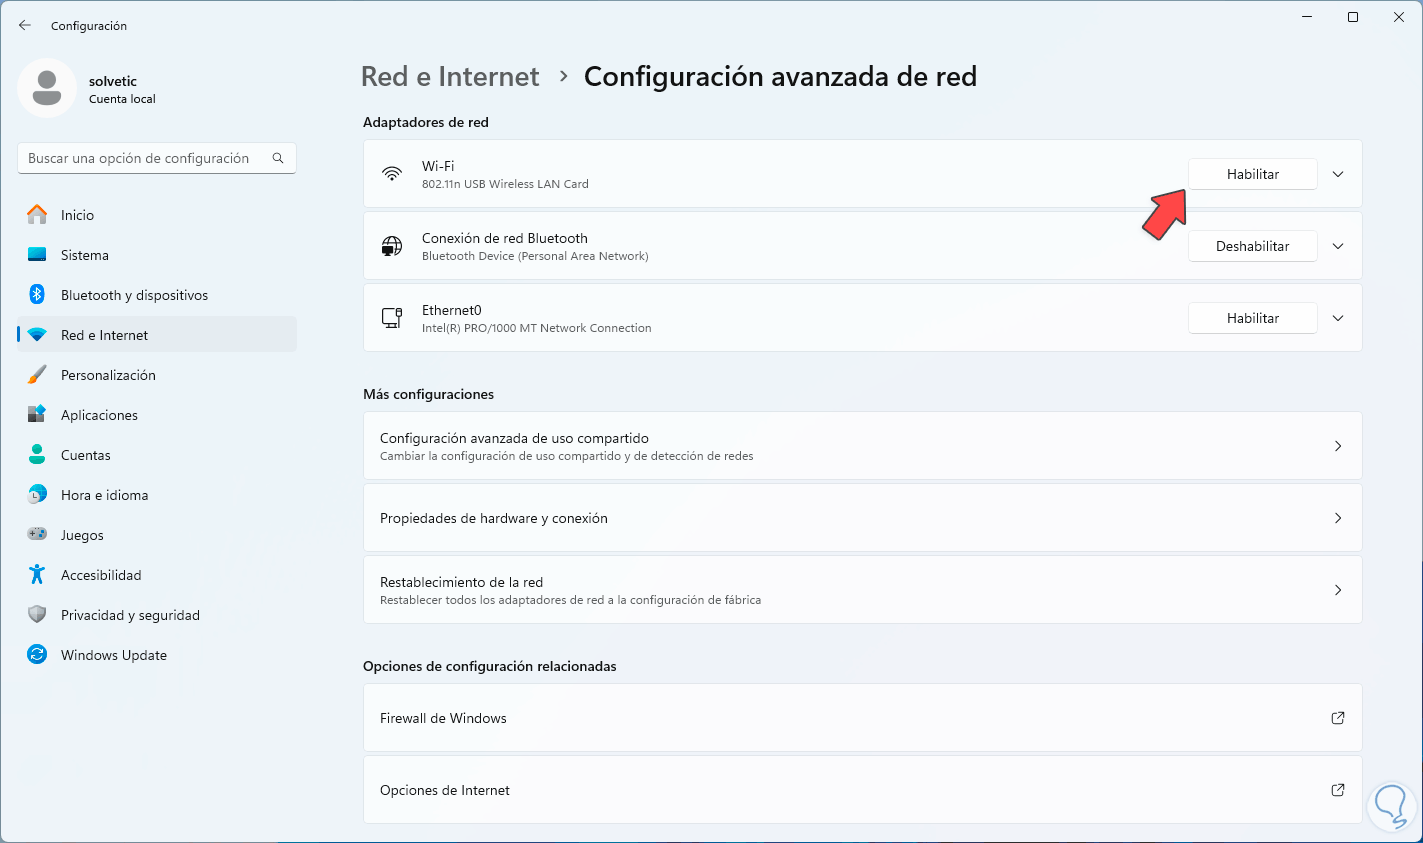
Step 6
We hope this is enabled. When the process is finished we will see the following:
Step 7
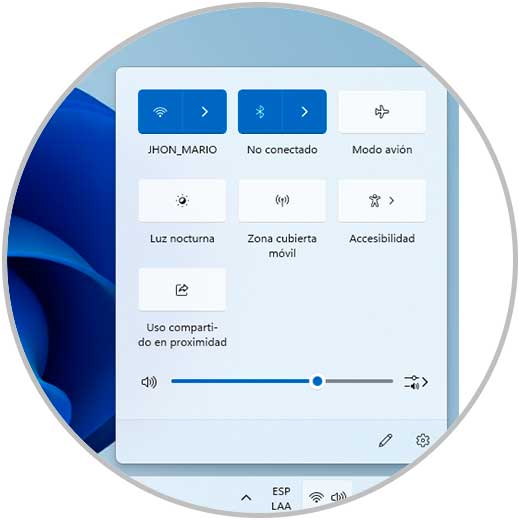
With the adapter enabled, we can see that the icon and network access are present:
2 Repair WiFi laptop error from Services
Windows 11 is managed through services which allow the various components of the system to work correctly, the Wi-Fi network depends on the WLAN or WLANSVC service. This is a service that is responsible for carrying out network configuration and detection tasks. Additionally, it allows you to connect and disconnect from that network when the range is available or not. Something additional about this service is that it allows the team, as long as it has hardware requirements, act as an access point so other devices can connect to it wirelessly.
Step 1
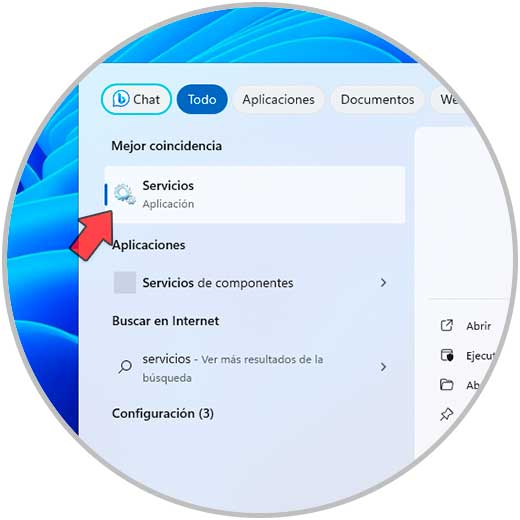
It is time to review the status of this service. To do this, in the search box we enter “services”, click on Services:
Step 2
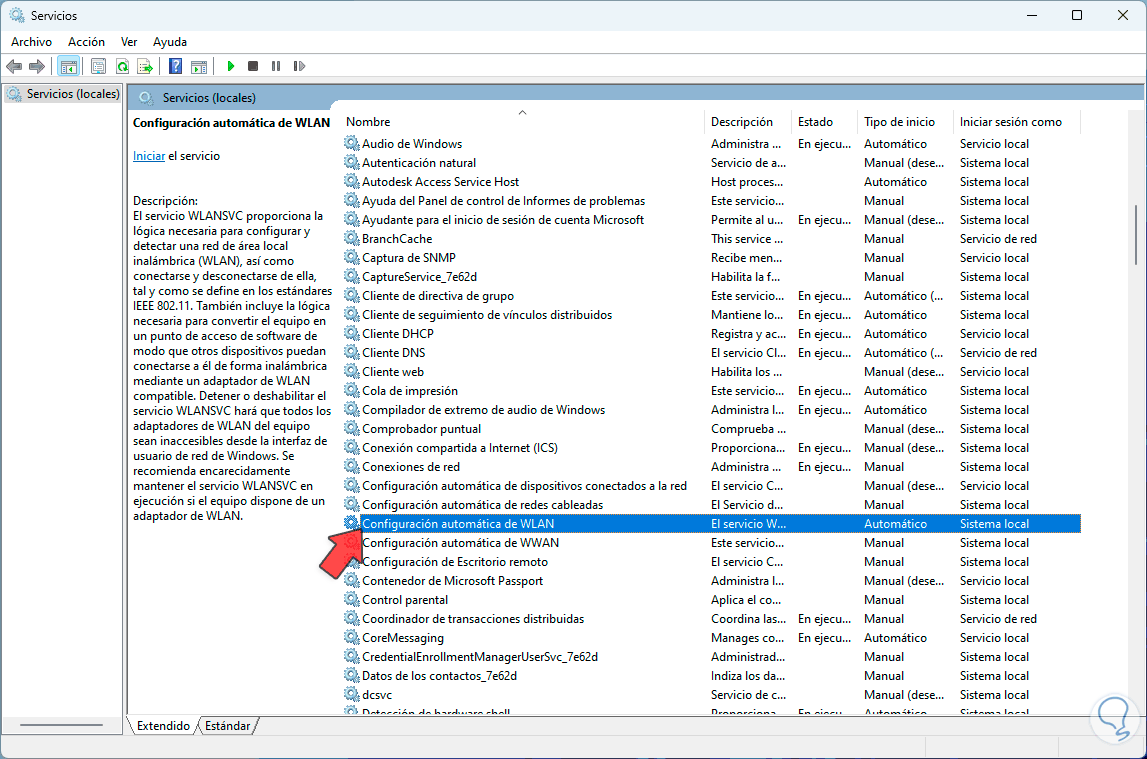
In the services console we locate the service called “WLAN automatic configuration”:
Step 3
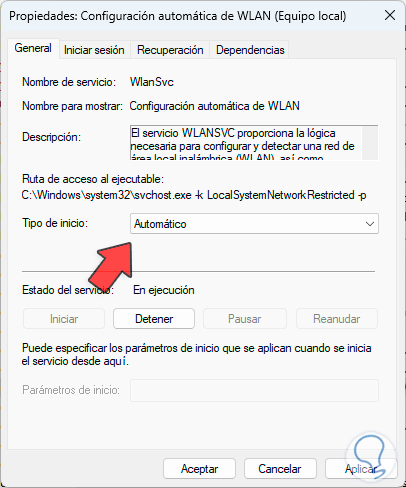
We double click on this service to see its properties. First of all, we validate that in “Startup type” there is the “Automatic” option. Then we click on “Start” to activate the service:
Step 4
We click on “Apply” and “Accept” to then check that our Wi-Fi network works:

3 Repair WiFi laptop error by updating driver
Step 1
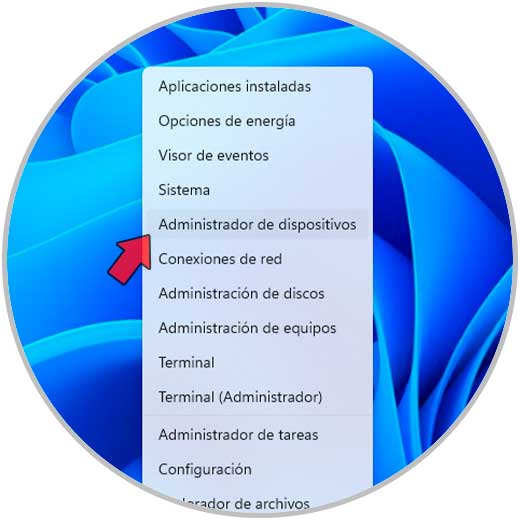
Having an outdated driver results in the connection to the Wi-Fi network, as well as seeing the icon, failing. To update the Wi-Fi network driver, we will right-click on the Start menu and select “Device Manager.” ”:
Step 2
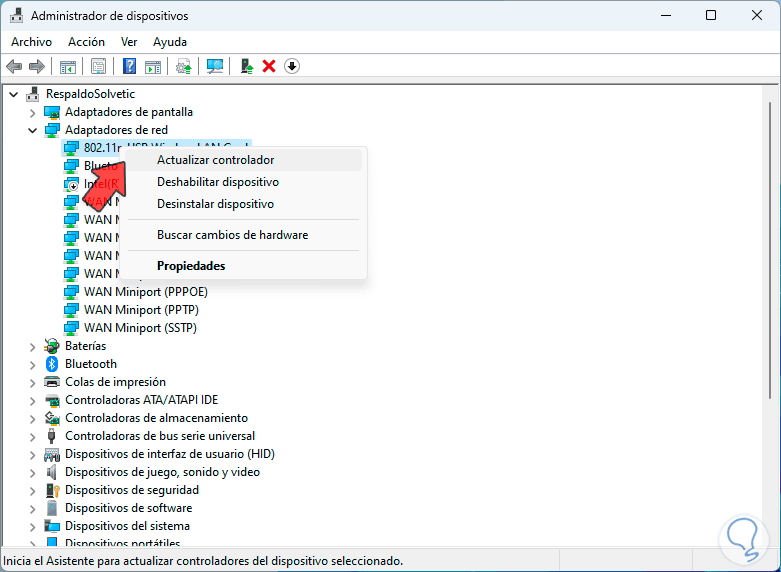
In “Network adapters” we right click on the Wi-Fi driver and select “Update driver”:
Step 3
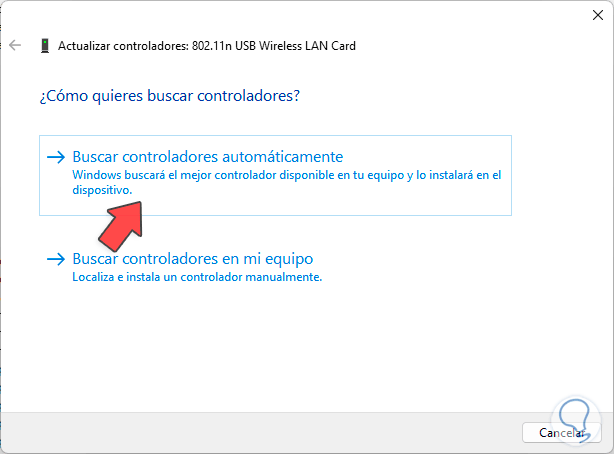
We will see the following. We click on “Search for drivers automatically”
Step 4
and we wait for this process to finish:
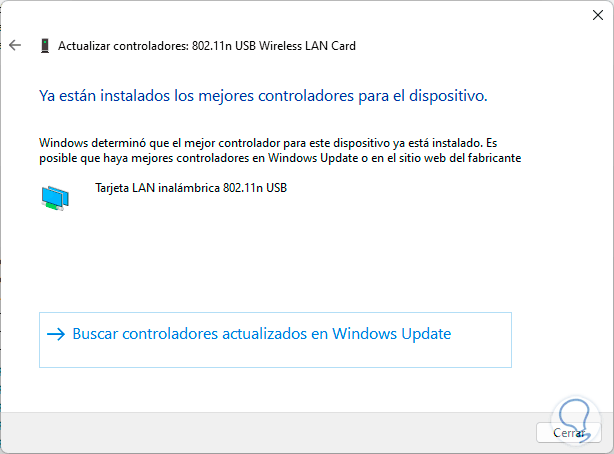
Step 5
After this we check that the Wi-Fi network is visible:

4 Repair WiFi laptop error by uninstalling driver
Step 1
Another option that we can highlight when we cannot see the Wi-Fi network icon is to uninstall the driver, this will not affect anything since we will teach you the simple method to reinstall it, we open the Device Manager from Start:

Step 2
Now, in Network Adapters, we right click on the Wi-Fi driver and select the “Uninstall device” option:
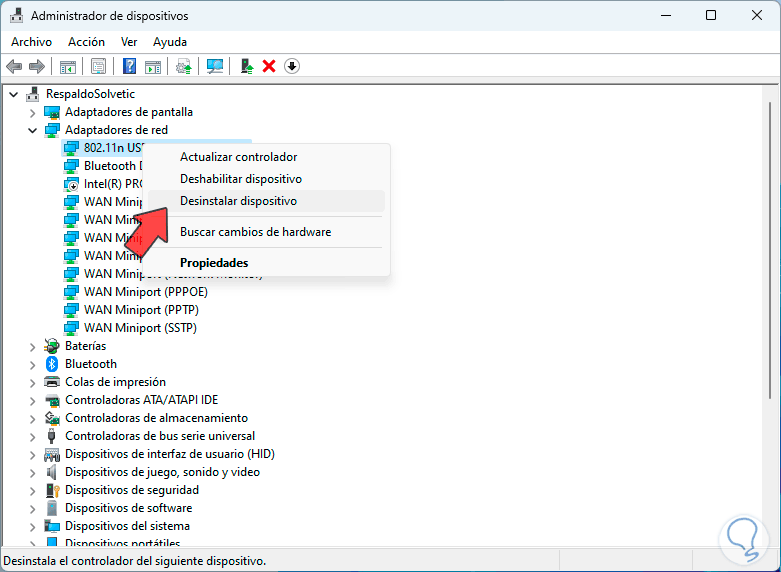
Step 3
We will see the next message. We click on “Uninstall”:
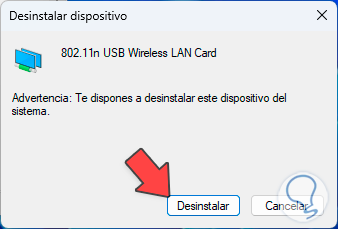
Step 4
and we wait for this step to be completed. After this, we go to the “Action” menu and there we click on “Check for hardware changes”:
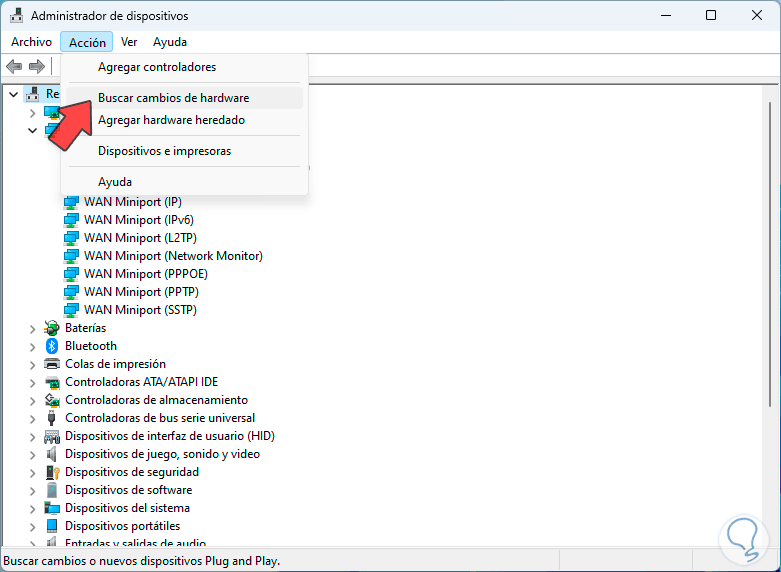
Step 5
We wait a moment and we will see that the Wi-Fi driver has been automatically reinstalled:
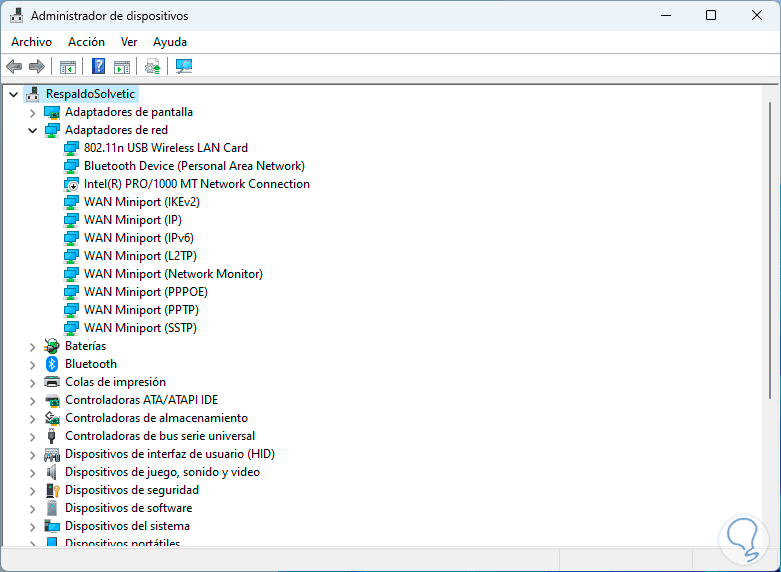
Step 6
Now we can check if we see and can access Wi-Fi:

5 Repair WiFi laptop error by adjusting the power
Step 1
This is a function integrated into the devices which allows the computer to turn off that device to save energy, but if this happens all Wi-Fi network functions will be deactivated, so it is best not to activate this option, we open the Device Manager devices:

Step 2
In “Network adapters” we select the Wi-Fi network driver:
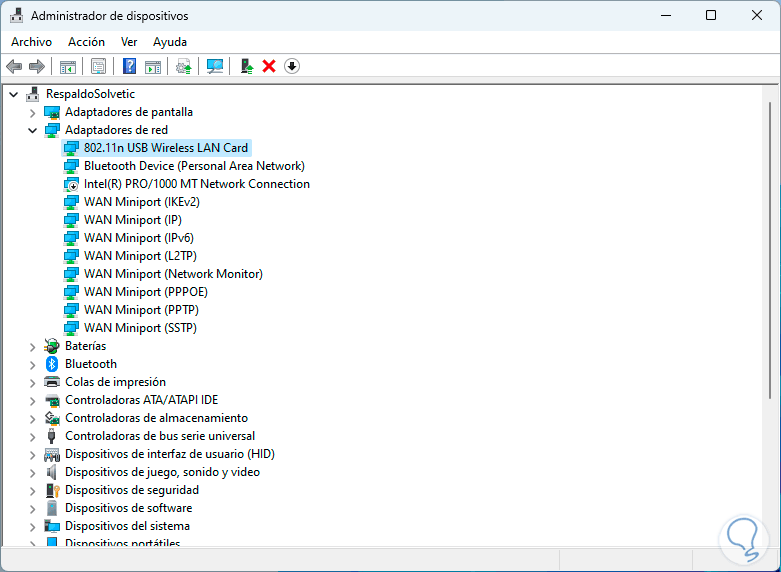
Step 3
We double click on it and then go to the “Power Management” tab. We deactivate the “Allow the computer to turn off this device to save energy” box:
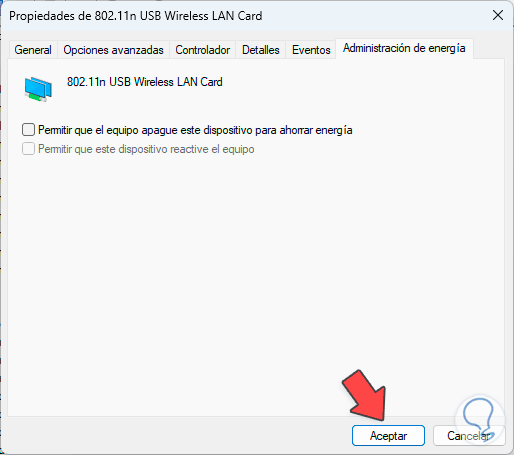
Step 4
We click on “Accept” and validate that the Wi-Fi network works:

6 Repair WiFi laptop error from configuration
Step 1
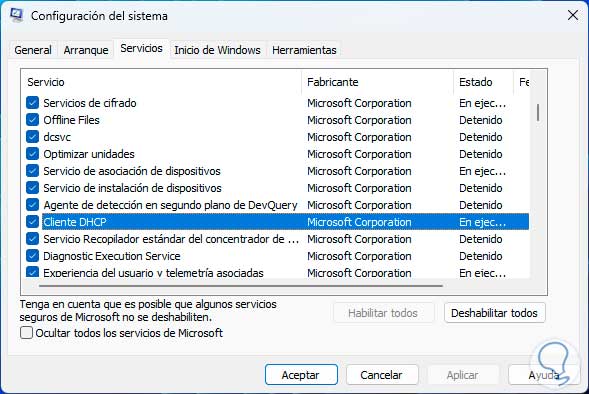
Finally, we can carry out a small review of Microsoft services, in the search box enter “msconfig” and click on the utility:
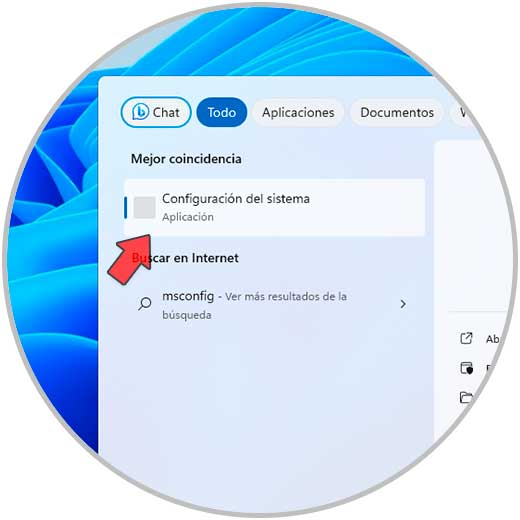
Step 2
In the opened window we will go to the “Services” tab:
Step 3
Here we check that all services associated with Wi-Fi are enabled, click “Accept” and check the Wi-Fi network. We see that it works correctly.

Step 4
Additionally, you can perform some verifications such as:
- See that the modem is connected to the power
- Check the connections from the equipment to the modem
- Validate that the failure is not general due to maintenance
With this you will be able to see the Wi-Fi icon and access the networks.