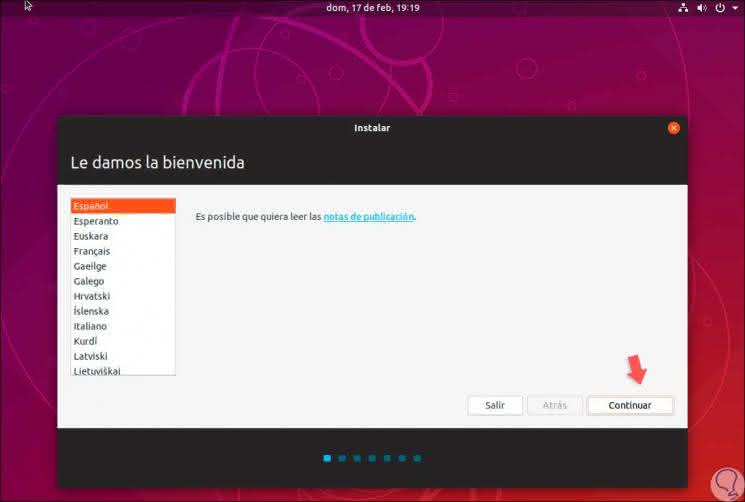
Ubuntu is about to launch its latest version that is code named Disco Desktop or Ubuntu 19.04 and that presents a series of improvements and features that seek to satisfy each of its thousands of users with better overall benefits . Recurrent Linux users know that when the Ubuntu system is installed 19.04 we have the possibility to assign the desired language in the general interface of the system with more than 30 available options:
It will also be possible to assign the desired language of the keyboard, worse if we have already received the equipment with an established language or for work or educational reasons we should go to a place with a different language, the most normal thing is that we should modify the interface language General or the keyboard of Ubuntu 19.04 . Although this may seem like a complex task TechnoWikis will help you see that it is not so..
We will learn several useful ways to change the language in Ubuntu 19.04.
1. Change the language from the Languages ​​function in Ubuntu 19.04
Step 1
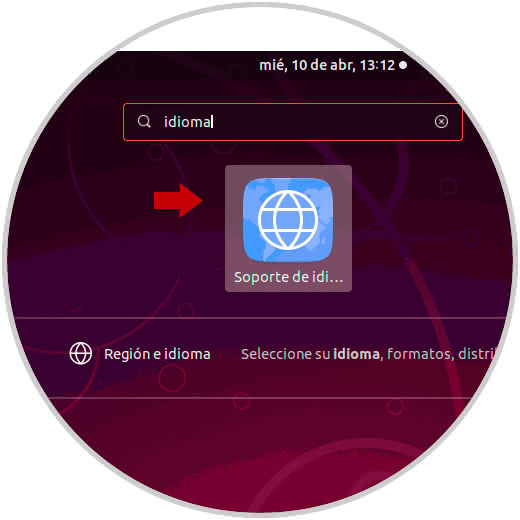
For this method click on the icon "Show applications" located at the bottom of the desktop and in the search field enter the term "language" and there we choose the option "Language support":
Step 2
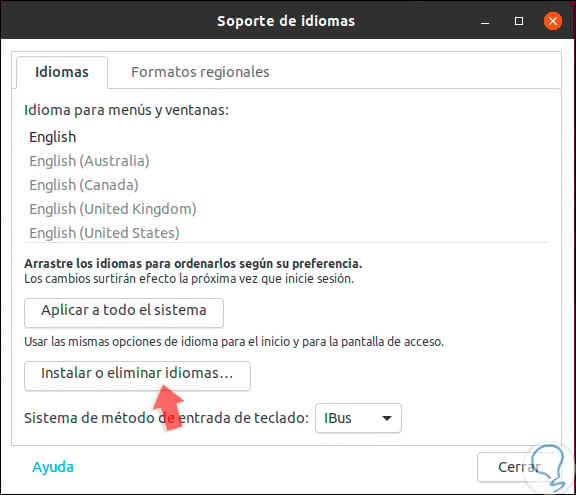
There will be displayed the following window where we have the following options:
- Select the language of the menus and windows of Ubuntu 19.04
- Apply the language to the entire system
- Install or delete languages
Step 3
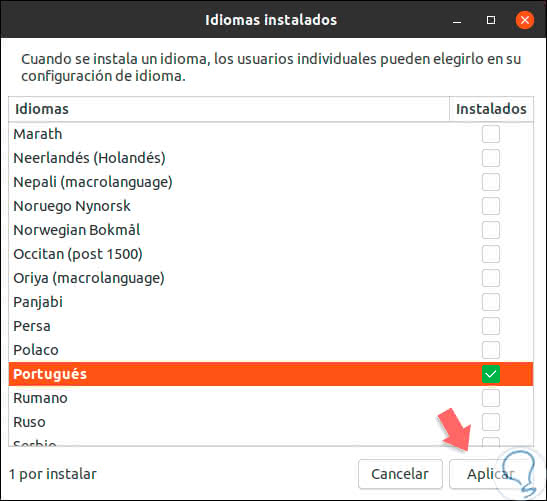
To install a new language that is not available, just click on the "Install or delete languages" button, and check the box for the selected language:
Step 4
We click Apply to have this language downloaded and be available as a language for Ubuntu 19.04.
Note
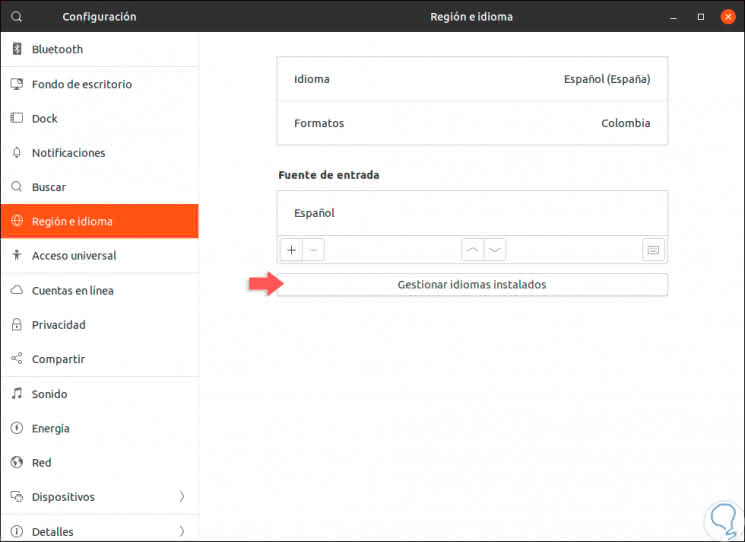
Another option to access this parameter is in the Configuration / Region and language path.
Step 5
There we click on the button "Manage installed languages" to be redirected to the Language Support window.
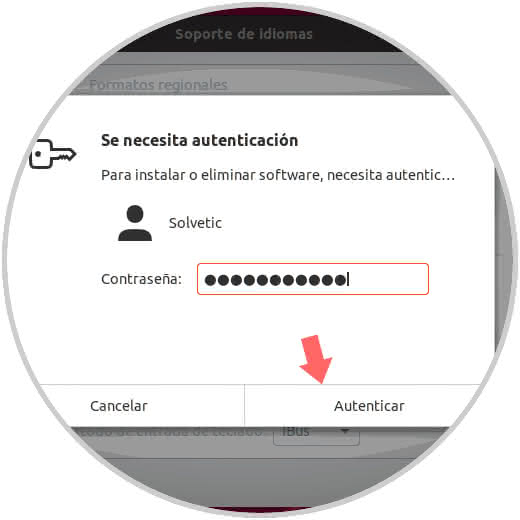
In the case of installing a new language, when you click on Apply, you will need to enter the administrator password:
Step 6
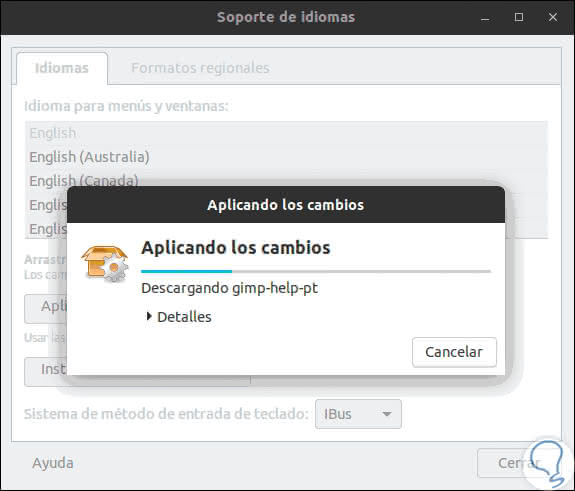
Click on "Authenticate" and there will start the process of downloading the language:
Step 7
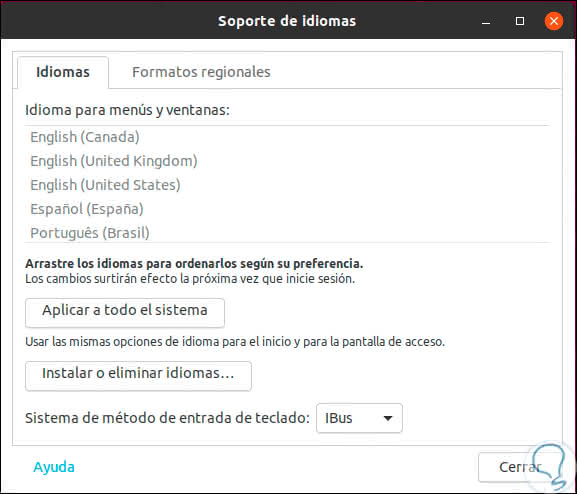
Once this process is finished we will see that the downloaded language is available as a language to be used:
Step 8
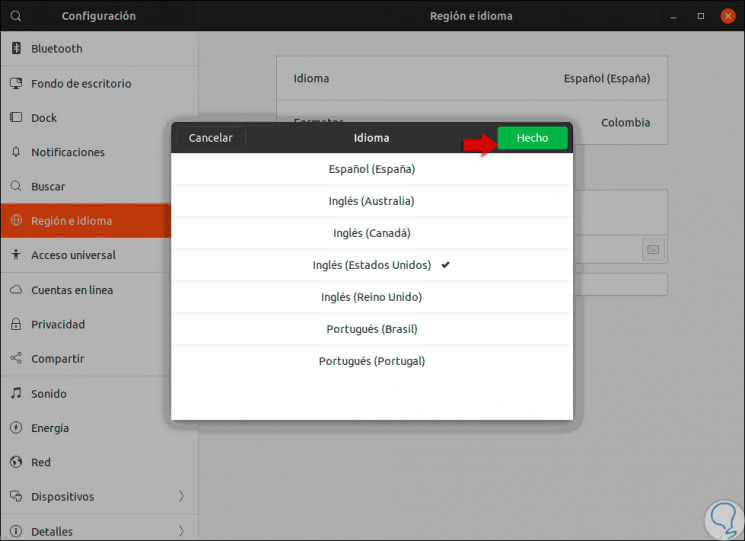
There we click on the "Close" button, and now we can go to the "Region and language" section to find the list of languages ​​that can be applied in Ubuntu 19.04 by clicking on the Language button:
Step 9
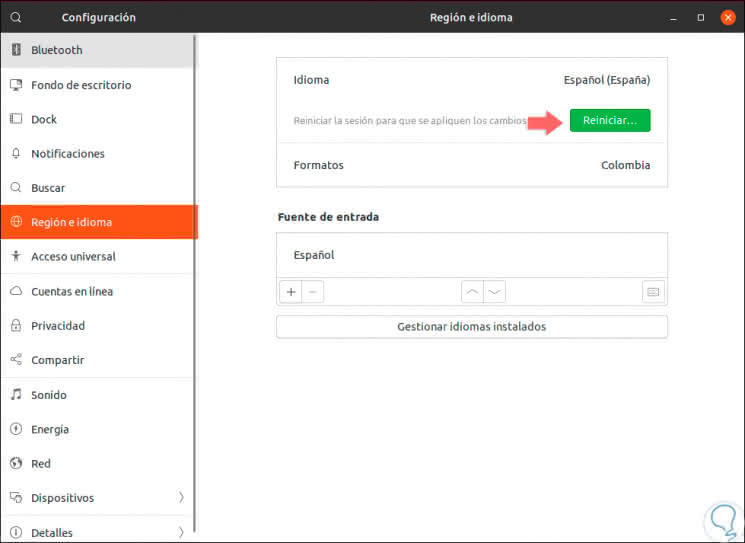
We select the appropriate language and click on the "Done" button and we can see that the session must be closed in order to apply the requested changes:
Step 10
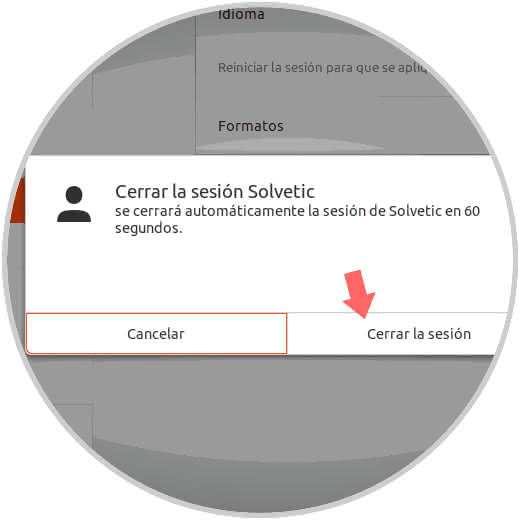
We click on the "Restart" button and the following message will be displayed:
Step 12
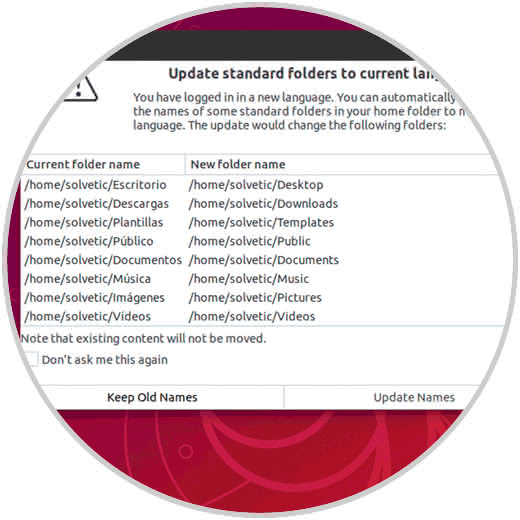
Again we click on "Close the session" and when we start again we will see the changes applied as well as a window indicating if we proceed with the new change for the system directories:
Step 13
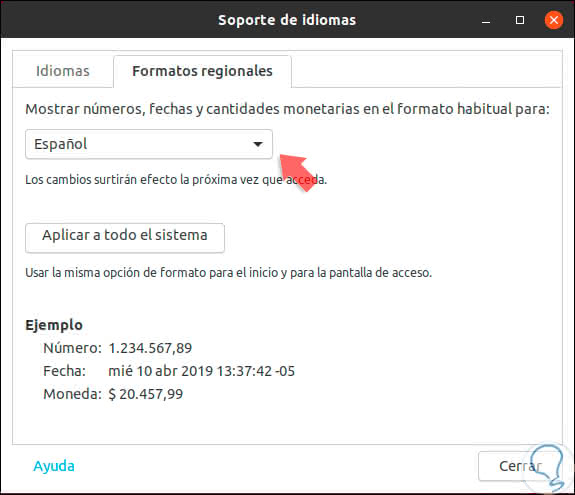
It will also be possible to apply or define the language of the regional formats, for this we go to the option "Language support" and we go to the tab "Regional formats":
Step 14
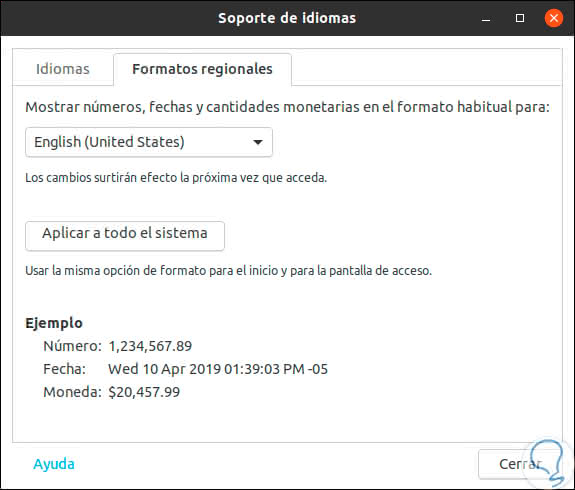
There we can select the desired language to be used and click on the Apply button so that the changes are processed. An important aspect is that based on the language selected in the regional format at the bottom we will see an example of that format.
If you agree, click Apply, enter the administrator password and, like the language, we must close the session so that the changes are applied correctly..
Thanks to this method we can change the general language as well as the regional format in Ubuntu 19.04.
2. How to change the keyboard language in Ubuntu 19.04
One of the frequent problems that we present as Ubuntu 19 users is the language of our keyboard, this usually brings with it errors when typing or inserting certain symbols.
Step 1
To modify the keyboard language in Ubuntu 19.04, we go to the option "Show applications" and there we will enter the term "language":

Step 2
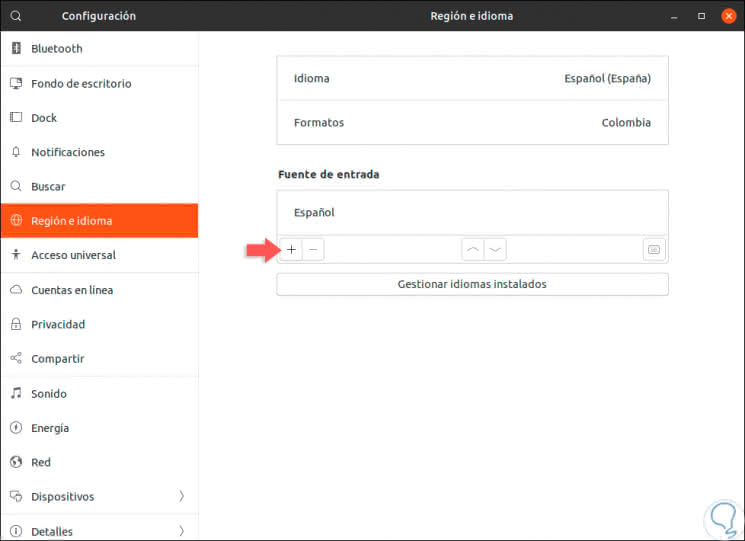
We select the option "Region and language" and we will be redirected to the following window:
Step 3
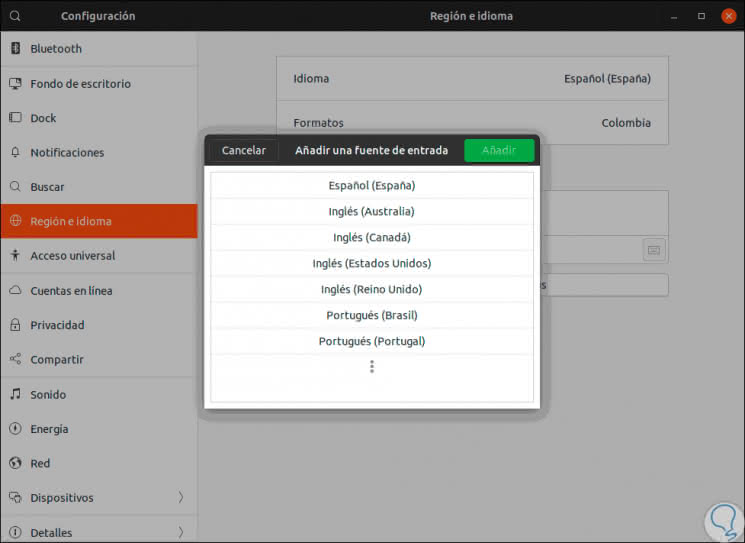
There we go to the section "Input source" and if we want to add a new language for the keyboard, we click on the + sign located at the bottom and proceed to select the desired language:
Step 4
Then we define the language type:
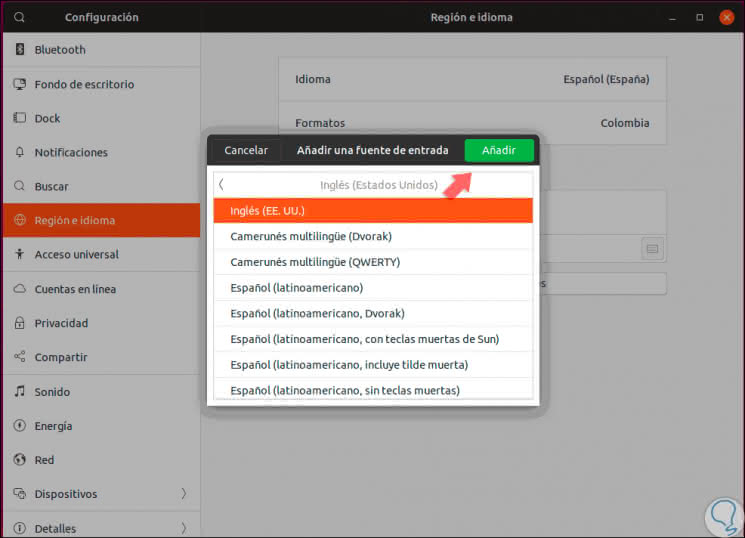
Step 5
We click on the "Add" button to add that language to Ubuntu 19.04 and thus have more options of keyboards to use:
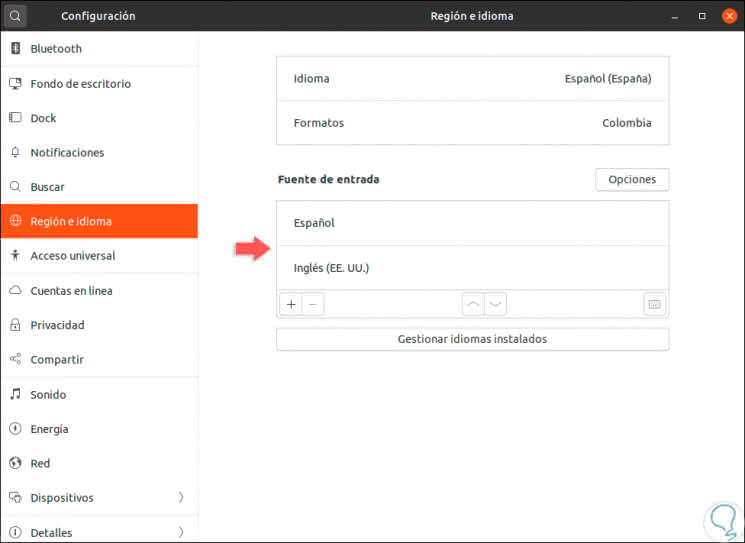
Step 6
Some variants of the keyboard layout are used little and therefore are not available by default from the + button of Ubuntu. In this case, we must enable these input sources from the terminal by executing the following line:
gsettings set org.gnome.desktop.input-sources show-all-sources true
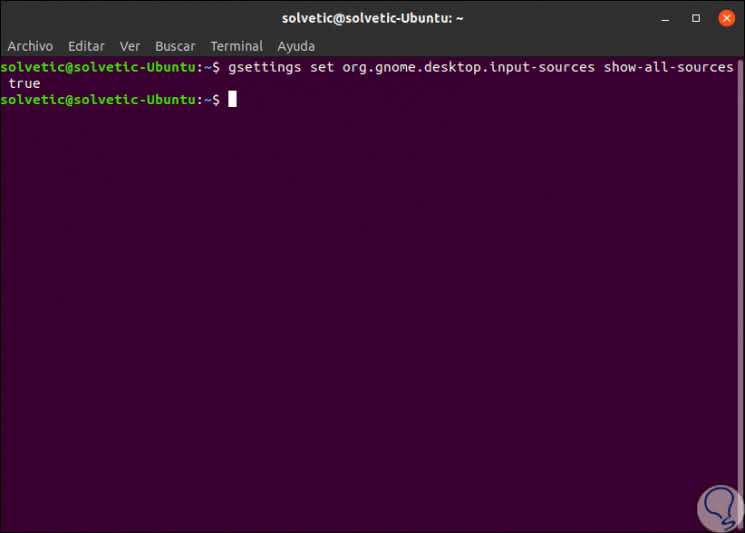
Step 7
To toggle between the languages ​​we have assigned in Ubuntu 19.04, we can press the Super key (key with the Windows logo) and the space bar to choose the desired keyboard language:
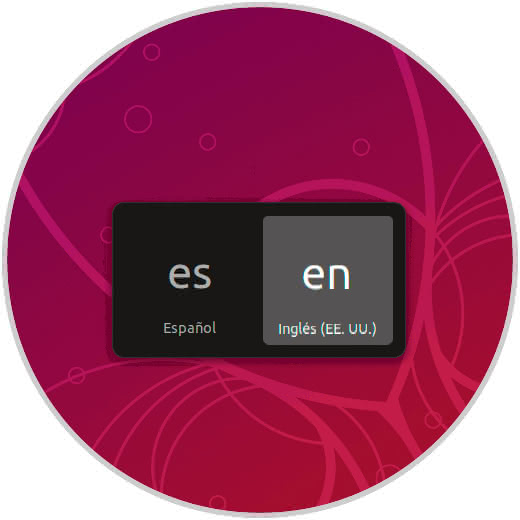
Now we can use the desired language in Ubuntu 19.04 according to our requirements thanks to these steps that TechnoWikis has explained in detail which are simple to carry out..