When we browse on our computer, we like to have a good browser that adapts to our needs and preferences and that is compatible with our equipment in order to feel as comfortable as possible when we are using it..
We know very well that the Internet Explorer browser has been discontinued in the new editions of Windows 11 as Microsoft Edge has been fully integrated with new features, let us recall some of the features of Internet Explorer:
More complete integration with Microsoft products, not all logically, being the online edition one of the most practical functions
- Ability to browse legacy websites
- Advanced security features
Although Internet Explorer has been officially ruled out in Windows 11, it is still possible to activate it and TechnoWikis will teach some methods to achieve it.
To stay up to date, remember to subscribe to our YouTube channel!
SUBSCRIBE ON YOUTUBE
1 Enable Internet Explorer Windows 11 in Edge
Step 1
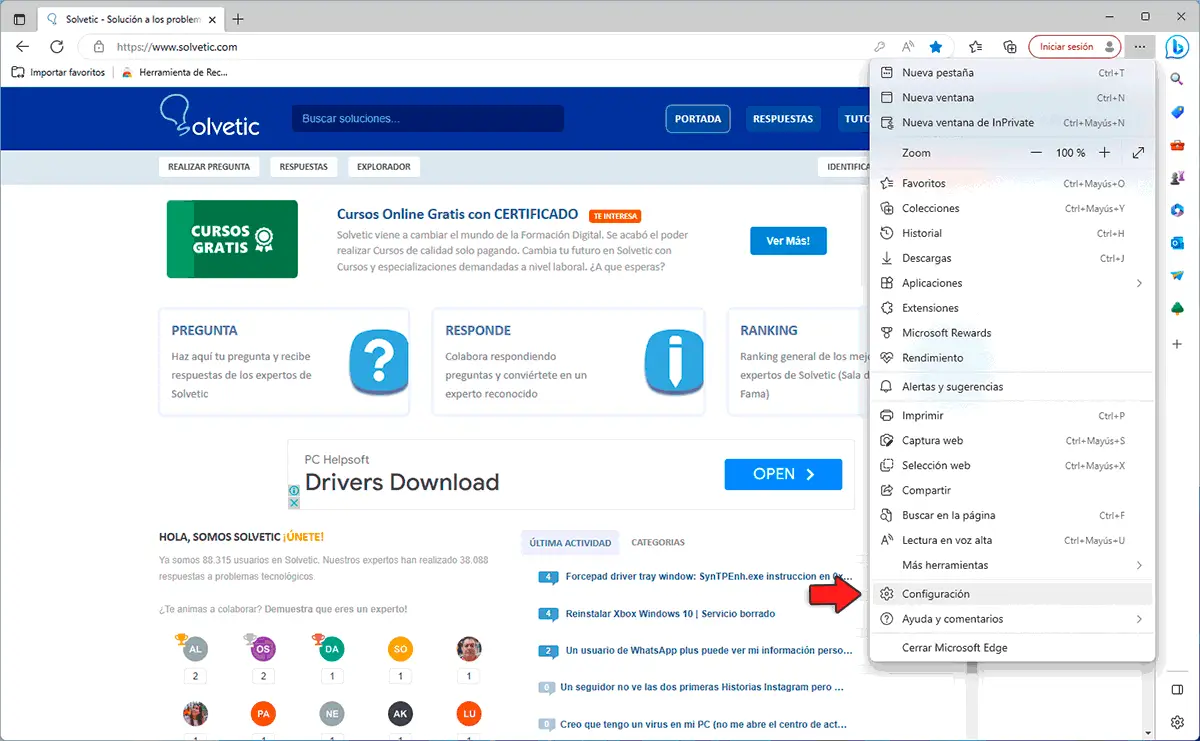
As we mentioned, Microsoft Edge is the default browser of Windows 11 and to activate Internet Explorer there we open Edge and go to the "Settings and more - Settings" menu:
Step 2
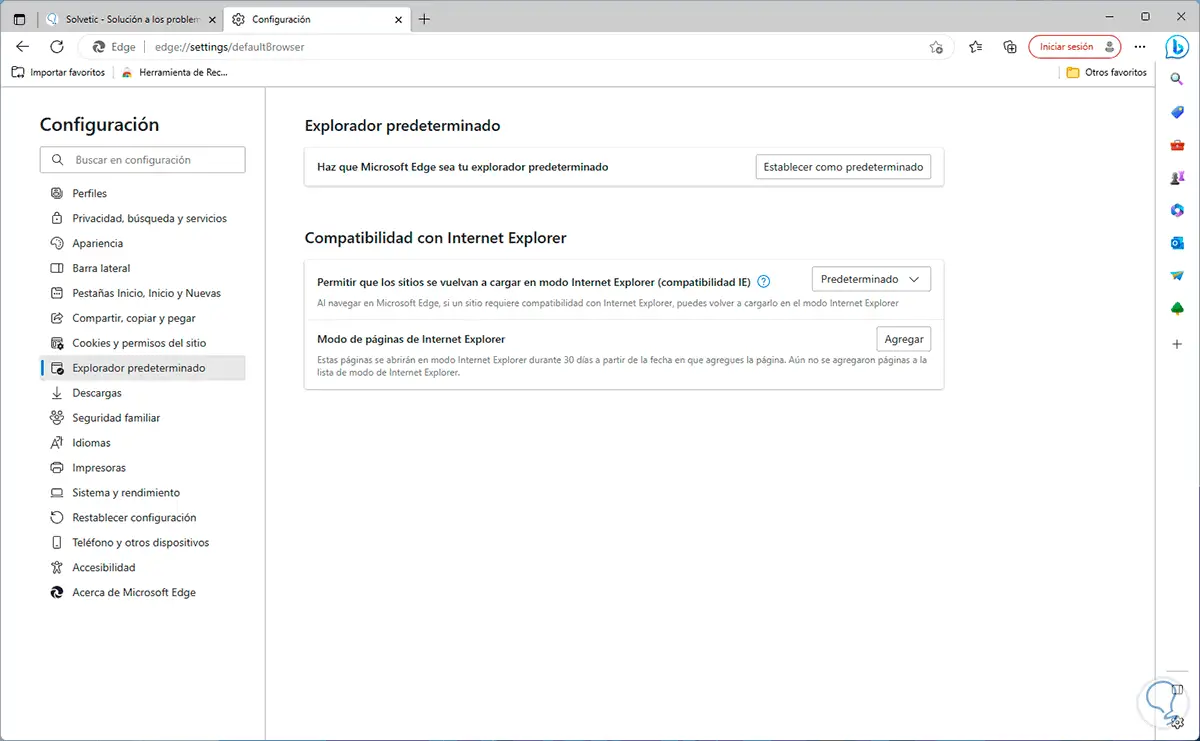
Go to the "Default browser" section:
Step 3
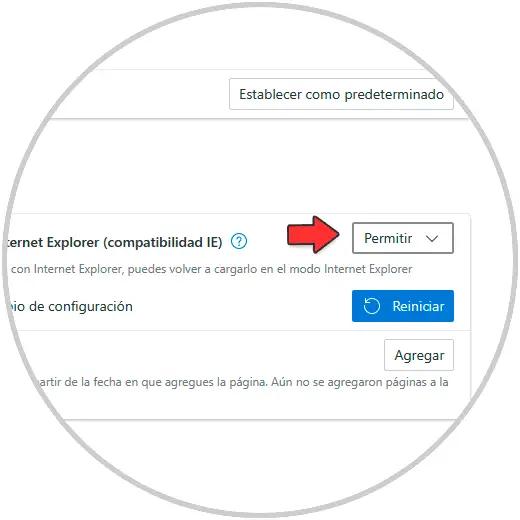
In "Allow sites to reload in Internet Explorer mode (compatibility)" we set "Allow":
Step 4
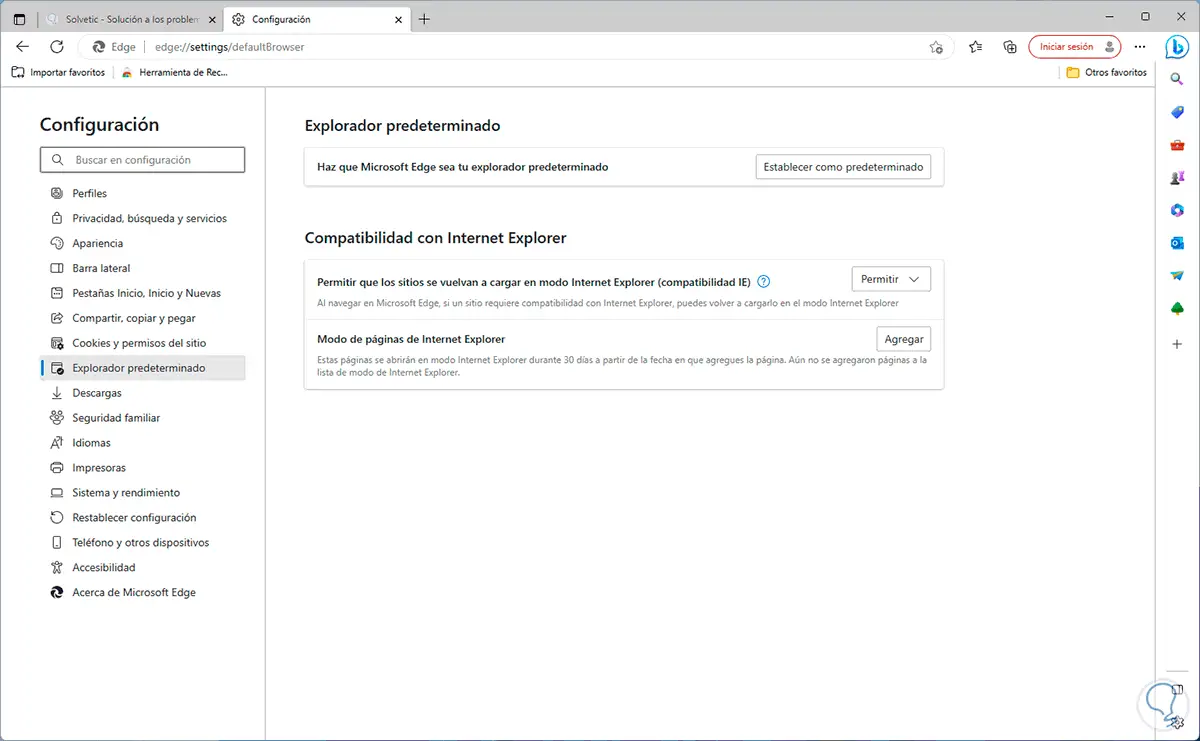
Click "Restart" to apply the changes:
step 5
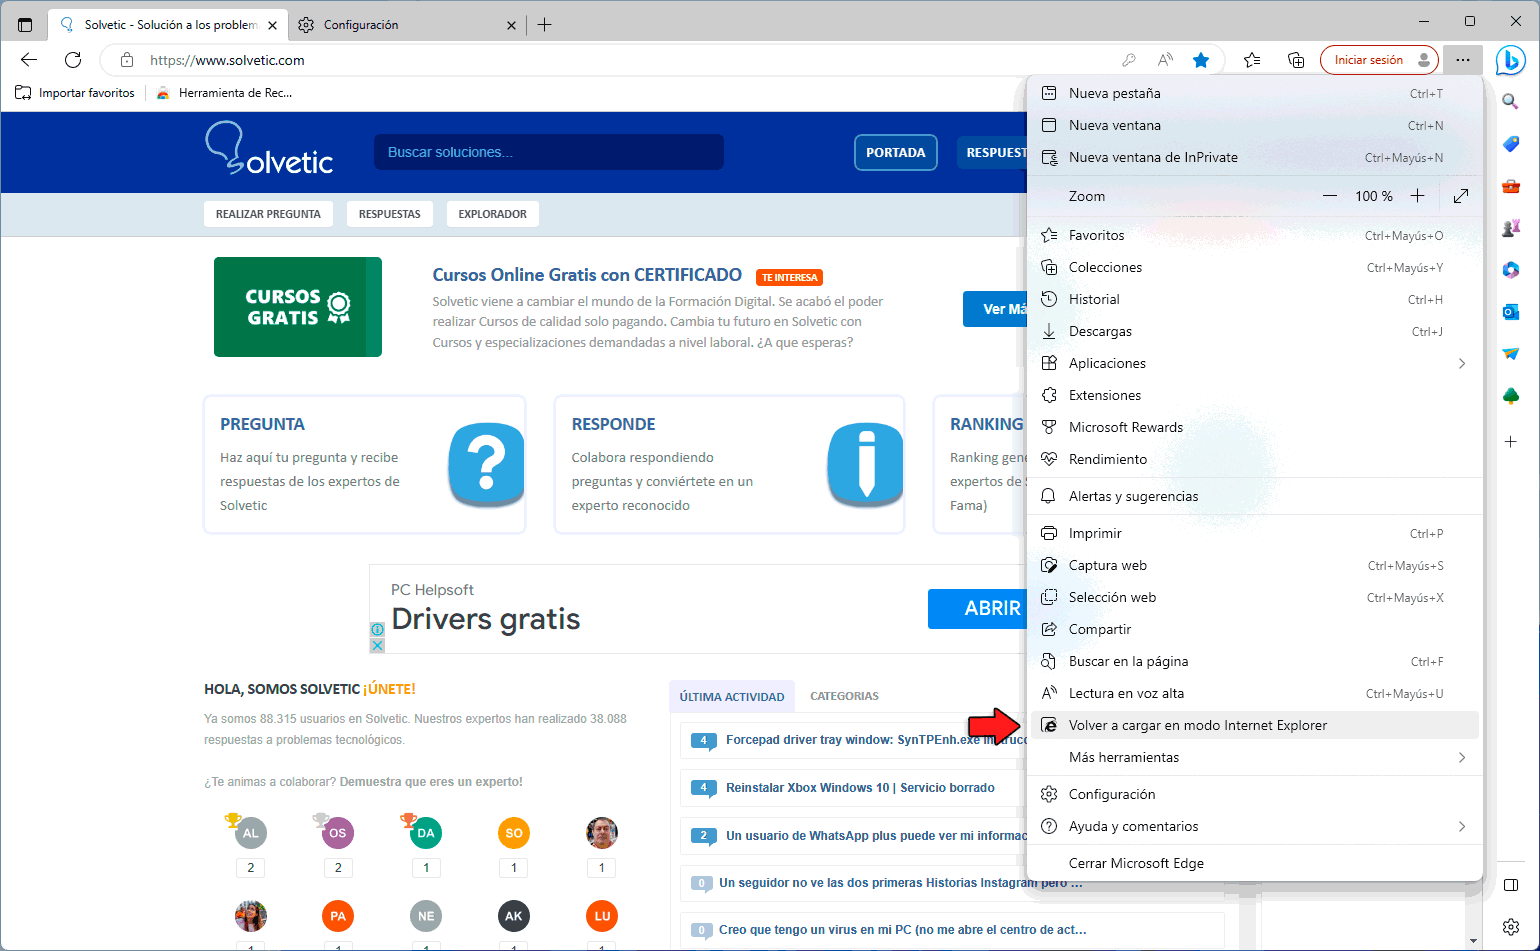
We go to the website and then we will go to "Settings and more - Reload in Internet Explorer mode":
step 6
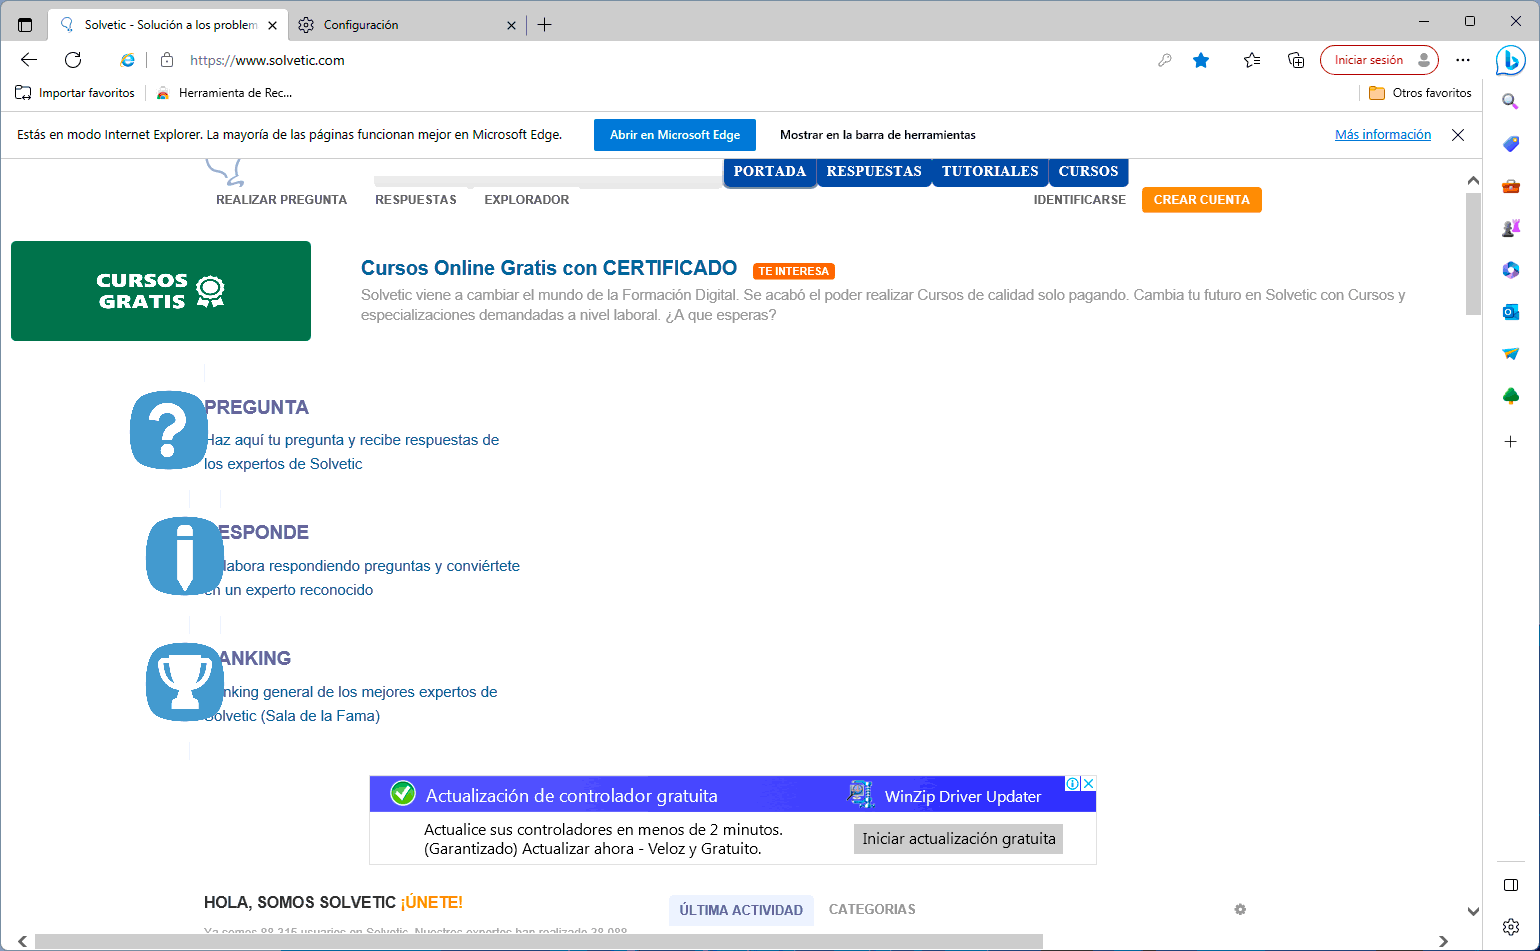
The site will be open in this mode:
step 7
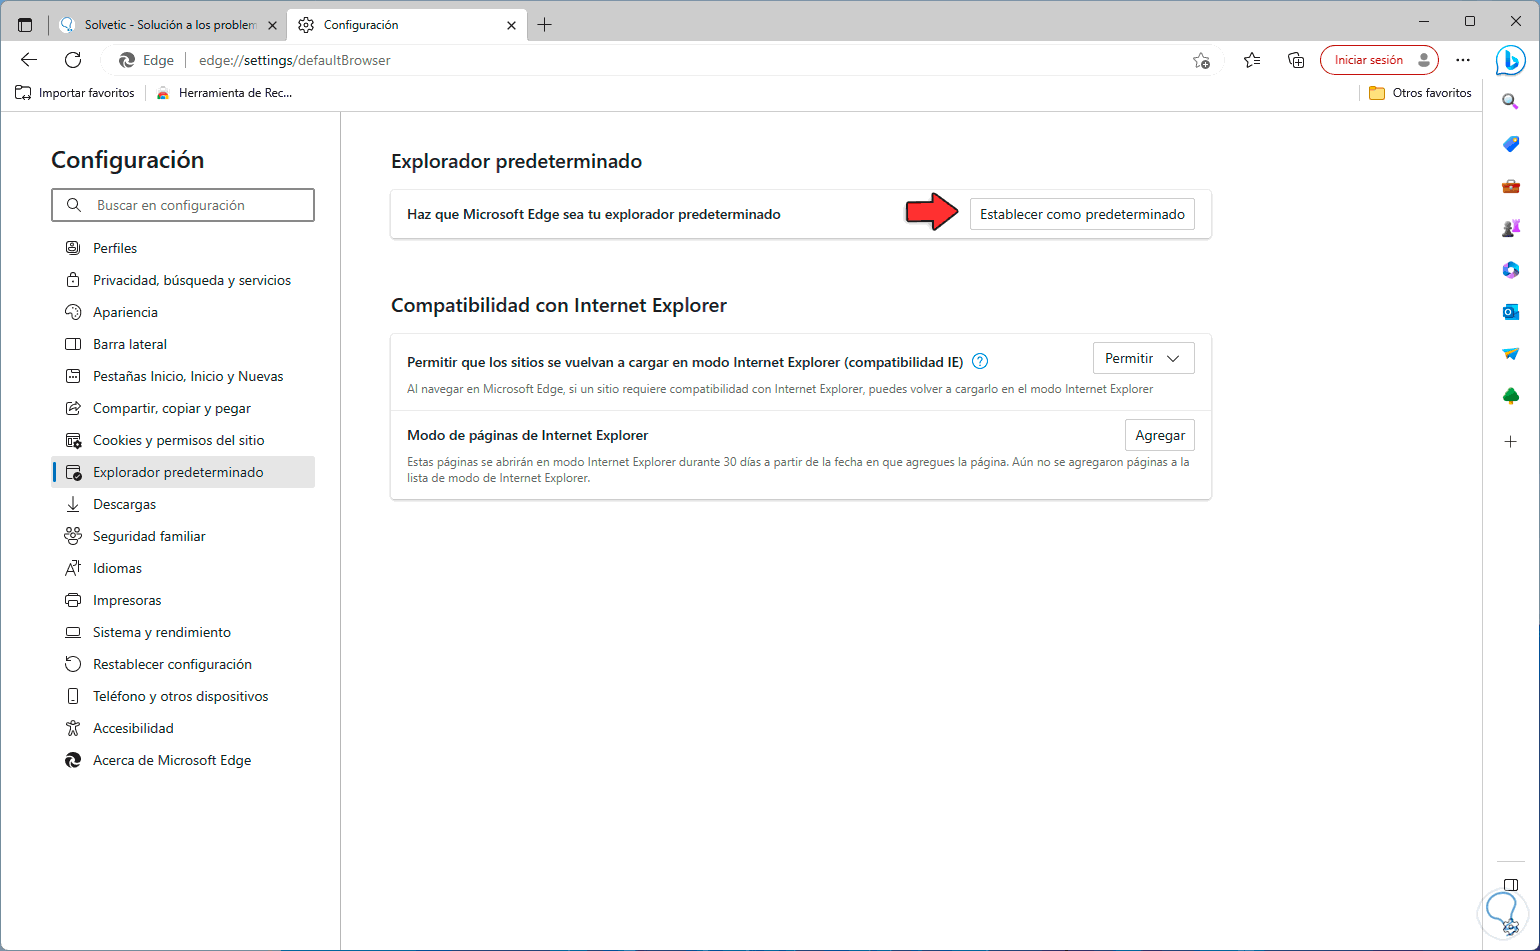
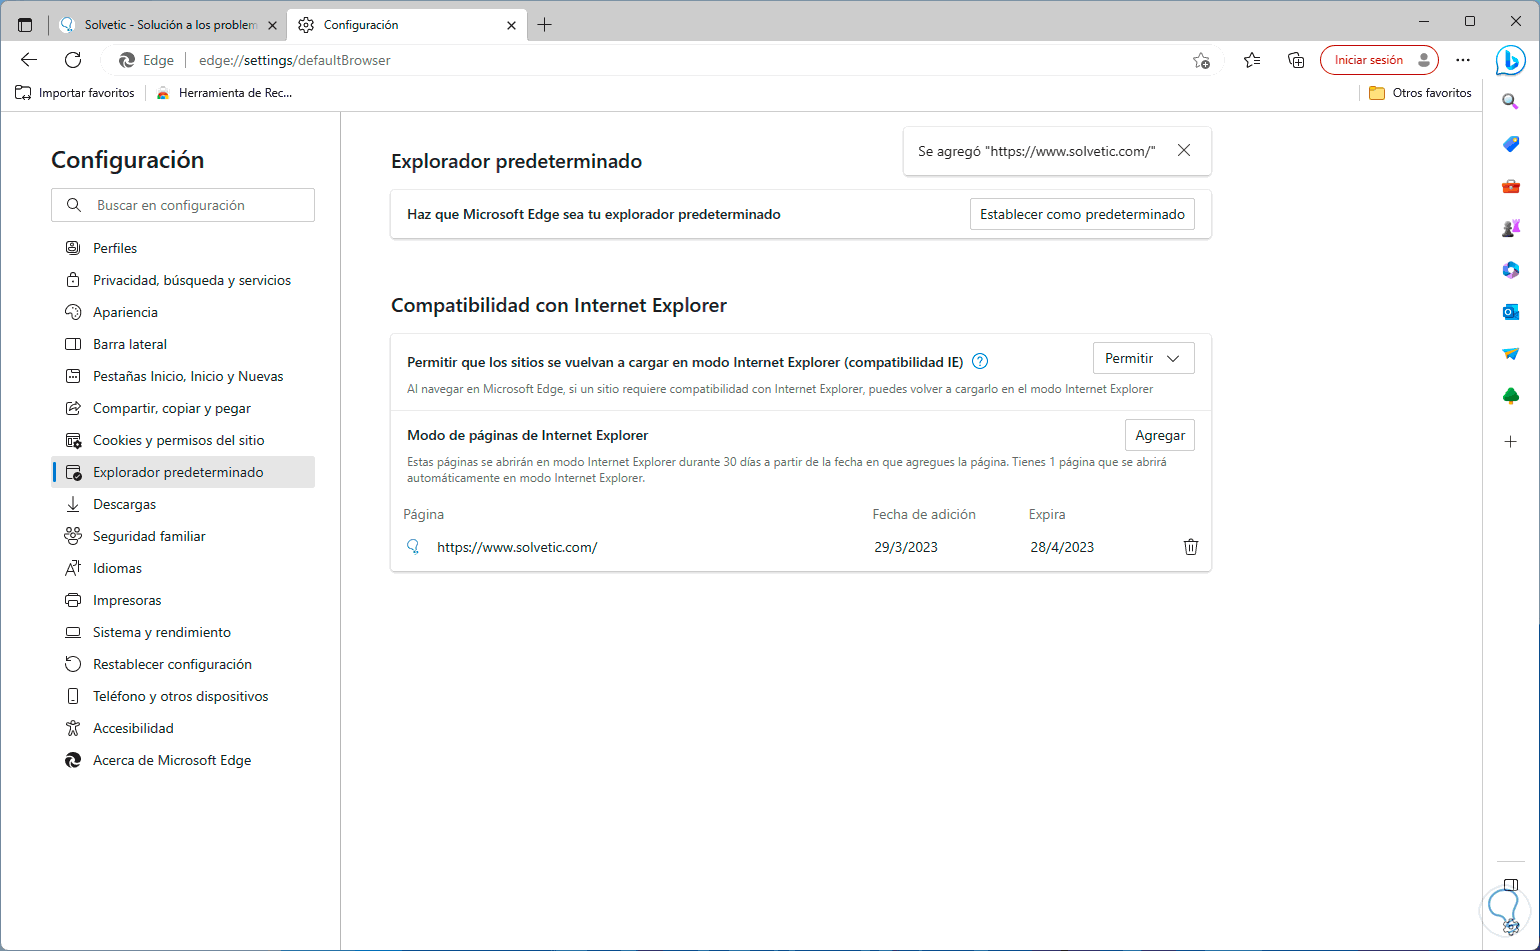
To make it permanent we go to the "Default browser" section:
step 8
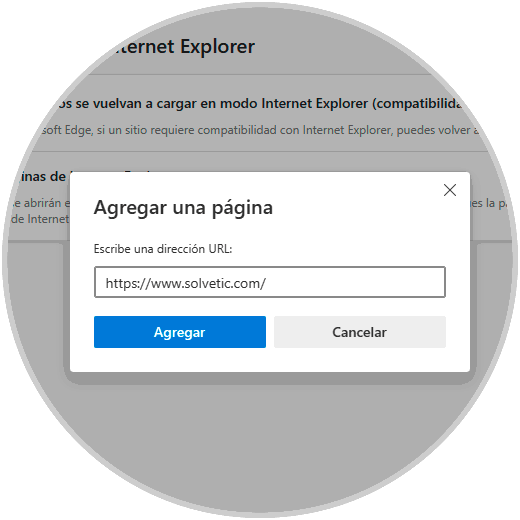
We click on "Add" in "Internet Explorer Pages Mode" and add the desired URL:
step 9
We apply the changes:
2 Enable Internet Explorer Windows 11 using VBS
Another option available is to create a small Visual Basic (.vbs) file.
Step 1
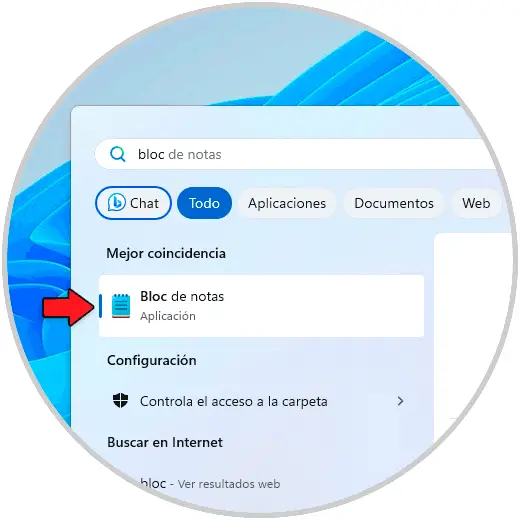
To open Internet Explorer, to achieve this we open Notepad:
Step 2
Enter the following:
CreateObject("InternetExplorer.Application").Visible=true 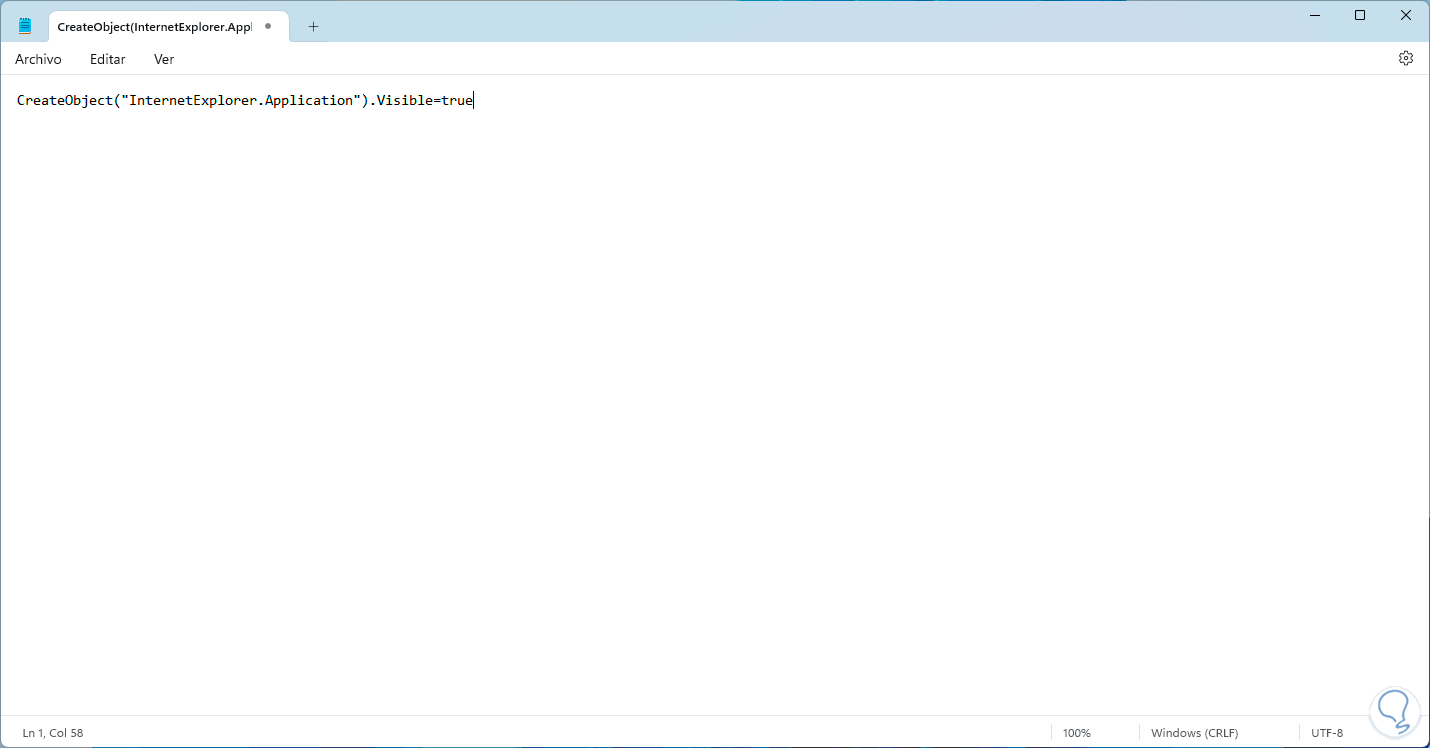
Step 3
We go to "File -Save as", then set the name with the extension .vbs and in "Type" set "All files":
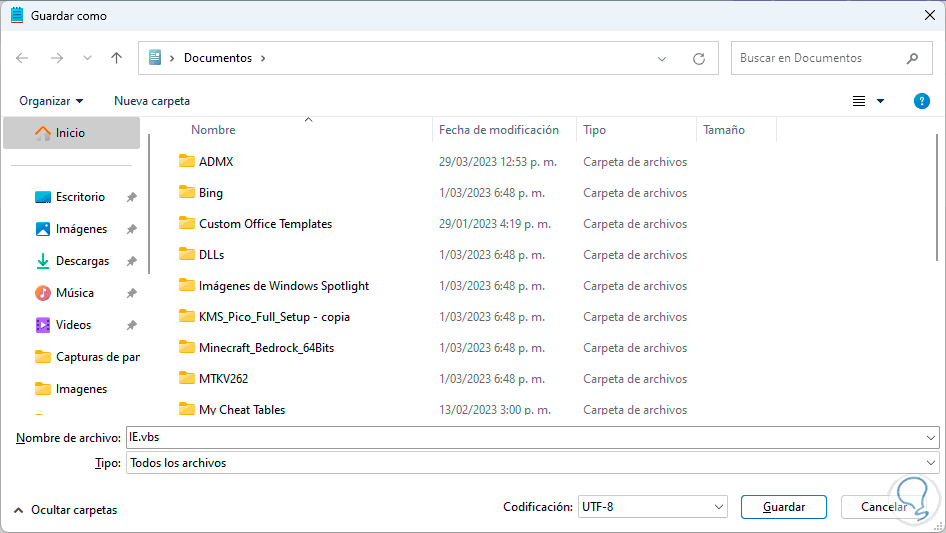
Save the file..
Step 4
Open the file folder, right click on the .vbs file and select "Show more options":
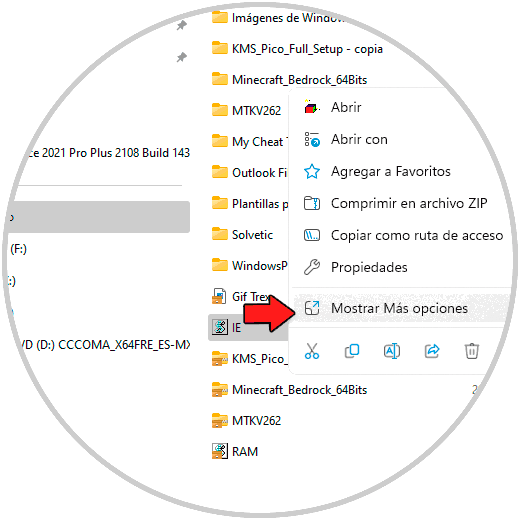
step 5
Now we are going to “Send to - Desktop (create shortcut)”:
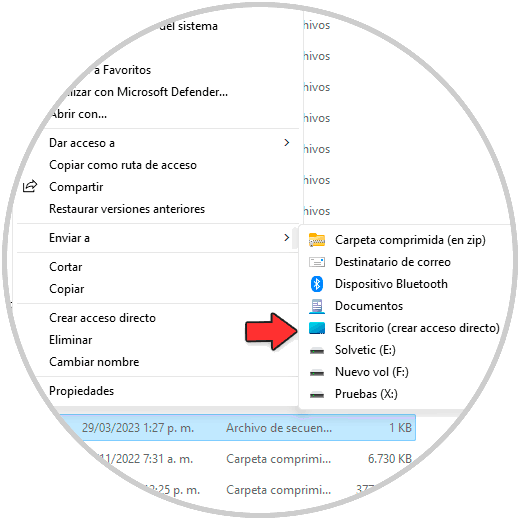
step 6
We will see the shortcut on the desktop, right click on the shortcut and select "Properties":
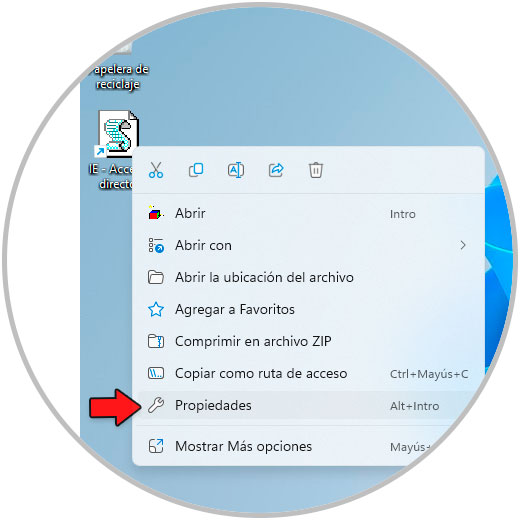
step 7
The following will open:
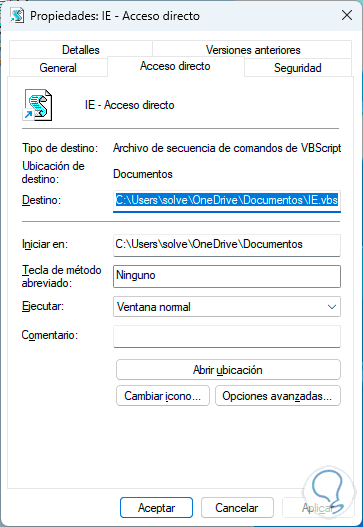
step 8
We click on "Change icon" and assign the Internet Explorer icon:
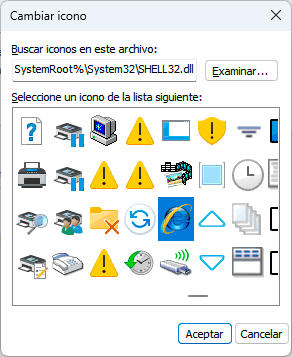
step 9
Apply the changes:
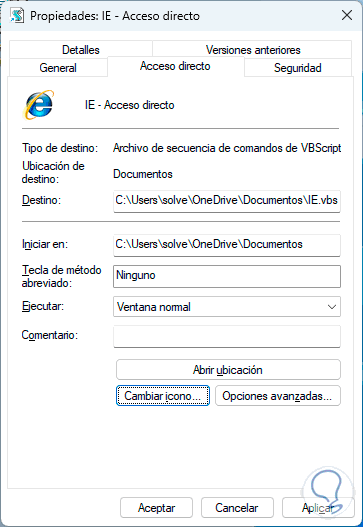
step 10
The shortcut will now look like Internet Explorer:
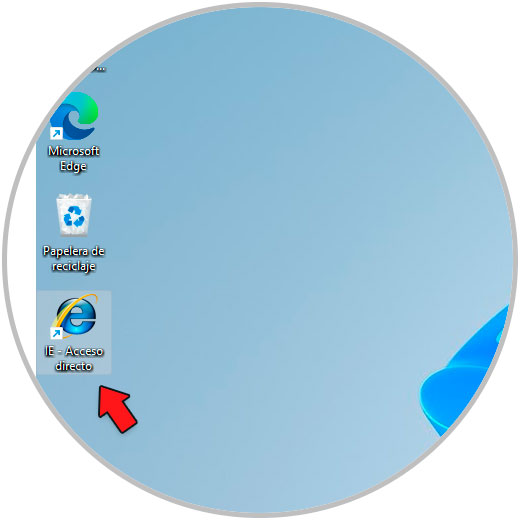
step 11
Double click on the shortcut to open IE:
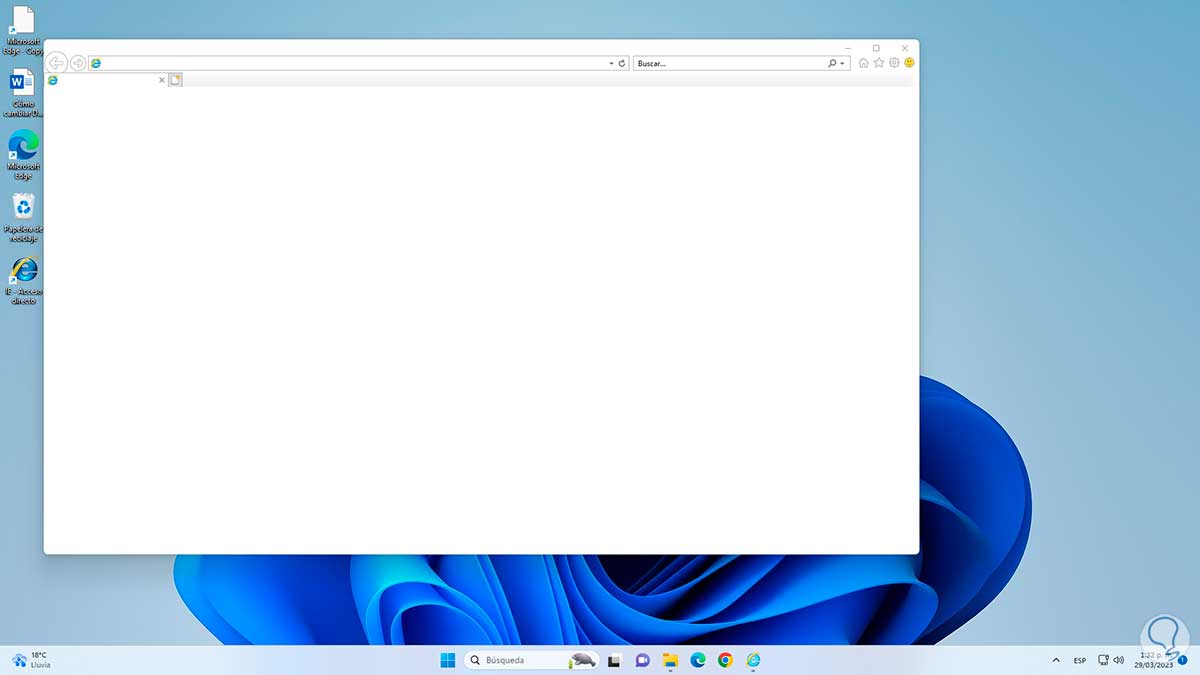
3 Enable Internet Explorer Windows 11 from Settings
With this method we seek to validate that Internet Explorer Mode is active in Windows 11.
Step 1
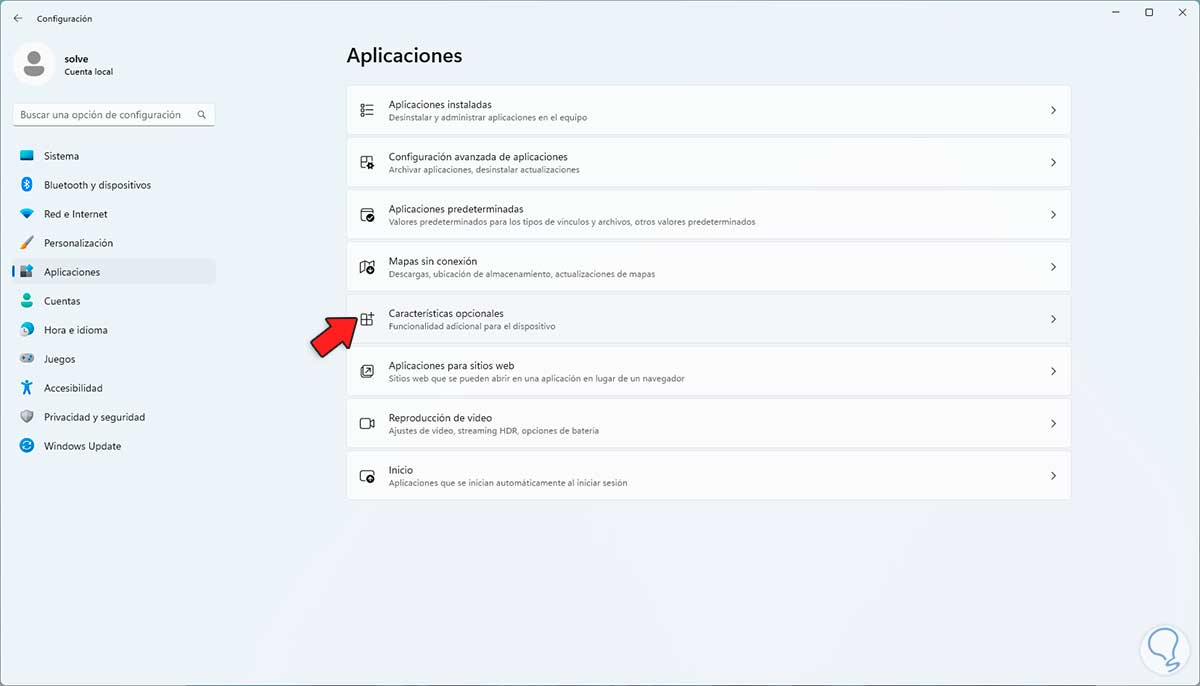
We go to "Start - Settings - Applications - Optional features":
Step 2
Validate that "Internet Explorer Mode" is available:
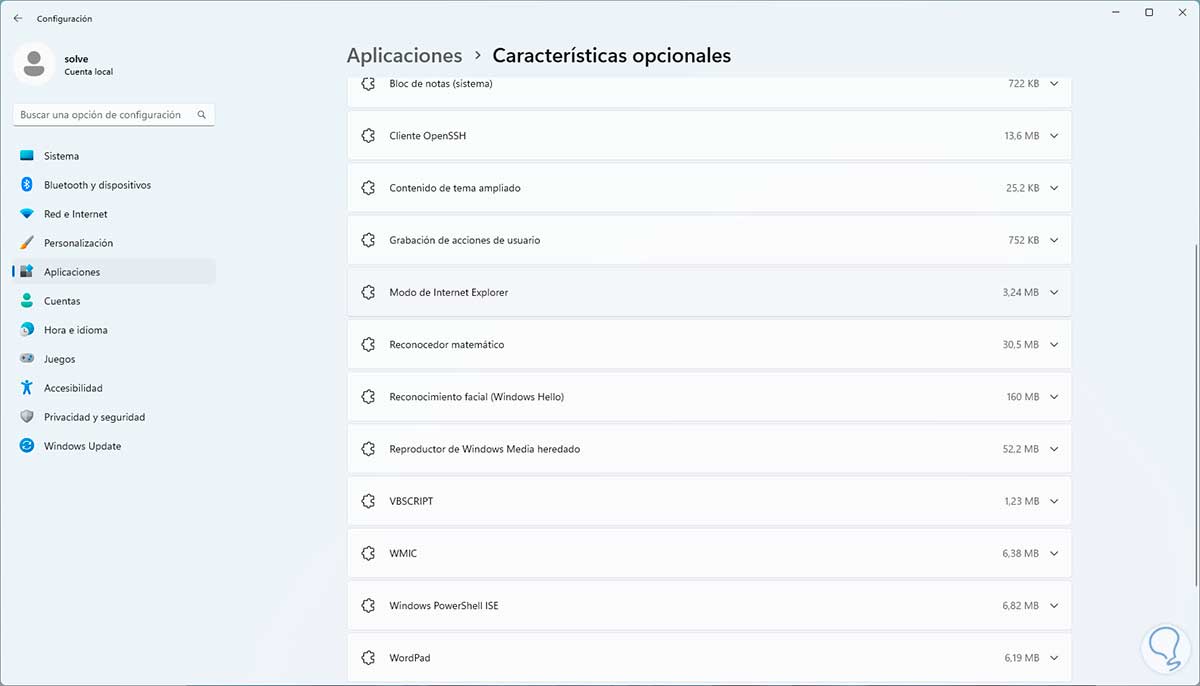
If this is not the case, we click on "More Windows features" and proceed to search for and add Internet Explorer Mode.
4 Enable Internet Explorer Windows 11 from CMD
Step 1
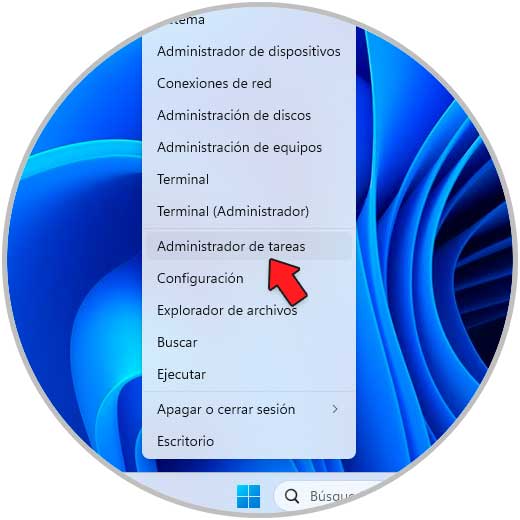
Finally it is possible to use the console to add Internet Explorer, we open the Task Manager:
Step 2
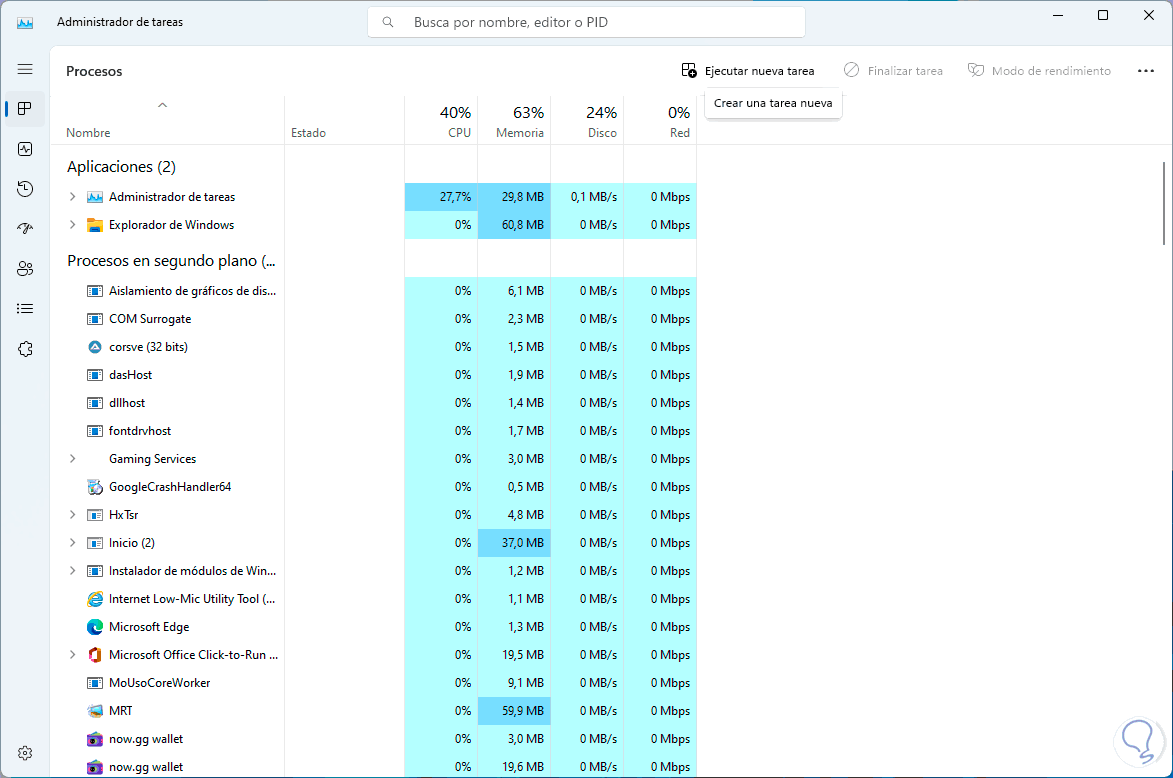
We will see the console:
Step 3
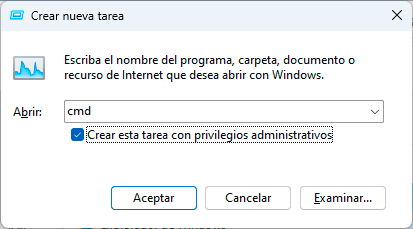
We click on "Run new task", then enter "cmd" and activate the "Create this task with administrative privileges" box:
Step 4
In the console run:
dism /online /Add-Capability/CapabilityName:Browser.InternetExplorer~~~~0.0.11.0
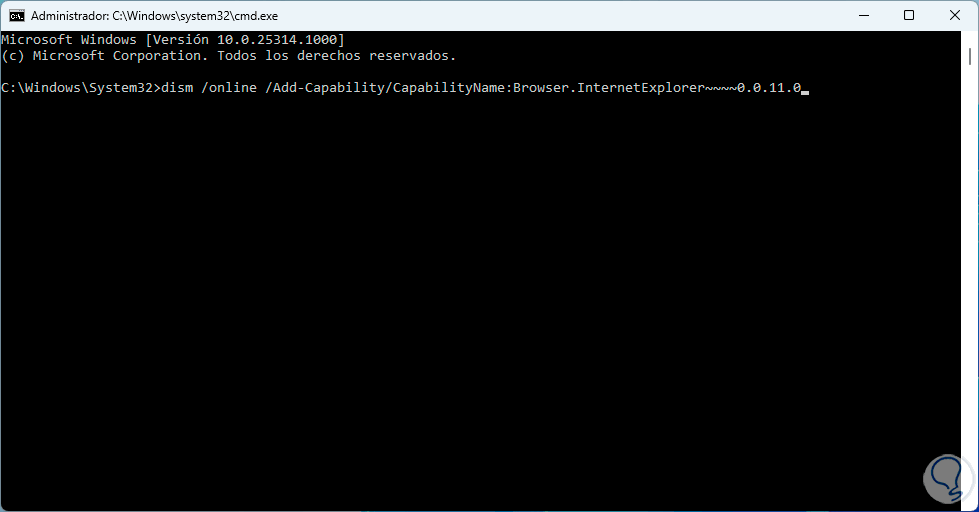
If it gives an error, the IE browser is already active in the system..
step 5
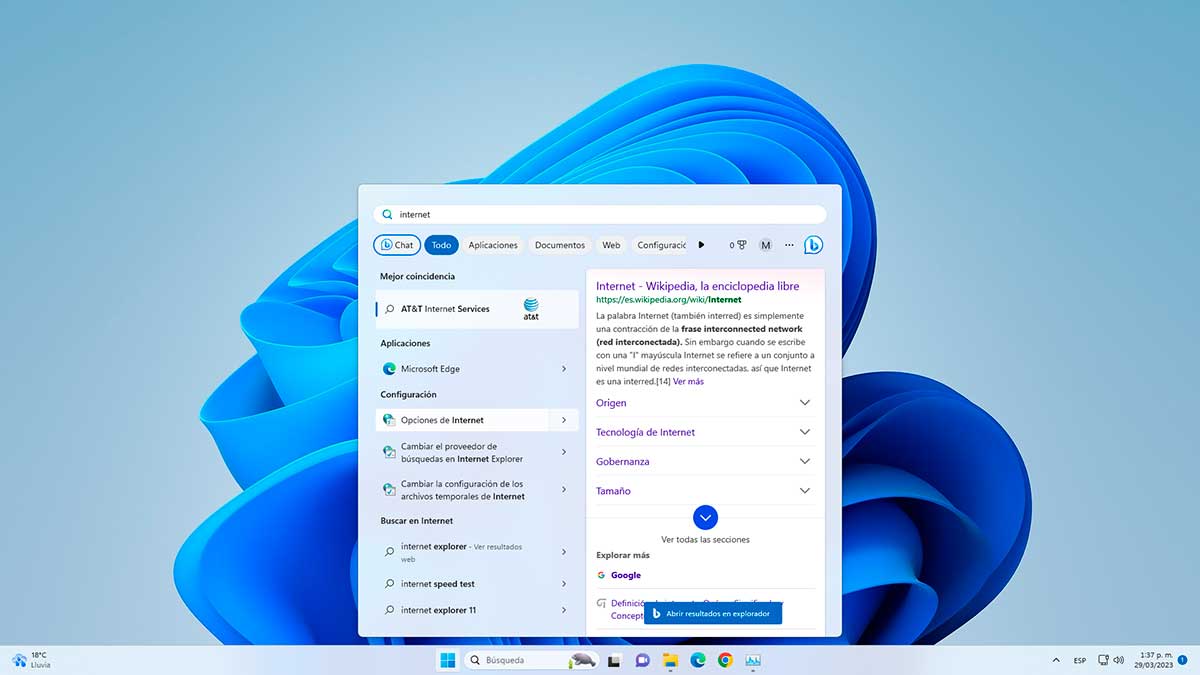
Now we access the Internet Options to see its various usage options:
step 6
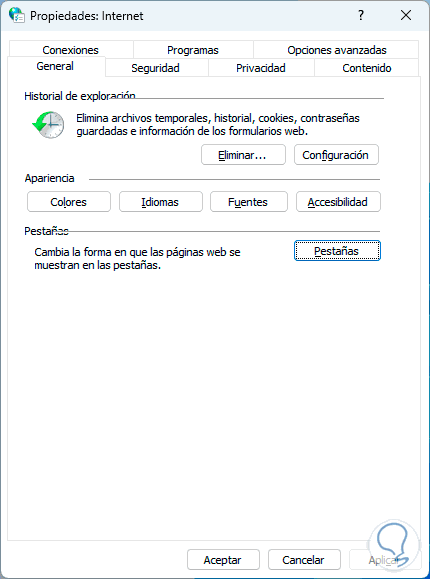
In the General tab it will be possible to configure or delete the history, configure the tabs, etc:
step 7
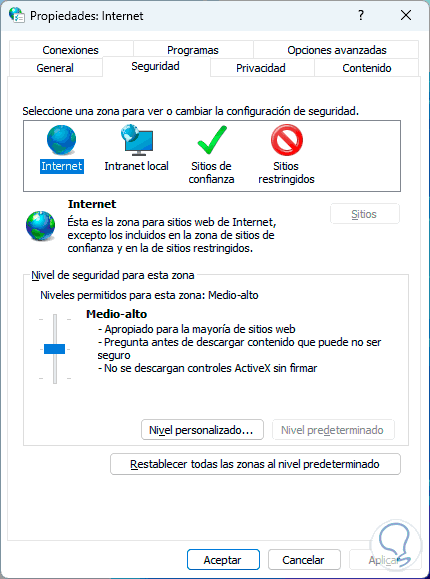
In Security we can establish the levels required for navigation:
step 8
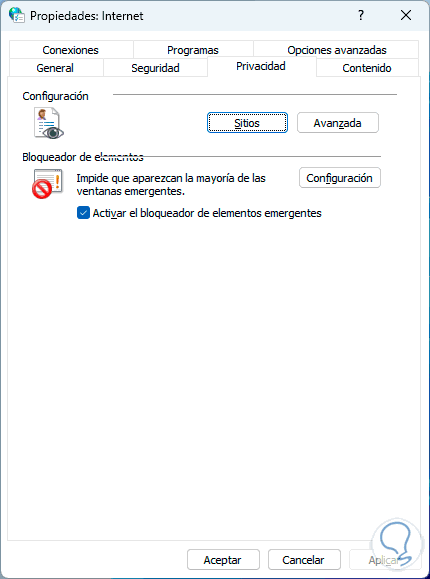
In Privacy we can make use of the blockers and general configuration:
step 9
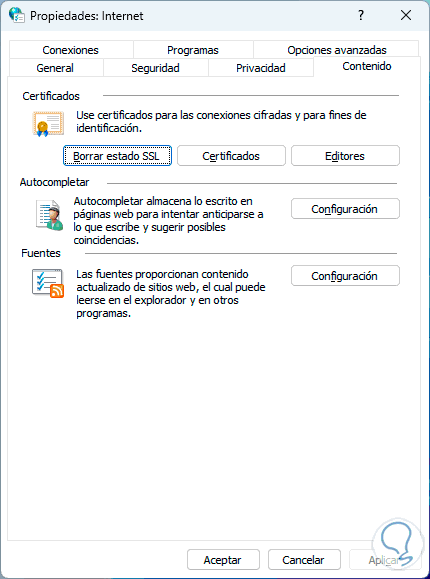
In Content we have access to the section of certificates, sources and autocomplete functions:
step 10
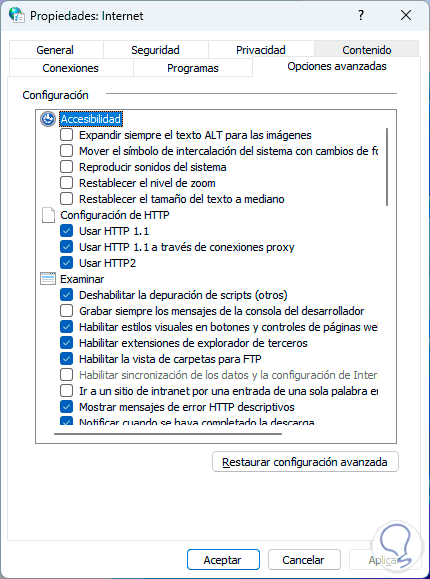
In Advanced Options we have a set of features to activate or not:
Thus it is possible to use Internet Explorer in Windows 11 when necessary.