Database management can become a really complex task due to the amount, type and complexity of this data, but there are platforms that help us mitigate this impact and have a centralized administration of the data and one of the most popular is MySQL..
MySQL has been created as a SQL (Structured Query Language) database server where its speed, multithreading capabilities, and multiuser stand out. It has been designed for production systems where data of all kinds abounds and it is capable of being integrated into software that they make use of the mass deployment method.
MySQL Features
Some of the general features of MySQL are:
- Your database is relational
- Allows you to use CMake to make it a portable option
- It supports data like FLOAT, DOUBLE, CHAR, VARCHAR, BINARY, VARBINARY, TEXT, BLOB, DATE, TIME, DATETIME, TIMESTAMP, YEAR, SET, ENUM and many more.
- It has independent modules to increase the actions of use
- Makes use of B-tree disk tables (MyISAM) with index compression
MySQL Advantages
Currently MySQL is available in version 8.0 which offers:
- Integration of atomic data definition statements (atomic DDL)
- Enhanced security and account management
- The grant tables in the MySQL system database will be converted to InnoDB or also called transactional tables.
- Added a new authentication plugin caching_sha2_password
- The caching_sha2_password and sha256_password authentication plugins have stronger password encryption than mysql_native_password
- Optimized resource management
- Table encryption management
- Support of new characters
- MySQL now supports windowing functions
- Regular expression support
- Time zone support for TIMESTAMP and DATETIME
TechnoWikis will teach the step by step to install MySQL in Ubuntu..
To stay up to date, remember to subscribe to our YouTube channel!
SUBSCRIBE ON YOUTUBE
How to install MySQL on Ubuntu
Step 1
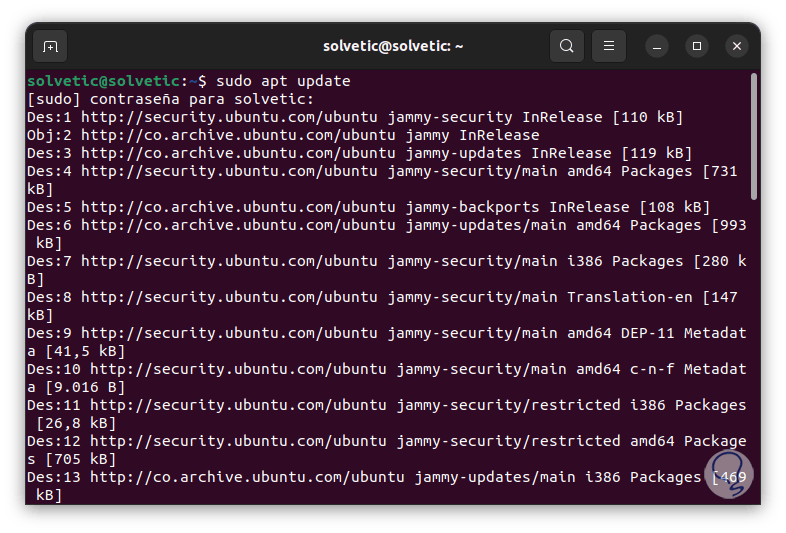
We open the terminal, update the system:
sudo apt update
Step 2
Enter the password. We wait for the process to finish.
Step 3
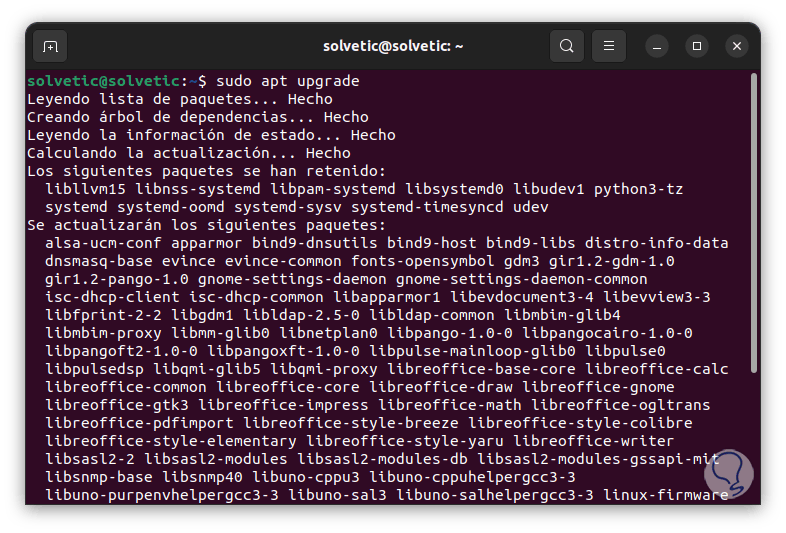
After this we apply the updates:
sudo apt upgrade
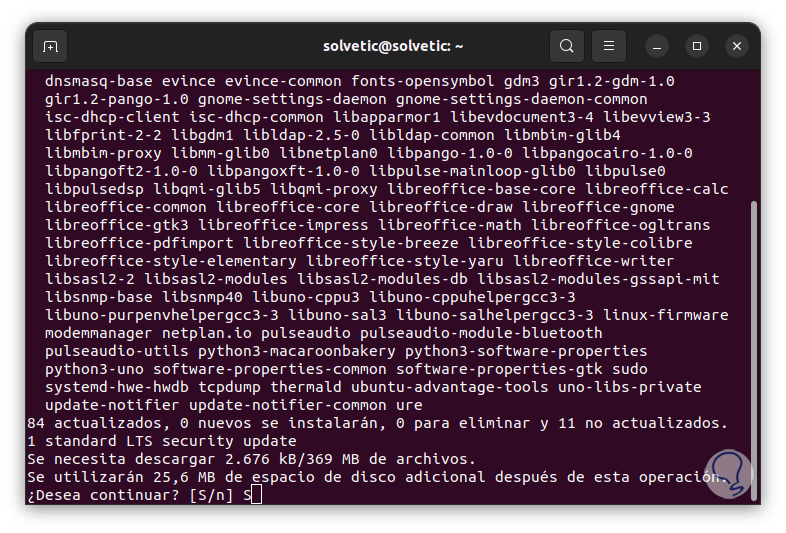
Step 4
Enter the letter S to confirm:
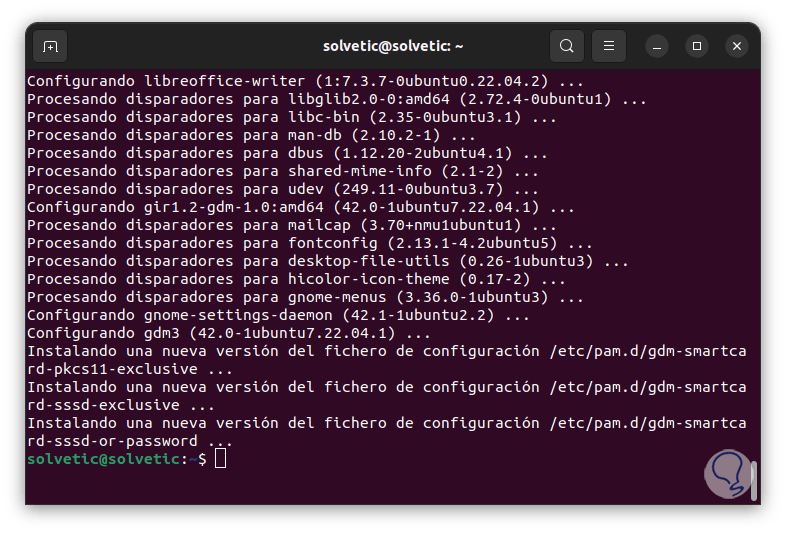
step 5
We wait for the updates to be downloaded and installed.
step 6
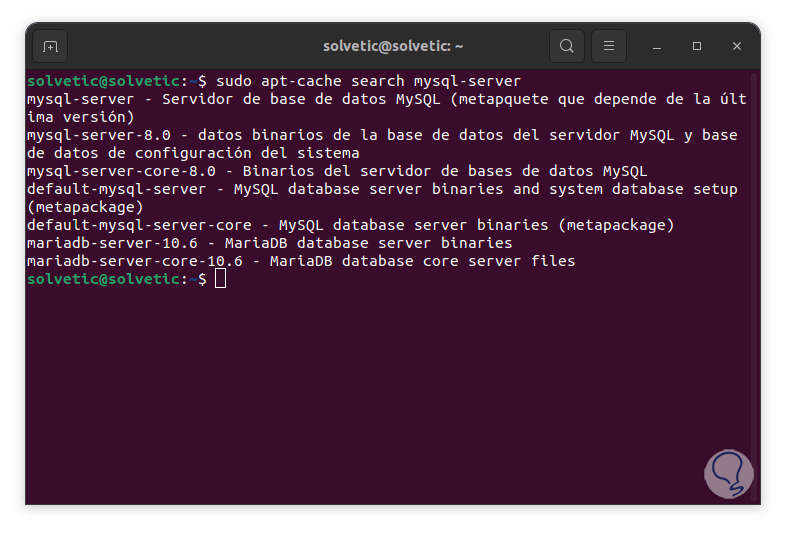
We validate the available MySQL options:
sudo apt-cache search mysql-server
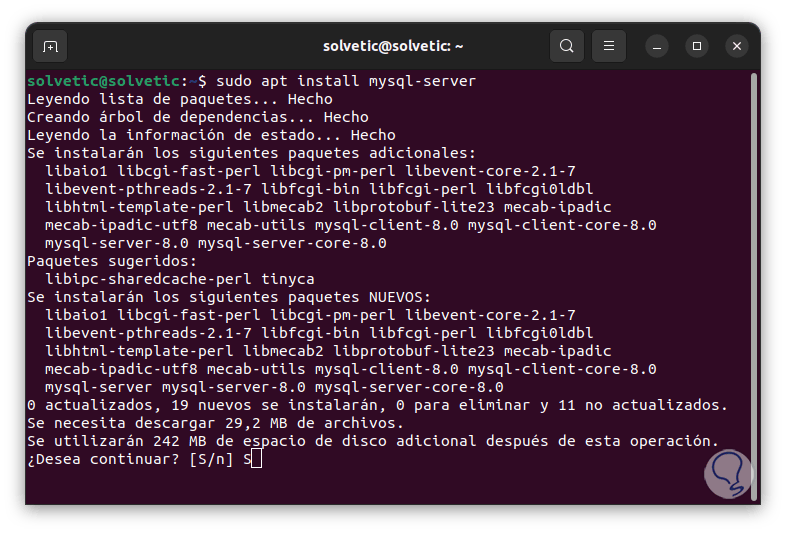
step 7
We install MySQL with the command:
sudo apt install mysql-server
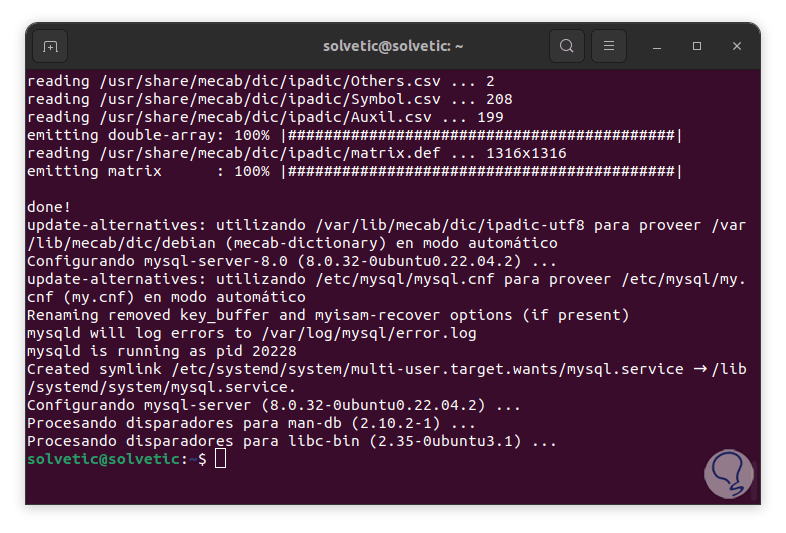
step 8
We confirm the operation by entering the letter S:
step 9
We confirm the status of MySQL:
sudo systemctl status mysql.service
8
step 10
We start the service if necessary:
sudo systemctl start mysql.service
step 11
We enable the service at Ubuntu boot:
sudo systemctl enable mysql.service
9
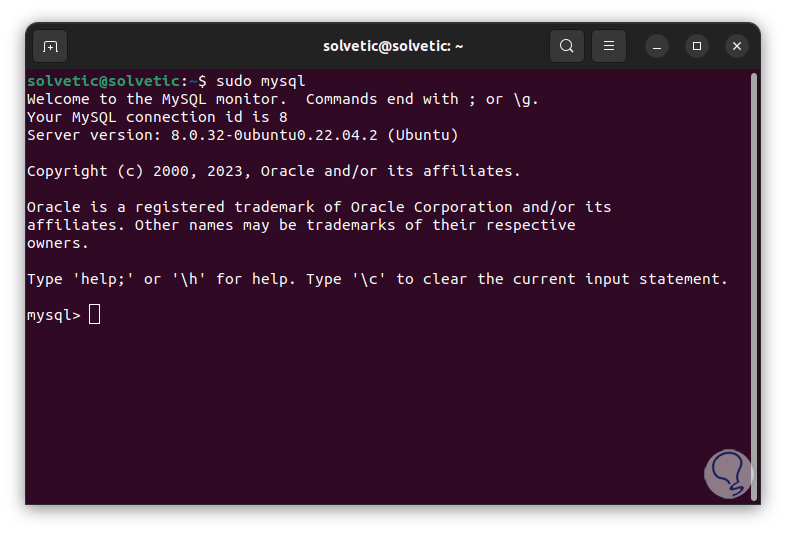
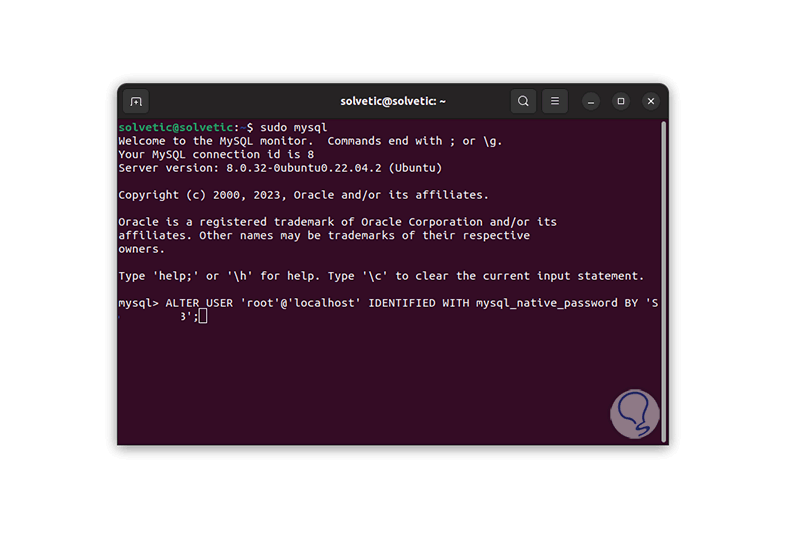
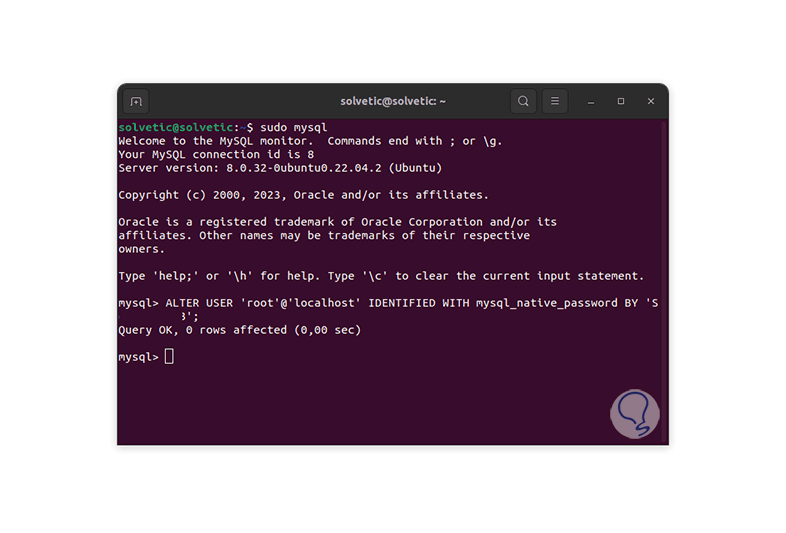
step 12
We access MySQL:
sudo mysql
step 13
We set the root password:
ALTER USER 'root'@'localhost' IDENTIFIED WITH mysql_native_password BY 'PASSWORD';
step 14
We leave the console:
exit;
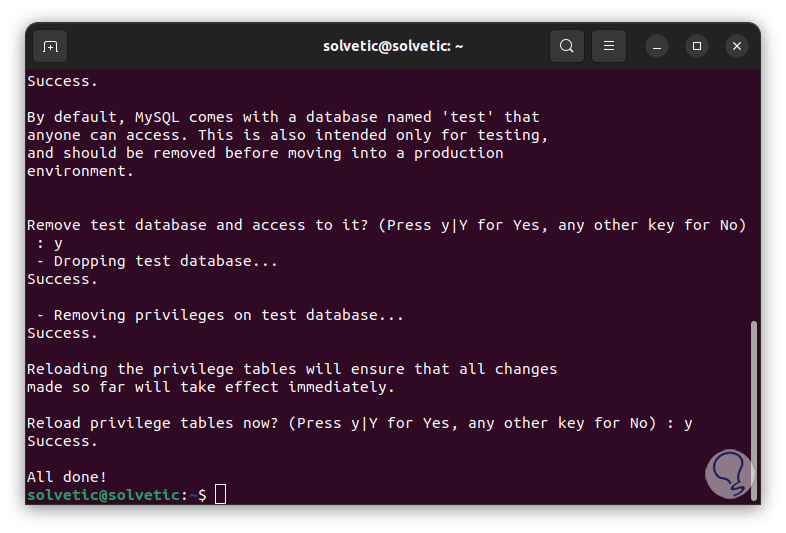
step 15
We ensure the installation of MySQL since by default it presents some security flaws, for this we execute:
sudo mysql_secure_installation
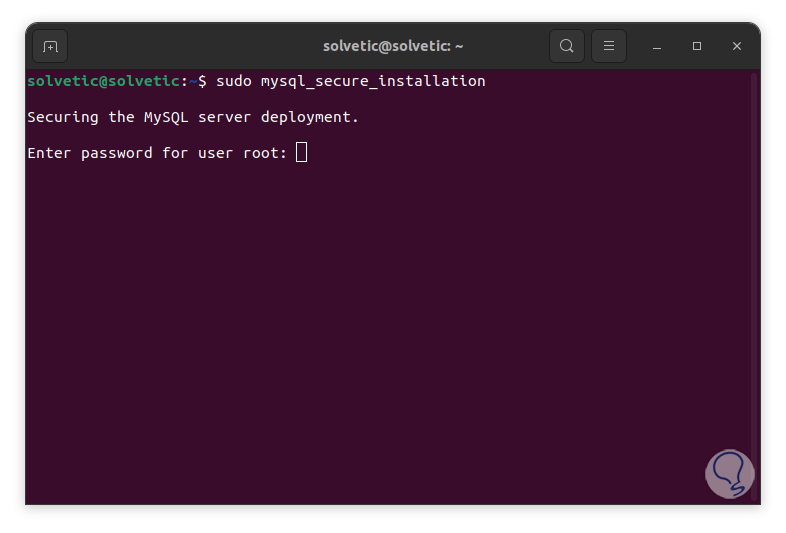
step 16
We enter the root password in the initial part we enter the letter "n" so as not to change the root password:
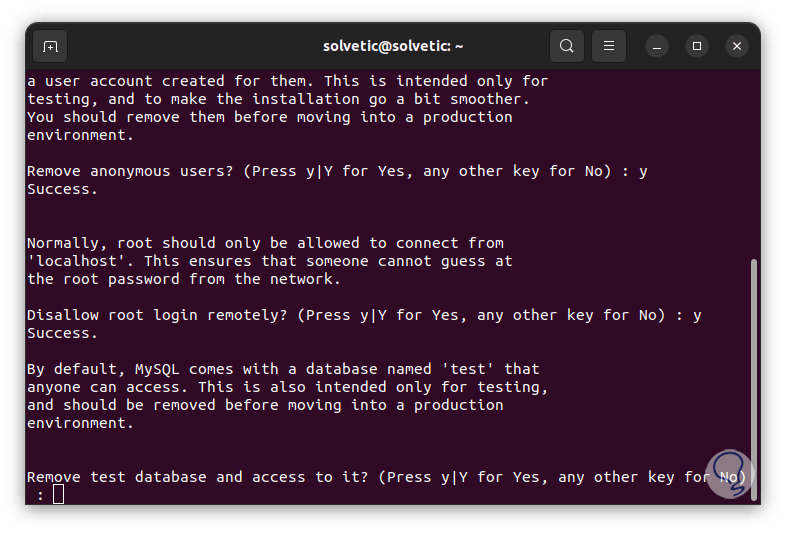
step 17
Then we enter in all the fields the letter "y":
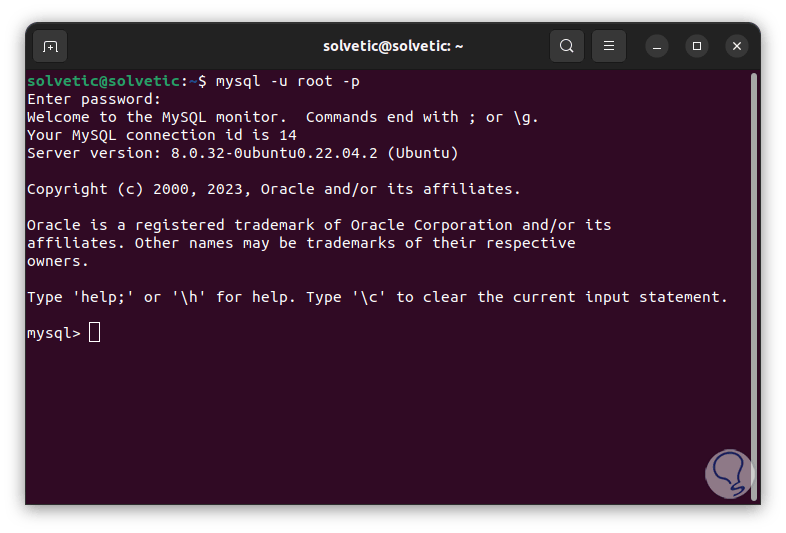
step 18
We access MySQL with the password:
mysql -u root -p
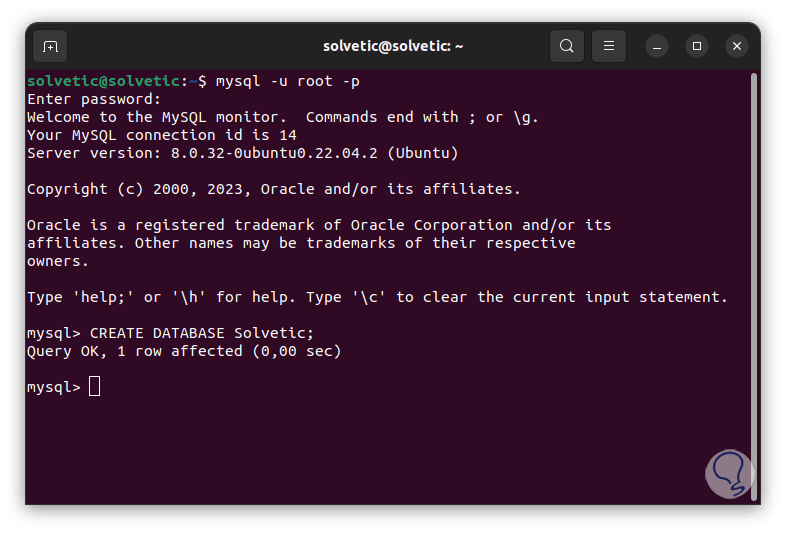
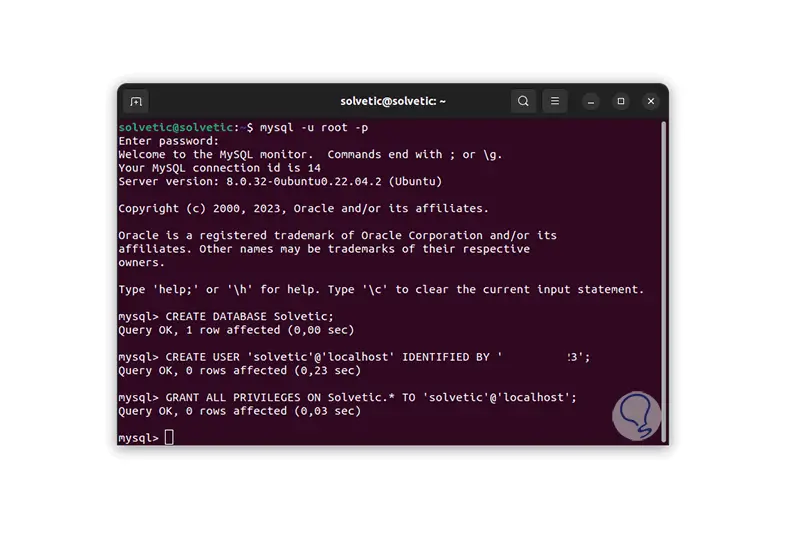
step 19
We create the database with the syntax:
CREATE DATABASE(base);
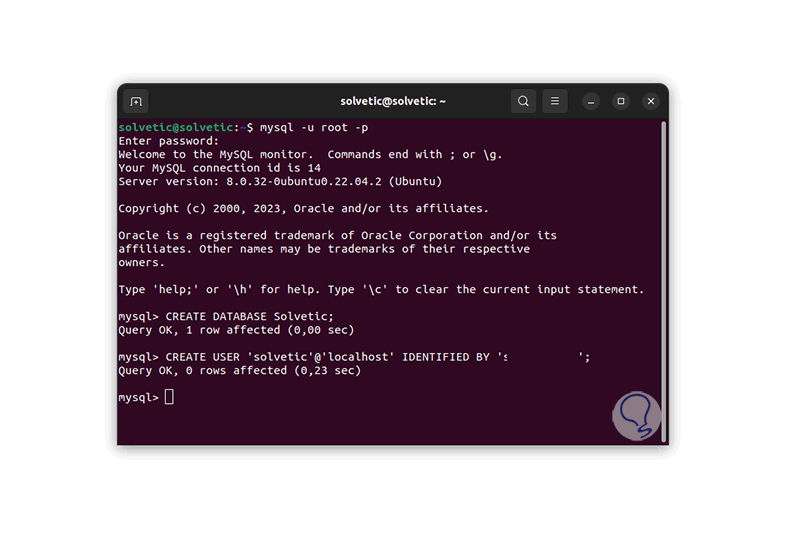
step 20
We create the user with password:
CREATE USER 'user'@'localhost' IDENTIFIED BY 'password';
step 21
We assign the database permissions to that user:
GRANT ALL PRIVILEGES ON base.* TO 'user'@'localhost';
step 22
We leave the console with exit;.
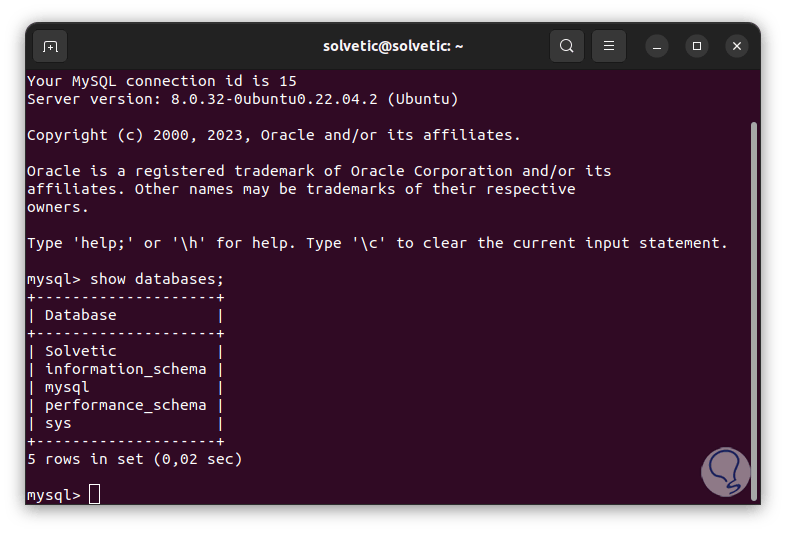
Step 23
We log in to MySQL again either with the root user or with the created user and validate the available databases:
show databases;
step 24
There we can see the database that we have created.
step 25
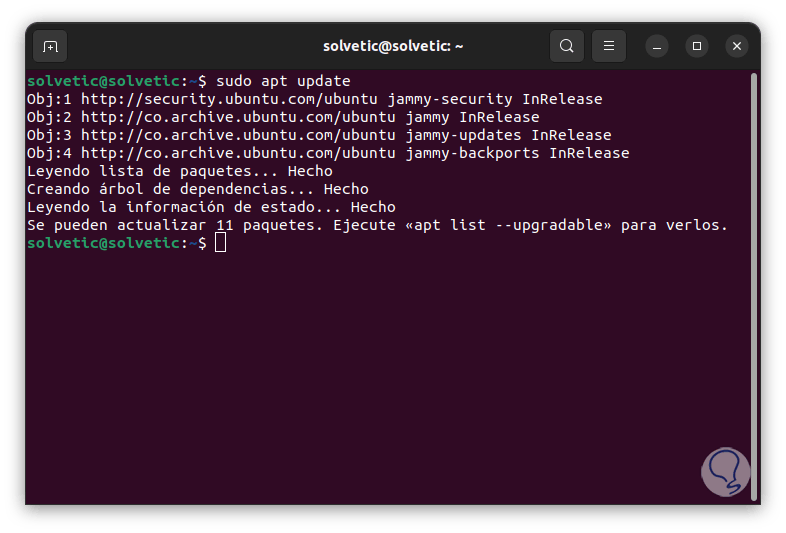
Update the system:
sudo apt update
Step 26
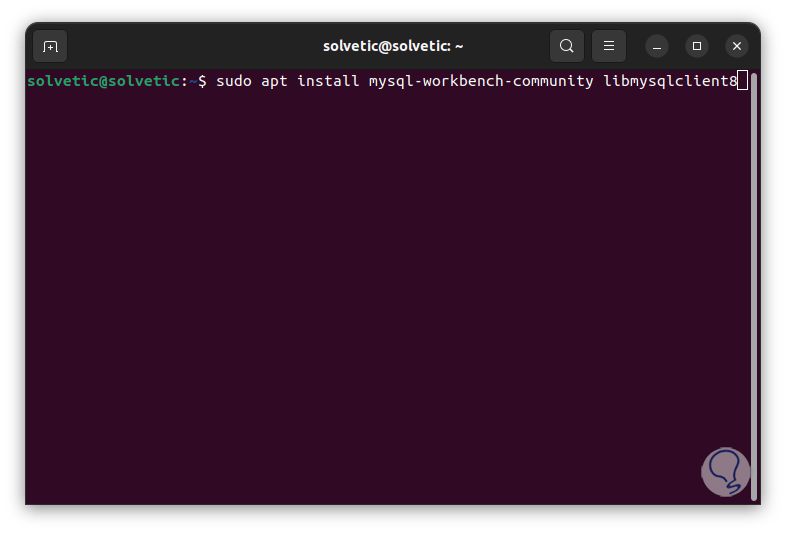
To install extra utilities, as optional, we execute:
sudo apt install mysql-workbench-community libmysqlclient18
Step 27
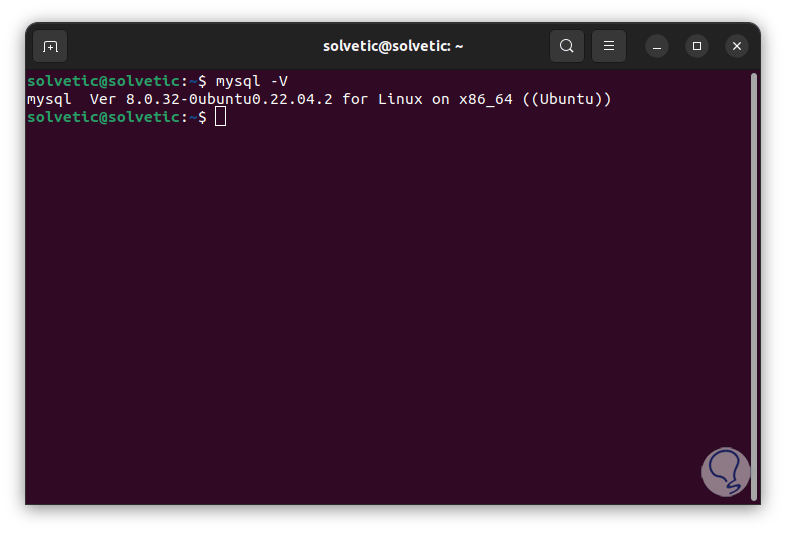
Finally to see the version of MySQL we execute the command:
mysql -V
We see how MySQL can be installed in a simple and functional way in Ubuntu and with it have one of the best platforms to manage data which is not only free but as we saw full of functions that make it the ideal solution for this type of work.