When talking about a database for corporate environments, without a doubt, one of the most traditional and functional is MySQL , developed by Oracle, which offers us attributes such as performance, reliability and ease of use, allowing for centralized control of databases. special web-based applications..
MySQL offers a fast, multi-threaded, multi-user and robust SQL (Structured Query Language) database server at the architecture and process level. The MySQL server has been designed for critical load and mission production systems in any type of organization, supports SQL and NoSQL, and also has a pluggable storage engine architecture, has multiple database connectors for different languages of programming which facilitates the development of applications making use of any of the current programming languages ​​thus allowing its scalability and deployment.
Currently MySQL has been updated to version 8.0 which has new features such as:
Data Dictionary
In MySQL 8.0, a transactional data dictionary is now incorporated which stores information about the objects in the database.
Atomic data definition declarations (atomic DDL)
It is an atomic DDL instruction that combines data dictionary updates, storage engine operations, and binary log writes associated with a DDL operation in a single atomic transaction.
Security and account management
A number of security enhancements have been added in MySQL such as a new caching_sha2_password authentication, new MySQL role media, MySQL now manages password history information and is now compatible with FIPS mode.
Resource management
MySQL is able to support the creation and administration of resource groups, it also allows you to assign threads that run within the server to particular groups.
InnoDB improvements
InnoDB improvements have been added such that the maximum current value of the automatic increment counter is written to the redo log each time the value changes, the server restart no longer cancels the effect of the AUTO_INCREMENT = N or table option InnoDB Memcached plug-in supports multiple fetching operations.
Support character set
The default character set has changed from latin1 to utf8mb4.
JSON improvements
These include the addition of the operator - >> which is equivalent to calling JSON_UNQUOTE, the addition of two JSON functions JSON_ARRAYAGG () and JSON_OBJECTAGG (), adding the JSON_PRETTY function and more.
Admit indexes
MySQL now supports invisible indexes.
Common Table Expressions
MySQL 8.0 supports common expressions of tables, both non-recursive and recursive.
Window functions
MySQL 8.0 is able to support window functions that perform a calculation using the rows related to that row. These include functions such as RANK (), LAG () and NTILE ().
Expressions
Support for regular expressions.
Temporary Internal Tables
The TempTable storage engine replaces the MEMORY storage engine by acting as the default engine for internal temporary tables in memory.
Logs
The error log was rewritten to implement the MySQL component architecture.
Backup lock
A new type of backup lock allows DML during an online backup.
Replication Enhancements
MySQL 8.0 replication now supports binary registration of partial updates in JSON documents using the compact binary format.
Now let's see how to install MySQL 8.0 on Ubuntu 18.04 Server..
1. Add the MySQL APT repository in Ubuntu 18.04
Step 1
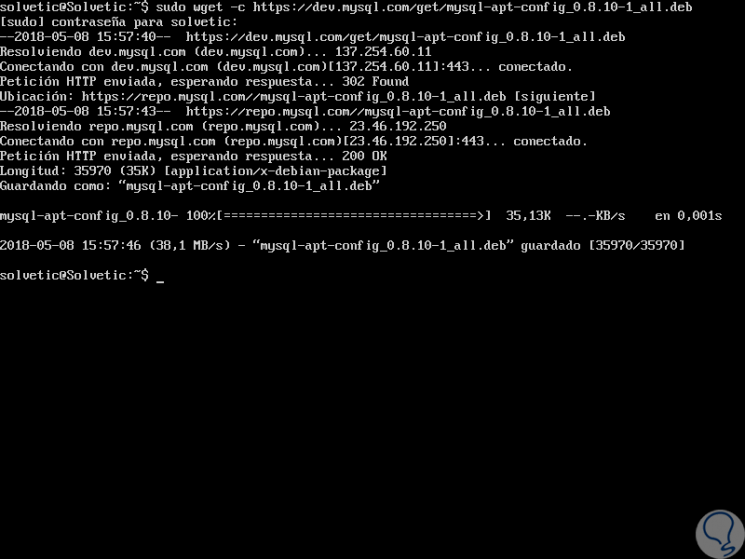
First, it will be necessary to add the MySQL repository to the list of Ubuntu 18 package sources and then use APT to install the MySQL server, the client and other components, for this we will execute the following command:
wget -c https://dev.mysql.com/get/mysql-apt-config_0.8.10-1_all.deb
Step 2
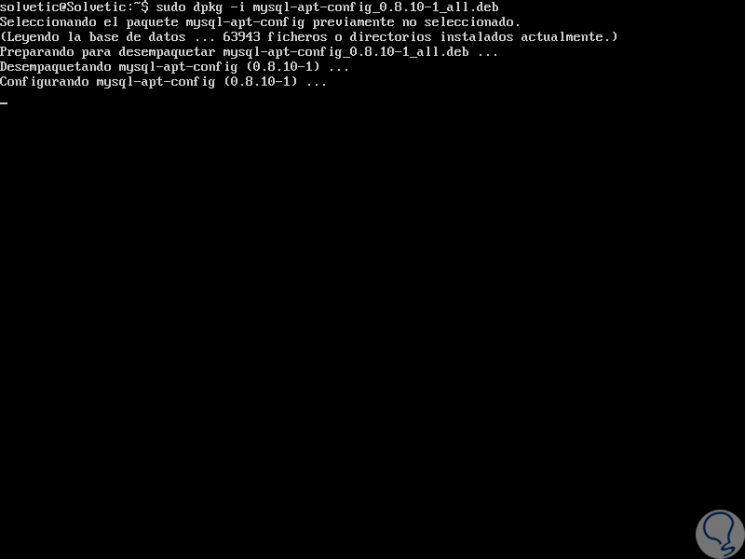
Once downloaded, we will install the MySQL 8.0 repository package using the dpkg command like this:
sudo dpkg -i mysql-apt-config_0.8.10-1_all.deb
Step 3
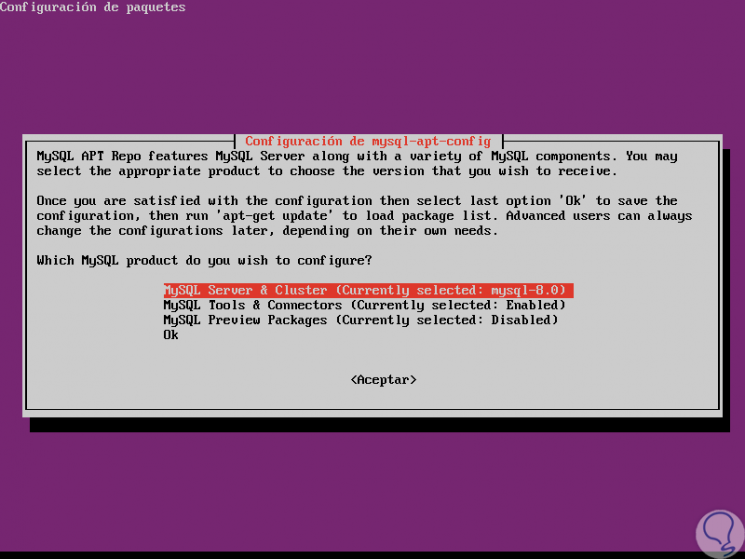
Then the following window will be displayed:
Step 4
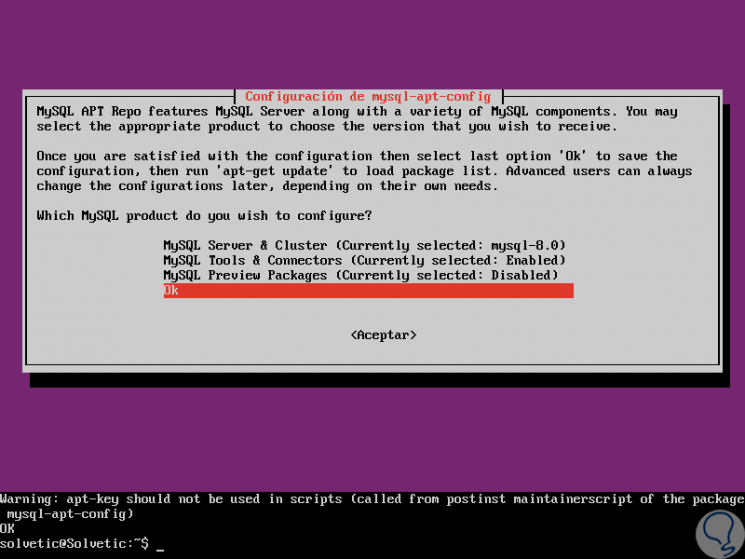
There we must select the MySQL server version and other components such as cluster, shared client libraries or MySQL packages that we want to configure for the installation of this, the MySQL server version mysql-8.0 will be automatically selected so we must select the line Ok and press Enter to continue the installation process.
2. Install MySQL on Ubuntu 18.04
Step 1
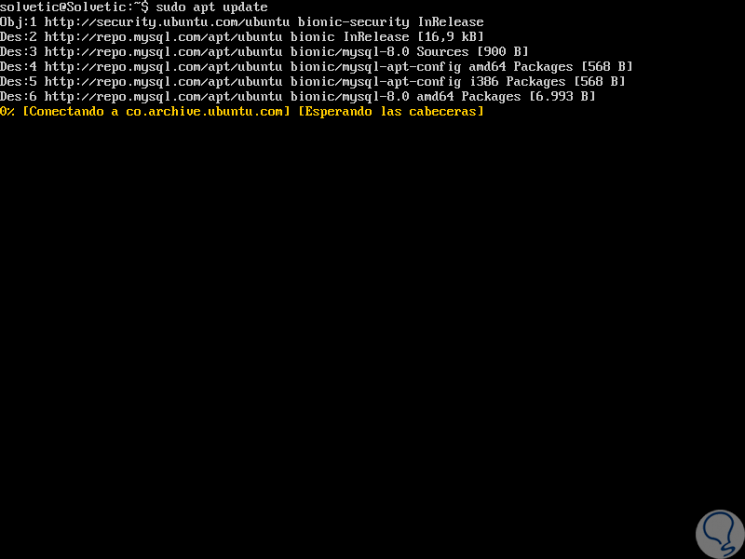
Before installing MySQL on Ubuntu we will update the packages available on the system by running the following:
sudo apt update
Step 2
Once they have been updated, we will execute the following command in order to install the packages for the MySQL community server, the client and the common files of this database:
sudo apt install mysql-server

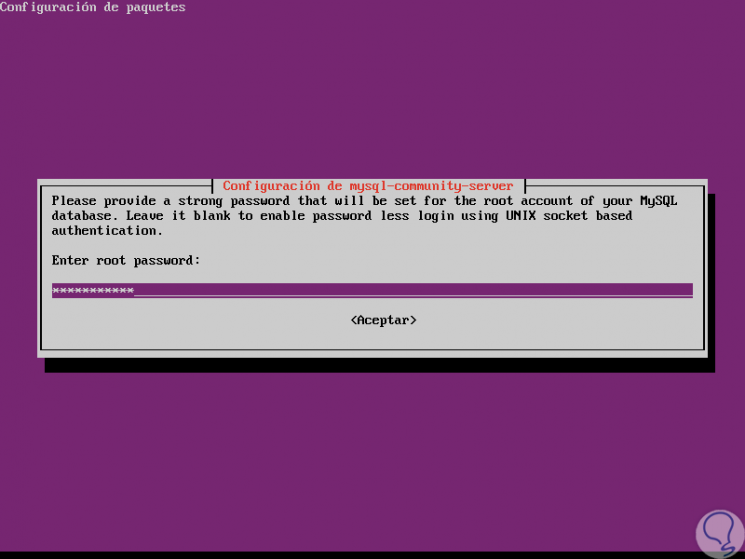
Step 3
Enter the letter S to confirm the download and installation and during this installation process the following window will be displayed where we will enter and confirm the password for the MySQL root user:
Step 4
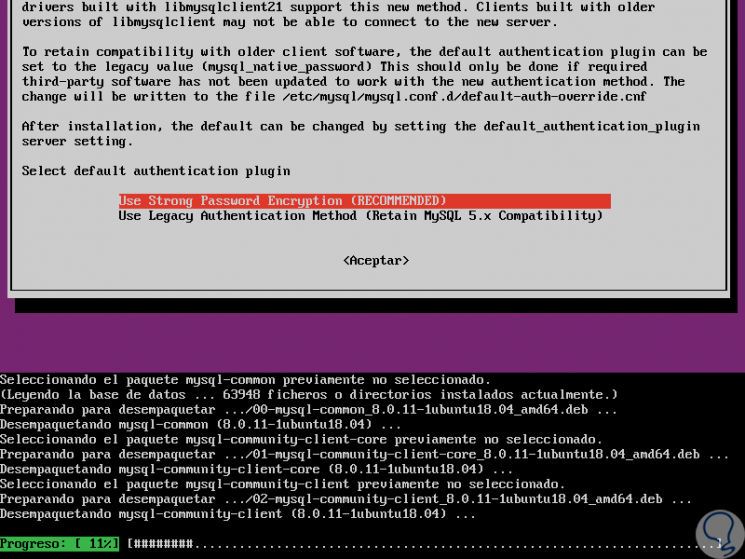
Based on the selected password we will see the following message:
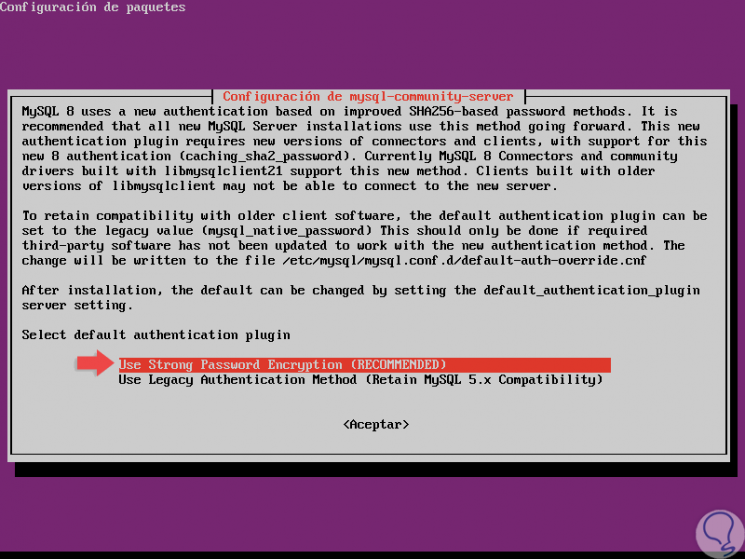
Step 5
This is due to the new MySQL SHA256 authentication system, there we select the recommended option and press Enter to continue:
In this way we have installed MySQL in Ubuntu 18.04.
3. Ensure the installation of MySQL 8.0 on Ubuntu 18.04
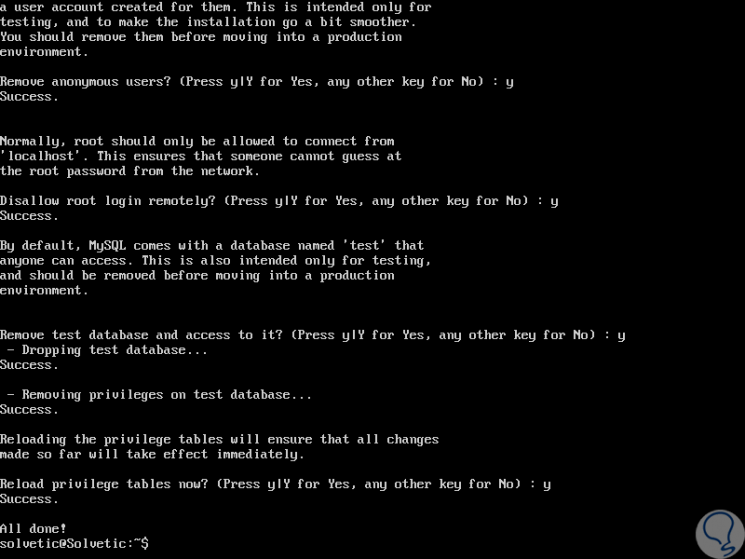
By default, the installation of MySQL 8.0 is not secure, so we must protect it, and for this we will execute the security script that comes with the binary package, there we will request the entry of the root password that we configured during the process of installation described above, for this we execute the following:
sudo mysql_secure_installation
The questions to answer are:
- Remove anonymous users? (Press y | Y for Yes, any other key for No): y
- Disallow root login remotely? (Press y | Y for Yes, any other key for No): y
- Remove test database and access to it? (Press y | Y for Yes, any other key for No): y
- Reload privilege tables now? (Press y | Y for Yes, any other key for No): y
4. Manage MySQL using Systemd in Ubuntu 18.04
Step 1
The next step is to verify if the MySQL server is active and running in Ubuntu 18, this is achieved using the following command:
sudo systemctl status mysql
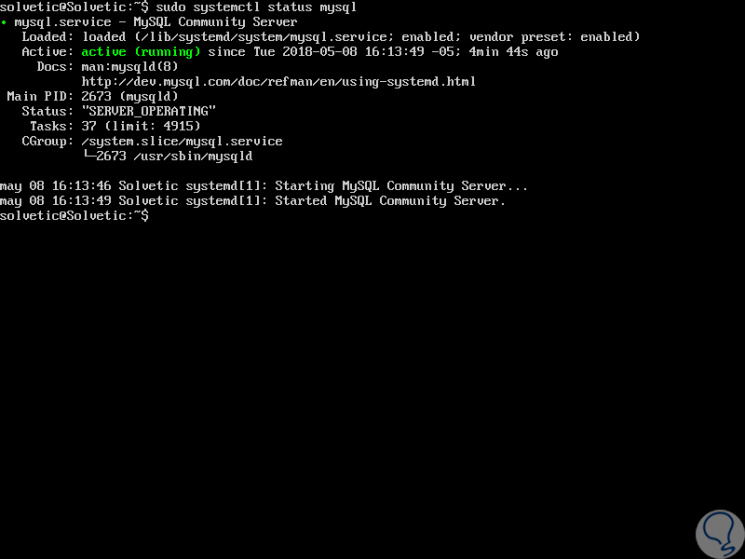
Step 2
As we see its status is Active
. We can use the following commands for MySQL management:
sudo systemctl status mysql (Start the MySQL service) sudo systemctl enable mysql (Enable automatic startup at startup of MySQL service)
5. Install extra MySQL components on Ubuntu 18.04
MySQL gives us the possibility of installing additional components that can be practical at the time of administration such as mysql-workbench-community, libmysqlclient18 and many more.
Step 1
For this we will execute the following commands:
sudo apt update sudo apt install mysql-workbench-community libmysqlclient18
Step 2
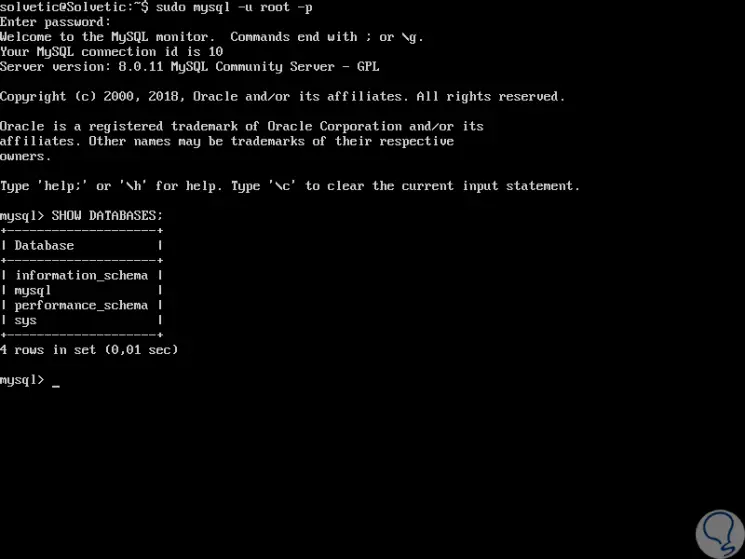
We can access MySQL by executing the following:
sudo mysql -u root -p
Step 3
Once we enter the respective password we can start working in MySQL completely:
Thus, we have learned to install MySQL 8.0 in the new version of Ubuntu: 18.04..