Java is one of the necessary software elements to execute multiple actions at the software level, especially if we work with web servers, since Java, developed by Oracle, is a global standard designed to develop and distribute mobile applications, games, content based on web and many other software with which its omission can be a cause of execution errors.
Java advantages
Some of the advantages of using java are:
- Write software on a defined platform and be able to run it virtually on another
- Create programs that are capable of being executed in a browser and access available Web services
- Combine various applications or services that make use of the Java language to create applications or services
- Develop server applications for online forums, surveys, HTML form processing and much more all in a simple and secure way
- Write powerful applications for mobile phones, remote processors, microcontrollers and much more.
Ubuntu 18.04 is the latest version of this versatile software and today we will learn to install Java there using the apt command.
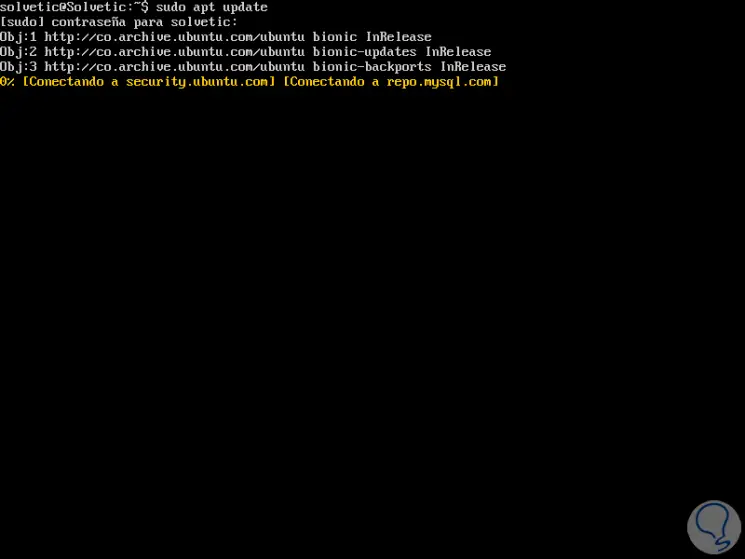
Upgrade system
The first step to take is to update the system packages by executing the following:
sudo apt update
1. How to install Java on Ubuntu 18.04
Step 1
By default, Ubuntu 18.04 includes Open JDK, which is an open source variant of JRE and JDK, and this package will install OpenJDK 10 or 11 as follows:
- Before September 2018, OpenJDK 10 will be installed
- After September 2018, OpenJDK 11 will be installed
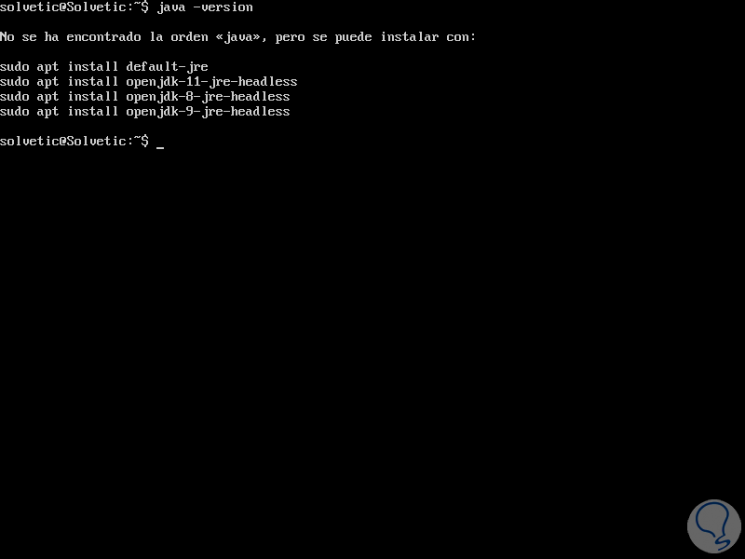
We will check if we have Java installed by running the following:
java -version
Step 2
As we see, at this moment we do not have Java, we proceed to the installation of OpenJDK by executing the following:
sudo apt install default-jre

Step 3
Enter the letter S to confirm the download and installation of OpenJDK, with which Java Runtime will be installed
Environment (JRE).
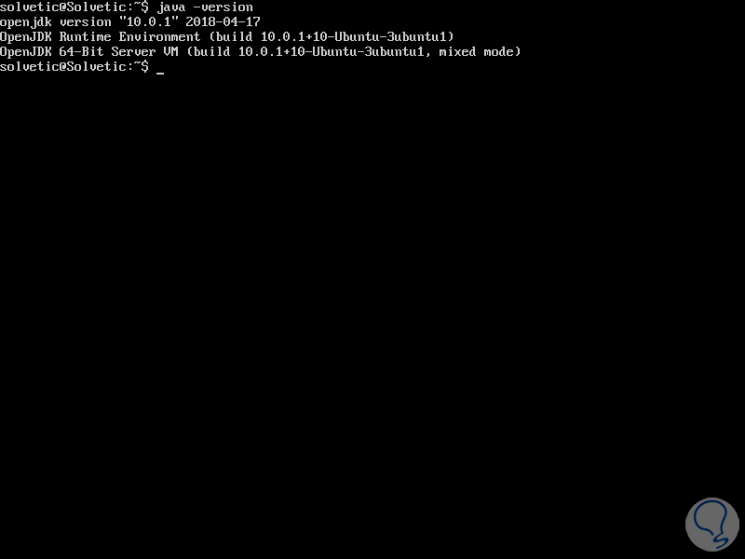
Once finished, we will check the Java version by running:
java -version
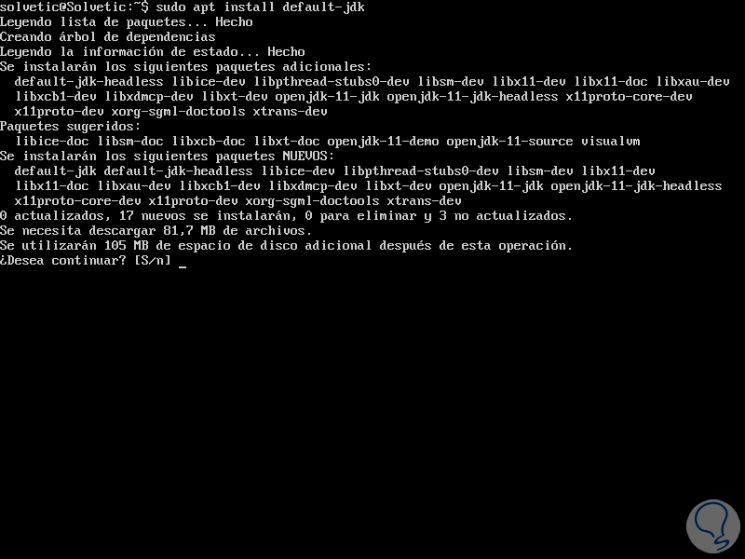
Step 4
Now it's time to install the Java Development Kit (JDK) which, in addition to the JRE, allows you to compile and run specific Java-based software. To install the JDK, we will execute the following command:
sudo apt install default-jdk
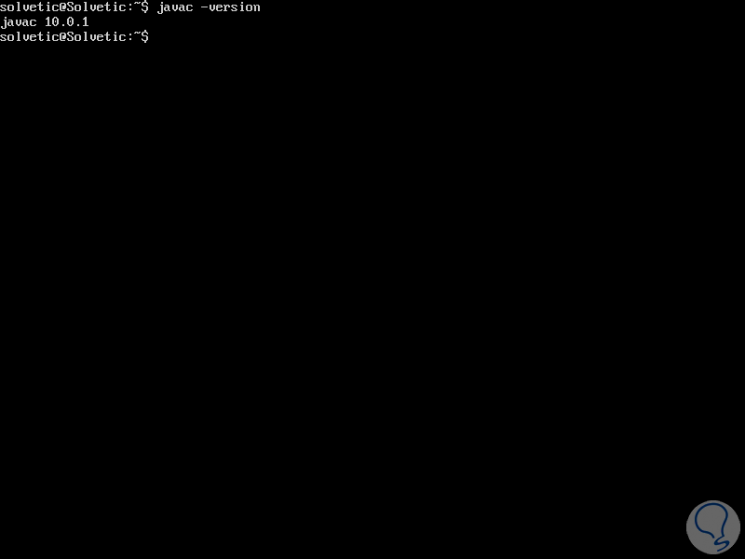
Step 5
Enter the letter S again to confirm the download and installation and once it is finished, we will validate the JDK version by running:
javac -version
2. How to install specific versions of JDK on Ubuntu 18.04
Step 1
It is possible that in some cases it is necessary to install only some special version of JDK and not the most recent one, we have the following options:
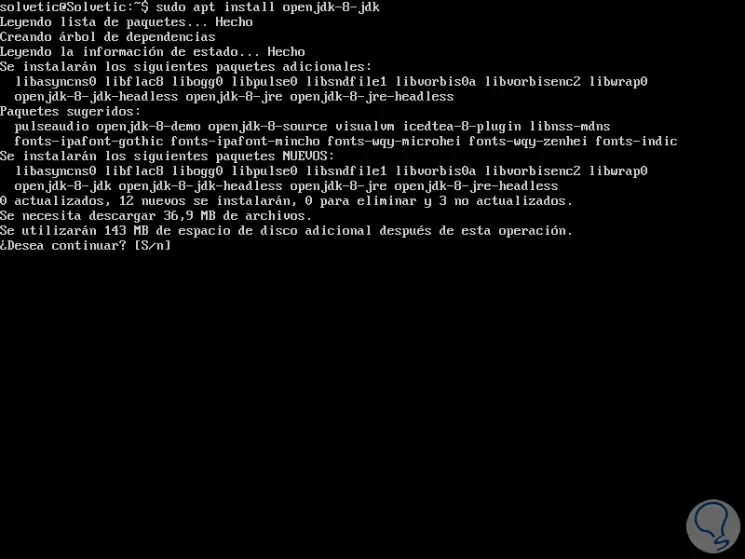
OpenJDK 8
Java 8 is the current version of long-term support and is compatible even with many applications. To install OpenJDK 8, we will execute the following command:
sudo apt install openjdk-8-jdk
Step 2
Finally we can check this version by running:
java -version
3. Installation of Oracle JDK on Ubuntu 18.04
Step 1
If the objective is to install Oracle JDK, which is the official version distributed by Oracle, it will be necessary to add a new package repository for the version that we want to use, in the case of Java 8 which is the LTS version, we will execute what next:
sudo add-apt-repository ppa: webupd8team / java
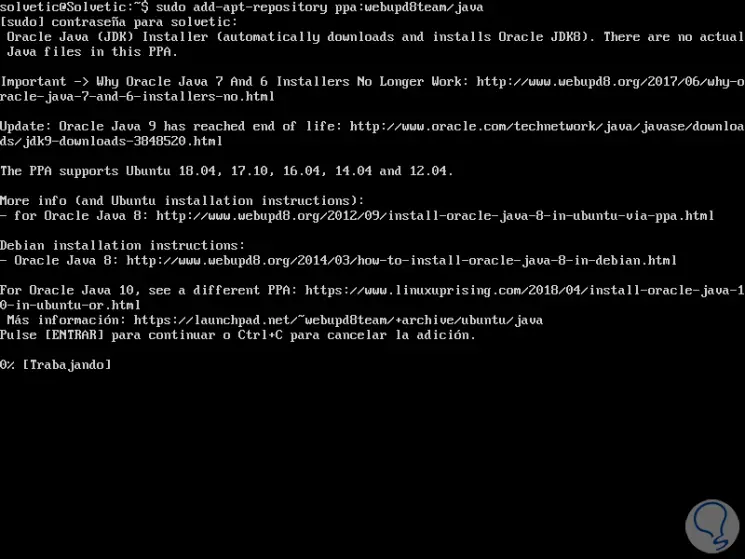
Step 2
Press Enter to confirm the download. Then we update the PPA packages by running:
sudo apt update
Step 3
Finally we install JDK by running the following command:
sudo apt install oracle-java8-installer
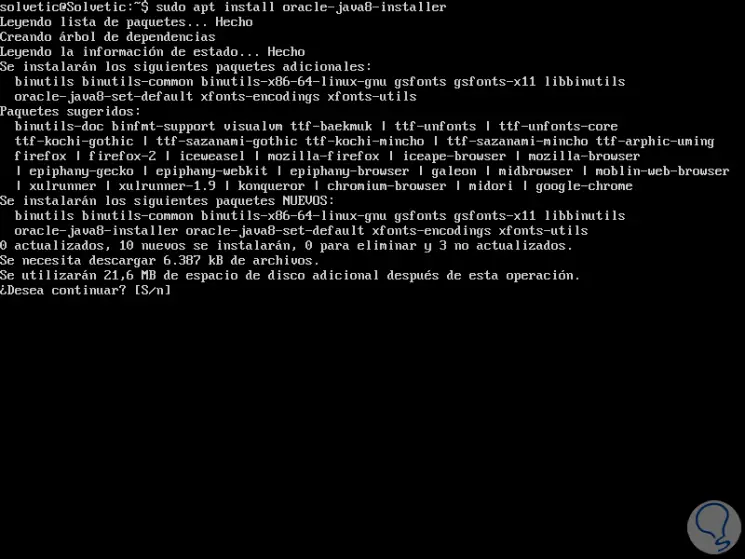
Enter the letter S to confirm the action.
4. How to manage Java in Ubuntu 18.04
It is possible to have multiple Java installations on a server. We can configure which version is the default to use on the command line using the update-alternative command like this:
sudo update-alternatives --config java
There we select the number associated with the version of Java that we want to use as default, or press ENTER to leave the current setting.
This option is also possible with other Java components such as javac:
sudo update-alternatives --config javac
5. How to configure the JAVA_HOME environment variable in Ubuntu 18.04
Some programs written with Java make use of the JAVA_HOME environment variable to determine the installation location of Java.
Step 1
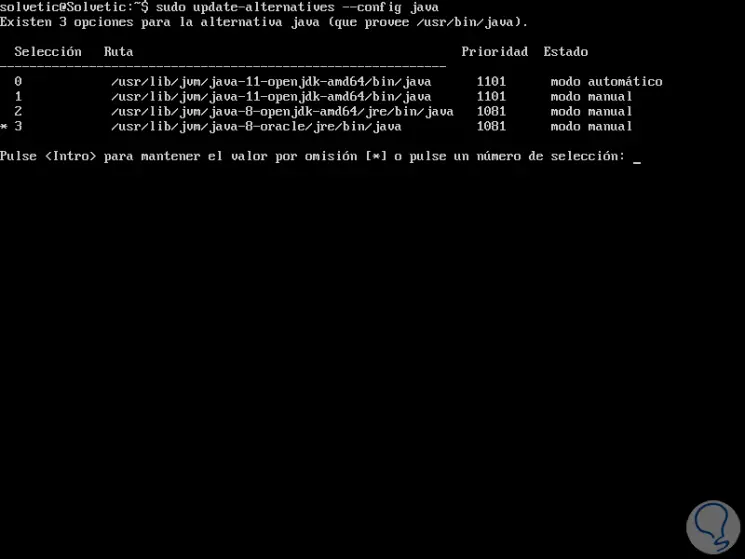
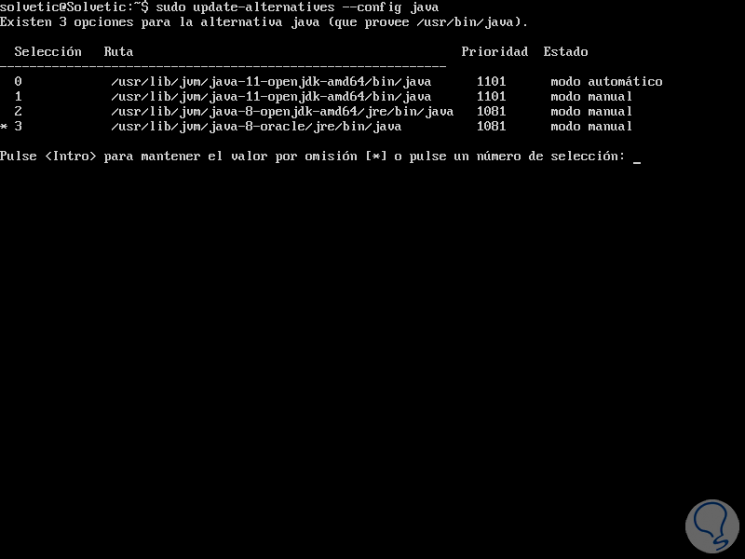
We can set this environment variable, but first we will define where Java is installed, for this we will use the update-alternatives command like this:
sudo update-alternatives --config java
Step 2
There we find the Route column where the route where java is installed in Ubuntu 18.04 is specified.
Usually these routes are:
OpenJDK 11: / usr / lib / jvm / java-11-openjdk-amd64 / bin / java.
OpenJDK 8: / usr / lib / jvm / java-8-openjdk-amd64 / jre / bin / java.
Oracle Java 8: / usr / lib / jvm / java-8-oracle / jre / bin / java.
Step 3
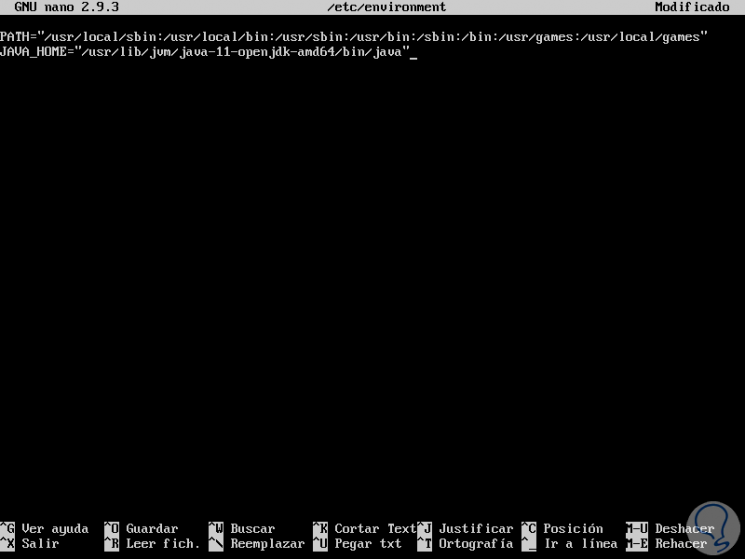
We will copy the desired installation path and then we will open / etc / environment using nano or some text editor like this:
sudo nano / etc / environment
In the deployed file we will paste the following line at the end:
JAVA_HOME = "/ usr / lib / jvm / java-11-openjdk-amd64 / bin / java"
Step 4
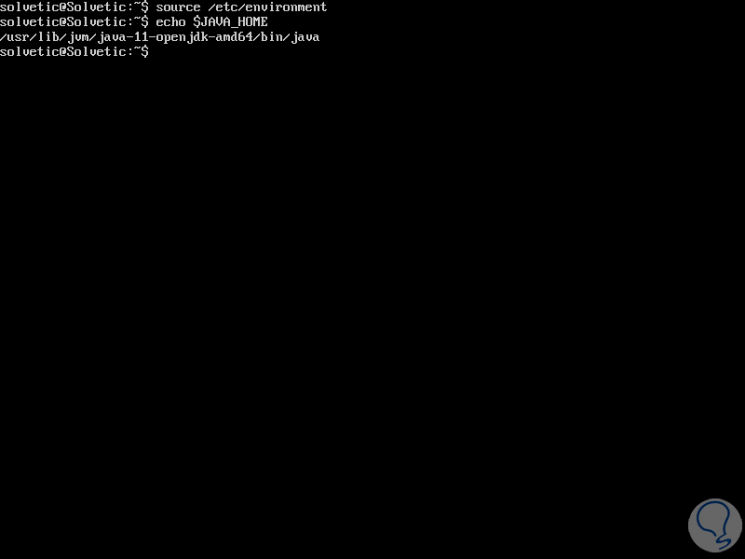
We save the changes using the Ctrl + O keys and exit the editor using the Ctrl + X keys. We must apply the changes using the following command:
source / etc / environment
We confirm the route by executing the following command:
echo $ JAVA_HOME
We have learned to install Java and configure some of its parameters in Ubuntu 18.04.