When we open a web browser to access a website, a series of background actions are carried out in the background that allow all communication processes to be executed correctly, this includes services, protocols and special connections but we can get to see an error indicating that the connection has been interrupted: the connection has been interrupted a network change has been detected. If this happens, we will not be able to access the web pages we want regularly and we will have problems with the network..
This network connection problem will prevent the website from opening, so we can try to update the site or check in another browser to see if the site opens and thereby verify that the error is not from the connection itself but from the website. If not, TechnoWikis has a series of solutions to correct this error.
To stay up to date, remember to subscribe to our YouTube channel!
SUBSCRIBE ON YOUTUBE
1 Reset network adapter
The first method is simple and includes resetting the network adapter to its default values, this will cause each configuration to be updated and the error can be corrected.
Step 1
To do this we are going to:
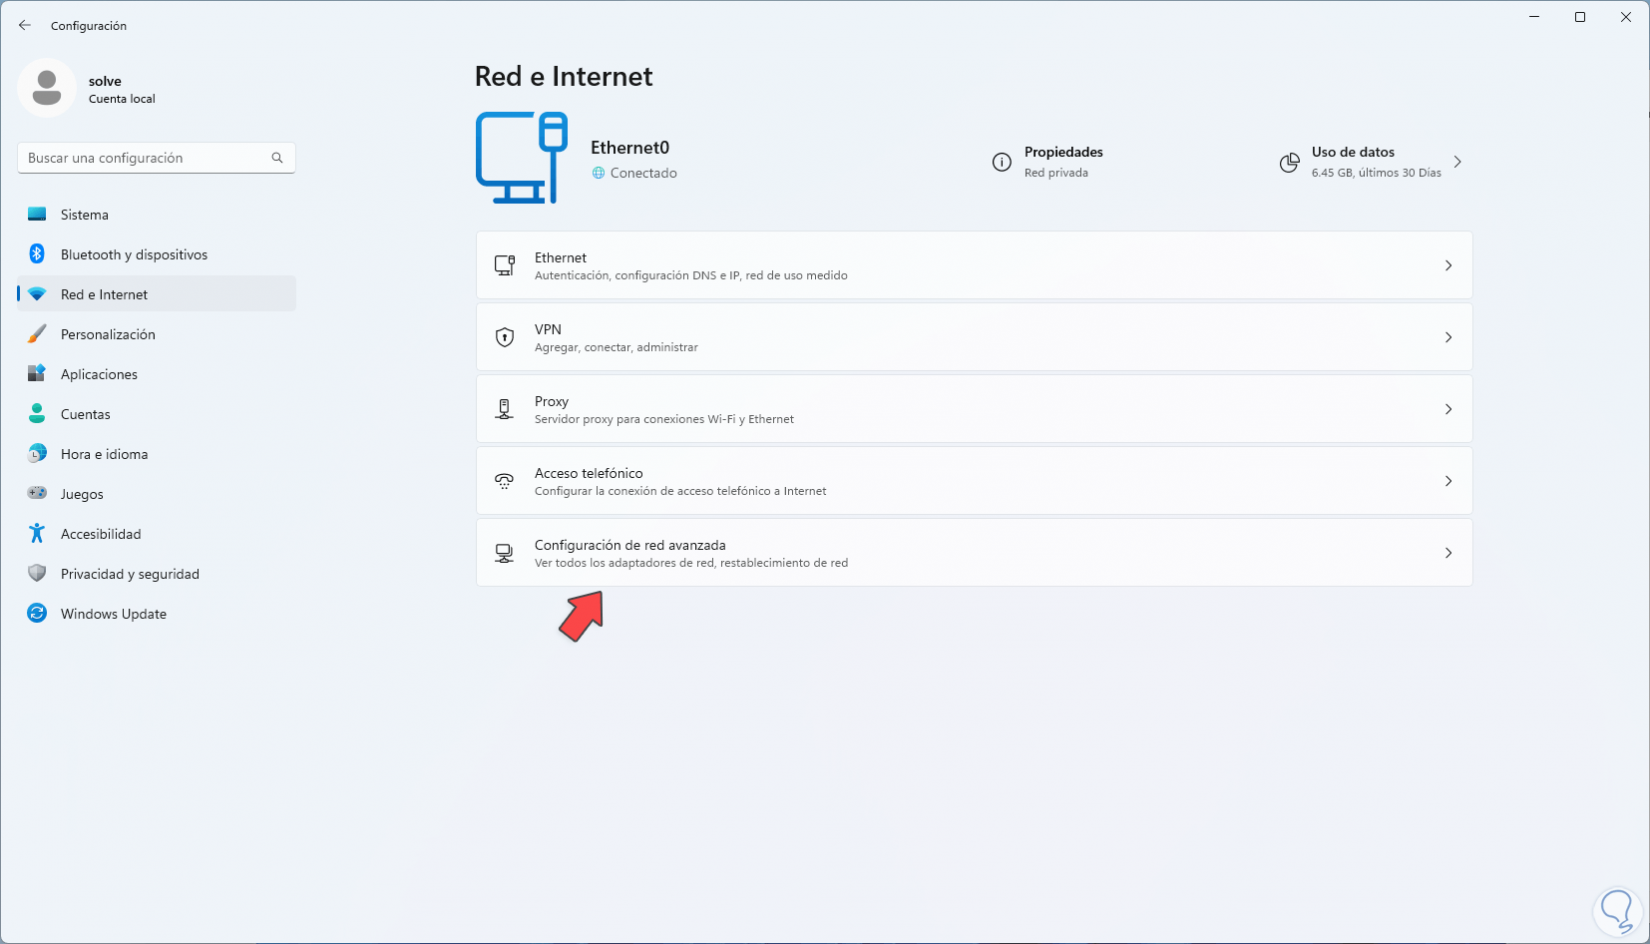
Step 2
We click on "Advanced network settings" to see the following:
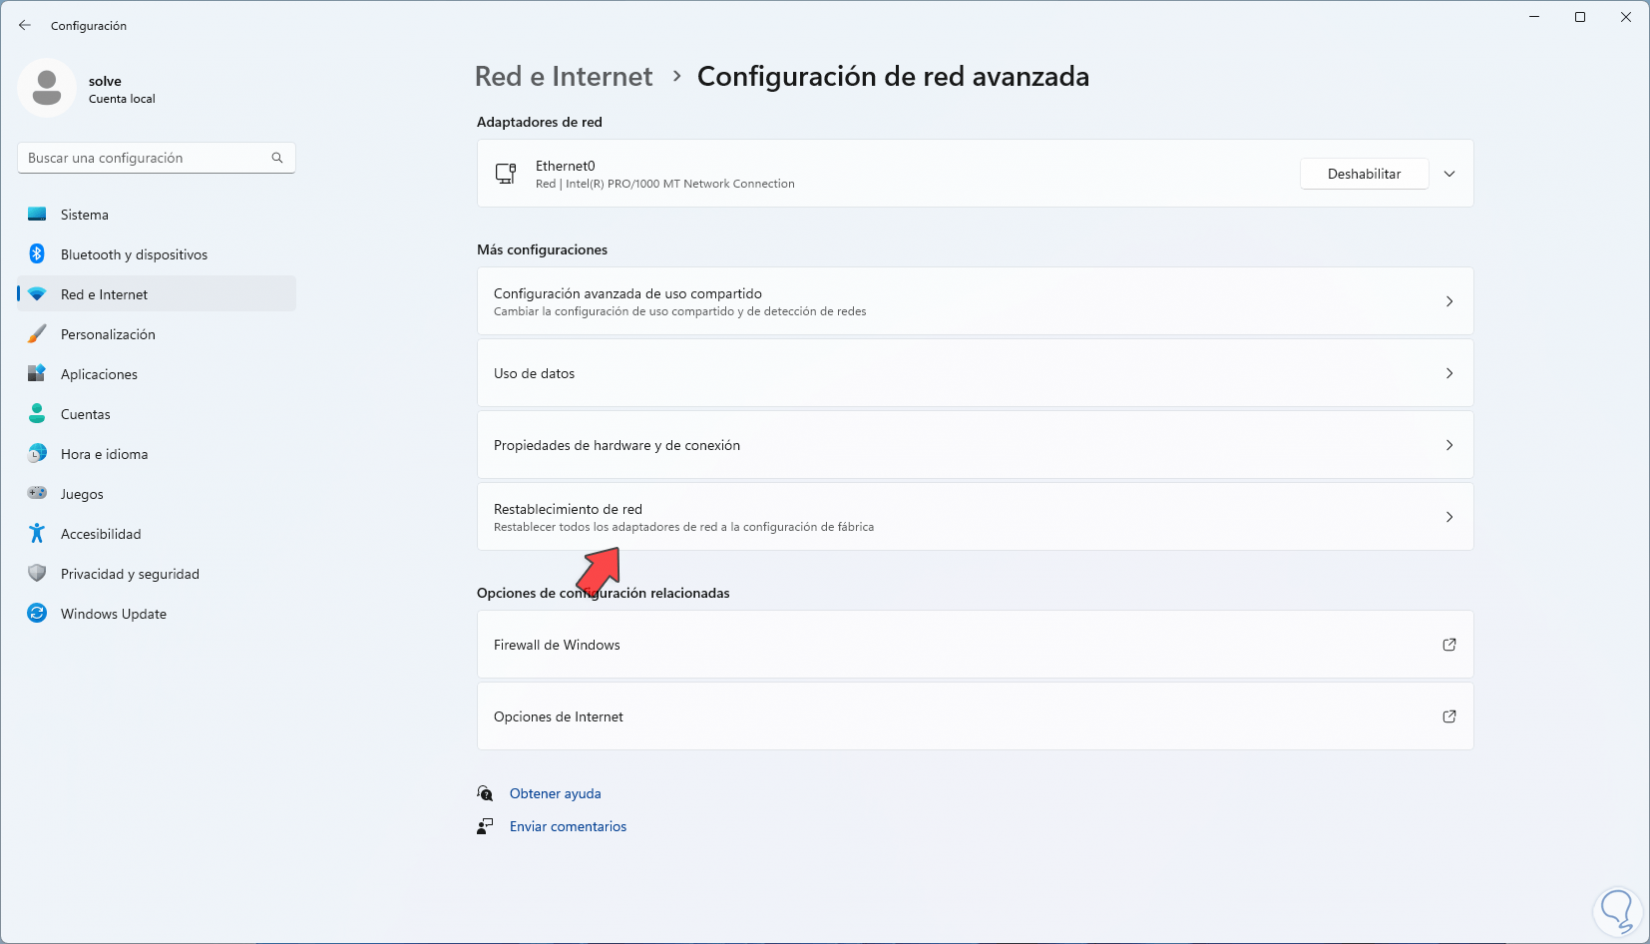
Step 3
We click on "Network reset" so that the following opens:
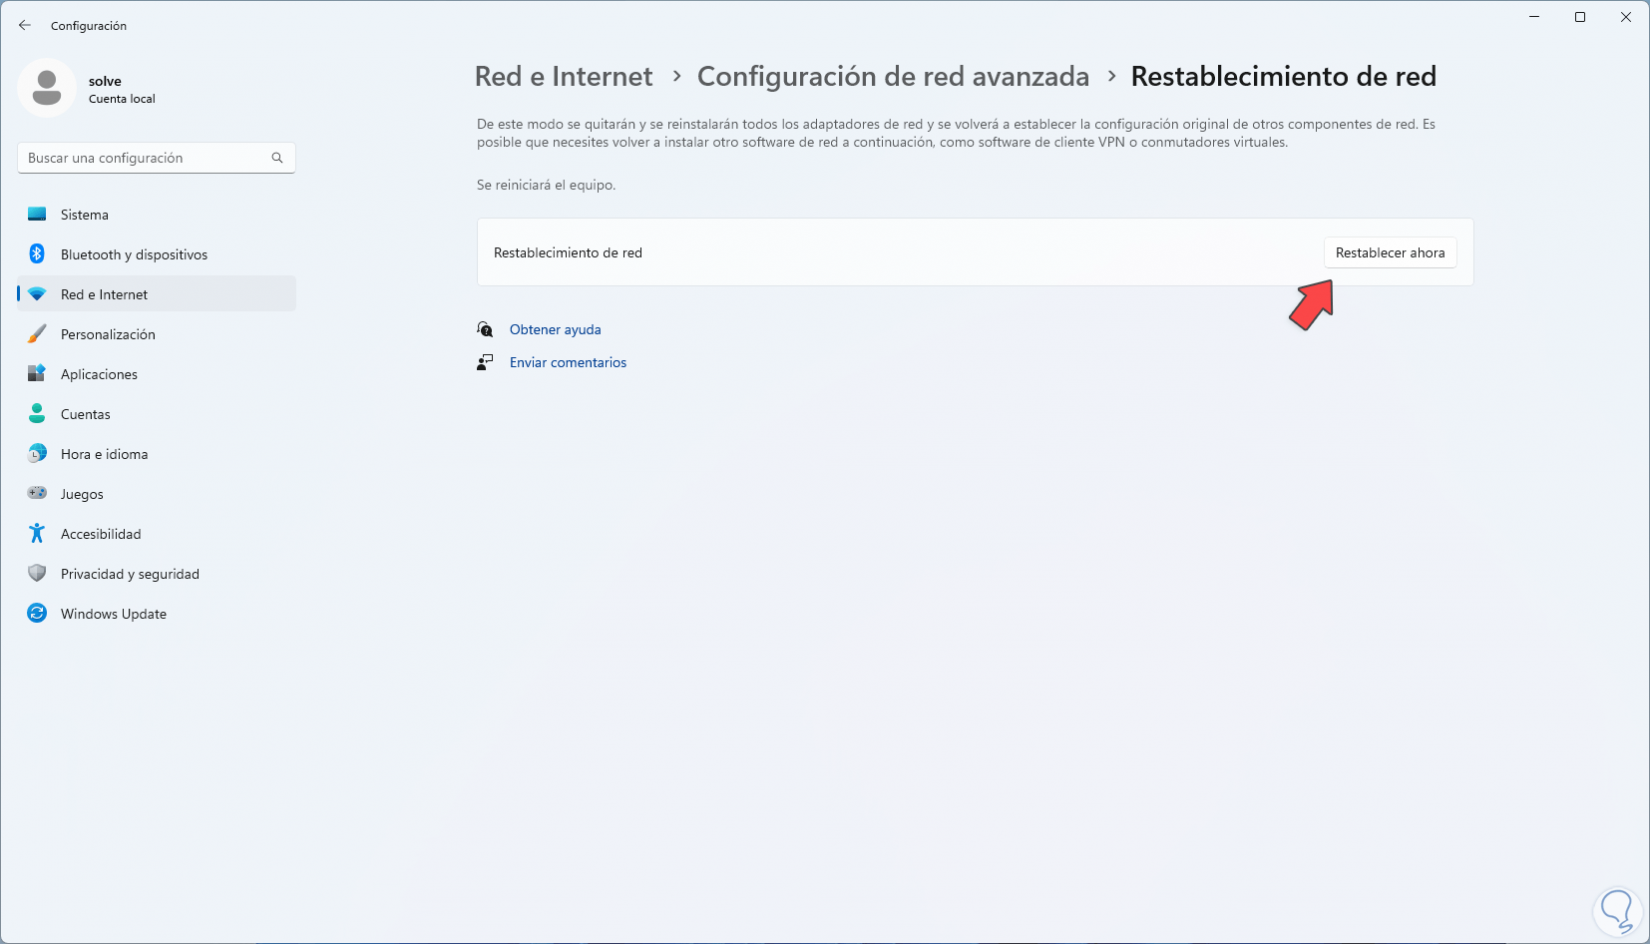
Step 4
We click on "Reset now" and the following will open:
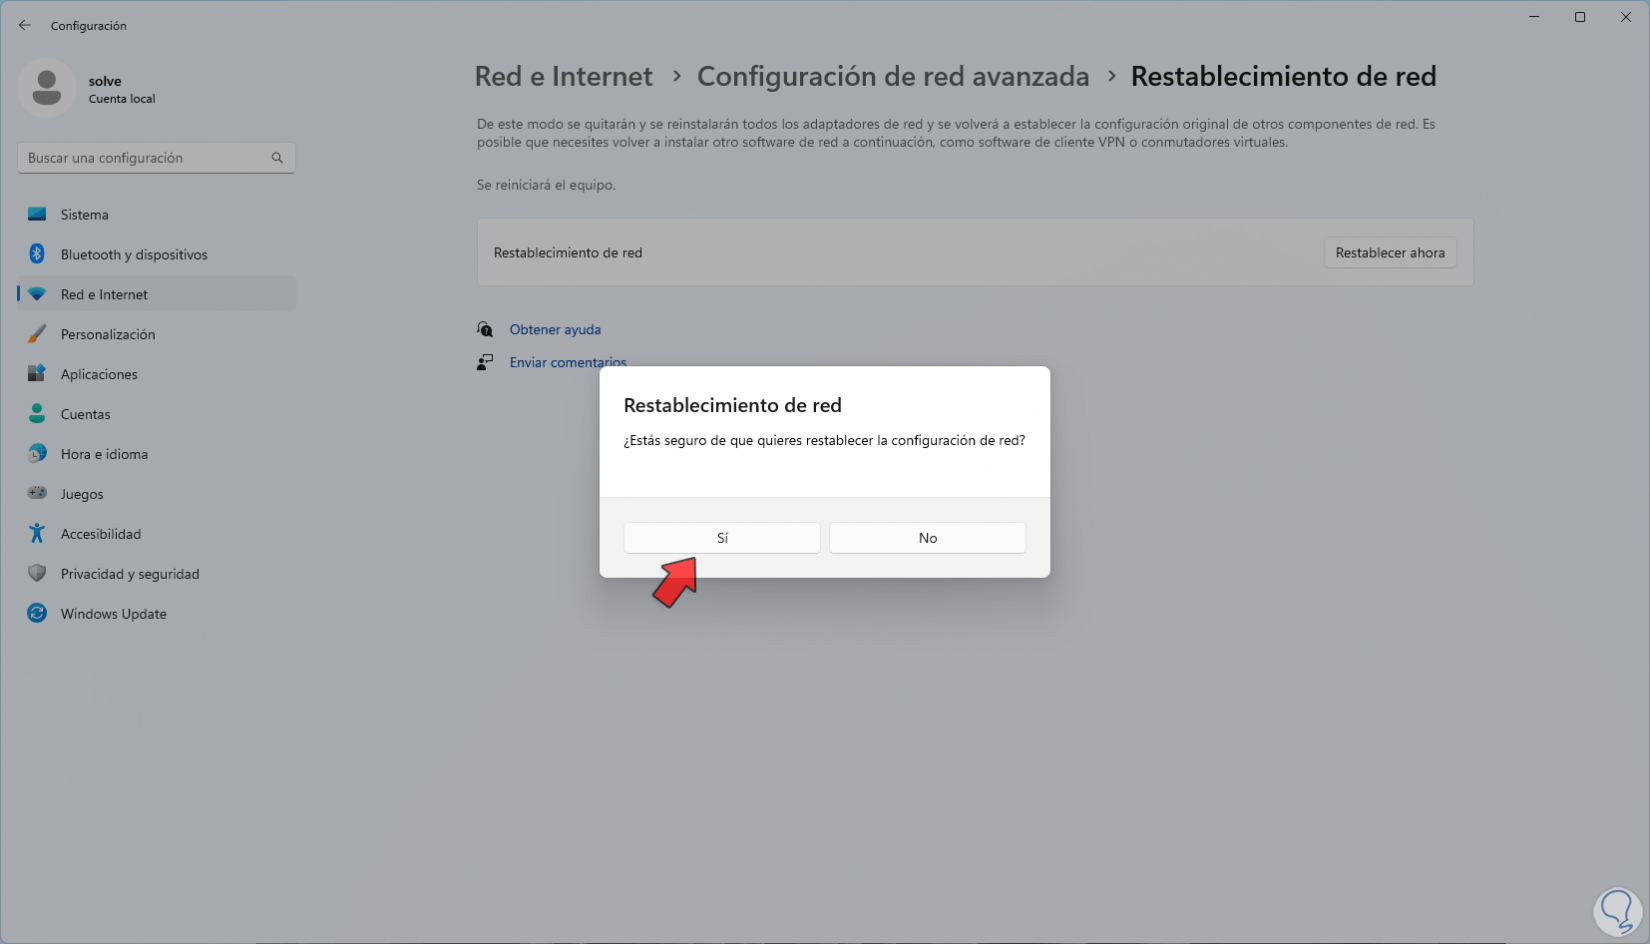
step 5
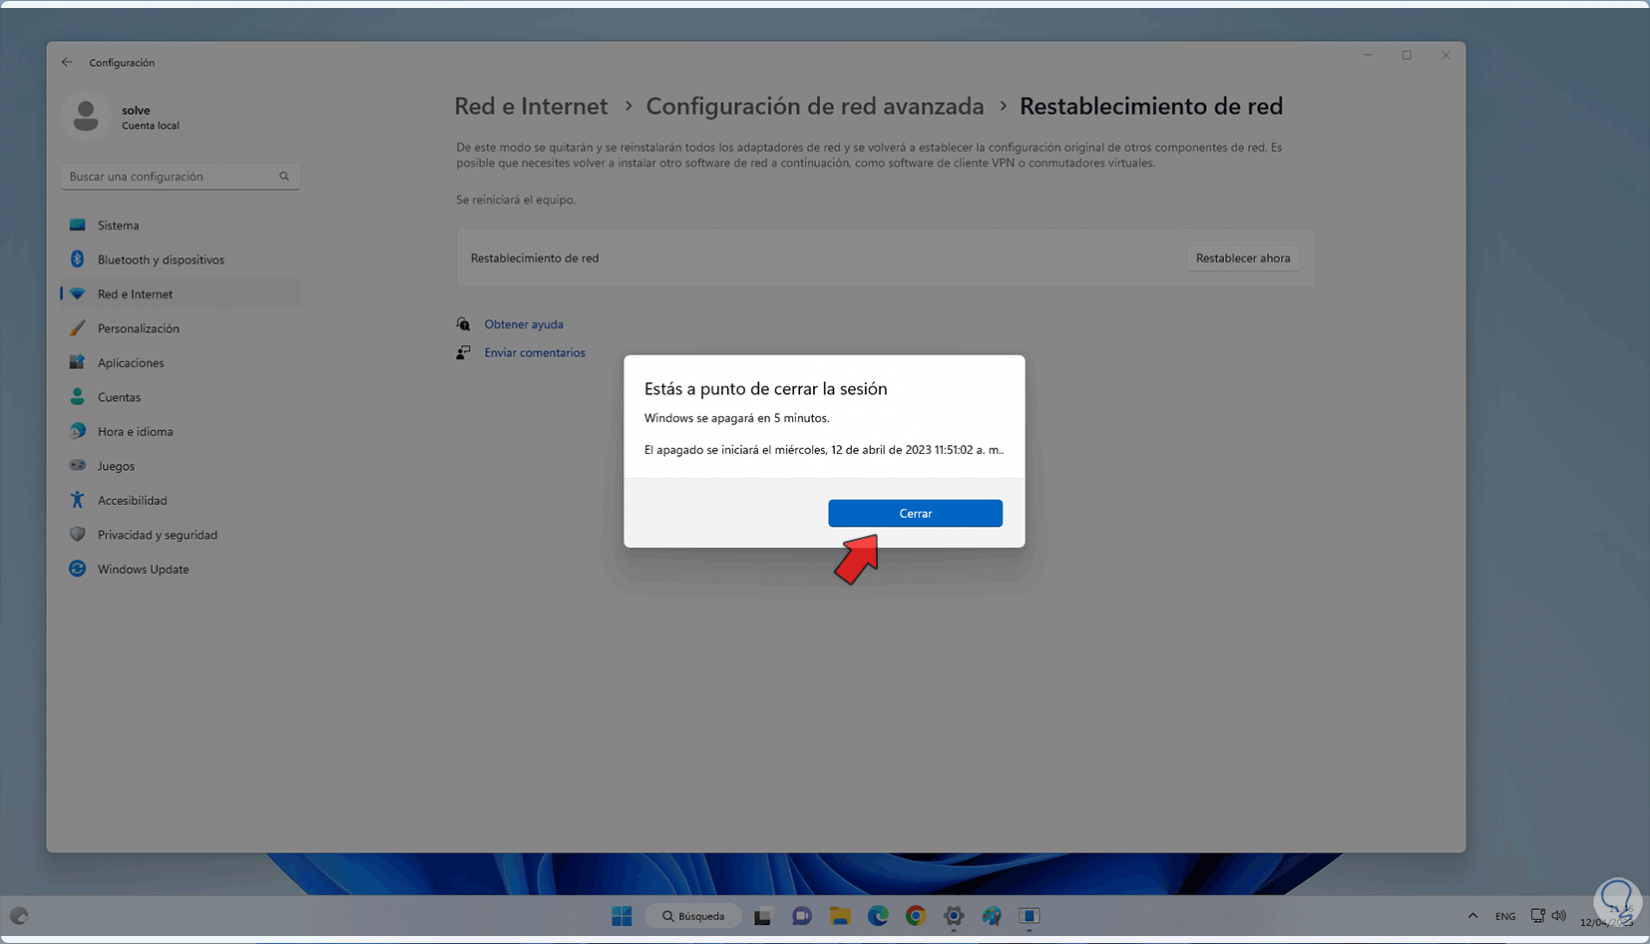
We confirm the process and after a moment we will see the following:
step 6
We click on "Close" and after a moment the system will restart to apply the changes:

2 Clear cache and data Browser
Another probable cause of this connection error is having a large amount of data stored in cache and history, every time we visit a website not only the history is saved but also the cache of that site is stored, this cache allows the opening process to be much faster in future access.
Step 1
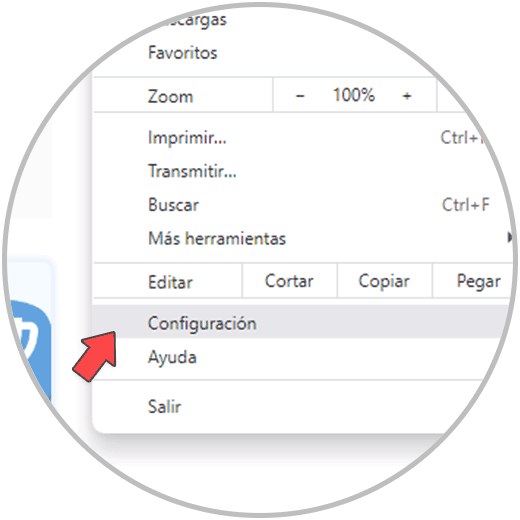
To delete this data and correct the error we open Google and go to "Customize and control Google Chrome - Settings":
Step 2
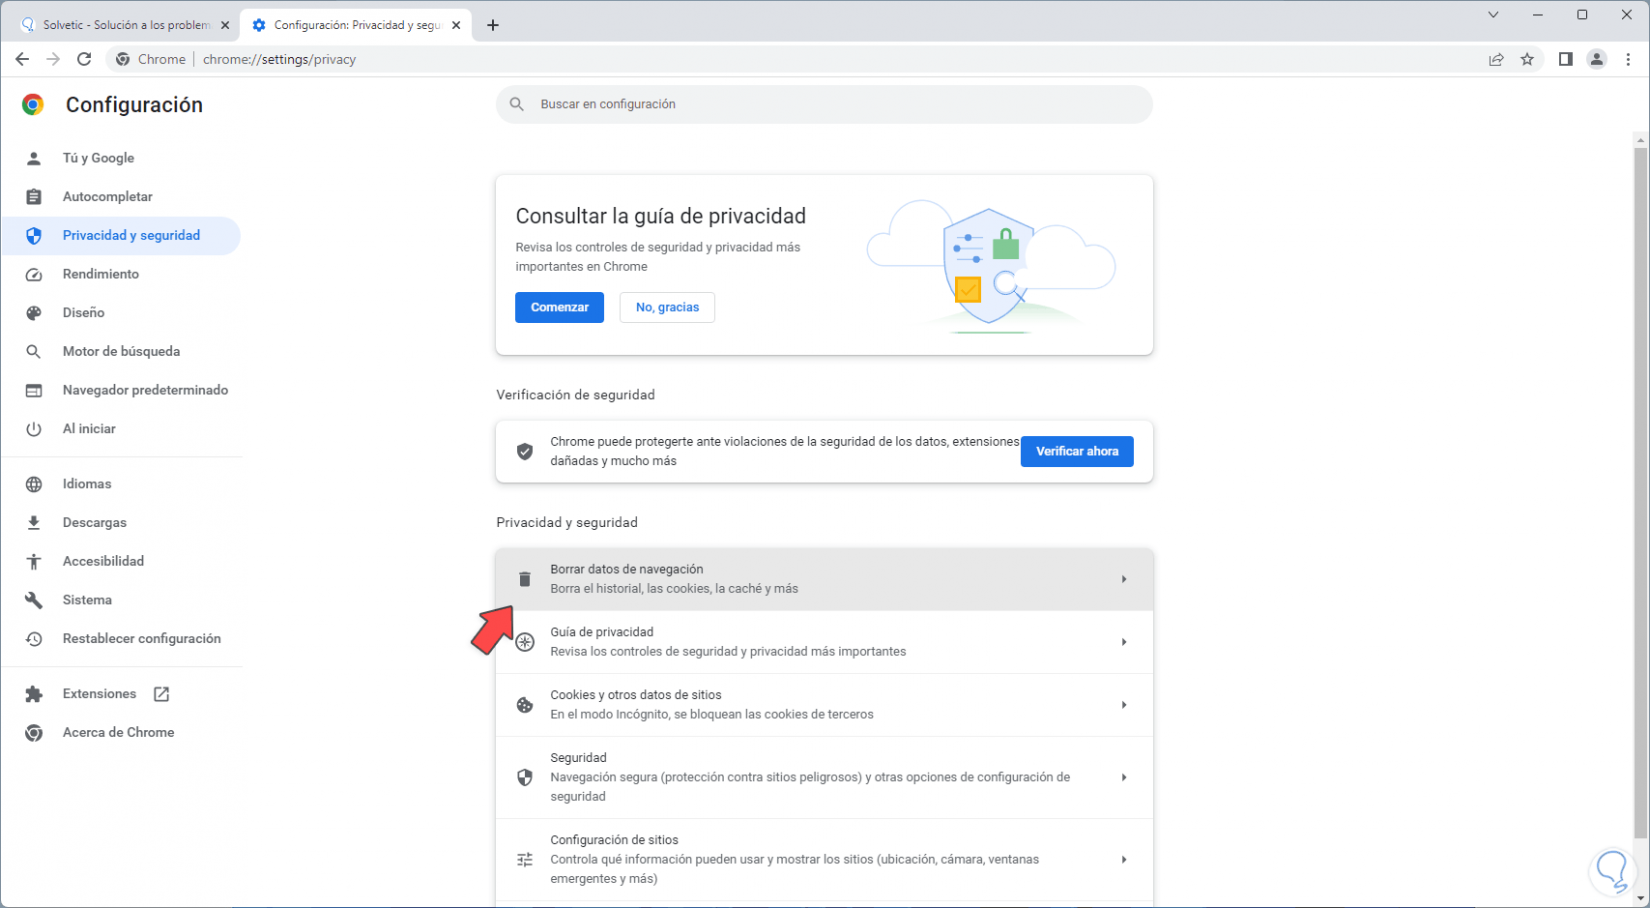
In the "Privacy and security" section we click on "Clear browsing data":
Step 3
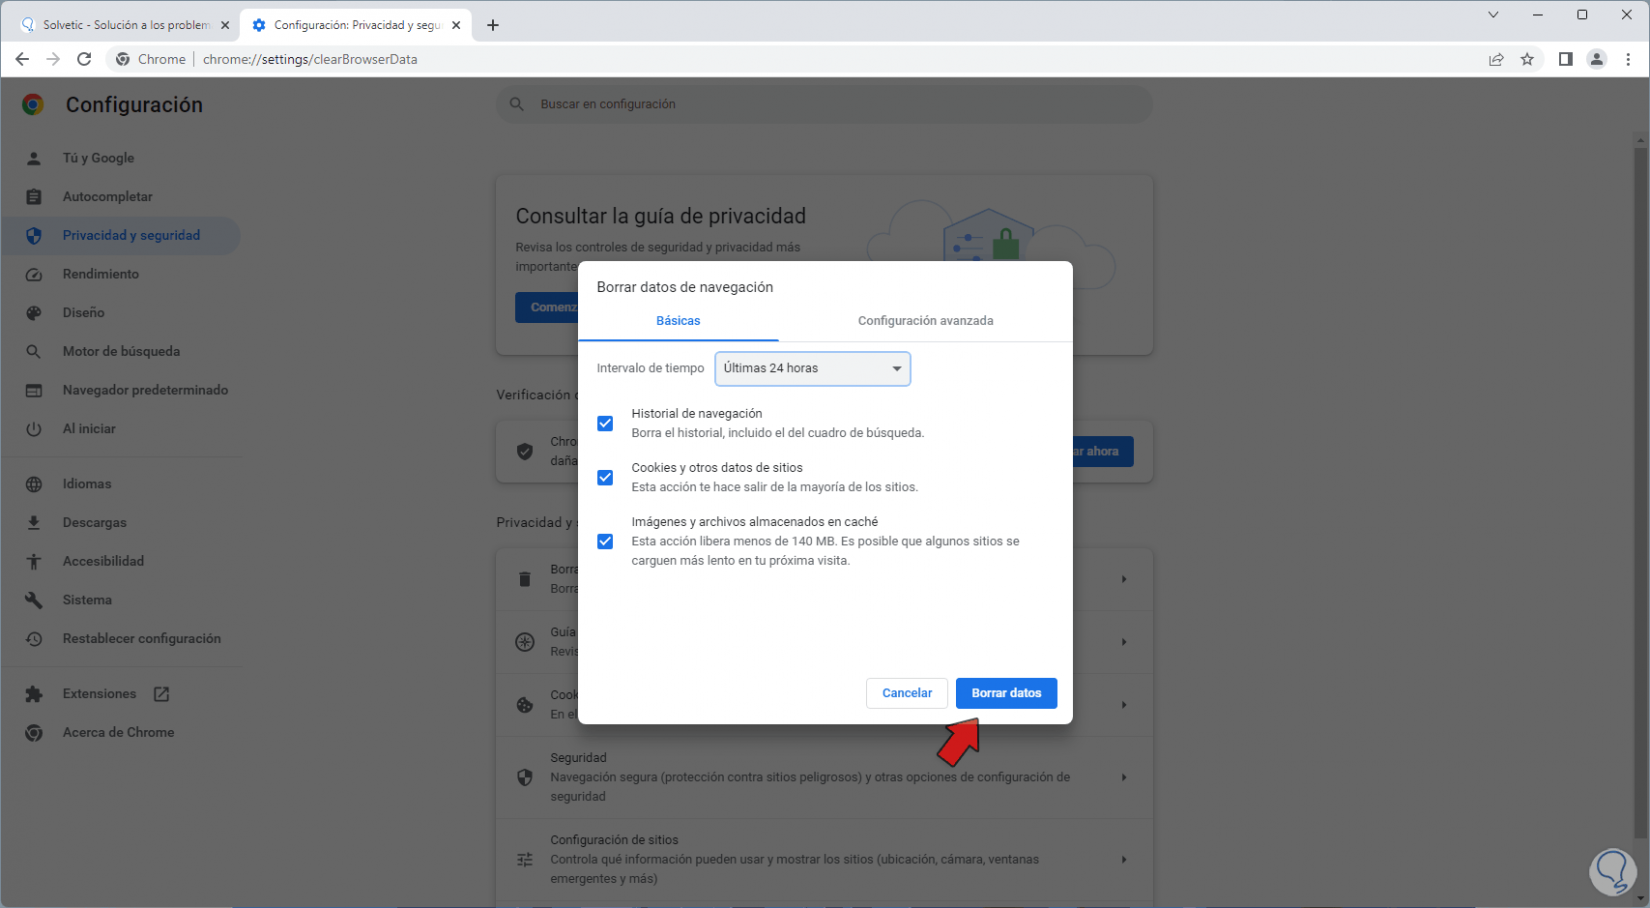
The following window will open: Select the time range and leave the boxes active, then click on "Clear data".
Step 4
In the case of Edge, we are going to:
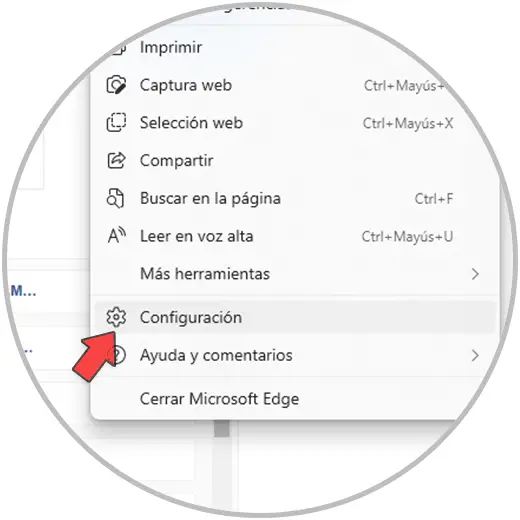
step 5
We go to "Privacy, search and services" and there we click on "Choose what should be deleted":
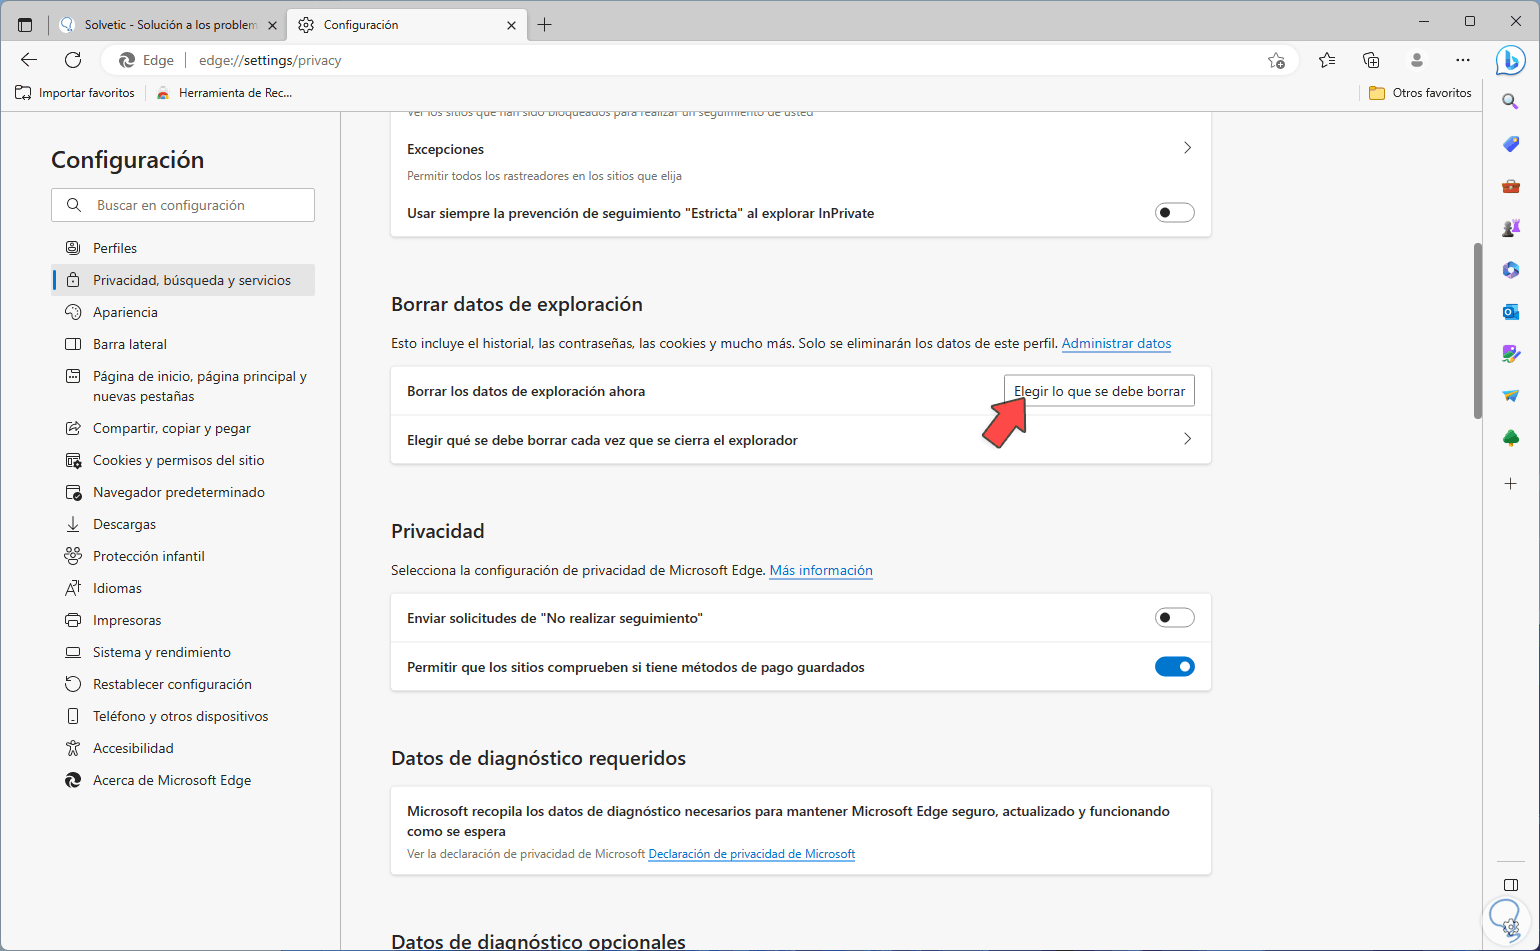
step 6
In the displayed window we select the time range and activate the necessary boxes. We click on "Delete now".
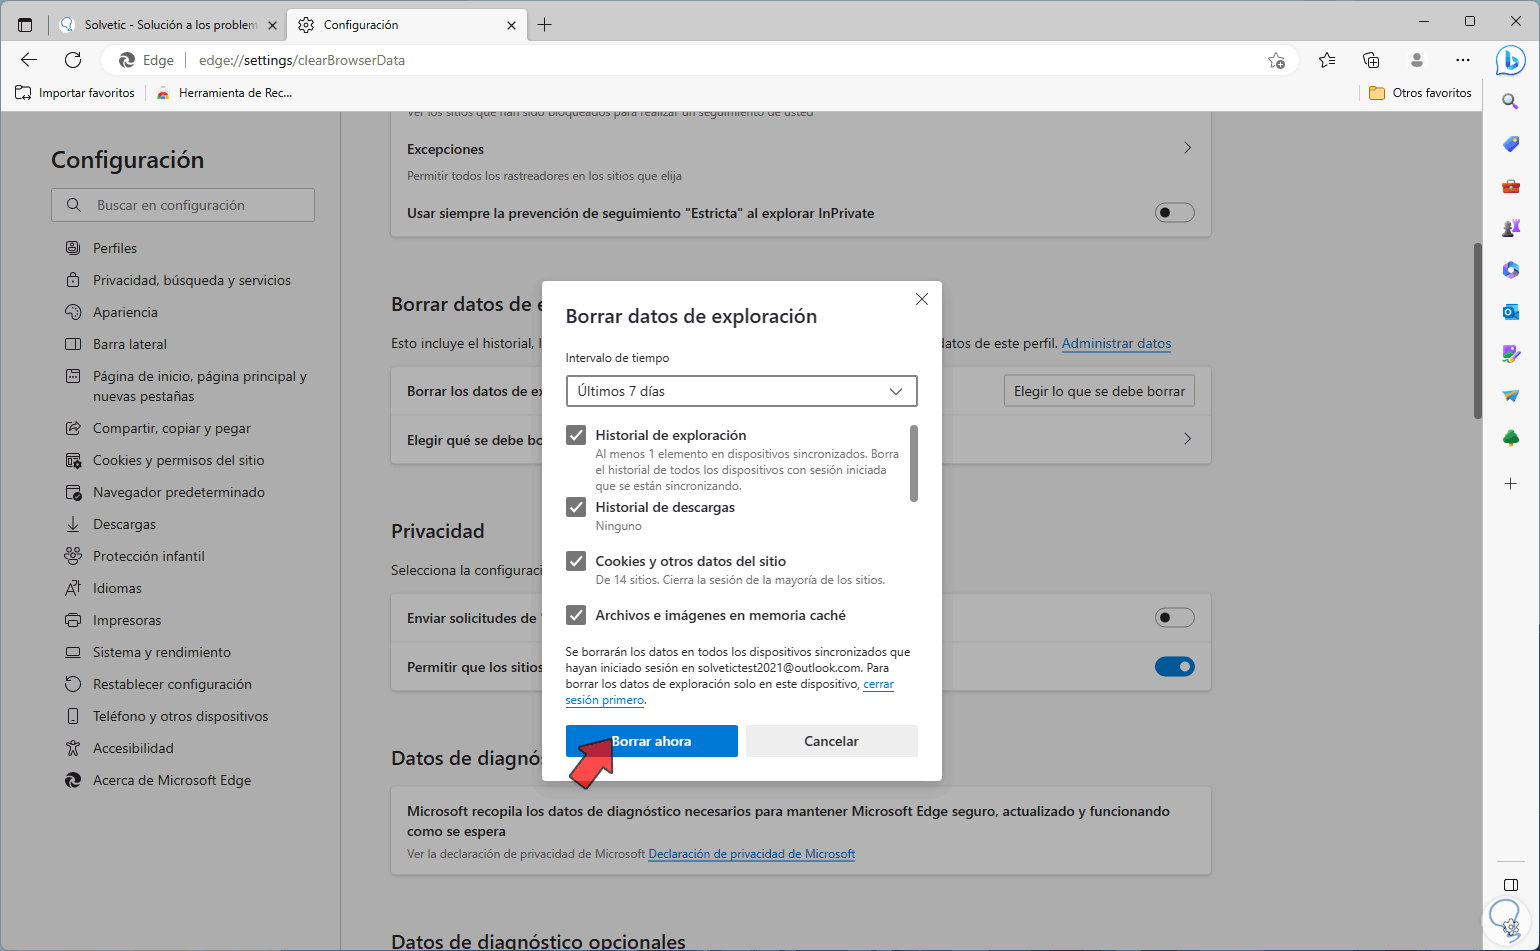
step 7
In the case of Firefox we open the menu and click on "Settings":
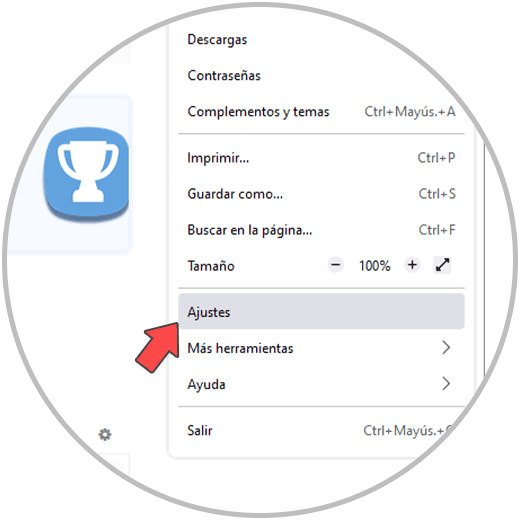
step 8
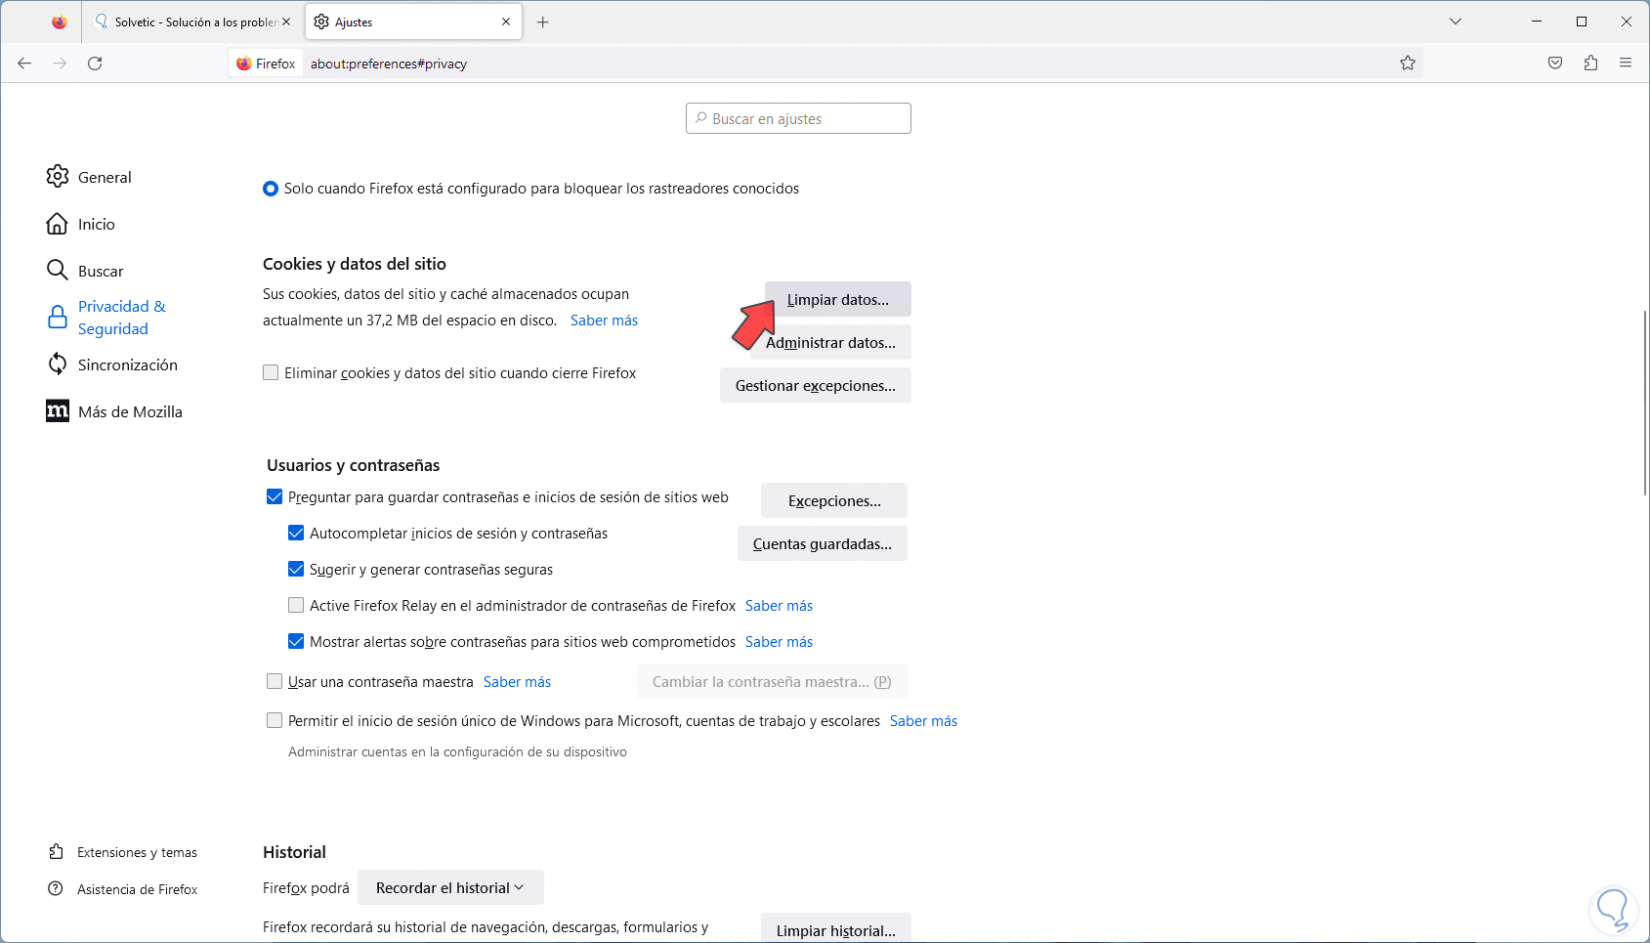
We go to "Privacy & Security", there we click on "Clear data" in the "Cookies and site data" section:
step 9
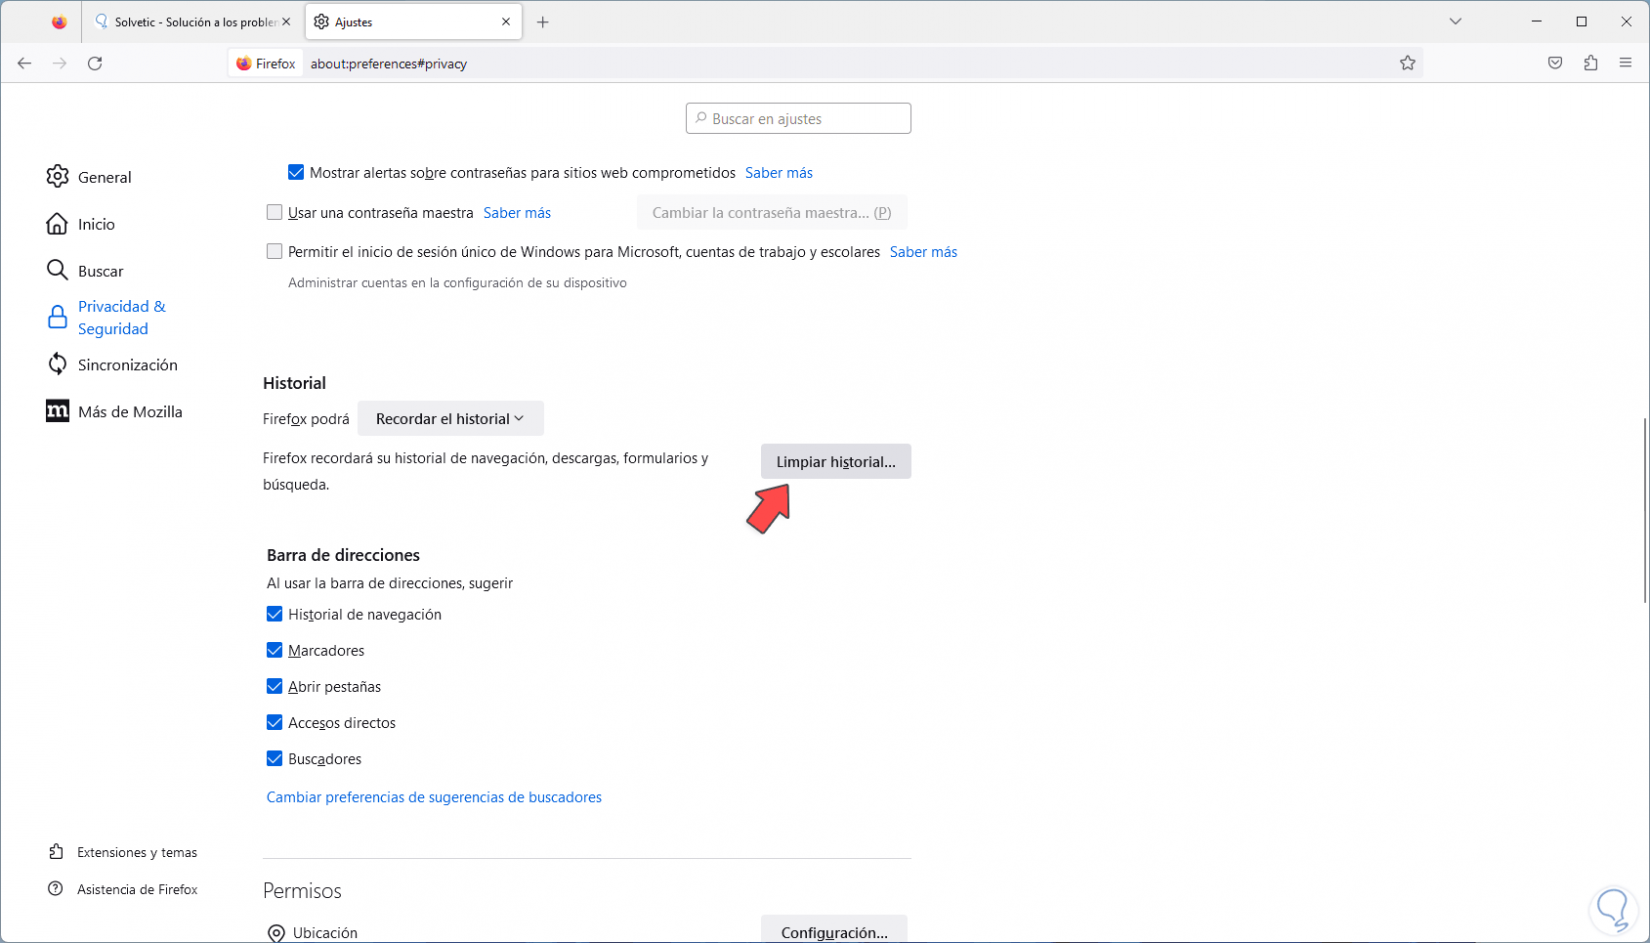
Below we click on "Clear history":
step 10
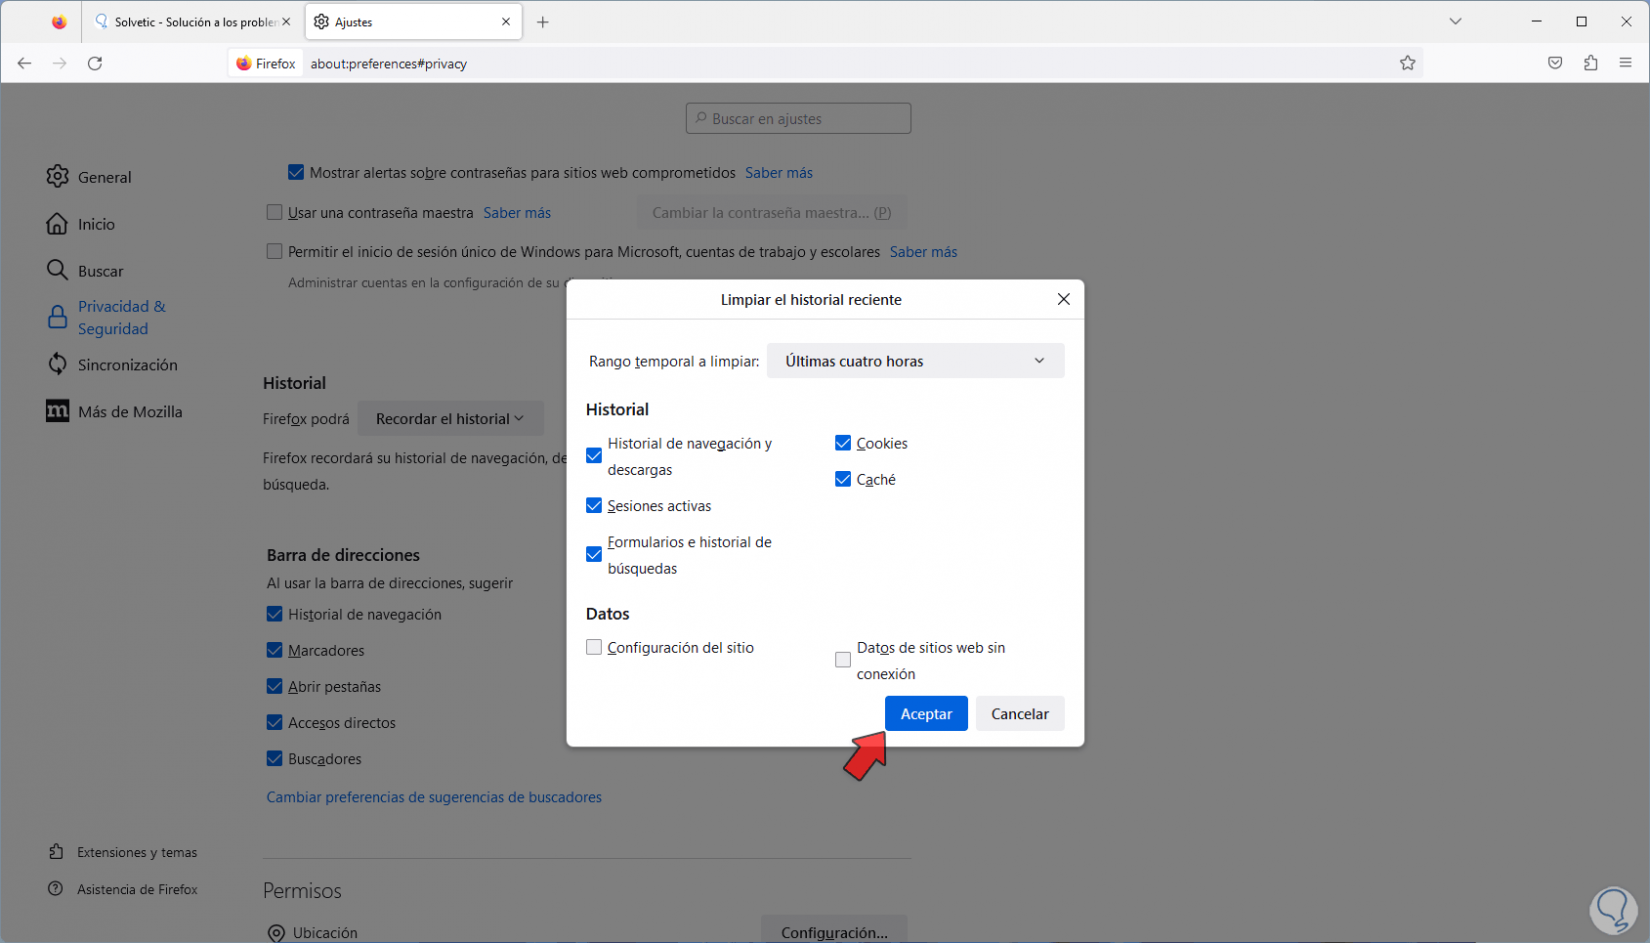
In the pop-up window we select the time and activate the boxes. We click "OK" to proceed with the deletion.
3 Disable Firewall
The Firewall in Windows is designed to protect the system and user data from internal and external threats, but this process, which includes rules, can affect the connection to the website.
Step 1
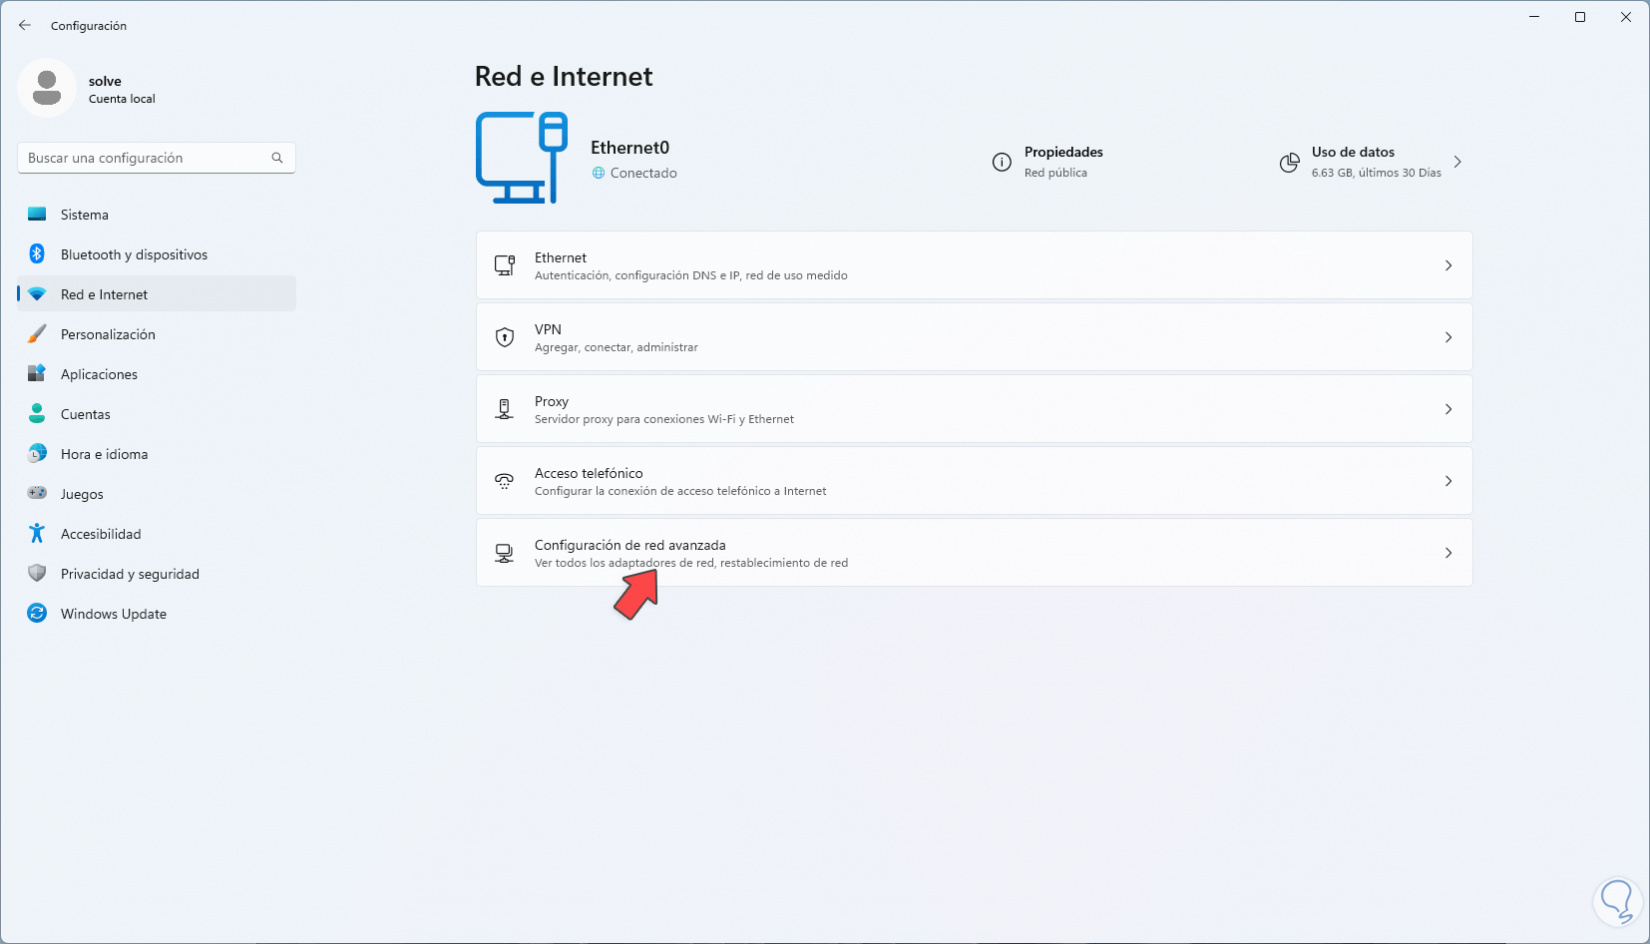
To disable the firewall and check if the page connects, go to "Start - Settings - Network and Internet":
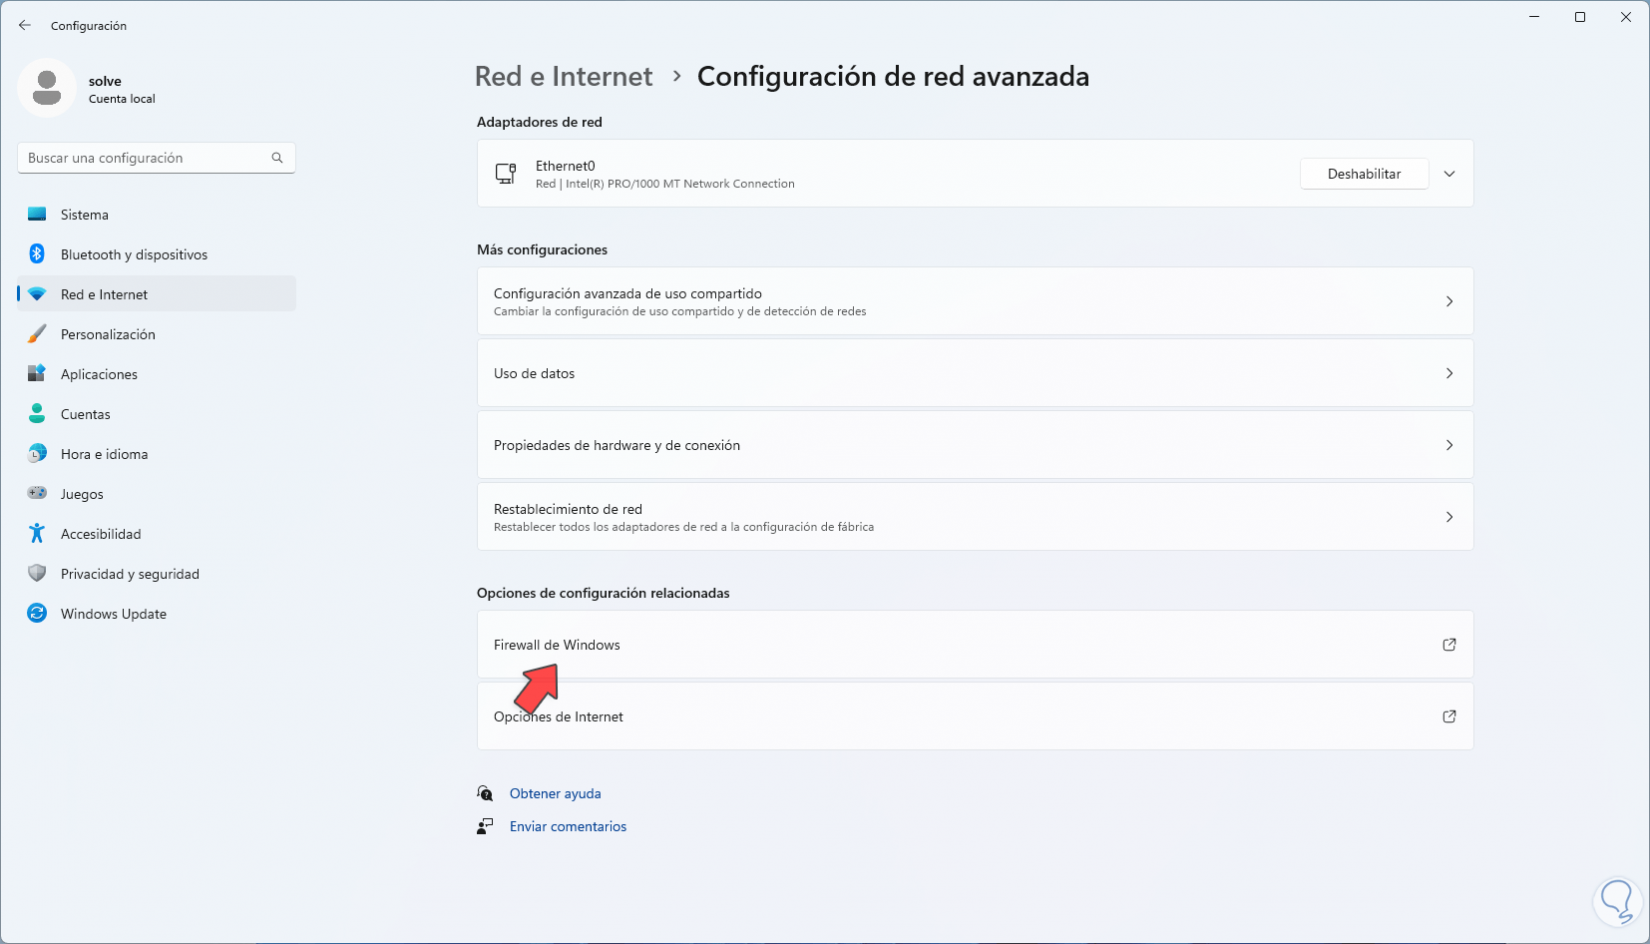
Click on "Advanced network settings"
Step 2
and the following will open. We click on "Windows Firewall"
Step 3
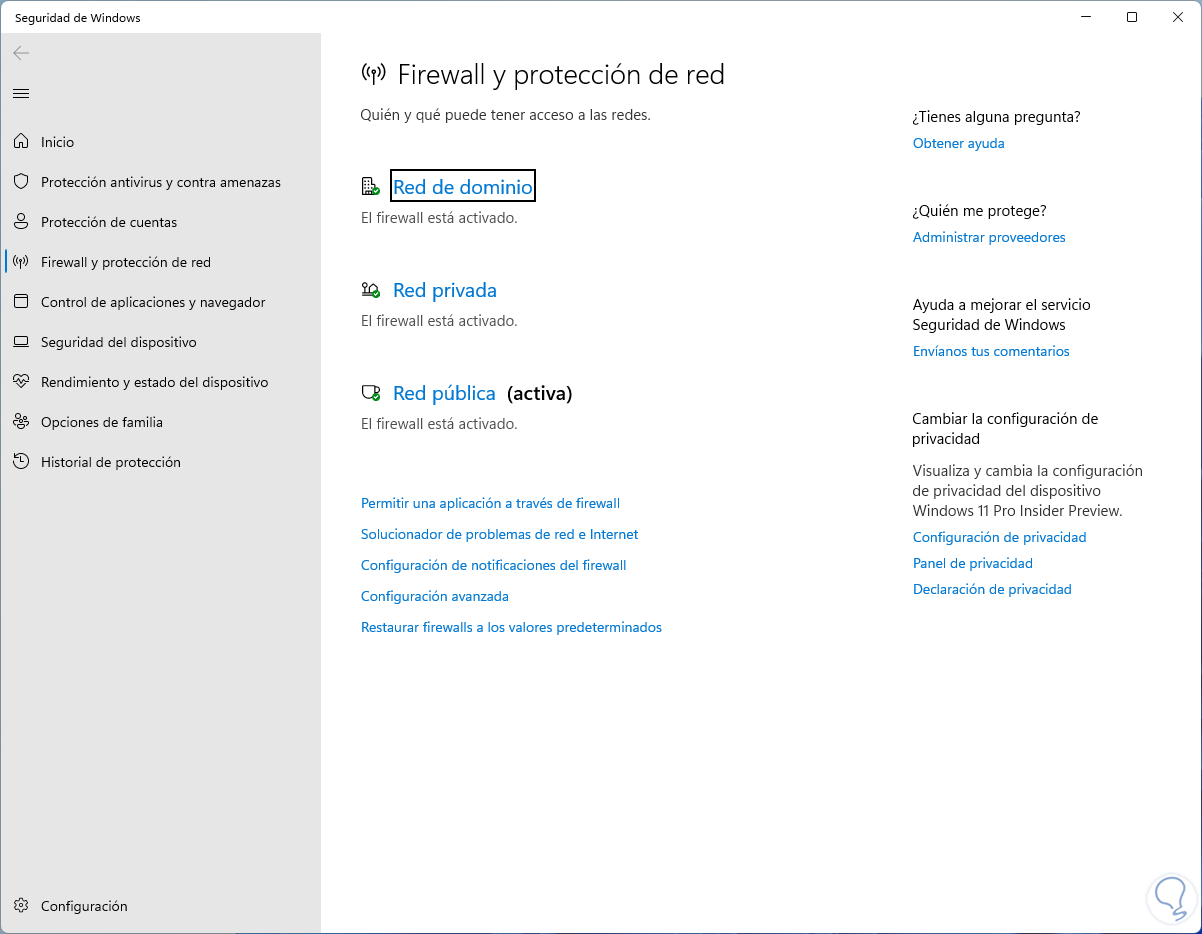
and the Windows Security utility will open:
Step 4
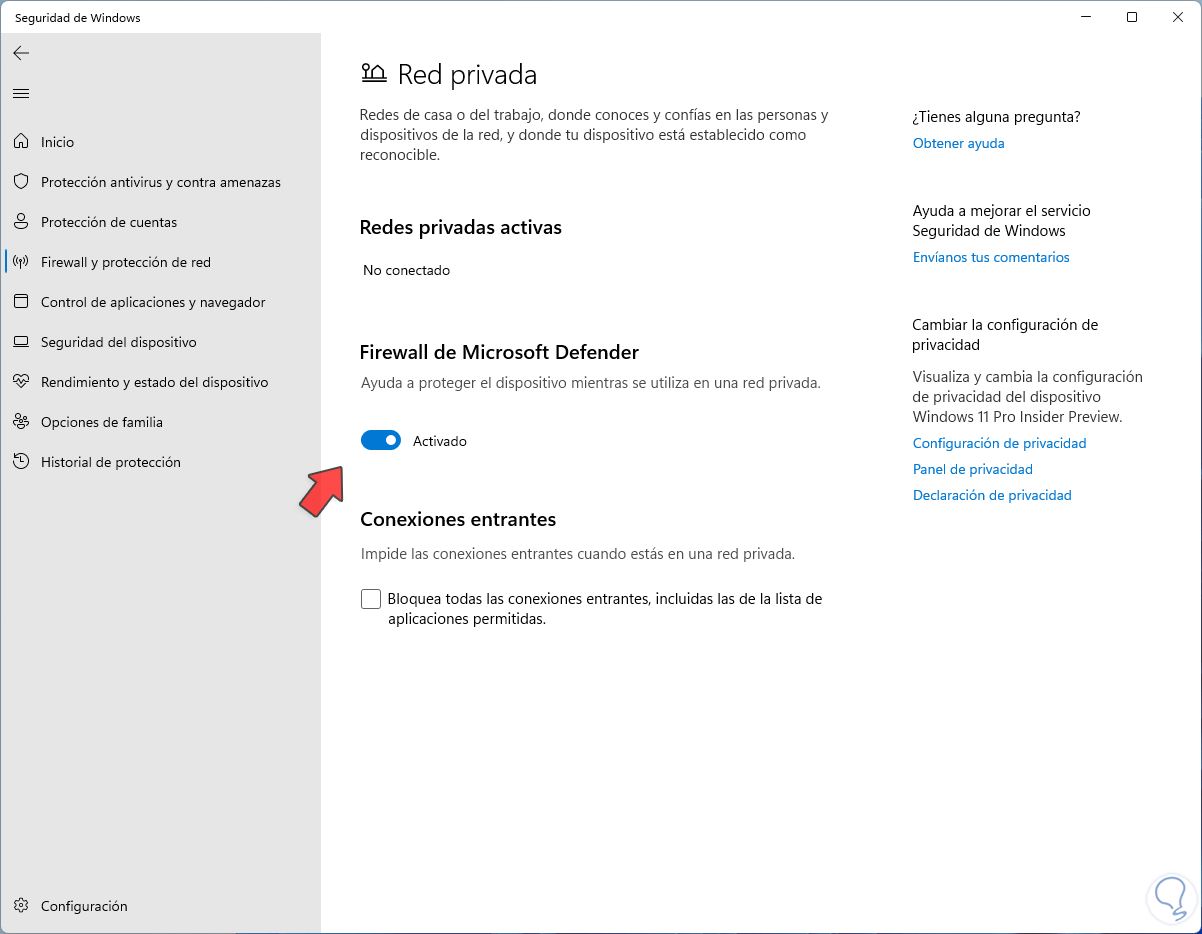
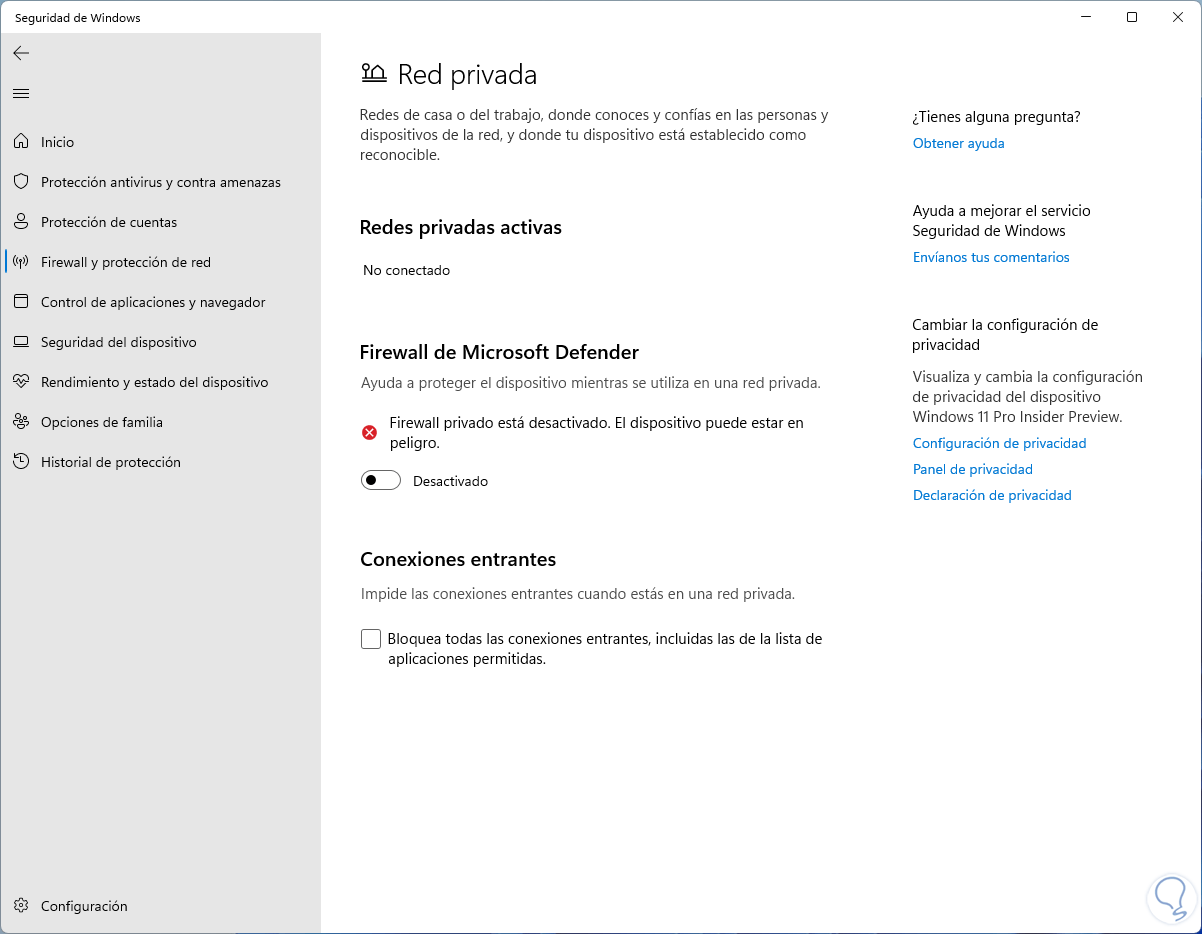
We open each of the networks to see the following. Disable the "Microsoft Defender Firewall" switch:
step 5
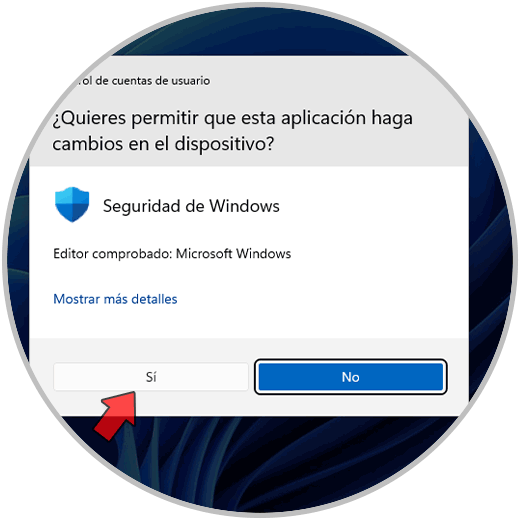
we must confirm the operation:
step 6
We will see the firewall disabled:
step 7
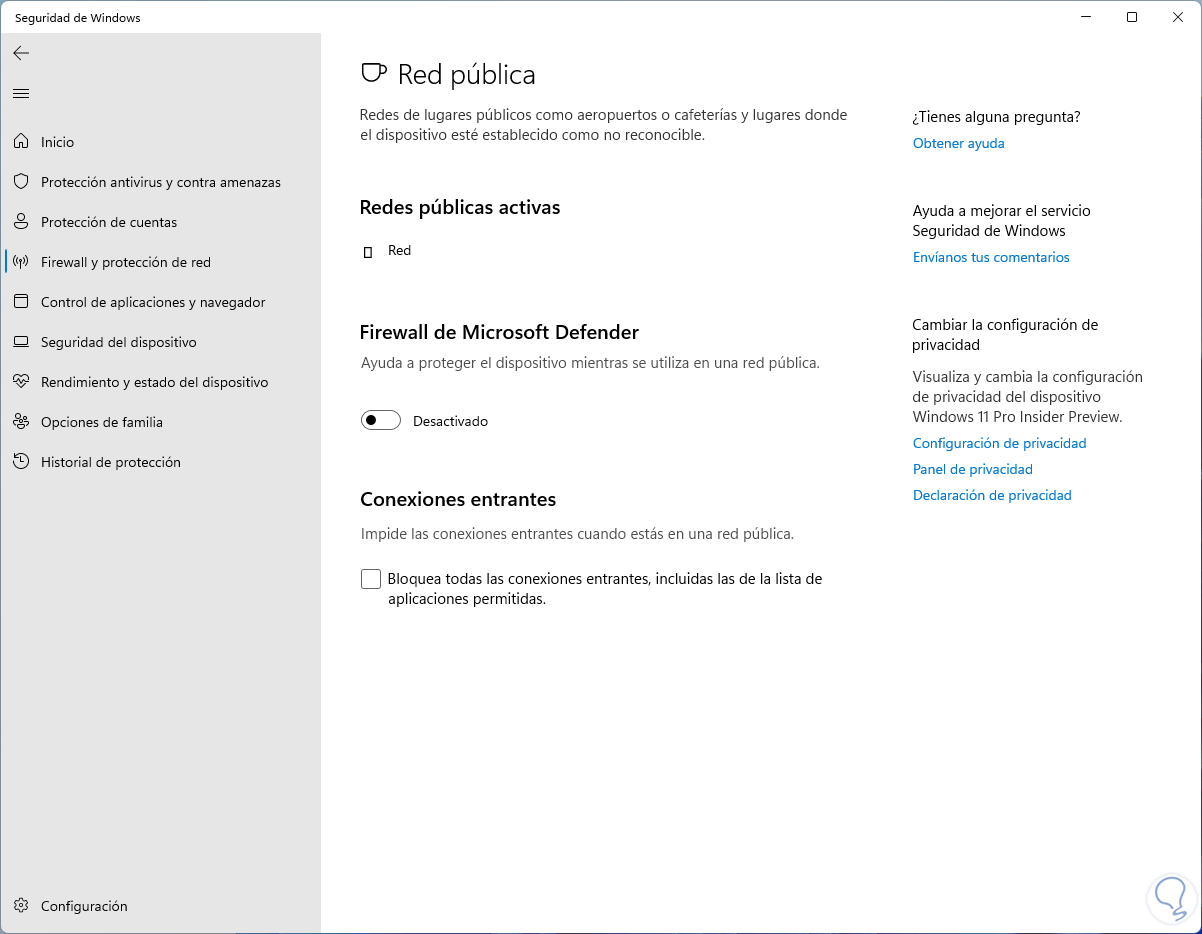
We repeat this process with the other networks:
4 Change DNS
Step 1
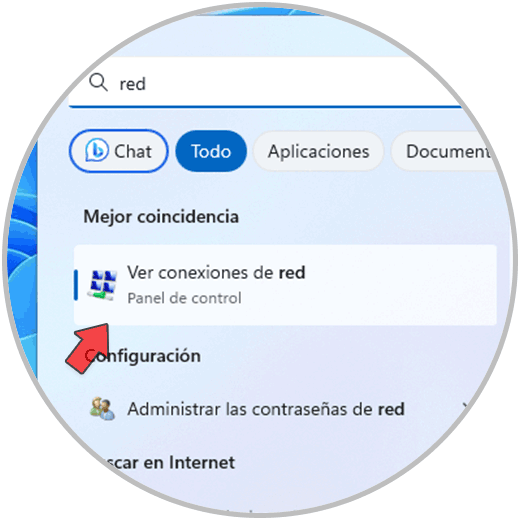
The DNS (Domain Name System - Domain Name System) is responsible for translating IP addresses into domain names and vice versa, by default the DNS is assigned by the Internet provider but over time it can be affected, in this In this case, it is ideal to use a public DNS which is free and robust, to establish it in the search engine we enter "network" and click on "See network connections":
Step 2
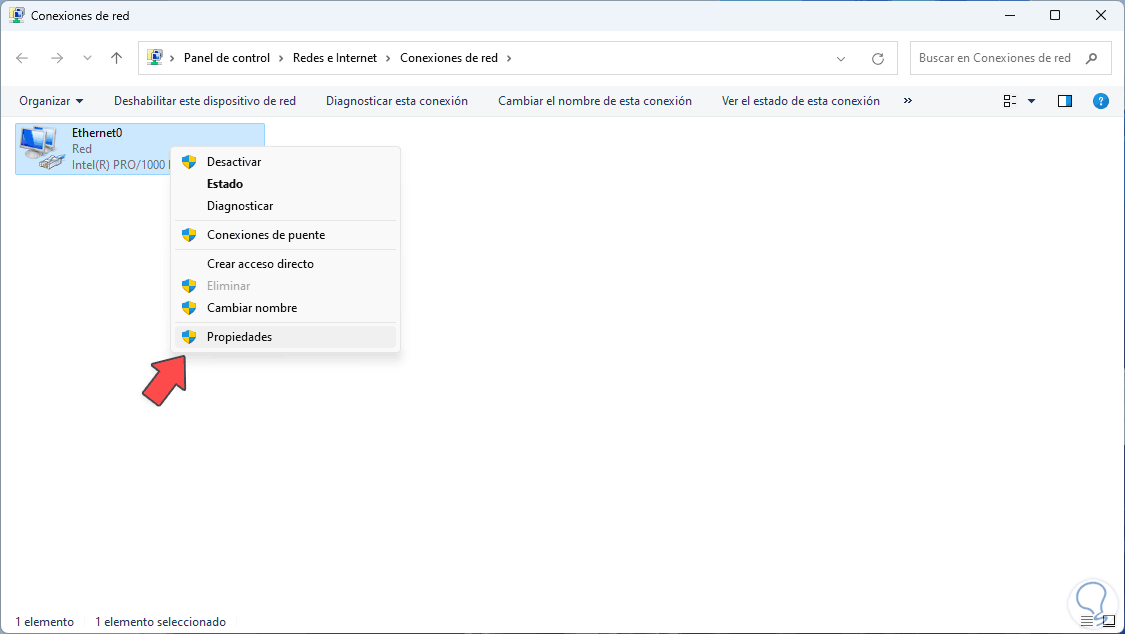
We right click on the network adapter and select "Properties":
Step 3
In the pop-up window we select the "Internet Protocol version 4" and click on "Properties":
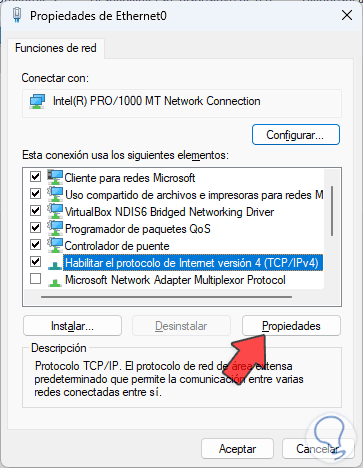
Step 4
We will see the following:
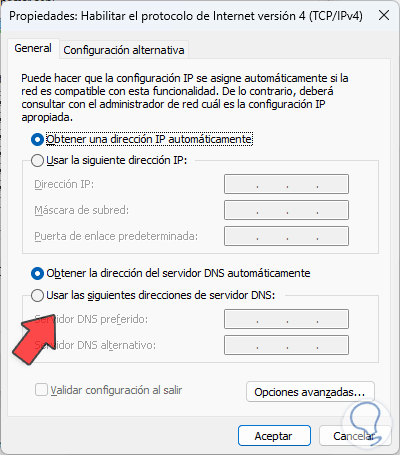
step 5
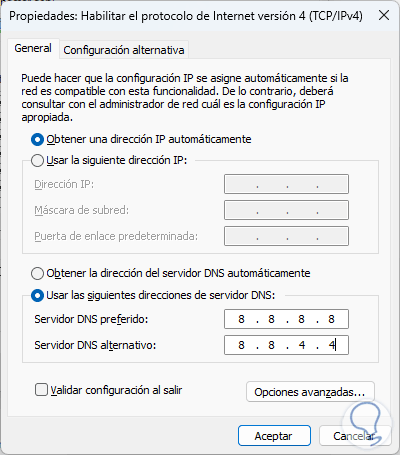
We activate the "Use the following DNS server addresses" box and assign one of the public DNS:
Apply the changes.
5 Disable proxy
It is possible that at some point a proxy server has been used but is no longer used, if this option has been left active it is possible that this configuration is the one that affects access to the website
Step 1
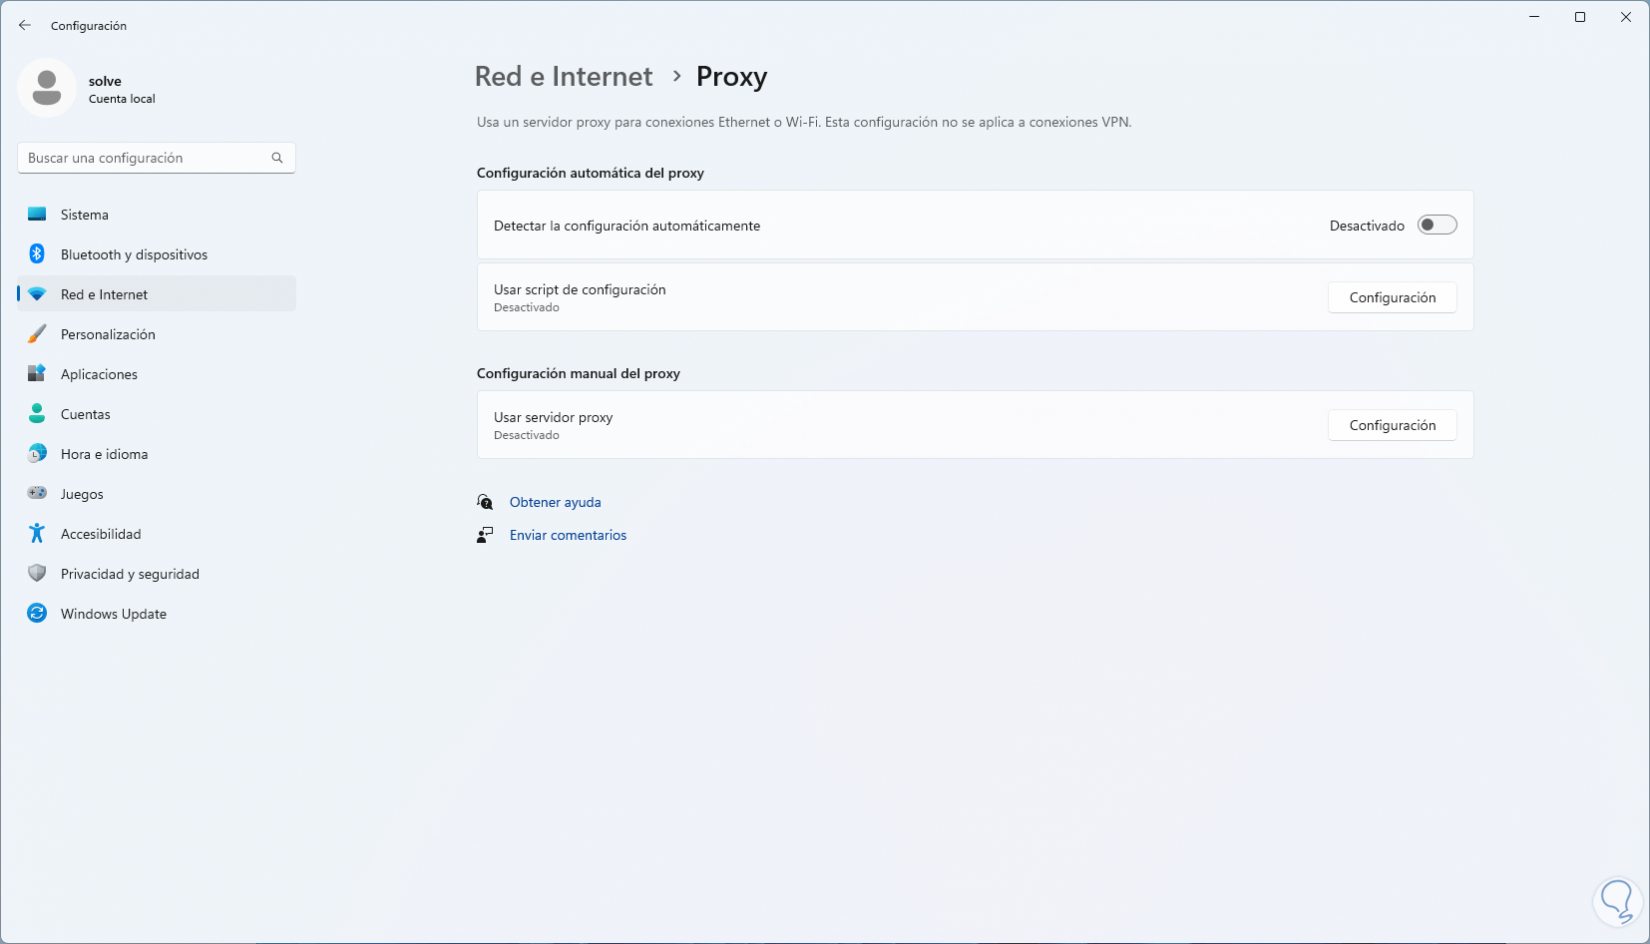
To deactivate the proxy we are going to:
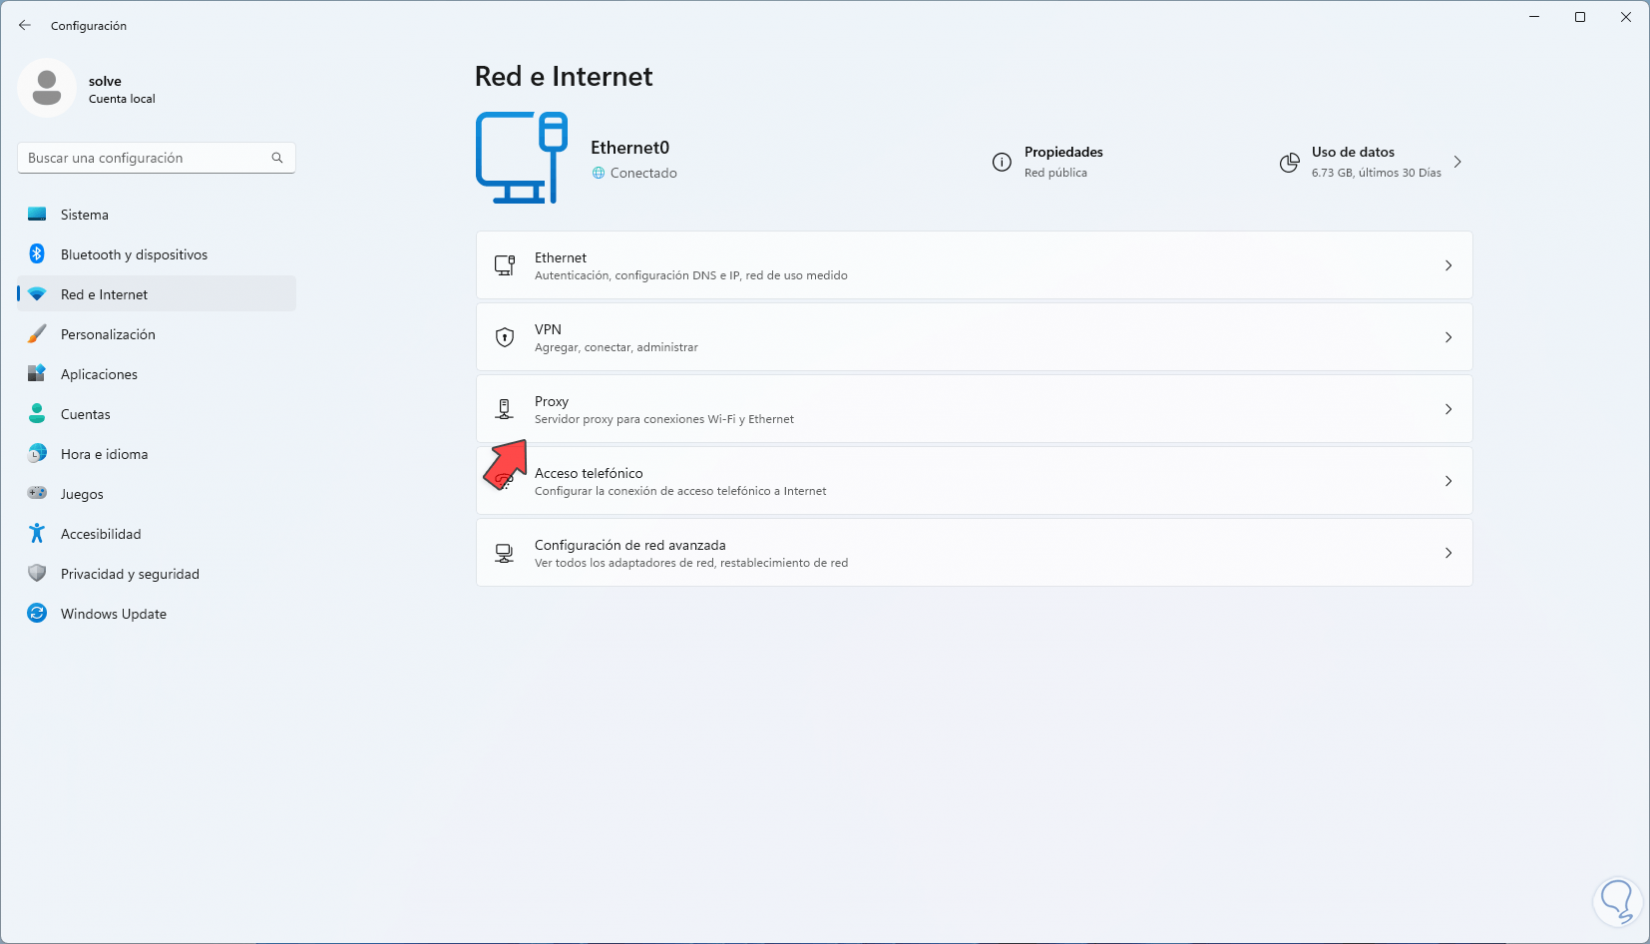
Step 2
By clicking there we will see the following. Turn off the "Automatically detect settings" switch:
6 System Restore
Finally it is possible to restore the system to a date in which everything worked correctly.
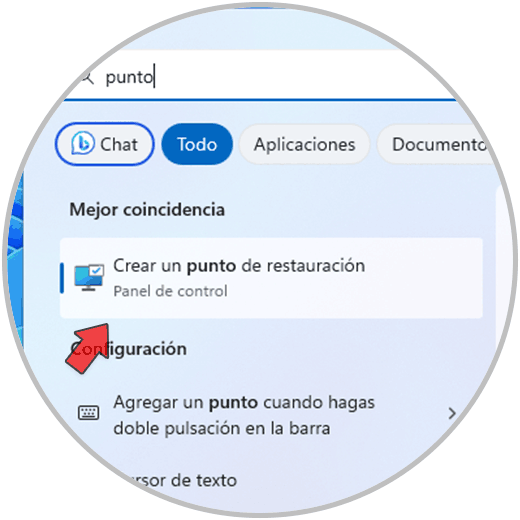
Step 1
To achieve this in the search engine we enter "point" and select "Create a restore point":
Step 2
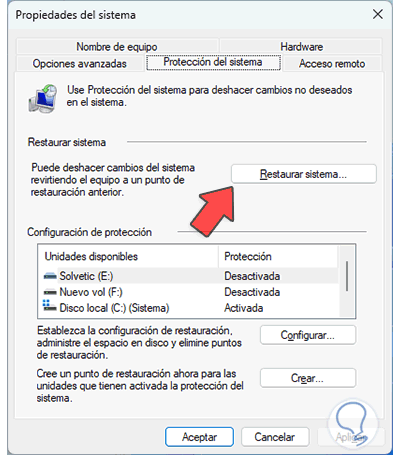
We will see this. Click "System Restore" to open the wizard:
Step 3
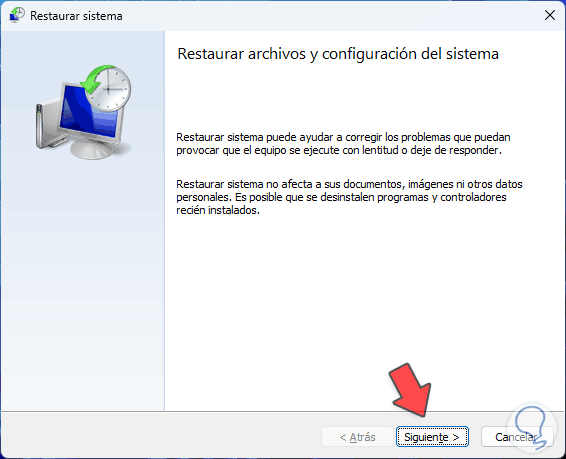
We continue the process.
Step 4
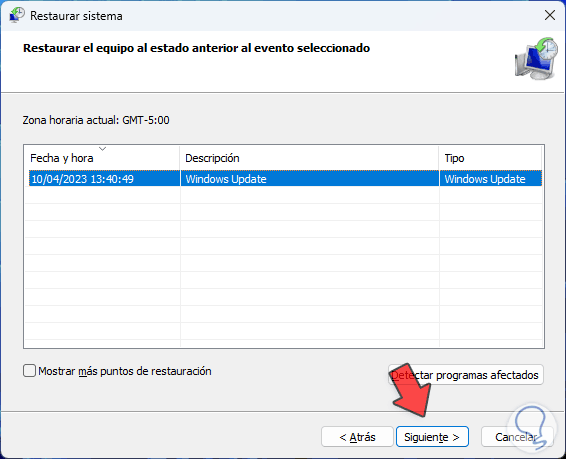
Select the restore point:
step 5
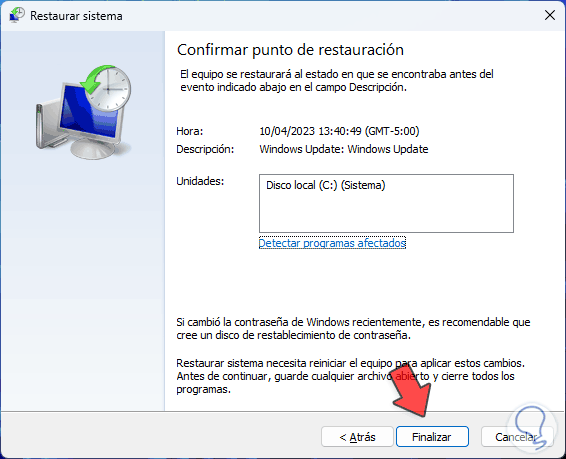
Now we will see a summary:
step 6
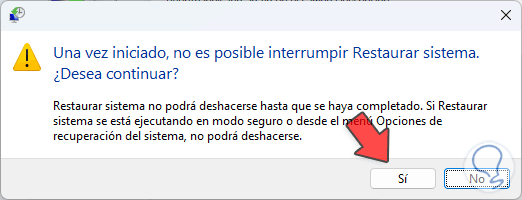
By clicking on "Finish" we will see the following. There we must wait for the process to finish.
With any of these options it will be possible to access the web without connection errors..