When we listen to any sound in Windows, music, alarms, videos, etc., some actions are executed in the background to make this possible and the first thing that comes into action is the audio service, this service has the task of managing the sound that it redirects to programs that are Windows-based. In the event of an error in this service, it will simply not be possible to hear anything on our physical media, but a frequent error in Windows is that said audio service is not running..
If we have Sound Problems in Windows, surely as we mentioned this affects playback and it is for these reasons that TechnoWikis will give you a series of solutions so that the audio service works correctly in Windows 10 or Windows 11.
To stay up to date, remember to subscribe to our YouTube channel!
SUBSCRIBE ON YOUTUBE
1 Repair Audio Windows 11 with troubleshooter
As TechnoWikis has told you many times, this is a utility which will automatically help to carry out an analysis of services or components when they fail to correct the errors or give a series of correction options, in Windows this has been updated a bit.
Step 1
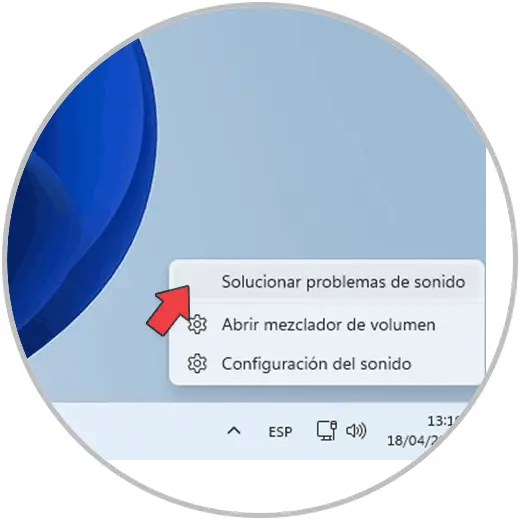
For its use we right click on the volume icon in the taskbar and there we select "Solve sound problems":
Step 2
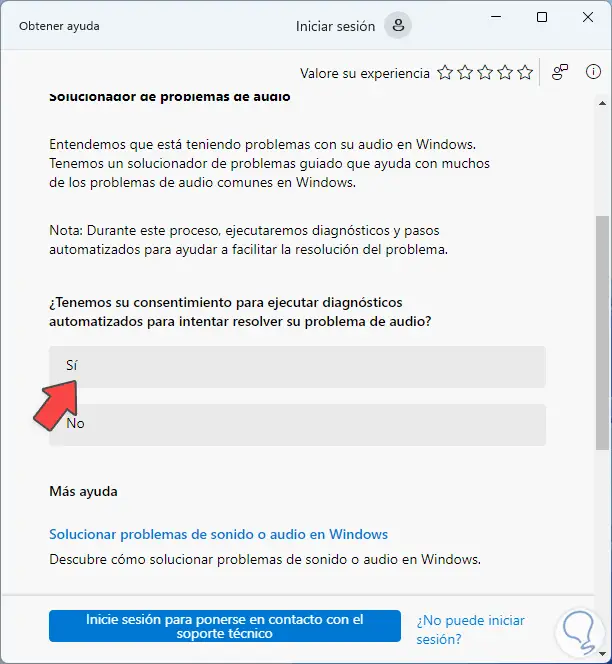
We will see the wizard displayed:
Step 3
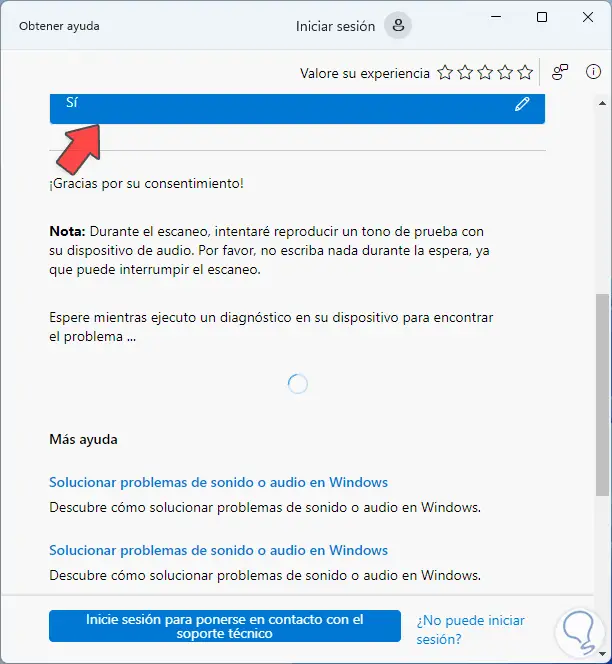
We click "Yes" to start the analysis:
Step 4
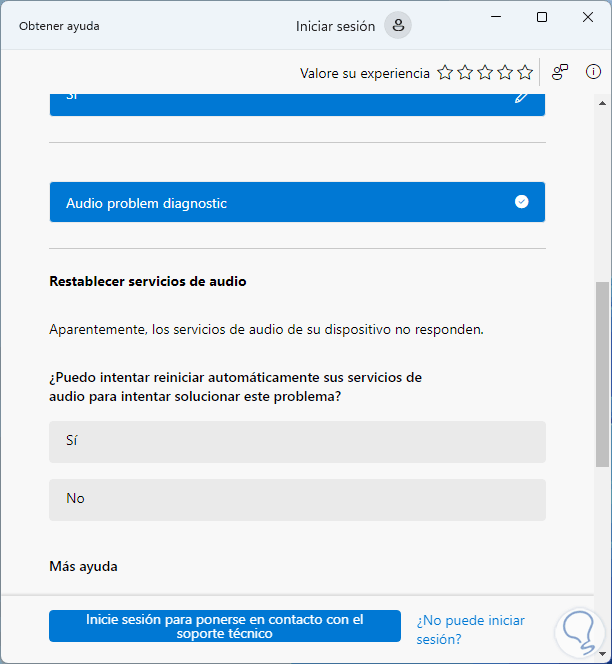
After a moment we will see the following. There we confirm the possible solution generated by the wizard
step 5
We click Yes to apply this correction:
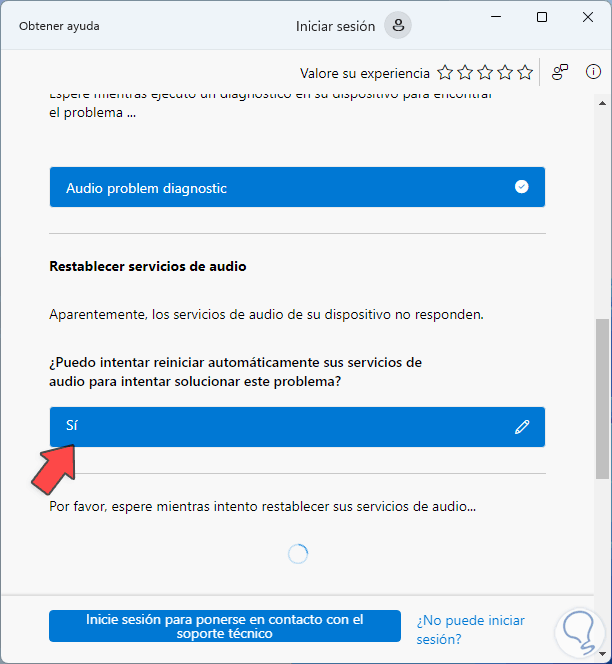
step 6
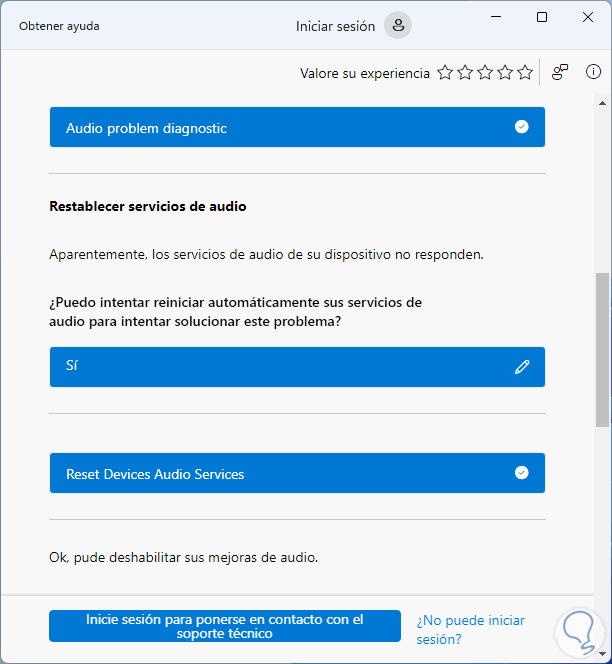
We hope that the process will come to an end. We see what the correction was applied and we validate that the audio works on the equipment.
2 Repair Audio Windows 11 with Services
Step 1
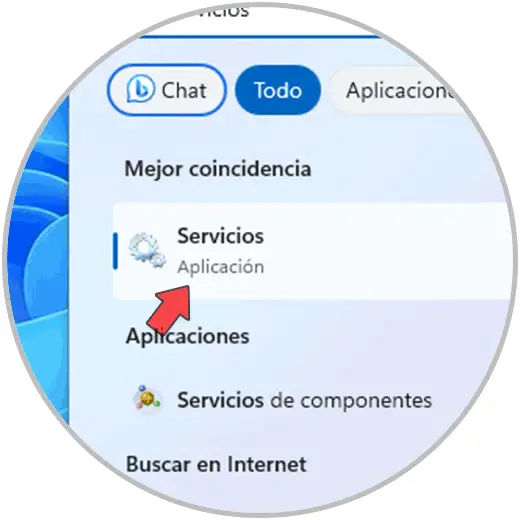
This option allows us to work directly on the Windows audio service to see its properties, for this we open Services:
Step 2
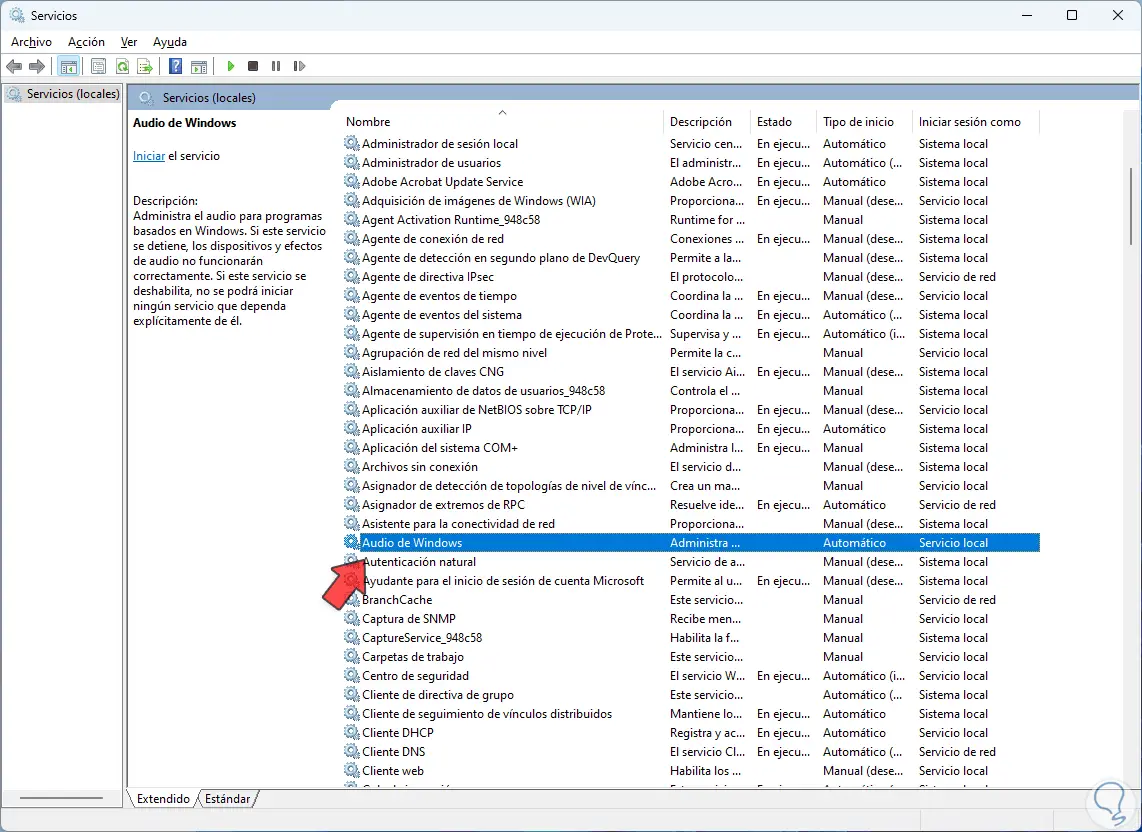
Select the "Windows Audio" service:
Step 3
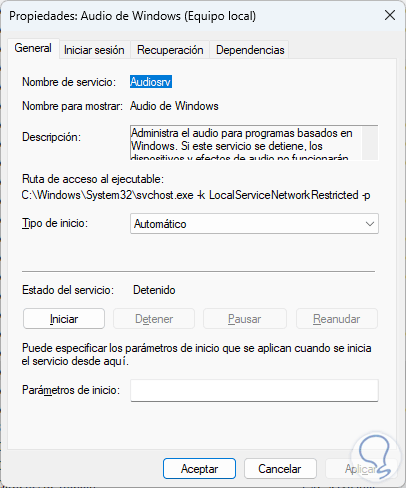
We double click on it to see its status:
Step 4
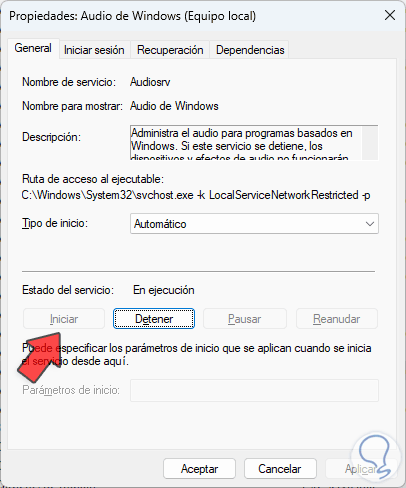
We can see that the service is stopped which affects its operability, we click "Start" to enable this service:
Note
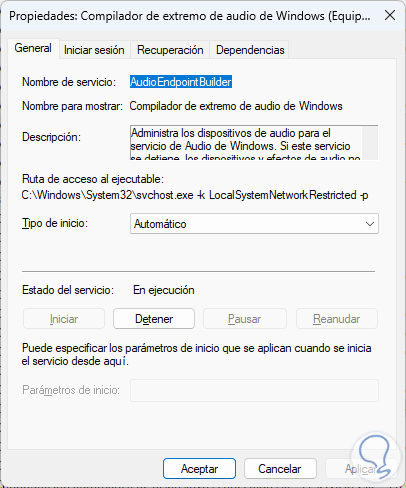
In the "Startup type" field, validate that the "Automatic" option is present.
step 5
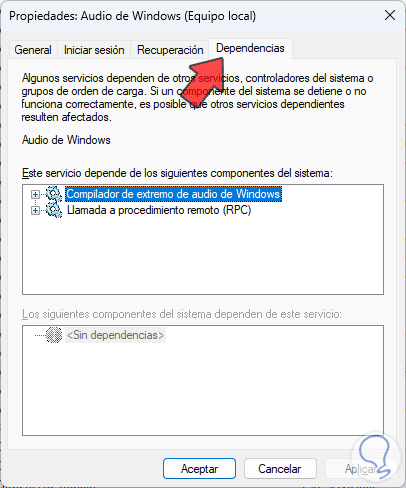
We go to the "Dependencies" tab and there we validate which services are related to audio:
step 6
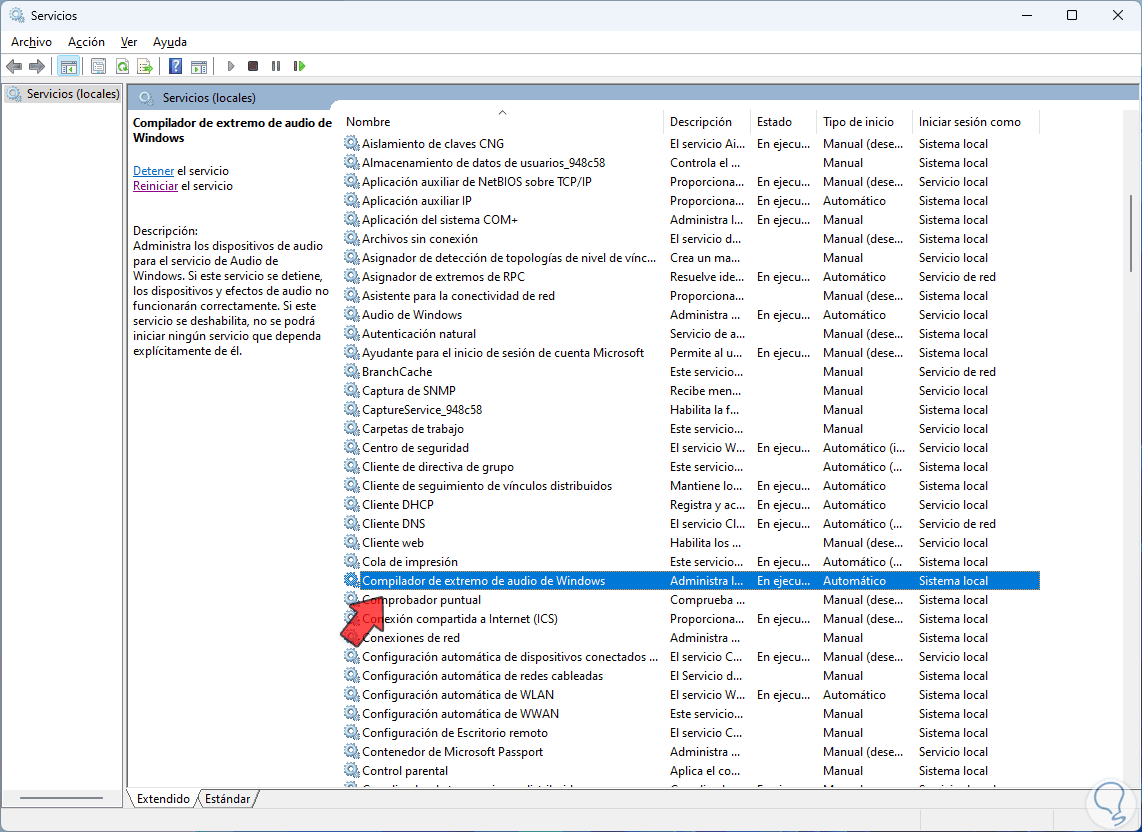
We open those services to validate their status and start them if necessary:
step 7
We see if it is active or not:
3 Repair Audio Windows 11 with Terminal
Step 1
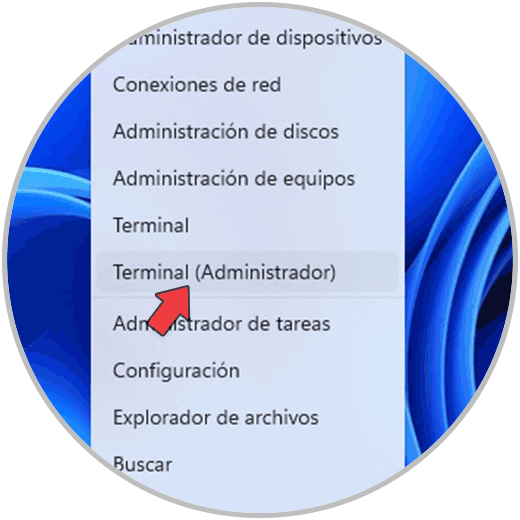
With the terminal it will be possible to carry out a series of commands that can have a direct impact on the behavior of the audio, we open the terminal as administrator:
Step 2
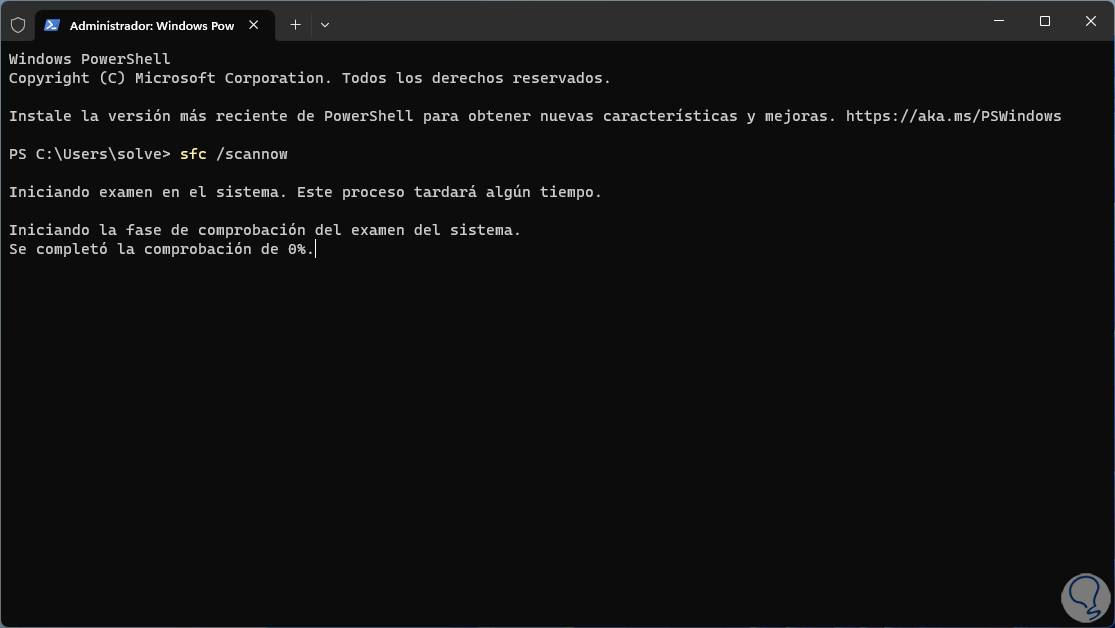
We execute the analysis of the file system:
sfc /scannow
Step 3
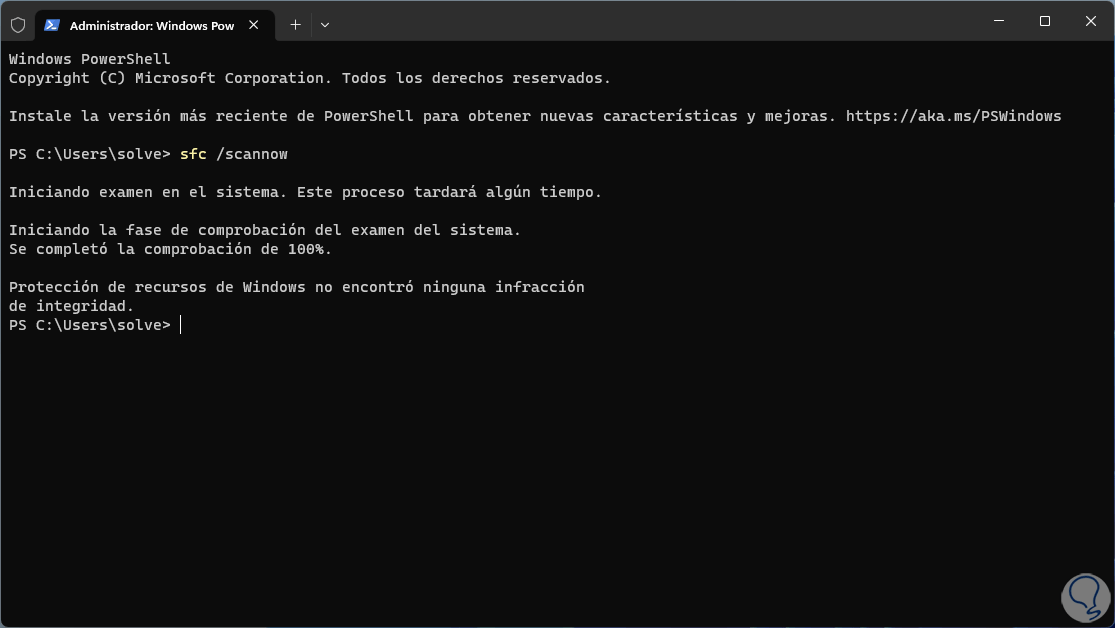
Wait for the analysis to finish:
Step 4
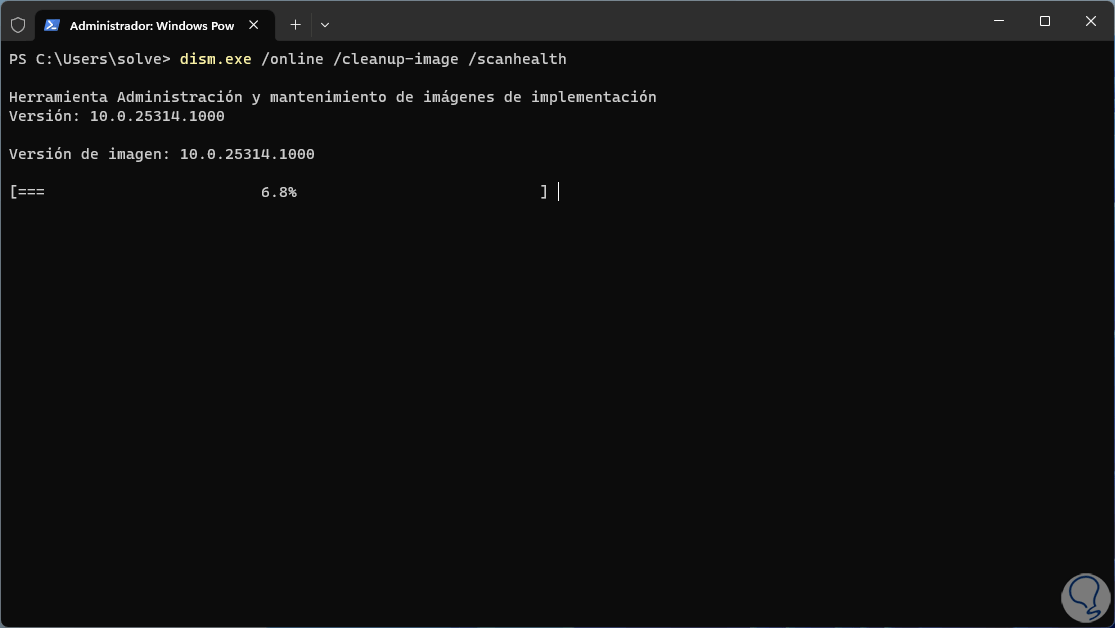
SFC (System File Checker) is a command used to analyze the entire NTFS file system which, if it were to fail, would affect many parts of the system including audio, now we will use the DISM command to analyze the local Windows image, for this we first execute location on scan:
dism.exe /online /cleanup-image /scanhealth
step 5
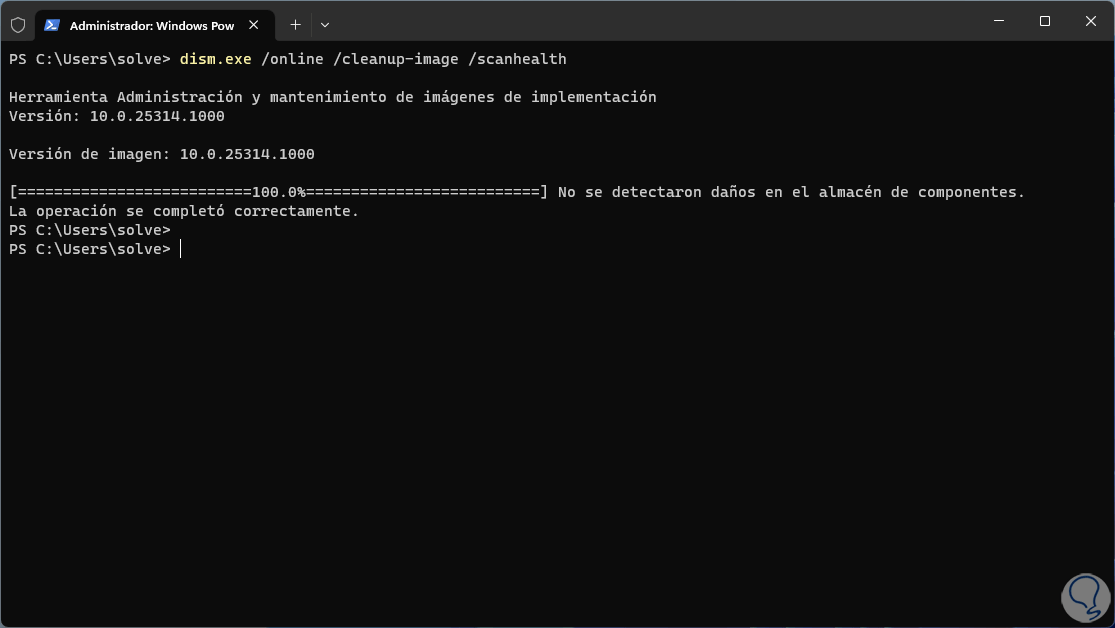
We hope it ends:
step 6
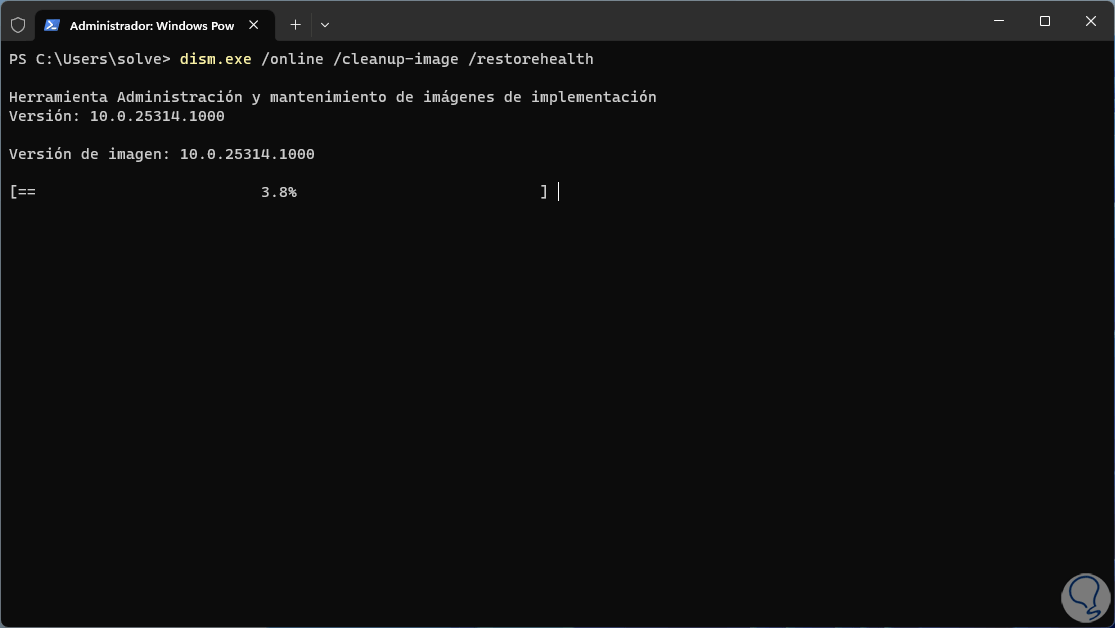
Now we execute the restoration of the image:
dism.exe /online /cleanup-image /restorehealth
step 7
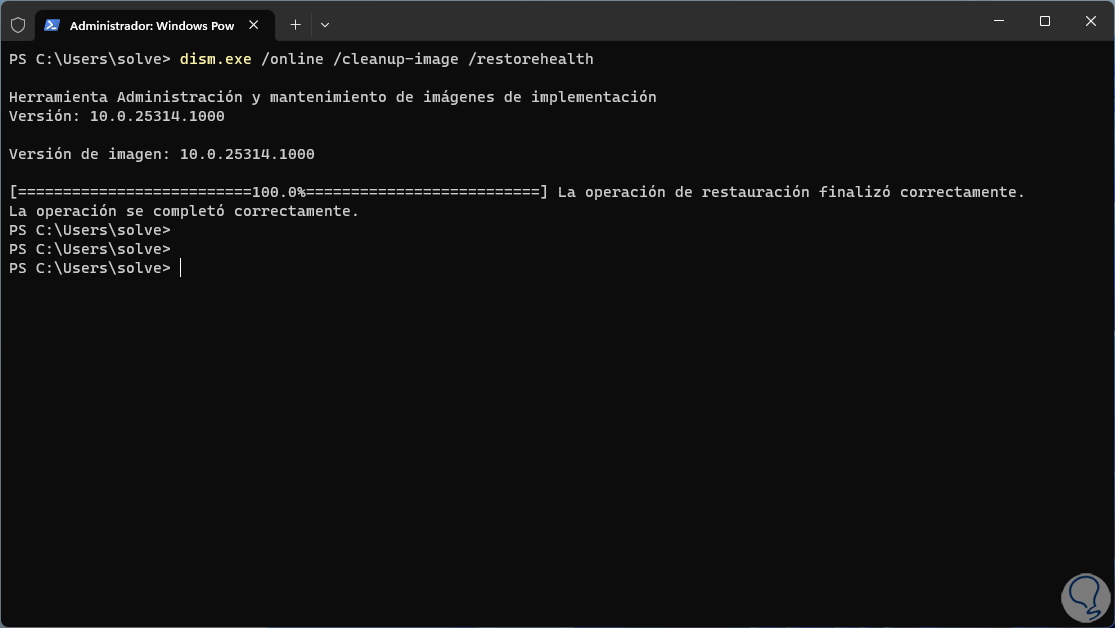
We hope this process reaches its end:
You can validate that the audio works..
4 Repair Audio Windows 11 with Regedit
Step 1
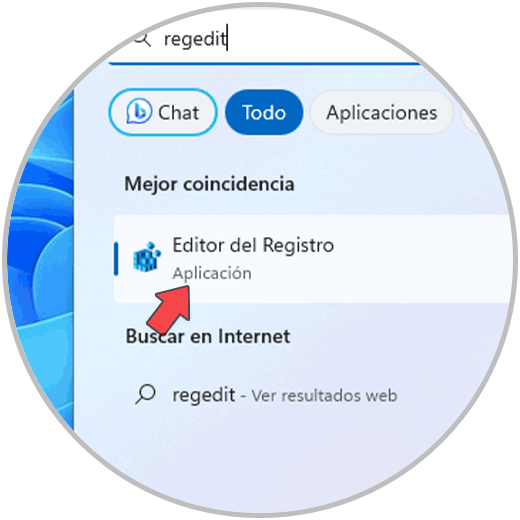
With this process we seek to combine the direct key of the Windows audio service to apply an update by overwriting the values, in this case we open the Regedit Registry Editor:
Step 2
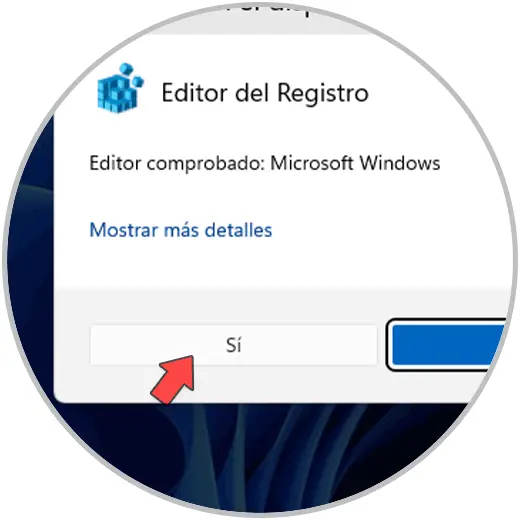
We accept UAC permissions:
Step 3
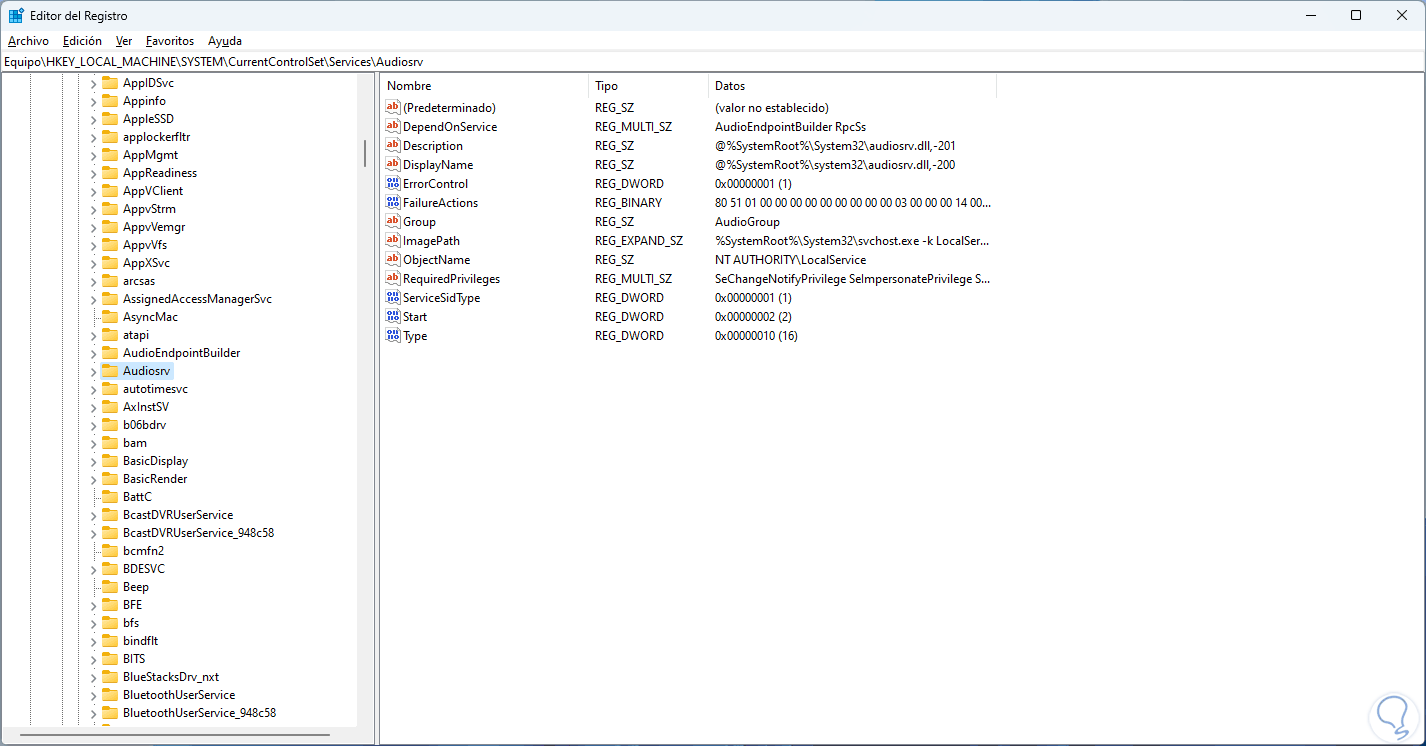
Let's go to the route:
HKEY_LOCAL_MACHINE - SYSTEM - CurrentControlSet - Services – Audiosrv
Step 4
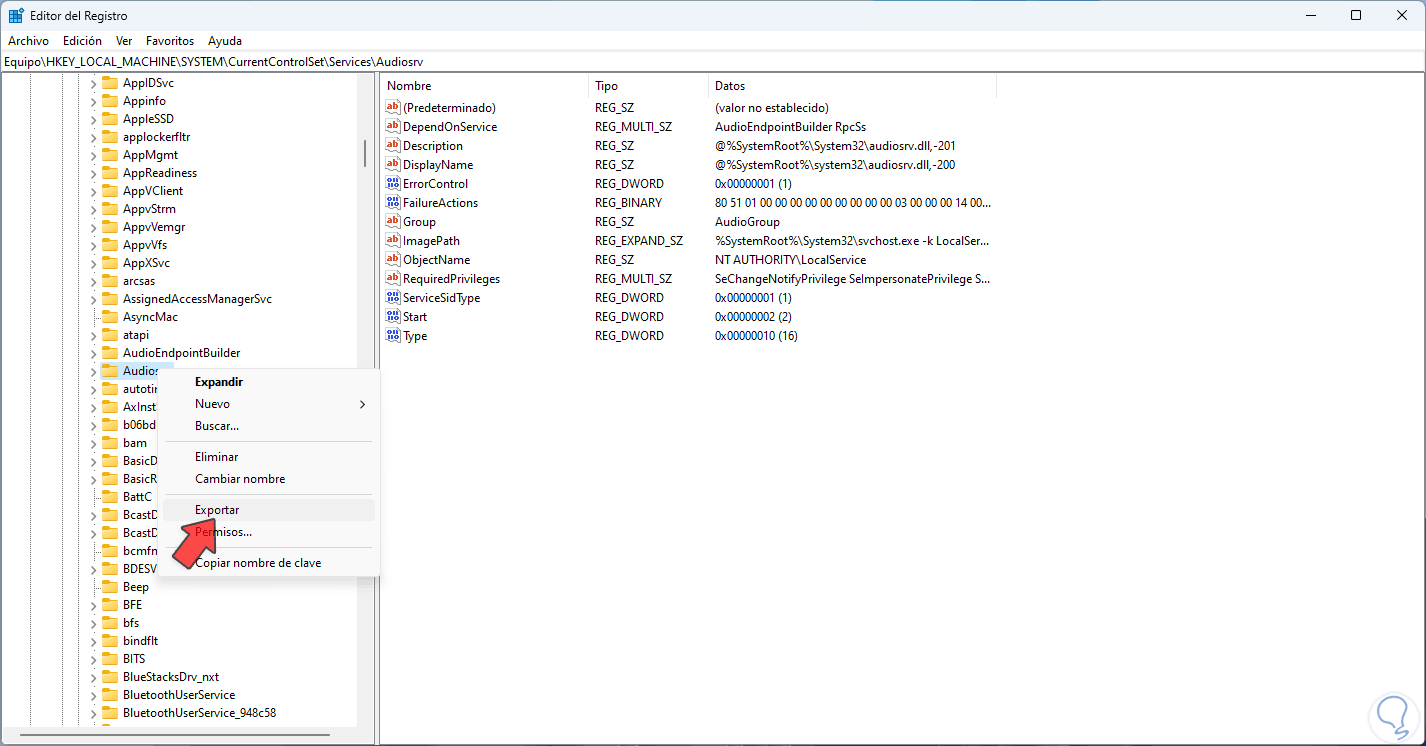
We right click on the "Audiosrv" key and select the "Export" option:
step 5
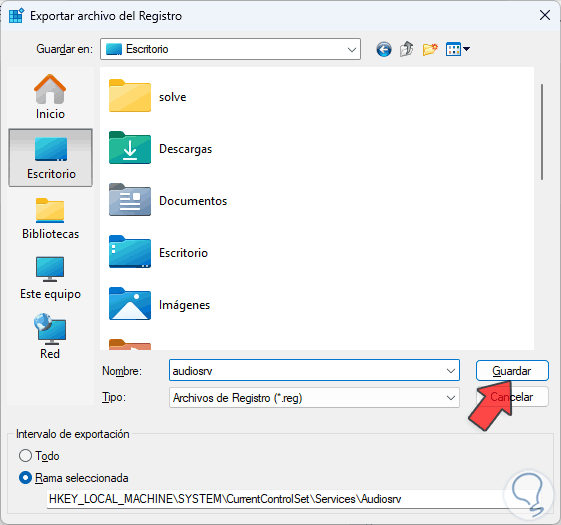
Define name and place, apply the changes:
step 6
We will see the file created:

step 7
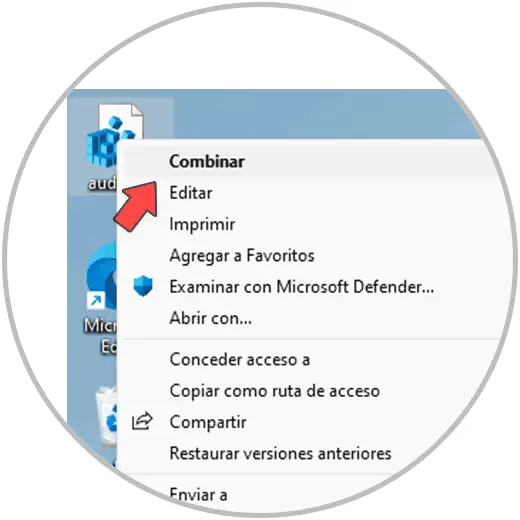
We right click on the file and select the option "Show more options - Combine":
step 8
By clicking there we will see the following pop-up window:

step 9
Confirm the process:

step 10
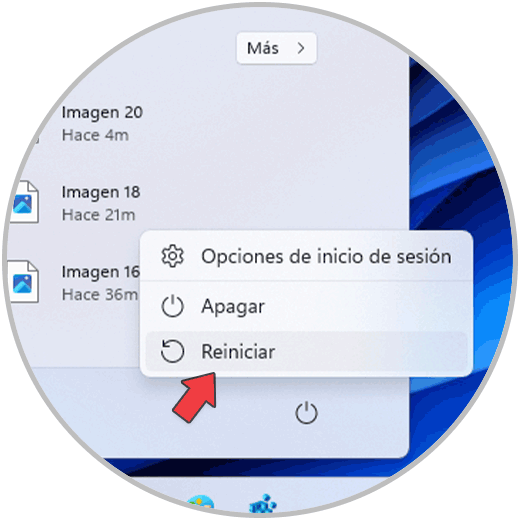
After this we restart Windows:
step 11
The system will reboot to apply the changes:

5 Repair Audio Windows 11 Resetting the PC
Step 1
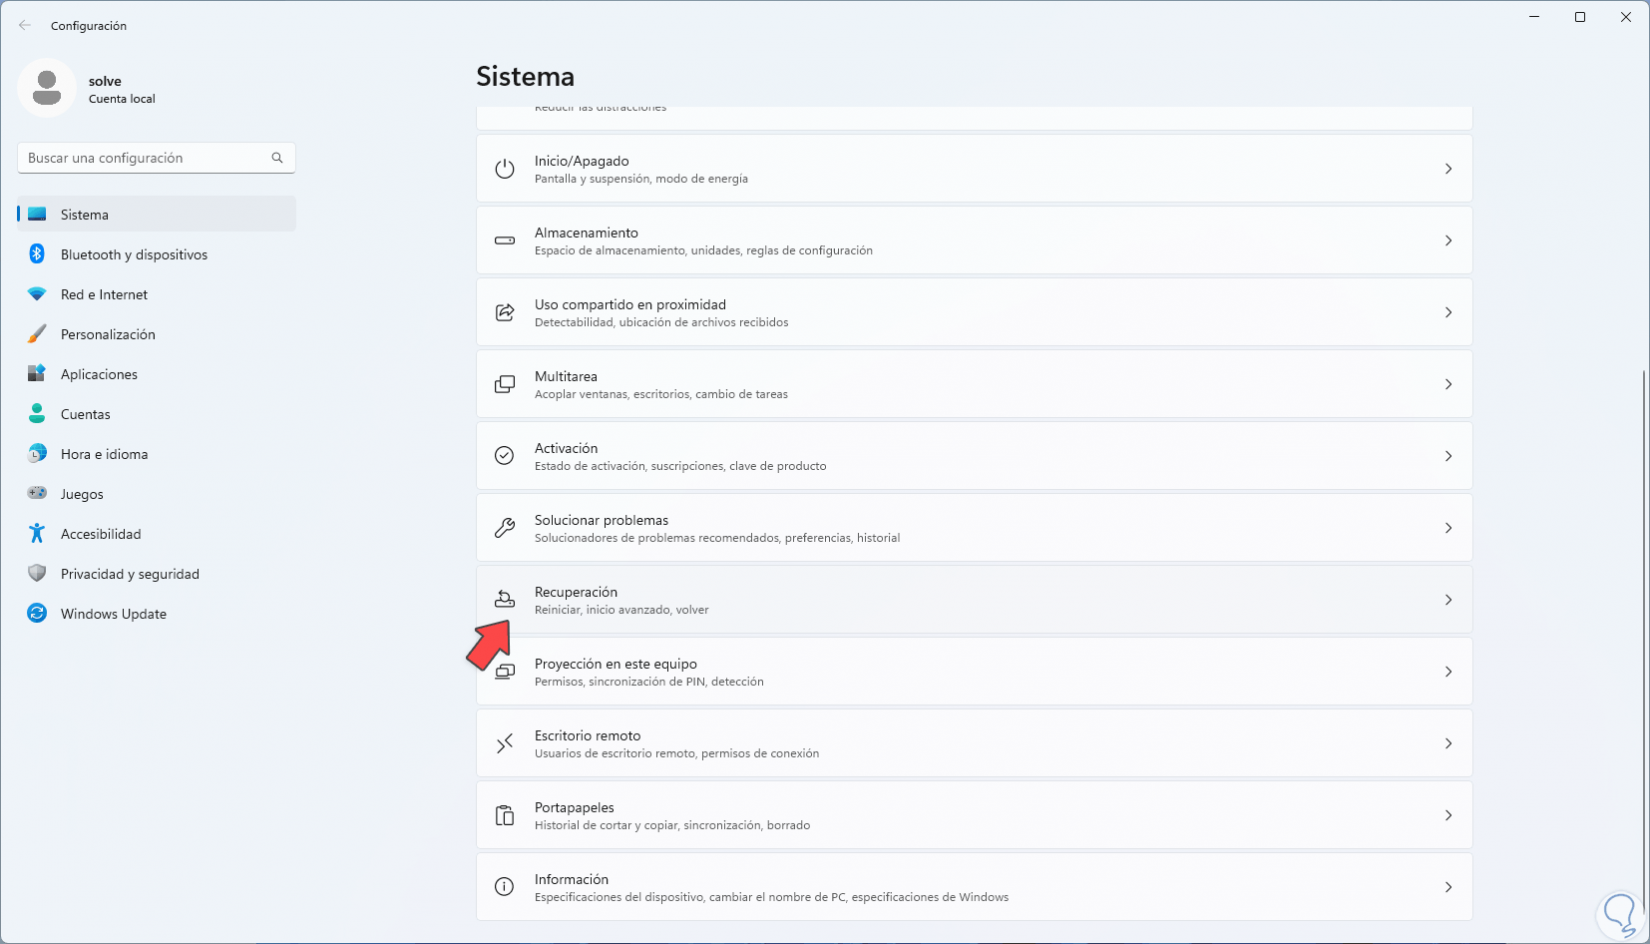
Another option is to restore the equipment to its factory settings where the audio may work correctly, to do this we are going to:
Step 2
There we will see the following. We click on "Reset the equipment":
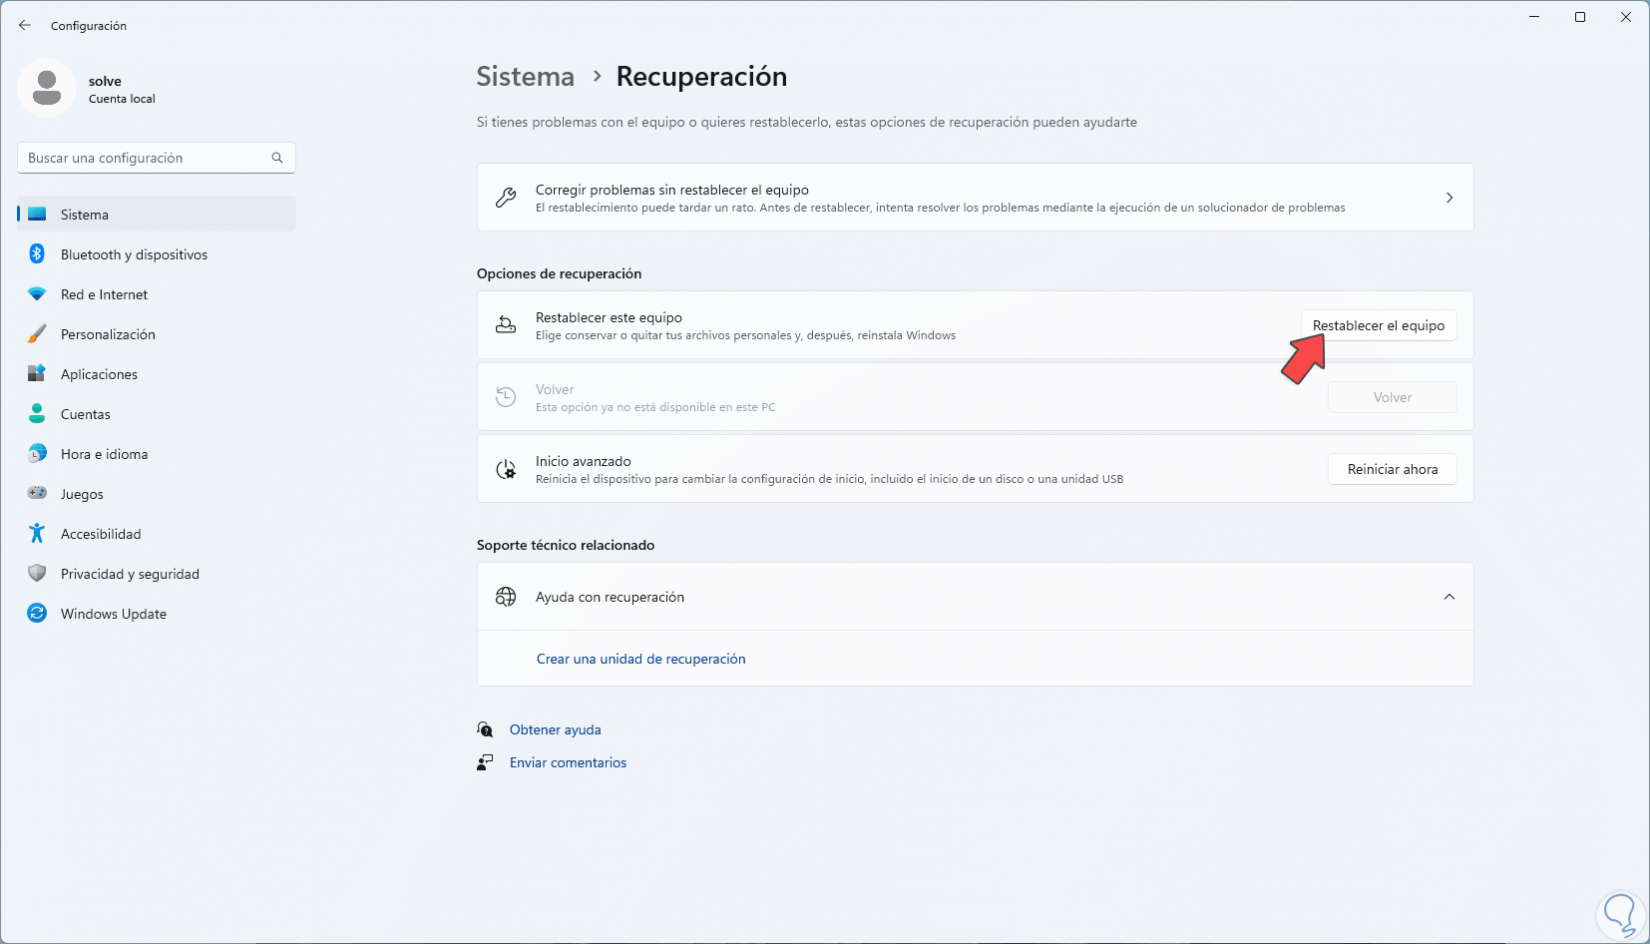
Step 3
The following window will open. We click on "Remove all"
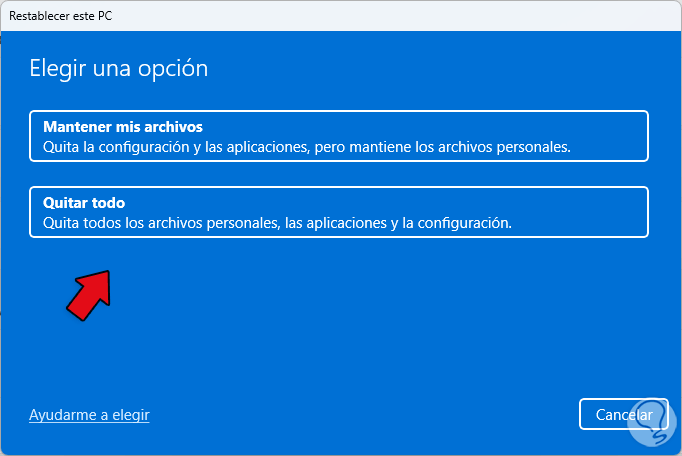
Step 4
and then we must select the type of installation to use, local or in the cloud:
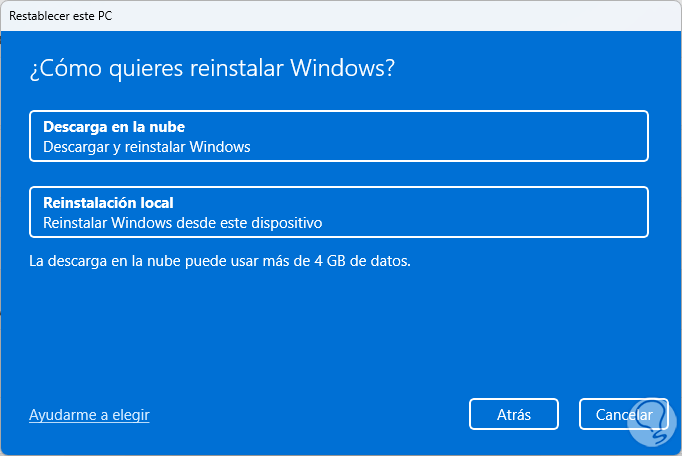
step 5
We will see a summary of the selected options:
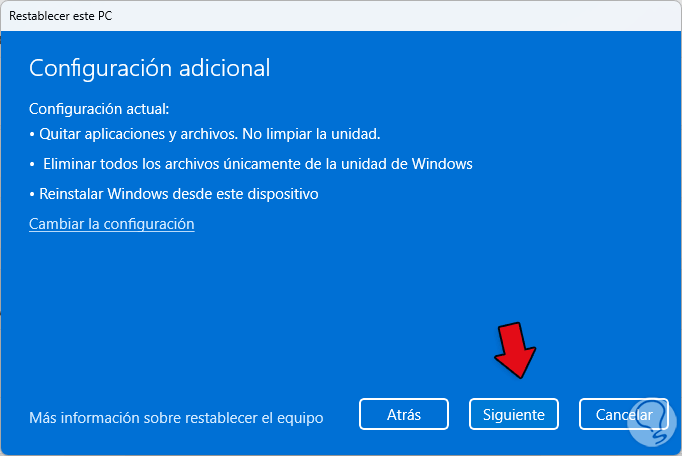
step 6
We click Next to start the process:

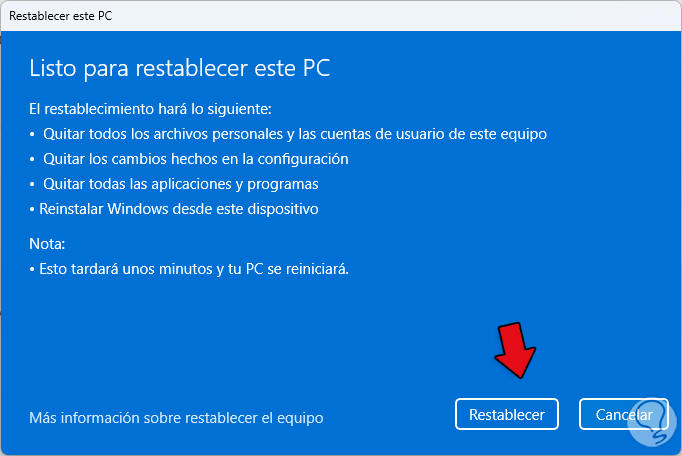
step 7
We click on "Reset" to start the operation and have the audio service at 100% functionality again:
6 Repair Audio Windows 11 with Device Manager
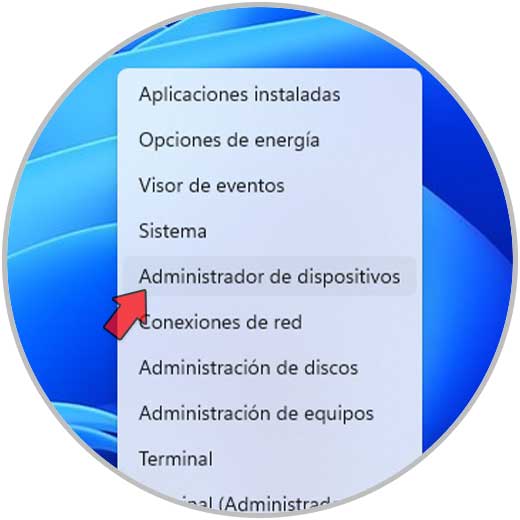
Step 1
It is possible that the audio driver itself is not updated, which will affect its use in Windows, we can update it to check if the error is corrected, we open the Device Manager:
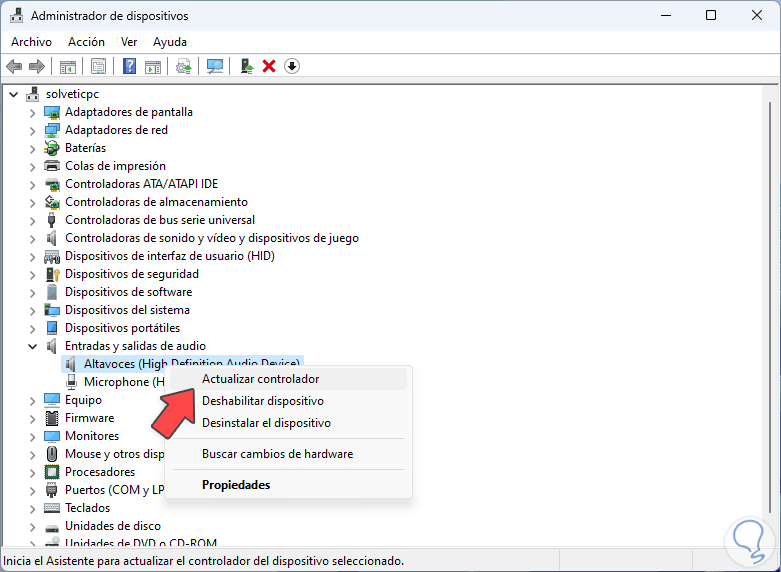
Step 2
In "Audio inputs and outputs" we right click on the driver and select "Update driver":
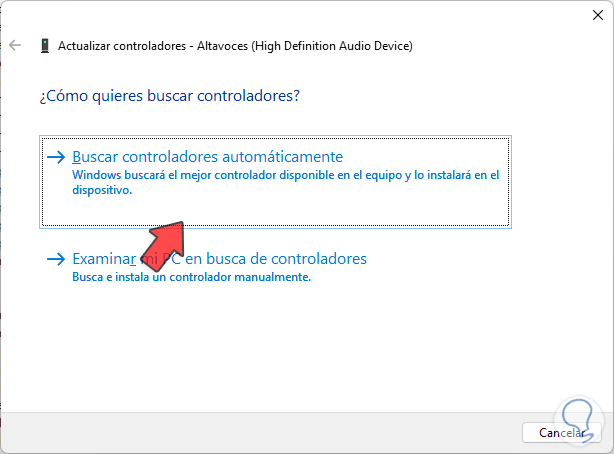
Step 3
We click on "Search drivers automatically":
Step 4
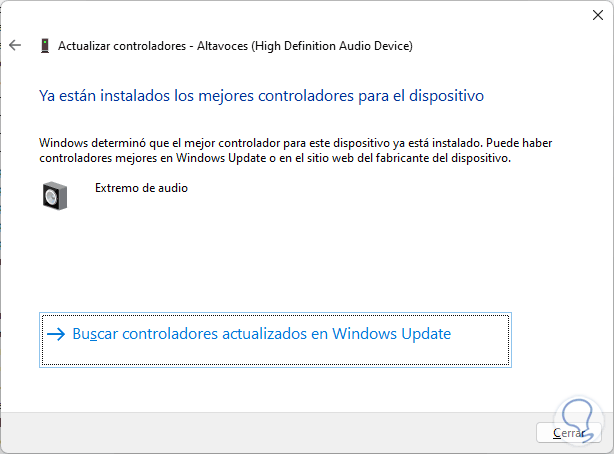
Wait for the update check to finish:
With each of these options it will be possible to recover the operation of this key service in Windows 10/11.