Outlook is the mail platform developed by Microsoft and in which we find different utilities for managing mail, calendars and contacts. There are numerous features in Outlook, both in its 2016 versions and in the new 2019 version , which help us get a better view of hosted emails and it is thanks to the folder view option..
In Outlook, each folder, such as the inbox or calendar, displays its elements in a design of a defined view, so each folder has several views that can be selected to obtain the best visualization of its elements.
Each of these folders will look the same, since it has columns that contain metadata about the selected email such as the sender, the subject, the date and time of receipt and more data. An Outlook view is composed of a type of view, fields, colors, fonts and other configuration options and we have different ways to view the elements of a folder. Outlook groups emails by date, unread messages in bold blue text and displays messages that have been read in a black font..
Note
The process to be performed applies in the same way in Outlook 2016 and 2019.
1. How to edit the default view of folders in Outlook 2016 and 2019
Step 1
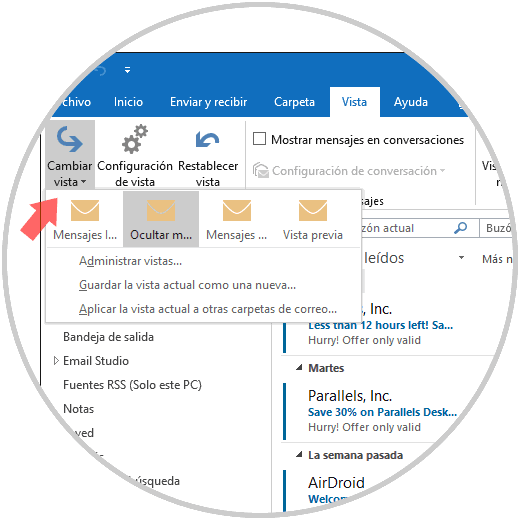
If we want to use another view different from the one set by default in Outlook, we must go to the View menu and there select the option "Change view" located in the Current view group:
Step 2
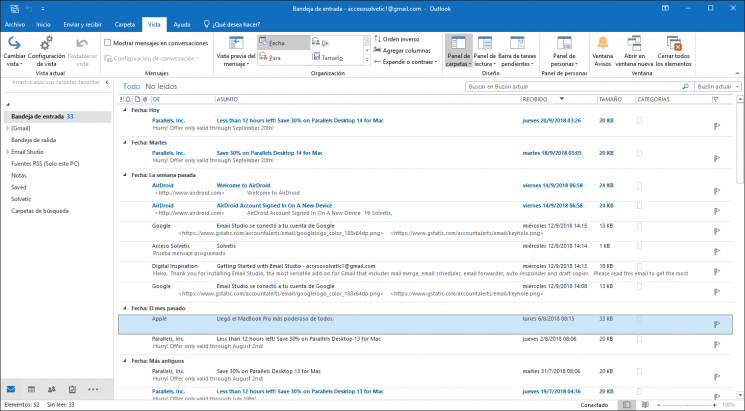
For example, the default option is "Preview" which displays the messages in the following format:
Preview Options
But from the preview option we can select options such as:
- Hide marked messages to delete
- Group messages marked to delete
2. How to edit the current view of folders in Outlook 2016 and 2019
Step 1
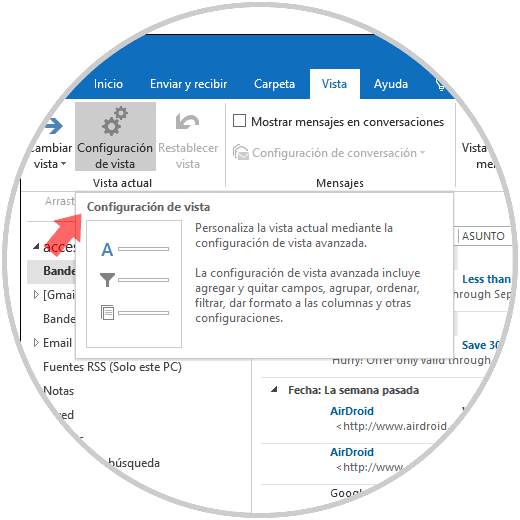
If we want to edit the configuration settings of the current view we must go to the View menu and click on the "View Settings" option
Step 2
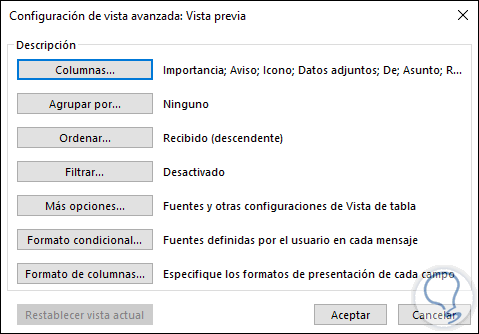
The following window will be displayed:
Step 3
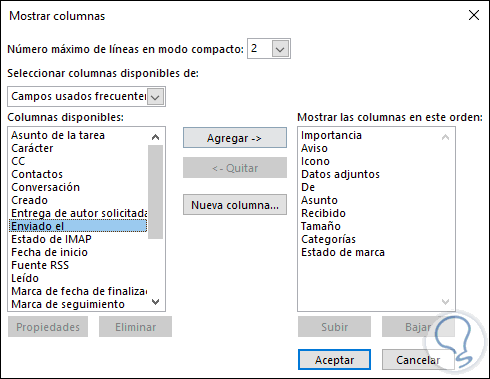
There we can see each of the values ​​that can be edited, for example, if we click on the option Columns we will see the following. There it will be possible to add or remove columns in the preview, as well as define the maximum number of lines.
Step 4
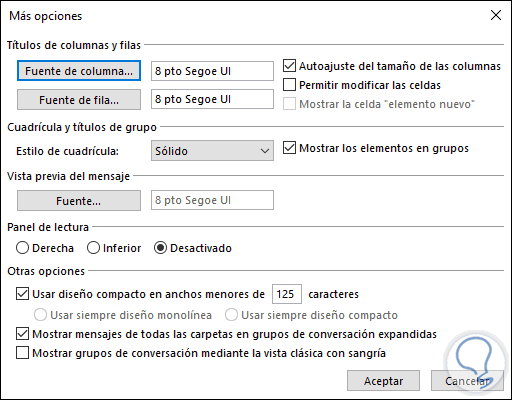
If we click on the More options section it will be possible to define the font and size of the columns, grid style, reading panel format and more. All changes made will be applied automatically.
3. How to apply the view to other folders in Outlook 2016 and 2019
Step 1
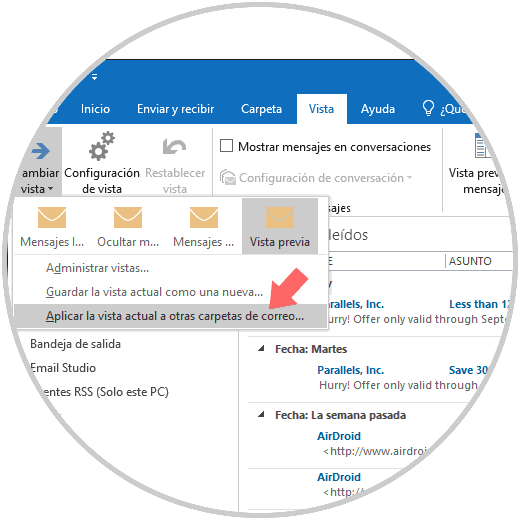
The design of a view can be applied to other Outlook folders so we will go to the View menu and there we select the option "Apply the current view" to other mail folders:
Step 2
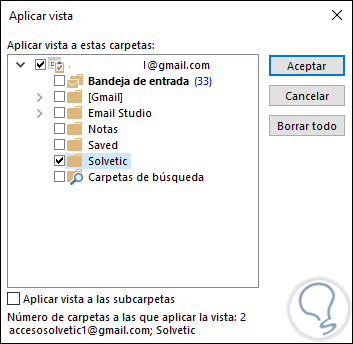
The following pop-up window will be displayed where we will activate the boxes of the folders where the selected view is to be applied. Click on OK to save the changes.
4. How to save a custom view in Outlook 2016 and 2019
Step 1
If we have applied changes to the current view format, we may want to save those changes for future use. Outlook allows us to save the changes as a template, to execute this, we will go to the View menu and there we select the option "Save the current view" as a new one:
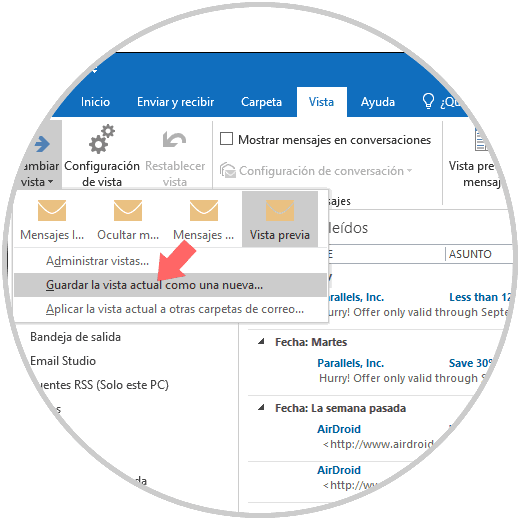
Step 2
The following window will be displayed where we will assign a name and in which folders this new view should be applied:
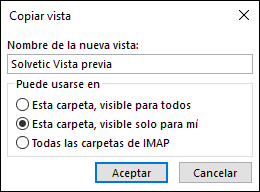
Step 3
After saving the changes we can see that the stored preview option is available from the View menu:
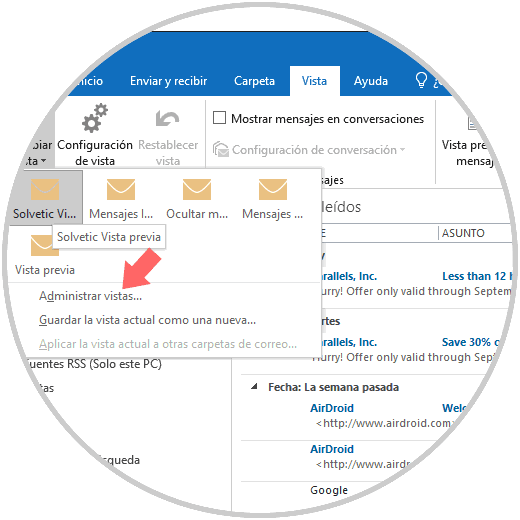
Step 4
There we can also click on the option Manage views and the following window will be displayed in table format where it will be possible to execute actions such as:
- Modify the name to an available view
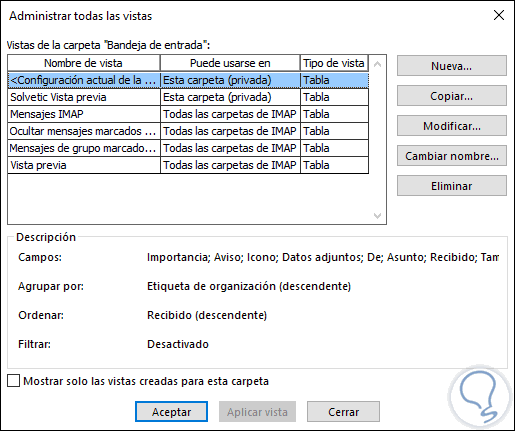
In addition to this, we can see each view with their respective attributes.
5. How to create a new Outlook 2016 and 2019 view
Step 1
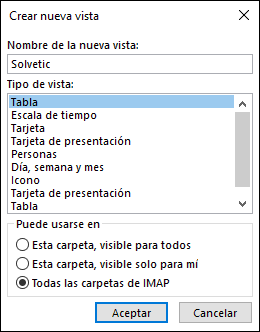
So far we have seen how to edit an existing view, but if we want to create a totally new view we must click on the "New" button, of the option "Manage views", and thus the following wizard will be displayed where we define:
- Type of view you will have
- Folders where it will be applied
Step 2
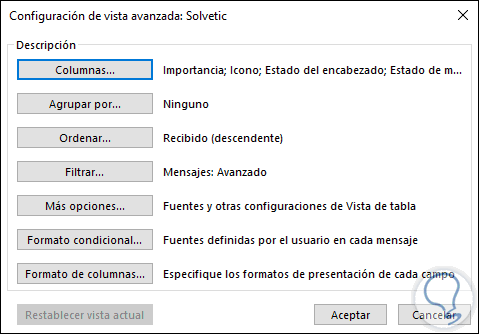
Click on OK and the options wizard will be displayed to apply to the view, there we define each aspect as necessary. Click OK again to save the changes.
Step 3
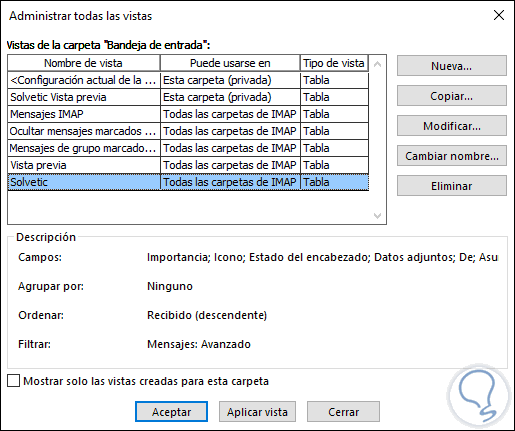
We can see our view created with its parameters:
Step 4
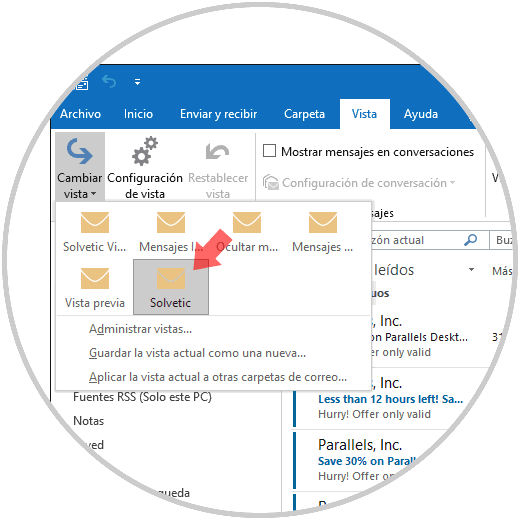
There we must click on the "Apply view" button so that the changes are saved correctly. The new view format will be automatically applied and we check that we are in the created view:
6. How to restore a view in Outlook 2016 and 2019
Step 1
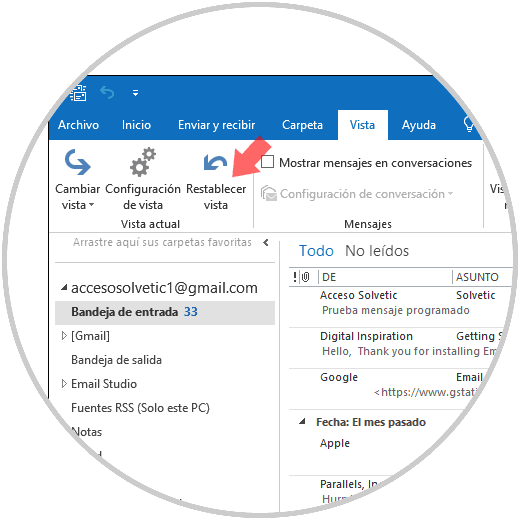
If we have made changes to any of the available views, but they generate some kind of error or we simply want to return to the initial format, just click on the "Reset view" button located in the Current view section:
Step 2
Clicking there will display the following message. Click Yes to confirm the restore action and the selected folder is restored to its original view immediately.

As we see, Outlook 2016 and 2019 offers us various ways to view emails and this option can be customized according to the necessary requirements but always focused on obtaining the best view of these elements..