Windows operating systems require, due to their nature, multiple services , both their own and third parties, so that all the elements within it and their applications work in the correct way. Each service plays an important role to a greater or lesser degree, but if any of these failures is not enabled we can face serious problems that prevent the optimal use of the system . This occurs, for example, when a network service is failing and will prevent us from connecting to the network; A disabled audio service will not allow us to listen to our songs or a Windows Update system will block the system from being updated..
Something to keep in mind is that, in Windows, whether 7, 8 or 10, the services carry out their mission individually and it is normal for one service to require another or others to accomplish the task for which it was developed. This is so that when a Windows service needs another service to work properly it is said to have a dependency. From this point of view, a service can depend on one or more services, so if any of the services in this unit fail, everyone will be affected, so it is not wise to disable or eliminate services lightly, we must first know if this service It depends on another or if other services depend on it.
TechnoWikis will explain the way to see the dependencies of a service, for this case we will use Windows 10 but the process is similar in Windows 7 or Windows 8..
1. Check the dependencies of a service in Windows 10
Step 1
To access the operating system services we will use one of the following options:
- Use the following key combination and execute the "services.msc" command, press Enter or OK.
+ R
- Using the command prompt or Windows PowerShell and execute the "services.msc" command, then press Enter or OK.
- In the Windows 10 search box enter the term "services" and select the utility
Step 2
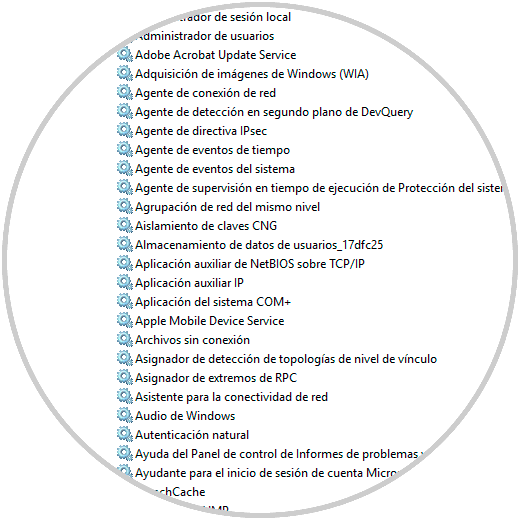
The following window will be displayed where we will see all the local Windows services:
Step 3
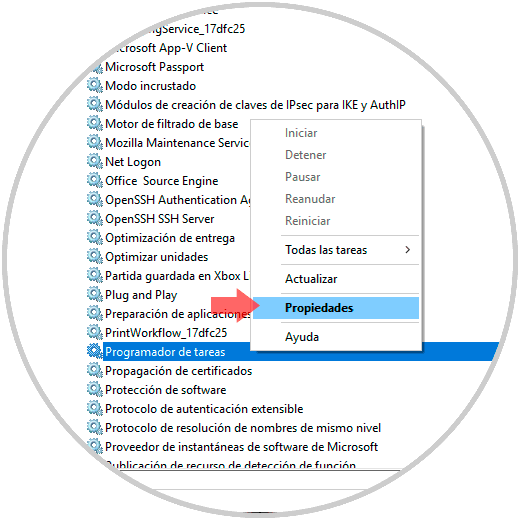
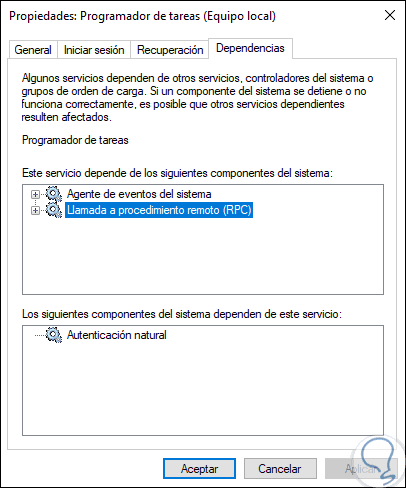
Remember that, if a service is not started or disabled, all the services that depend on it will be affected, to verify these dependencies, we can double-click on the service to be verified or right click on it and select “Properties†:
Step 4
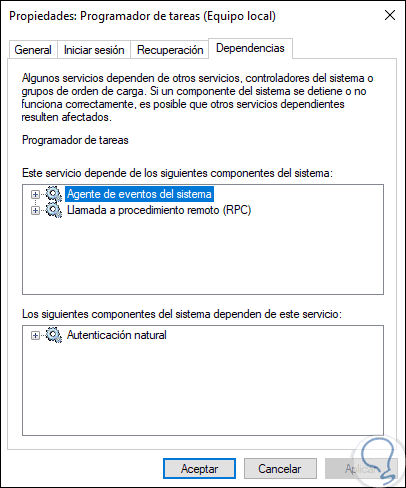
In the window that will be displayed, we go to the “Dependencies†tab and there the services that interact with the selected service will be loaded:
Step 5
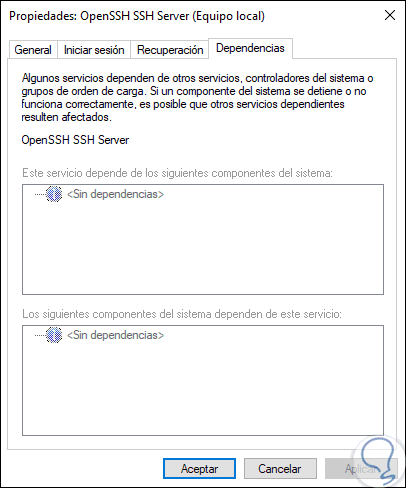
As mentioned, all services do not always have dependencies, in case a service is independent we will see the following:
Step 6
The Dependencies tab is divided into two sections that are:
- In the first section we find the legend "This service depends on the following system components" and lists all the other services that must be run so that the service can begin to be used.
- In the second section, we will see the legend "The following system components depend on this service" and then list the services that depend on the selected service.
2. Disable a service with dependencies in Windows 10
Let's see how we can deactivate a service with dependencies.
Step 1
To disable a service in Windows we have the following options:
- Right click on it and select the "Disable" option.
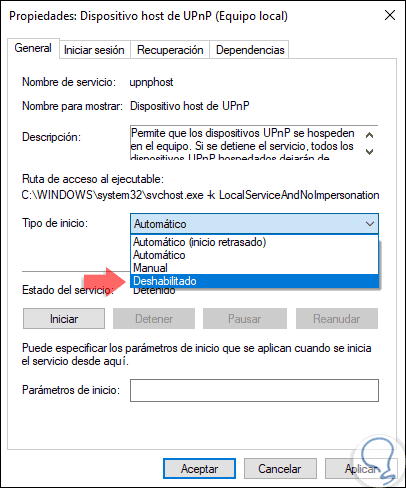
- Double click on the service and in the "general" tab go to the "Startup type" field and there select the "Disabled" option.
Step 2
Click on Apply to save the changes. Some services are essential for the operation of the system and applications, so one tip is to not always select the "Disabled" option but the "Manual" option since if we set the startup type to Disabled it means that the selected service is never can start
3. Configure automatic service startup in Windows 10
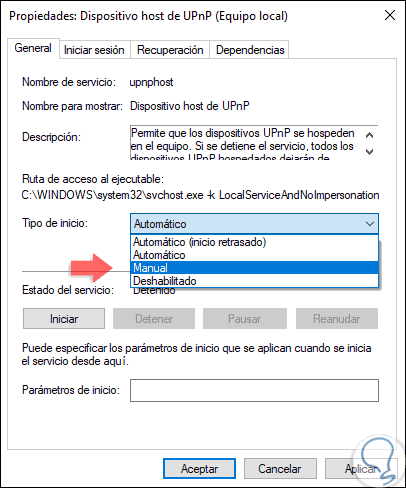
To configure a service with a manual start we will double click on it and in the "General" tab we go to the "Startup type" option and there we select "Manual": Click on Apply and Accept to save the changes. When a service is configured to start manually, the selected service does not start when Windows starts, but in case the service is requested by other system components or services, Windows can run it automatically, otherwise select Disabled option.
This option is useful for services that do not require system resources during the Windows boot process because it only runs when necessary by other processes.
4. Configure delayed or automatic start of service in Windows 10
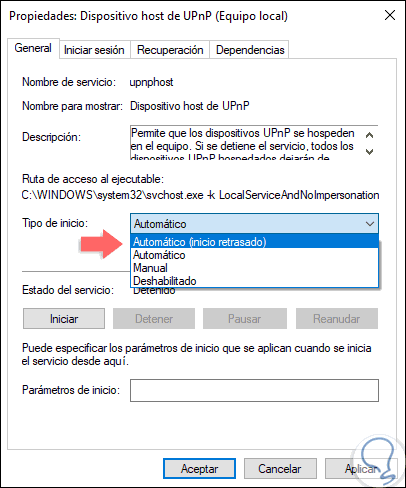
Another option available is the delayed start, which allows a service to start automatically, but only after Windows completes the entire process of loading vital services, that is, those that are set to Automatic.
To activate this option, we will double-click on it and in the "General" tab we go to the "Start type" option and there we select "Automatic (delayed start)". We save the changes by clicking on Apply and then OK..
We can see the different options we have for the start of a service, these must be configured based on the dependencies of this service so that we do not affect other system services.