Many times we hear about the context menu in Windows operating systems , but we do not know for sure what it is talking about. Well, the context menu is the same, popular, by the way, right-click that we give on a line to access various editing options ..
By right-clicking on an element, it can be in Word , PowerPoint , Excel , Desktop, etc., we can carry out actions such as:
- Open, edit or delete the selected item.
- Open the selection with a specific program.
- Compress or decompress the selection and many more actions.
Windows systems give us the possibility to add or remove the options that are displayed with the context menu and this is practical when we want to add a new option in order to save time for its execution.
For this reason, in the following video and tutorial that we leave you below, we will explain how to add a program in the context menu (by pressing the right button) in Windows 10..
To stay up to date, remember to subscribe to our YouTube channel! SUBSCRIBE
1. How to add applications to the context menu Windows 10, 8, 7
To add different applications that we use on our computer to the context menu of Windows 10, the steps that we will have to follow are the ones indicated below:
Step 1
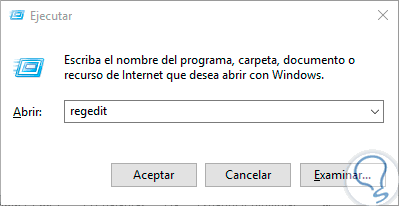
We can add the desired application and for this we will open the registry editor, called regedit, using the following key combination:
+ R
In the displayed window execute the following command:
Regedit
Press Enter or Accept.
Step 2
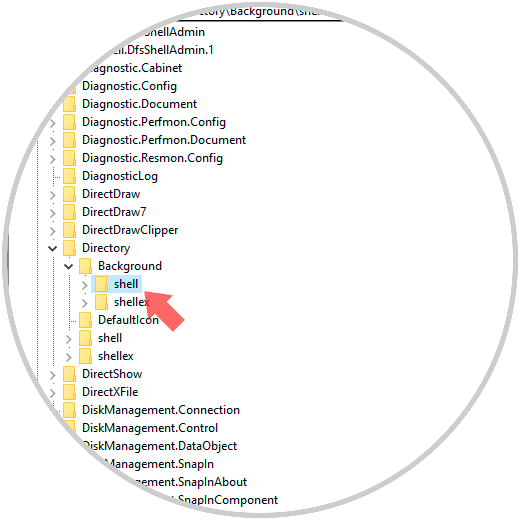
In the displayed window we will go to the following route:
HKEY_CLASSES_ROOT \ Directory \ Background \ shell
Step 3
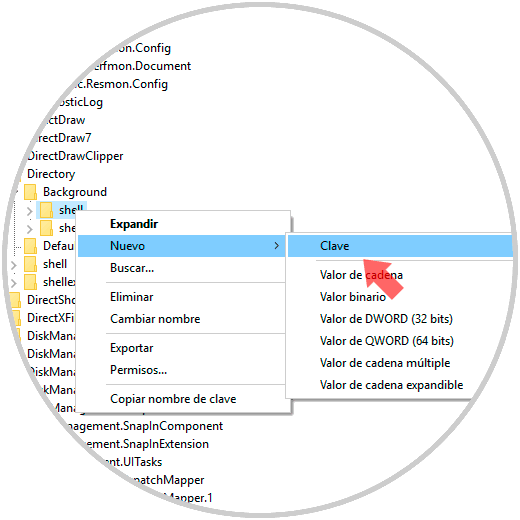
In this Shell folder we must create a new key by right-clicking on it and selecting the "New / Key" option:
Step 4
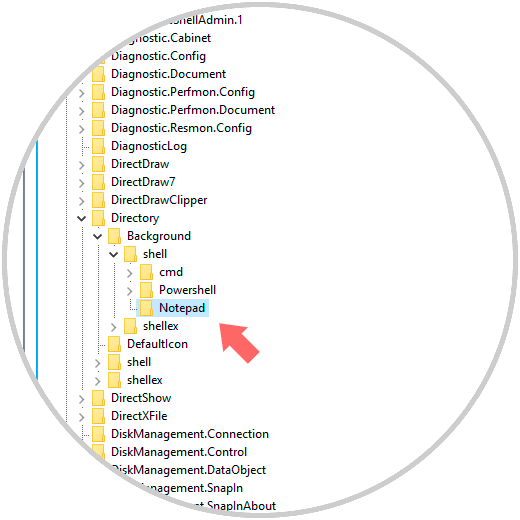
This new key will be called with the application to be deployed, in this case Notepad:
Note
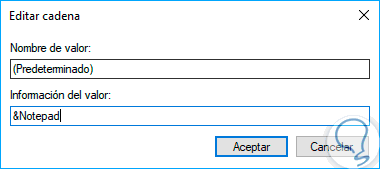
If we want to assign an "Alt" key to this menu entry for faster access, we can change the value (Default) to the right and place an & character in front of the key we want to use. For example, if you want to be able to simply use the N key to start Notepad once the desktop context menu appears, we can do the following about the available string value:
Step 5
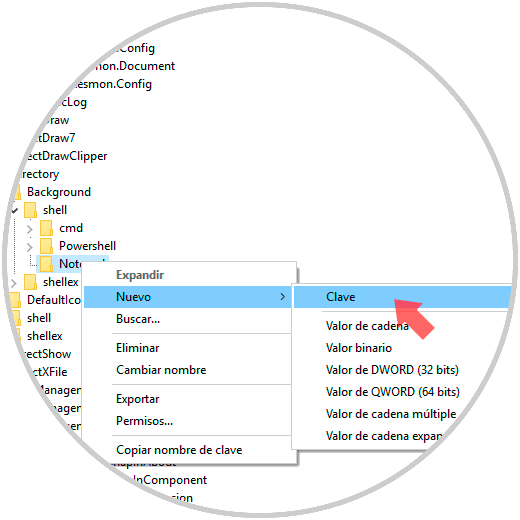
Once this key is created, we must create the key that will contain the command used to start the application, for this we will right-click on the new key called Notepad and select the option "New \ Key":
Step 6
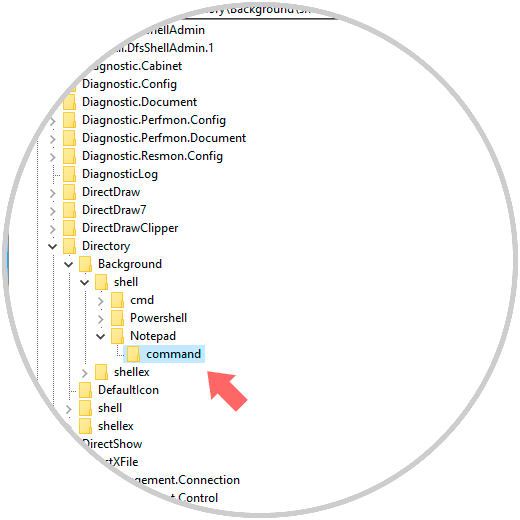
This new key will be called "command":
Step 7
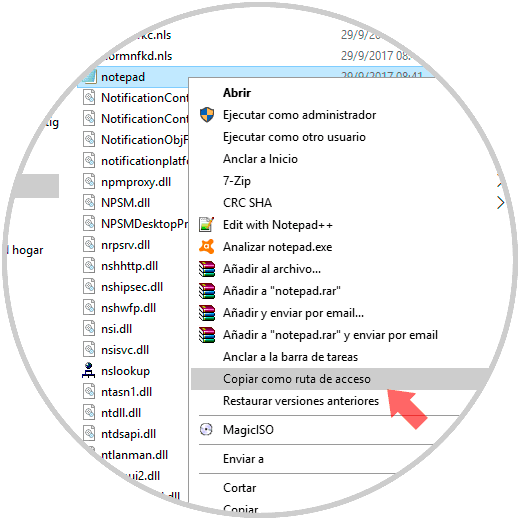
To complete this process, we need the full path to the application with which you want to start. We can use Shift + Right click to get the menu item "Copy path as access" to find it more quickly:
Step 8
Now, we go back to the registry editor and double click on the default value in the “command” key and paste the path in the “Value data” field:
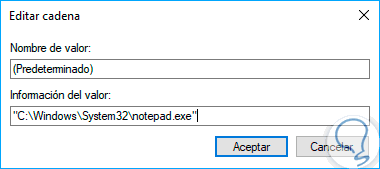
Step 9
Click on OK and we can see that the path to the application has been pasted correctly established:
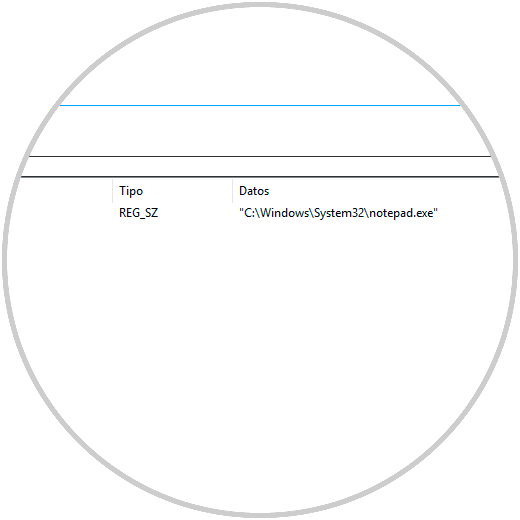
Step 10
Now, to check that everything has been correct, we will right-click on the desktop and we will be able to see the Notepad option available there:
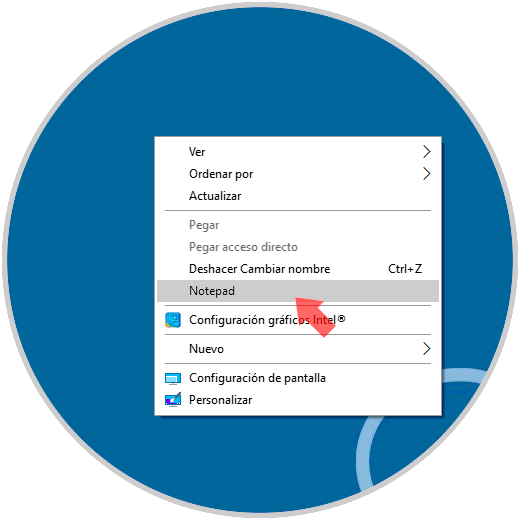
It's that simple we can add the number of applications that we consider necessary to access new programs in a much more agile way to open our files.
2. How to fix context menu does not work in Windows 10
This option that we have explained in the previous section is really useful especially when we are working on our Windows 10 computer and we want to be as productive as possible, since this will allow us to move and use the different applications on our PC by accessing in a way much faster.
But it may be that for various reasons you cannot use the right button of your mouse and therefore it is impossible for you to access the context menu of Windows 10. This will terribly delay the task but you should not worry because it is something that can be solved quite easily if you know the procedure to do it. For this reason, in the following link we show you how to solve I cannot use the right button on the Windows 10 desktop to avoid having problems accessing its context menu..
Another possible way to solve this is to change the right and left buttons of Windows 10, since the Windows context menu is associated with the right mouse button by default; but if it doesn't work as it should you can configure the left mouse button as the primary button. In the link that we leave you below we show you the step by step to perform this action:
With this section we can solve any failure to access the context menu of Windows 10.