The security of user information is one of the pillars on which Google is fully working to implement new functions in its Chrome browser that will help prevent the theft of each user's data, remember that in
Chrome Sensitive Data
Chrome we enter sensitive data such as:
If any of this data is violated, we may be faced with critical privacy situations, for which Chrome has strict isolation from websites. The isolation of websites is responsible for protecting users from the round of information when visiting sites that are not trusted, many times we can accidentally access these sites or be victims of fraud with similar sites, in these cases the Website isolation is responsible for running websites in different processes so as not to leave everything in one place, by activating it, we will prevent malicious sites from being able to bypass the integrated security measures for everything related to theft of information..
Website sandboxing has been enabled by default since Chrome 76 and for Android websites in its version of Chrome 77 and newer.
isolation processes
Some of the processes that work with website isolation are:
- The documents between sites will always be in a different process regardless of the way we are browsing.
- Cross-site data such as HTML, XML, JSON, and PDF files will not be forwarded to a web page process, they will only do so if the server enables the permission.
- Security checks in the browser process are in the ability to detect and terminate a process in case it is not trusted.
TechnoWikis will explain how to use this method to increase the security of Google Chrome..
To stay up to date, remember to subscribe to our YouTube channel!
SUBSCRIBE ON YOUTUBE
How to turn on strict website isolation in Chrome
Step 1
To start we are going to open Google Chrome, then at the top we will click on the + sign to be able to add a new tab, there we enter:
chrome://flags
Step 2
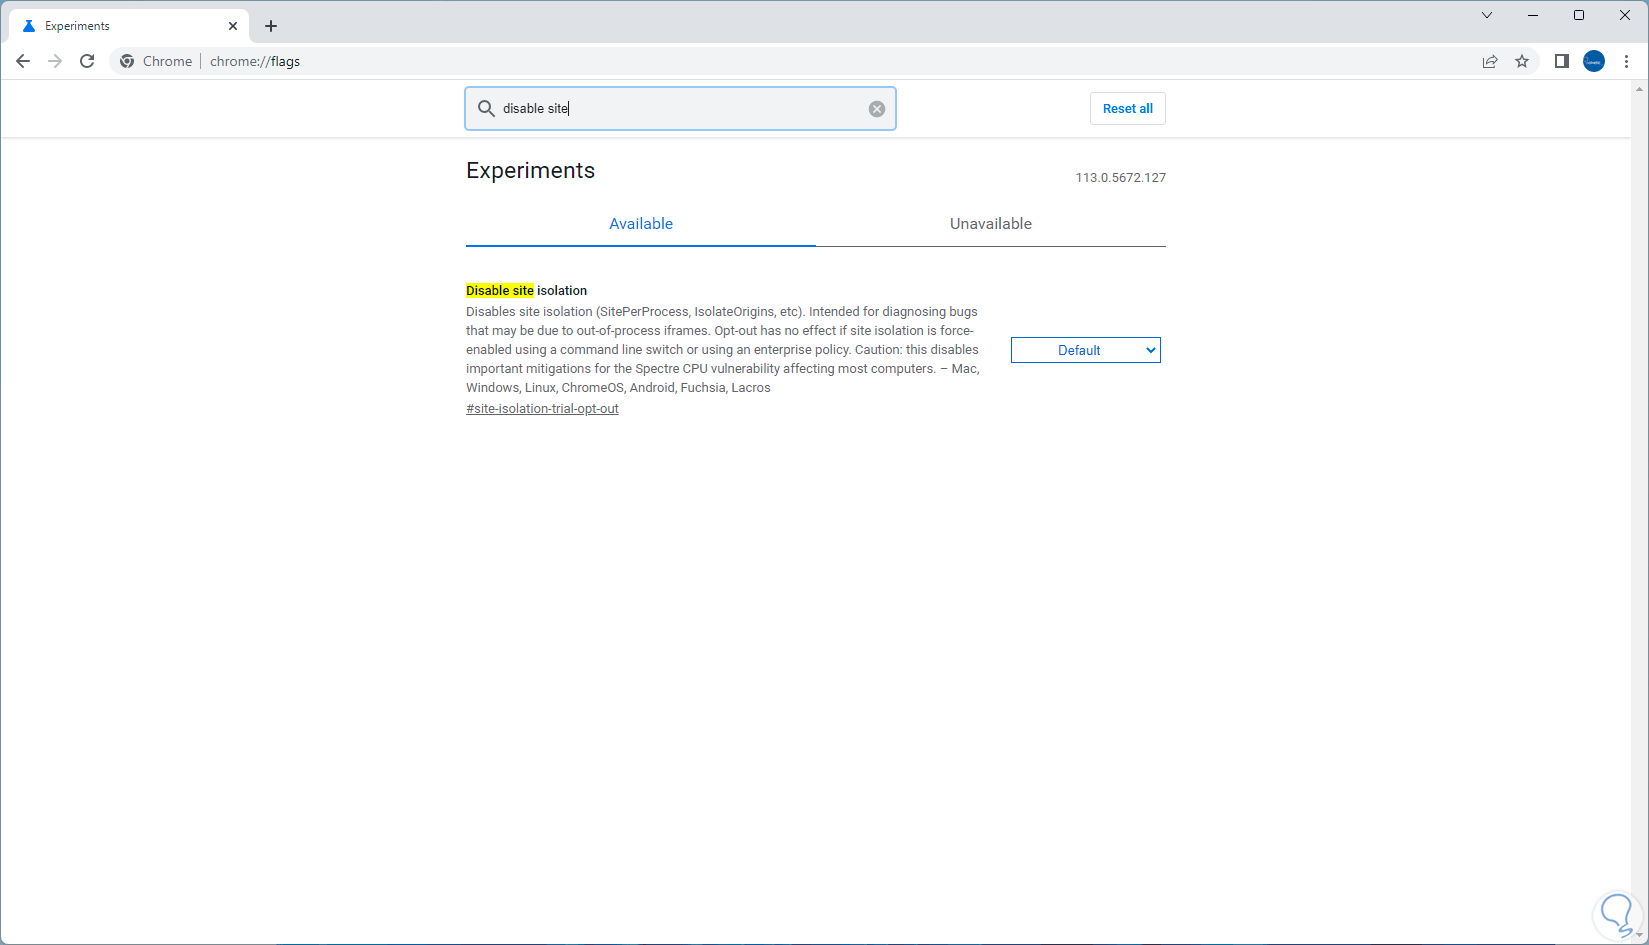
We click on the search box and enter the word “disable site”:
Step 3
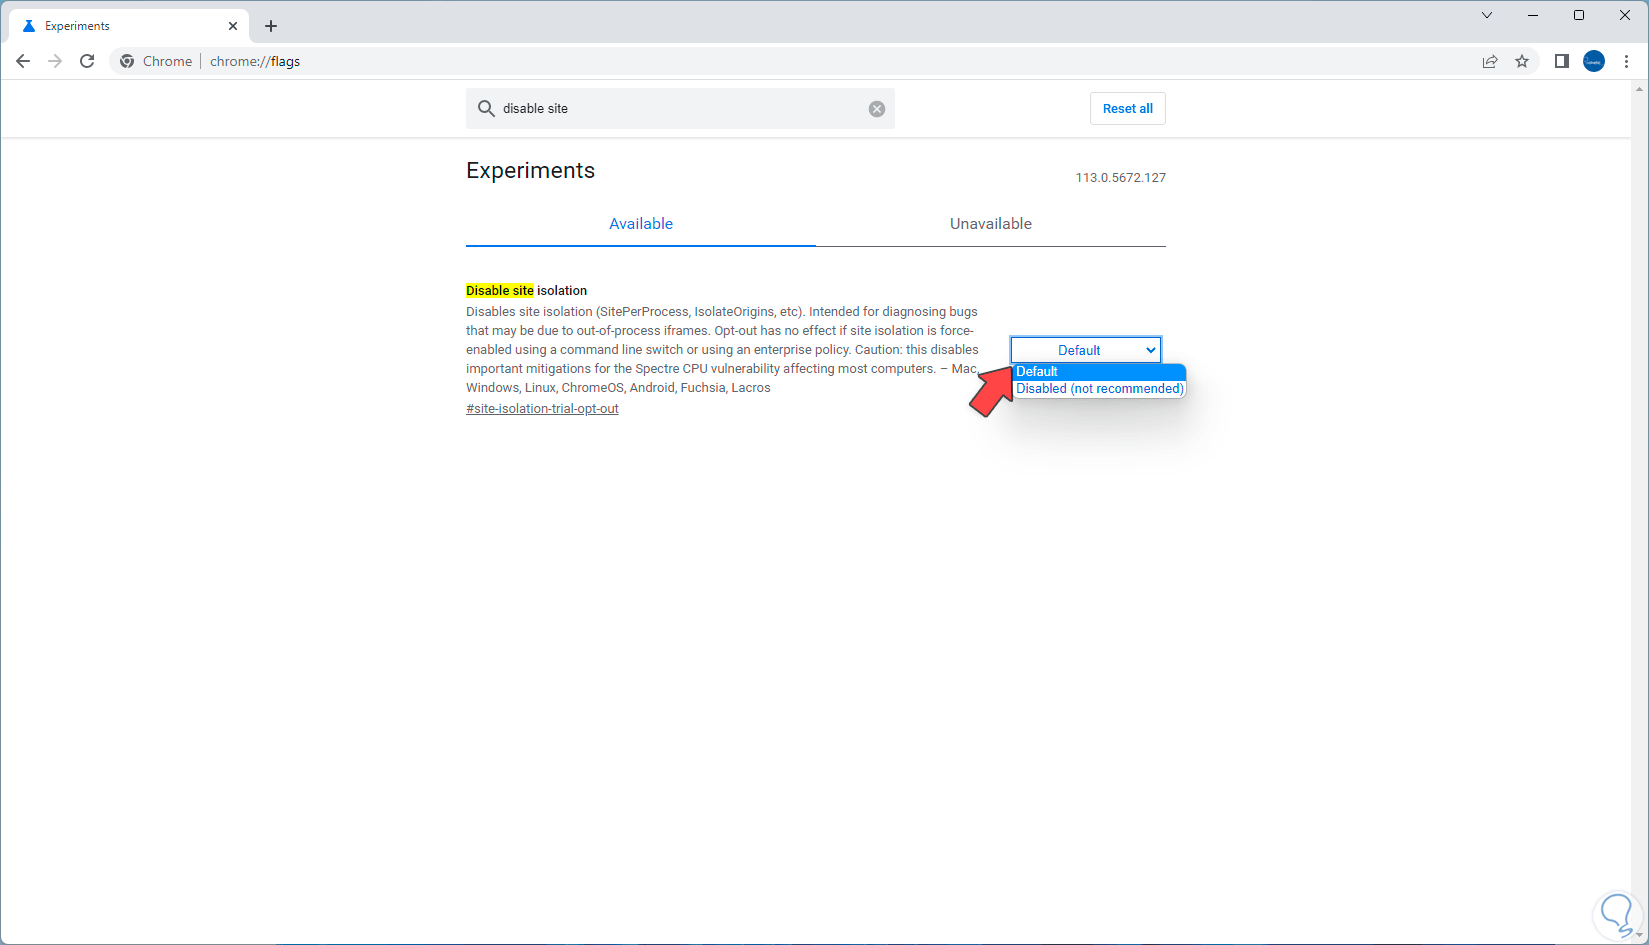
We will see the Disable site isolation option, click on the box located next to it and select (if it is not) the Default option:
Step 4
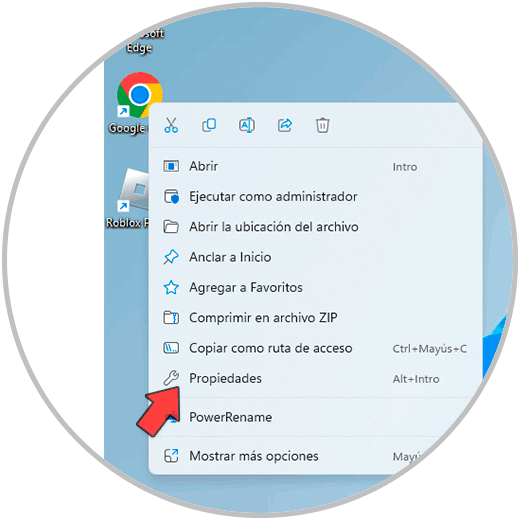
As we mentioned from previous versions it is already enabled by default. On the Windows desktop we right-click on the Google Chrome shortcut and in the displayed list we click on "Properties":
step 5
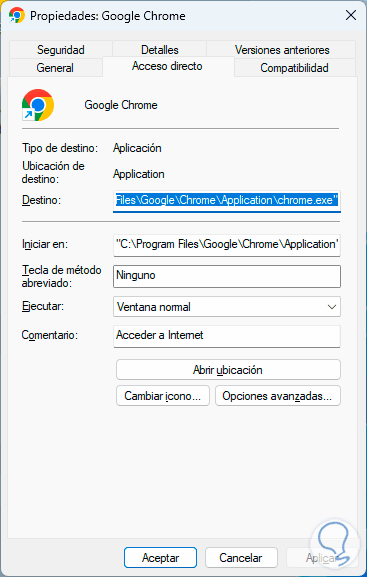
The following window will open:
step 6
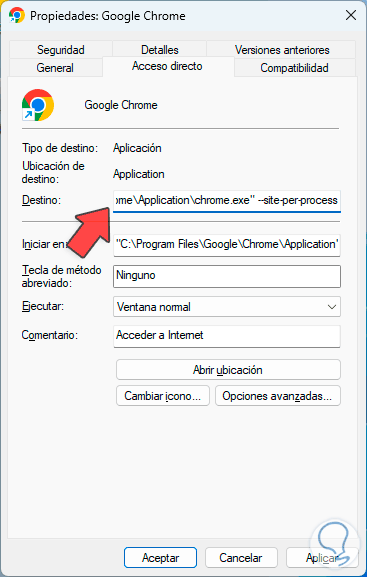
We click at the end of the word in the Destination field and enter the following leaving a space:
--site-per-process
step 7
If this option is enabled, website isolation will be enabled on all the websites we access, this means that each website will be executed in an independent rendering process and isolated from the other windows, apply the changes by clicking on Apply and Accept.
It is time to configure another function to process the origin of a specific website, for this we open Google Chrome and at the top we will click on the + sign to add a new tab, we execute again:
“chrome://flags”
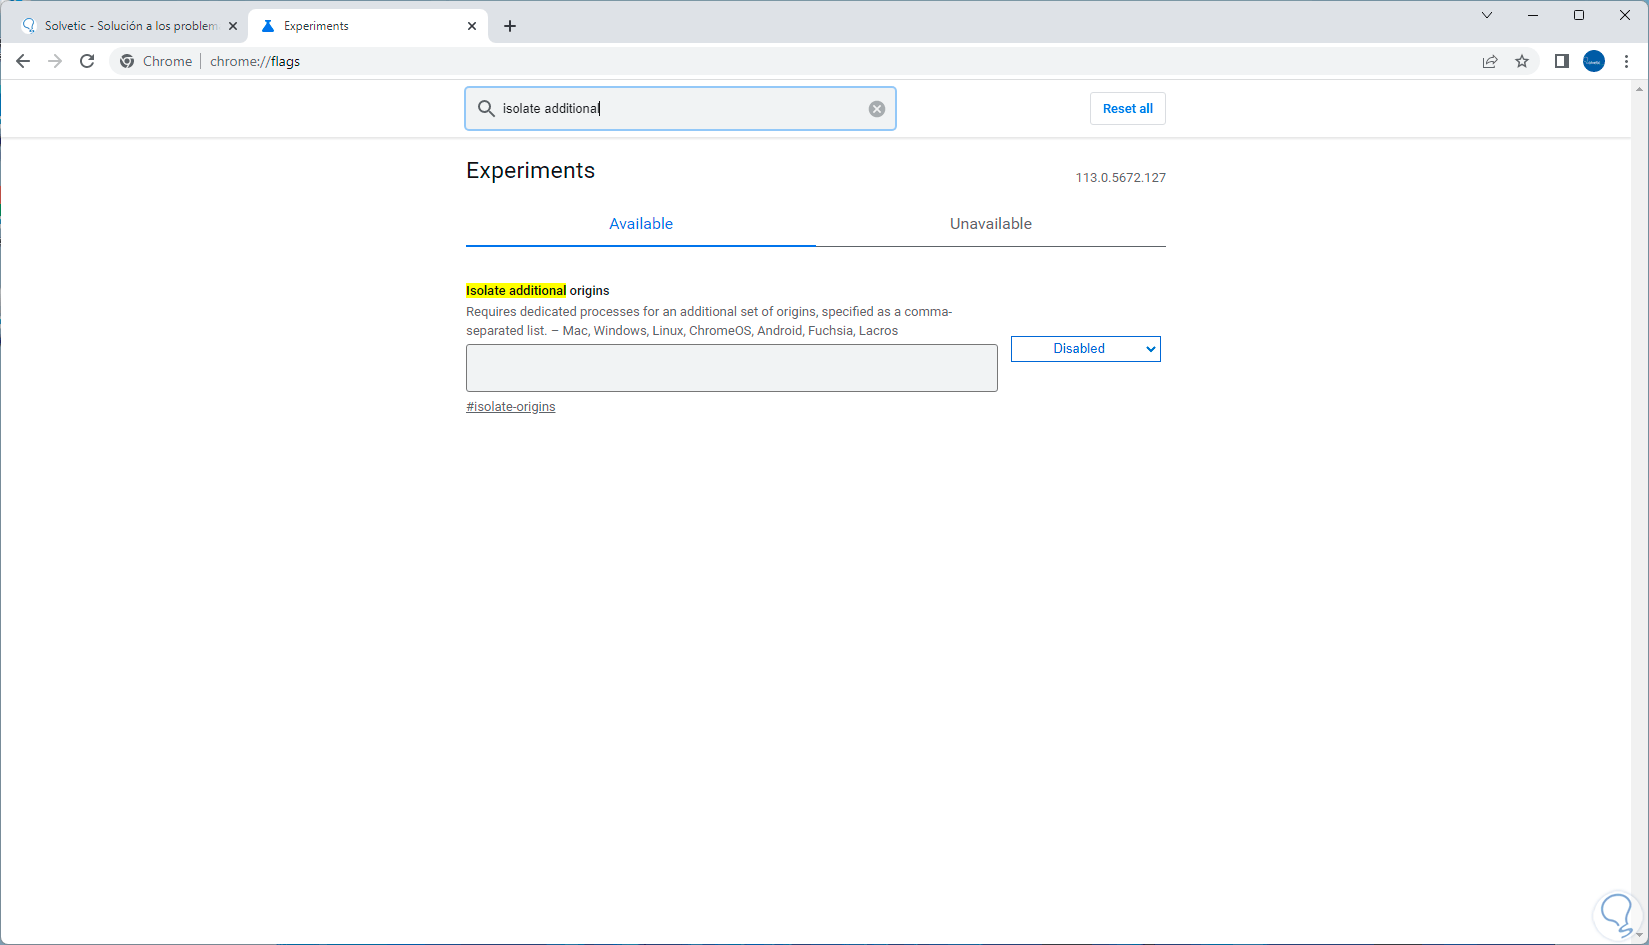
We enter the word isolate additional:
step 8
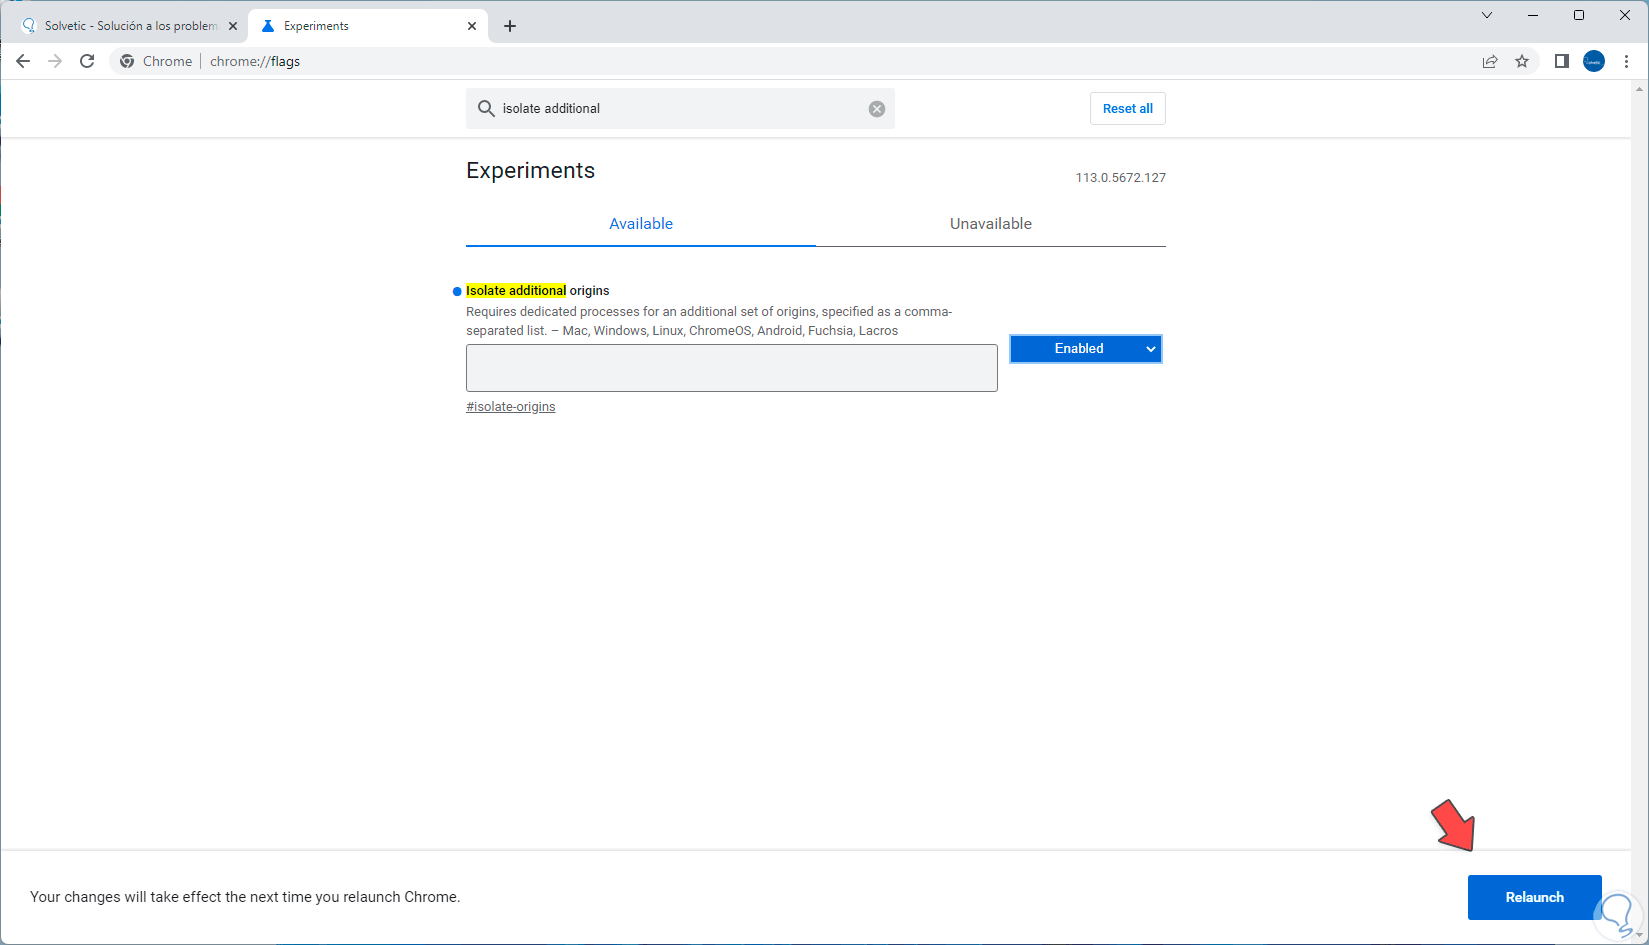
In Isolate additional originals we must go to the box next to it and there set the value Enabled:
step 9
For this function to be activated, we are going to click on the Relaunch button:
step 10
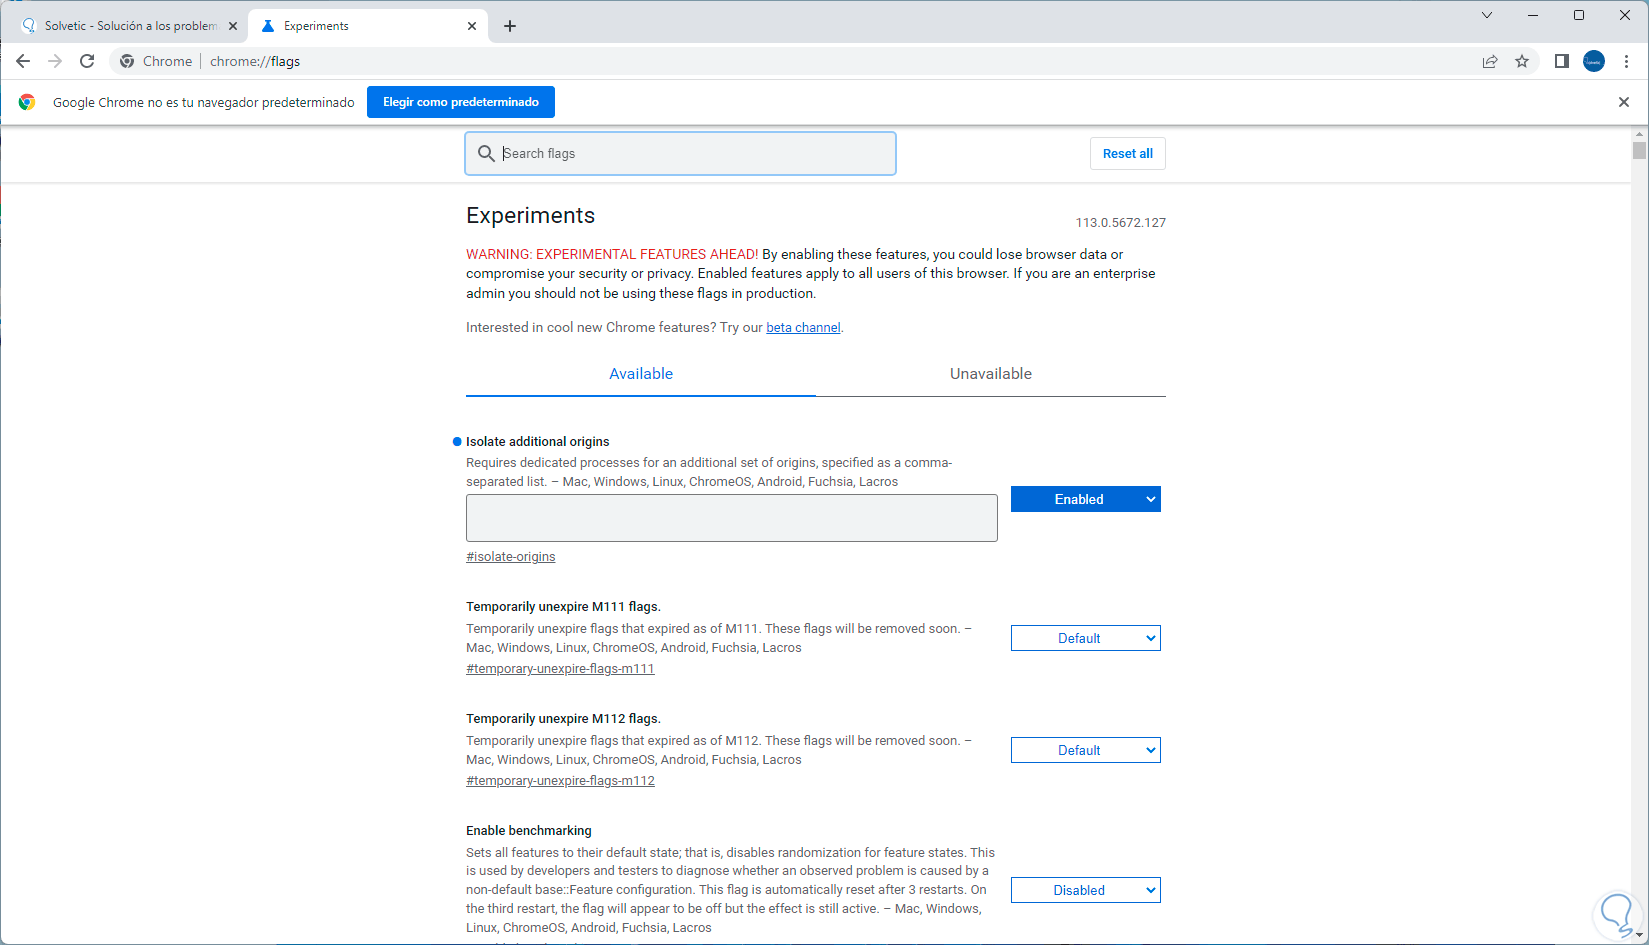
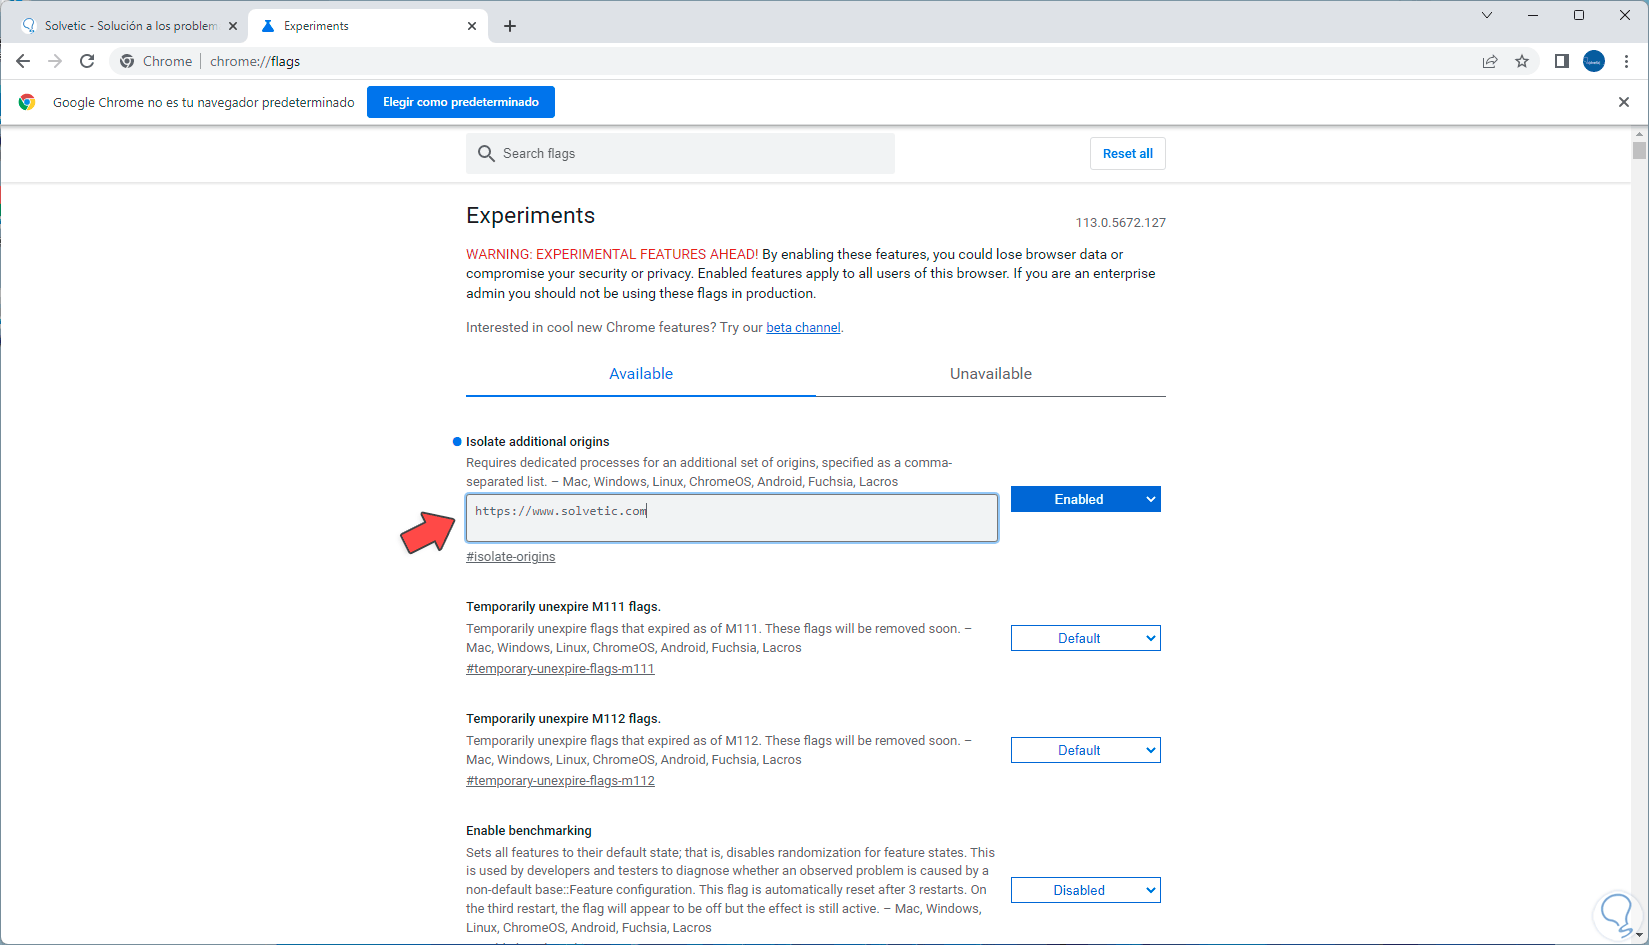
We will see a field available in this function, there we enter the web address of the site to process:
Again you must use your mouse to click Relaunch to confirm the changes.
step 11
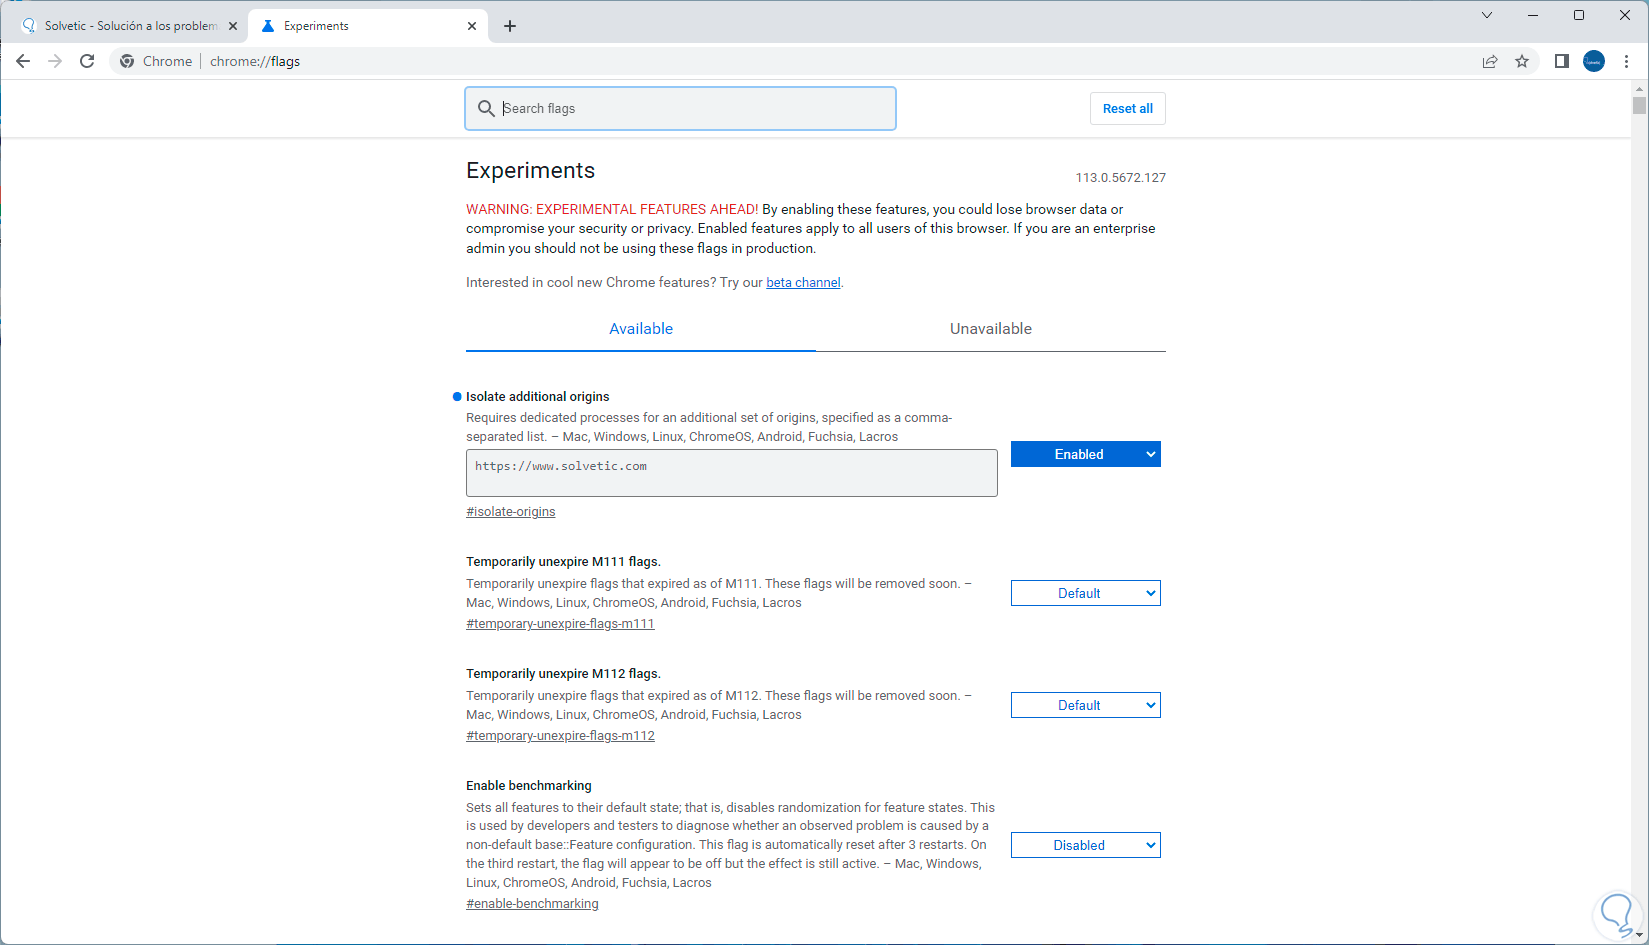
Now that site we registered will be sandboxed in Chrome.
Thanks to this isolation function, without a doubt, security when browsing in Chrome will increase, giving results of comprehensive privacy in the event that a site is visited..