Creating a USB Recycle Bin is a practical and very useful task. This functionality allows us to be able to save the deleted files on the USB drive instead of deleting them permanently. One of the advantages, therefore, of having a USB Recycle Bin is that it provides us with an additional layer of security and protection for important files when we delete them by mistake. If you accidentally delete a file, you can easily recover it from the USB Recycle Bin instead of losing it forever..
Apart from this, another advantage is that it helps to save space on the USB drive. And it is that instead of permanently deleting the files, they will be temporarily saved in the Recycle Bin. With this we can free up space on the USB drive without having to delete the files forever. This is especially useful when working with capacity-restricted USB drives. Therefore, we are going to see how we can both Create Recycle Bin on USB and configure its size completely.
To stay up to date, remember to subscribe to our YouTube channel!
SUBSCRIBE ON YOUTUBE
1 Create Recycle Bin on USB
Step 1
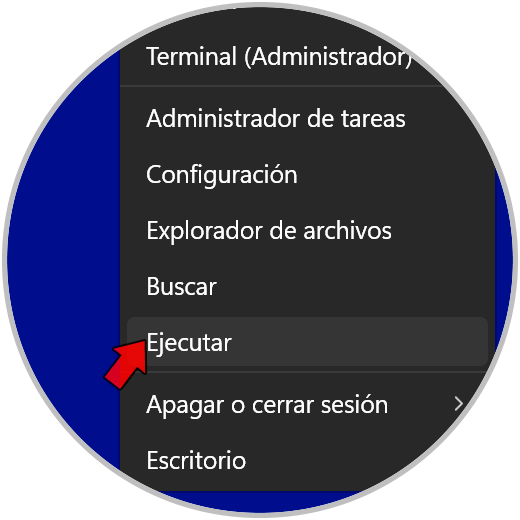
We'll start by opening Run. To do this, right click on the Windows icon and select the "Run" option.
Step 2
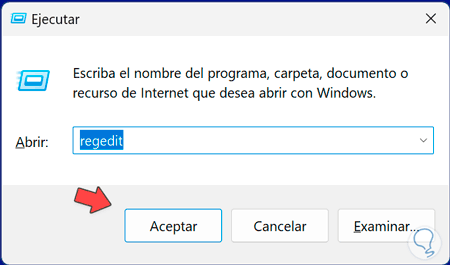
Next, type the command “regedit” and hit the Enter key or hit “OK” to execute it.
Step 3
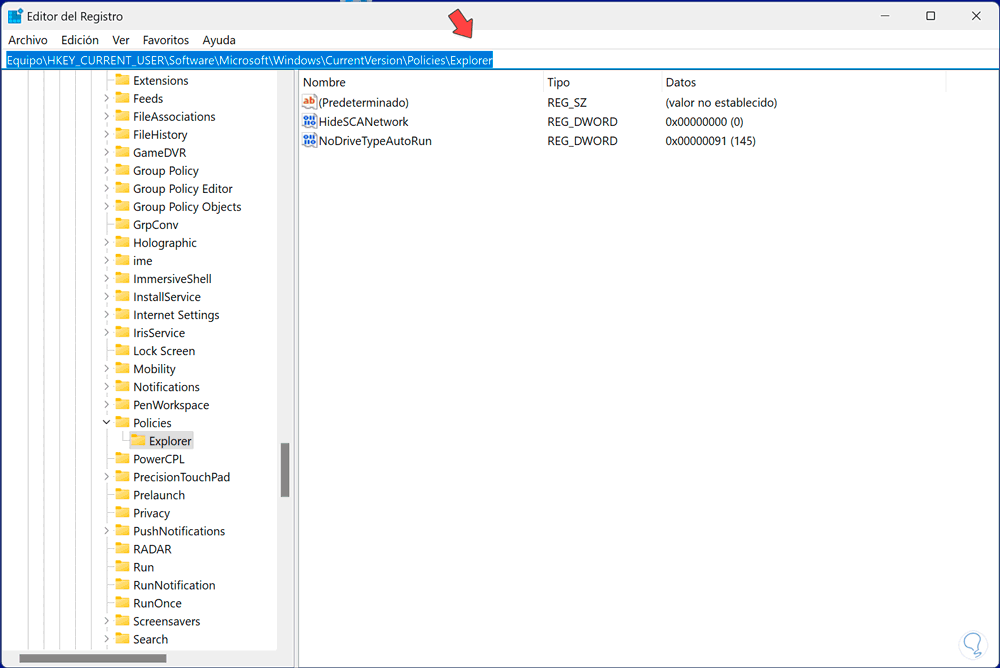
We will see that the Registry Editor window opens. Next we will go to the route that you can see on the screen and that if you prefer you can copy and paste directly:
HKEY_CURRENT_USER\SOFTWARE\Microsoft\Windows\CurrentVersion\Policies\Explorer
Step 4
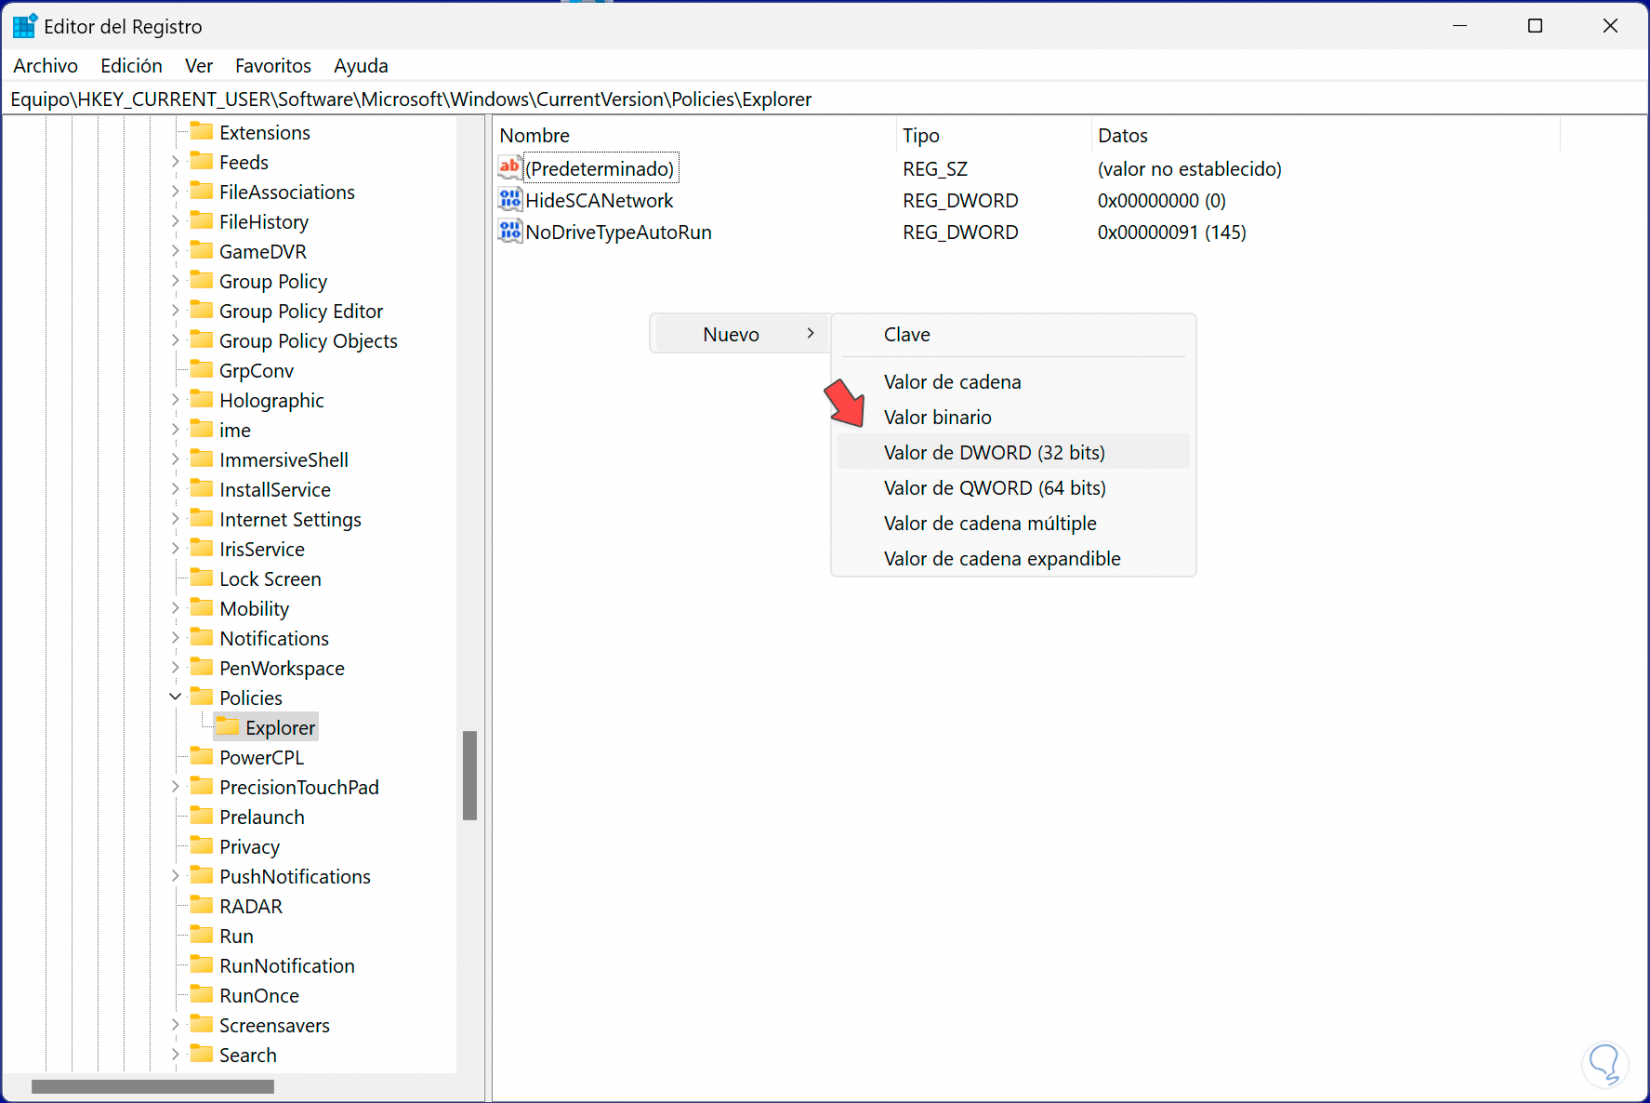
Once we are inside the "Explorer" folder, we are going to right click on a blank space. Then we will click on the “New” option and then on “32-bit DWORD Value”.
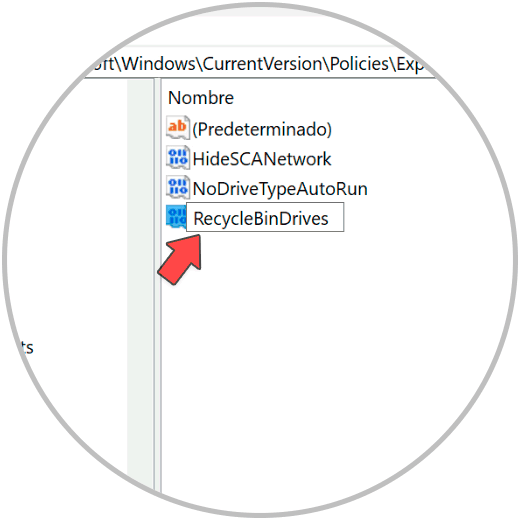
step 5
The next thing will be to change the name to this value. To do this, press the F2 key once you click on it and set its name as “RecycleBinDrives”.
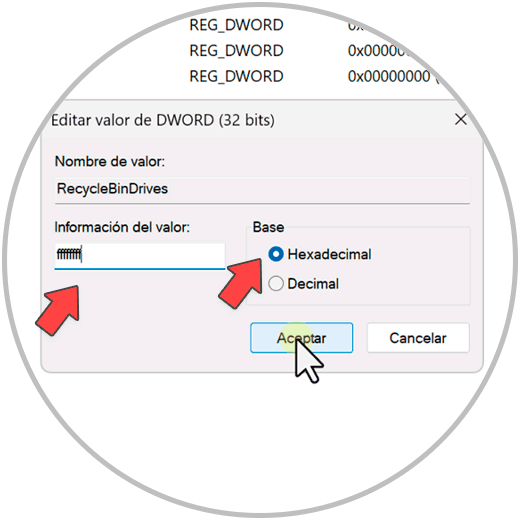
step 6
Next, we double-click on this value to modify it. Here we will set the code “ffffffff” in the “Value data” field. We will also select the Hexadecimal Base and apply the changes with "OK".
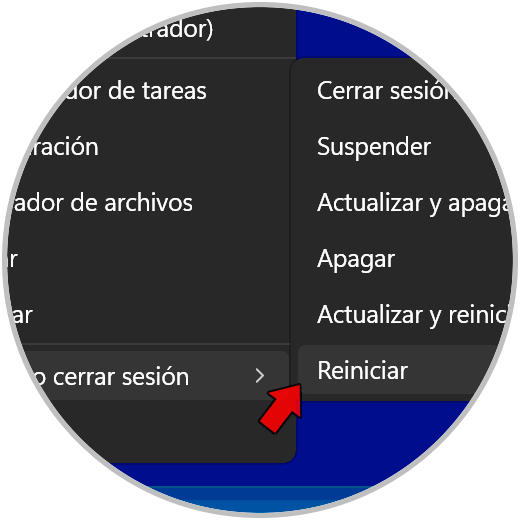
step 7
After that, restart the computer to be able to apply the changes from the power options.
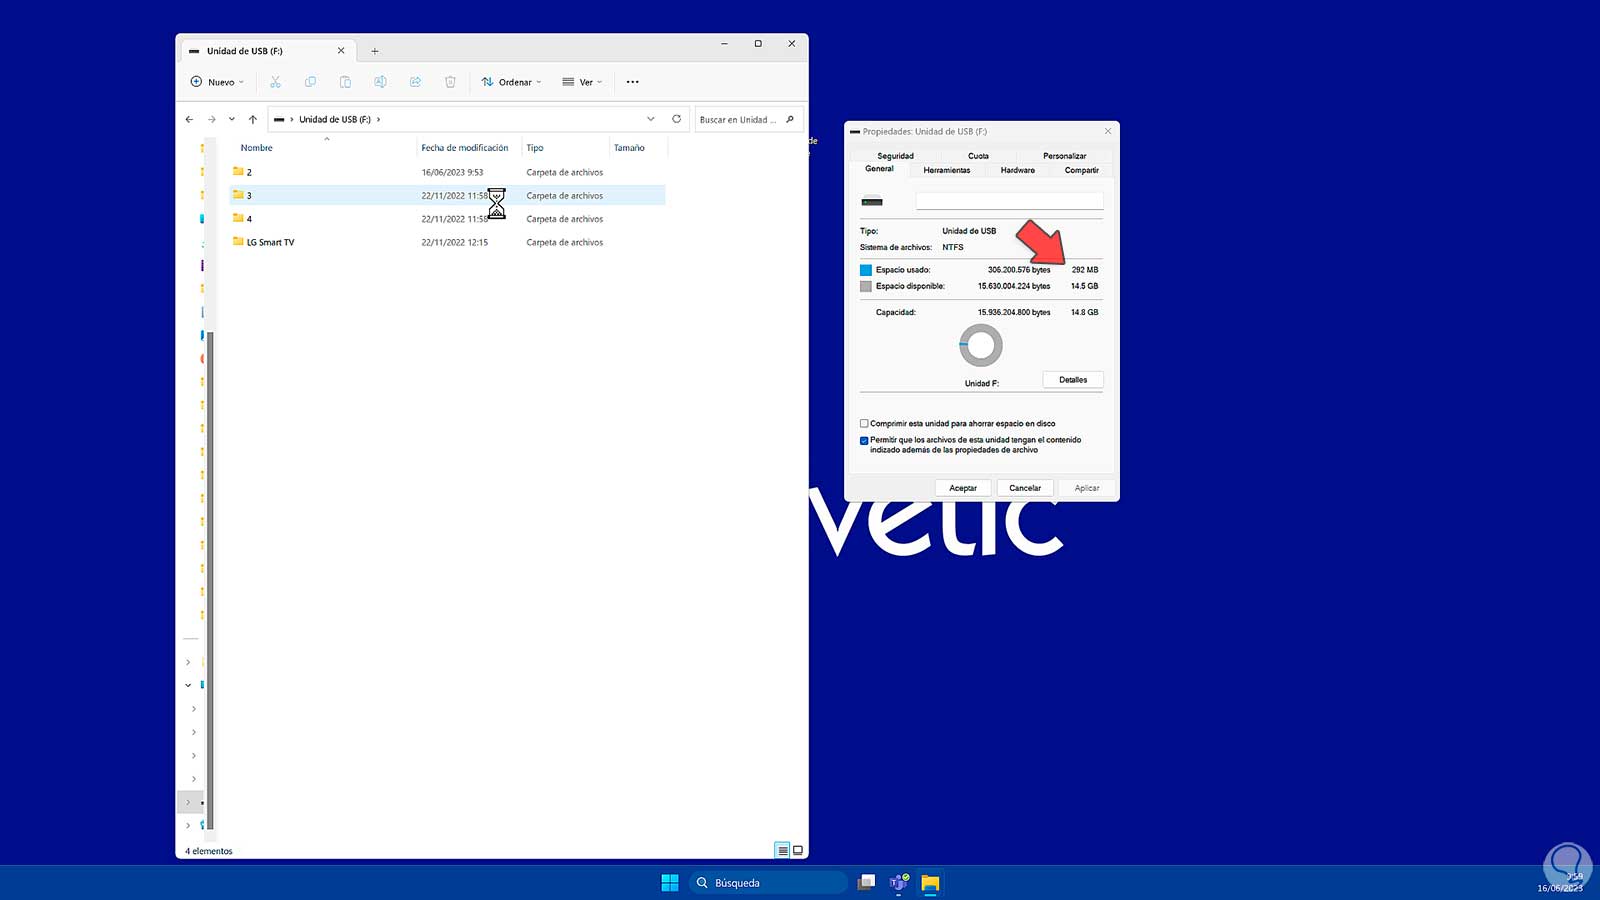
step 8
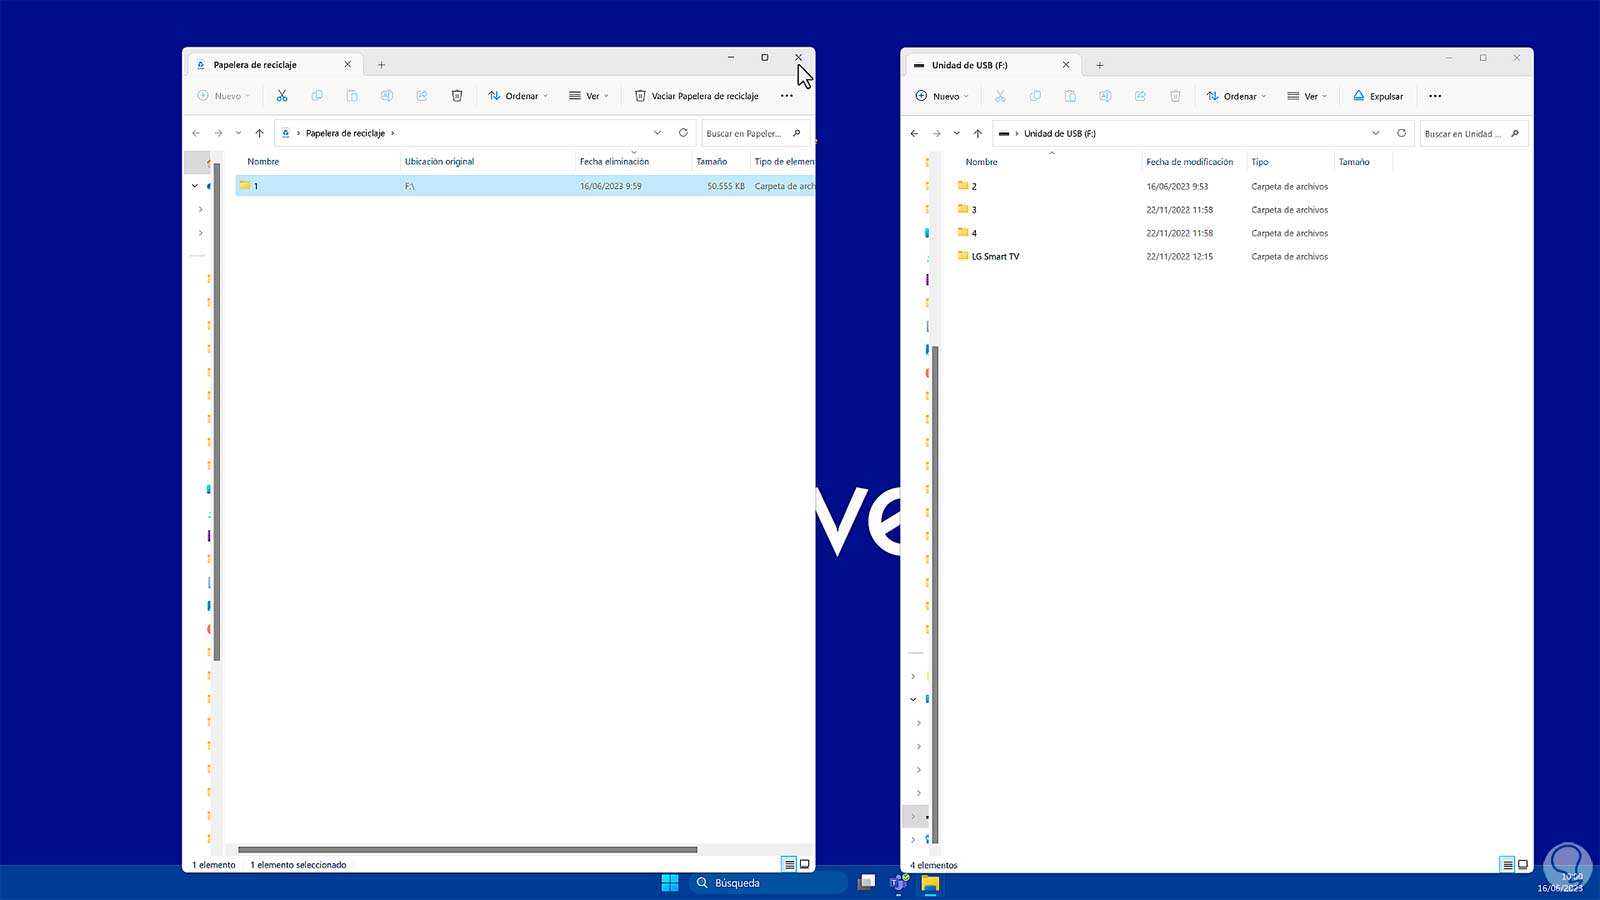
After this, the changes will have been applied. To check it we are going to open our USB drive. We see that we have a folder that we want to delete and that it has a certain weight within the USB drive.

step 9
If we eliminate it, we will see that it still has the same weight. This is because it has not been permanently deleted and is in the Recycle Bin.
step 10
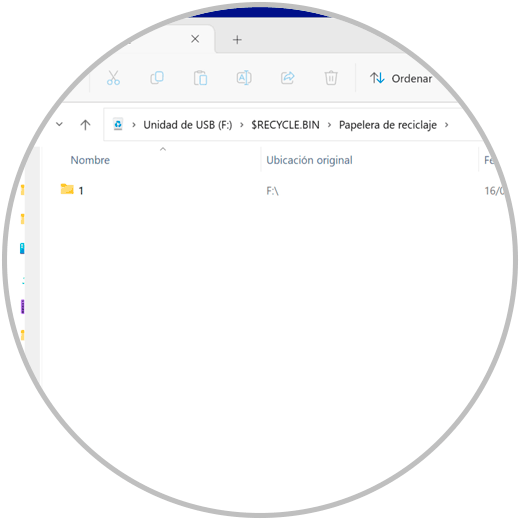
If we open the Recycle Bin we will see that the folder that we have deleted from our USB is there.
step 11
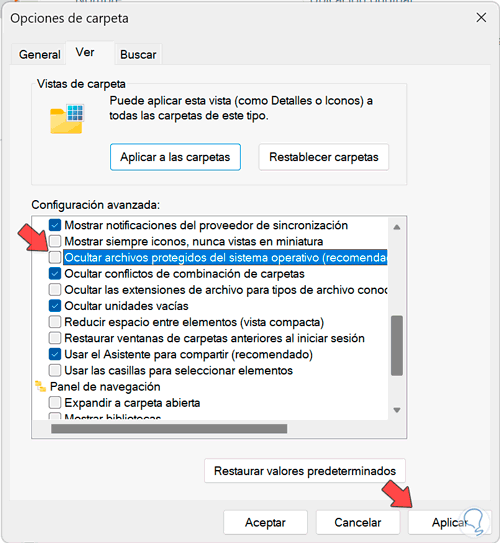
We can also make us see that recycle bin inside the USB memory. To do this, we go to the File Explorer window of our USB. Then click on the three upper points and then on "Options".

step 12
Here, we enter the "View" tab. Then we look for and uncheck the "Hide protected operating system files" box. Accept the notice that appears before continuing and finally Apply the changes by clicking on "Accept" or "Apply".
step 13
Now we will see that the trash folder appears inside our USB drive. Keep in mind that this option that we have activated allows you to see hidden system files on the entire computer.
step 14
If at any time you want to disable the Recycle Bin on the USB, go back to Registry Editor and delete the "RecycleBinDrive" value that we created. Remember that you have to recover deleted items first.

2 Set USB Recycle Bin size
Step 1
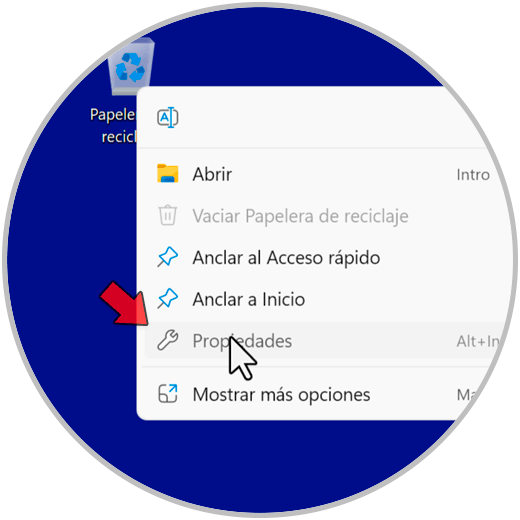
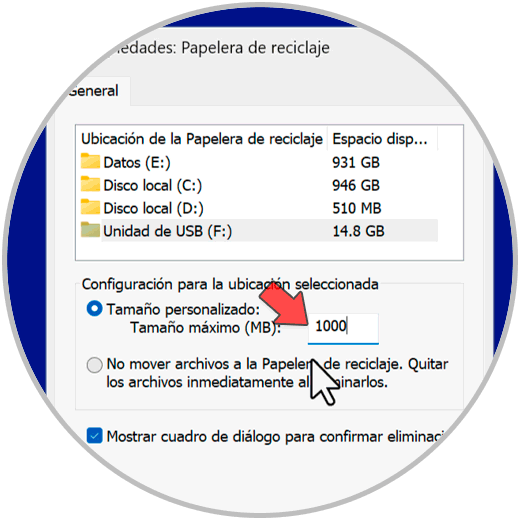
We have the possibility of configuring the maximum size that we will have for the volume on the USB disk. To do this, right click on the Recycle Bin icon and click on “Properties”.
Step 2
Then click on the corresponding USB drive. In the "Custom size" option, set the maximum size you want to configure. Apply the changes with "OK".
In this way we will be able to Create Recycle Bin on USB completely and prevent files from a USB from being automatically deleted..