One of the activities that we do the most in Windows is listening to music or watching movies, but additionally we can have access to podcasts and everything related to some audio, as users we can be demanding with the medium where the sound is reproduced and it is for This means that we connect an extra device to the one normally used, if this is your situation TechnoWikis has created this tutorial to explain how to change the default audio device and thus decide on the one that offers the best quality..
The task of changing the default audio device in Windows 11 or Windows 10 brings us a series of benefits and practical uses for users. With this task we can select the appropriate audio output according to each individual need, be it an external speaker or headphones. This provides an optimal and personalized listening experience. That is why we are going to see different ways to know Change Default Audio Device.
To stay up to date, remember to subscribe to our YouTube channel!
SUBSCRIBE ON YOUTUBE
1 Change default audio device from Quick Settings
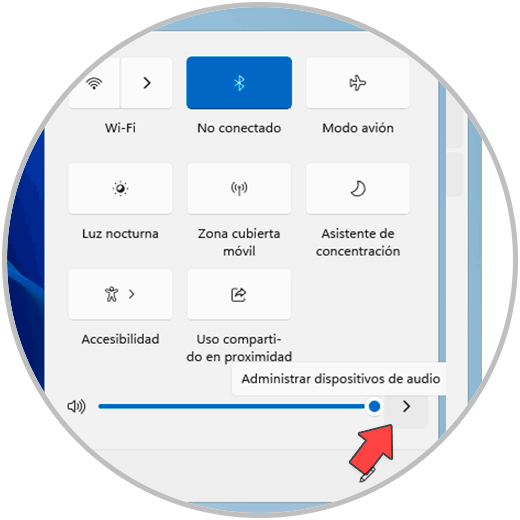
This is one of the simplest options to change our audio device, to use this method we will click on the volume icon that we see in the taskbar.
Step 1
After this on the slider bar we will click on the arrow icon on the side:
Step 2
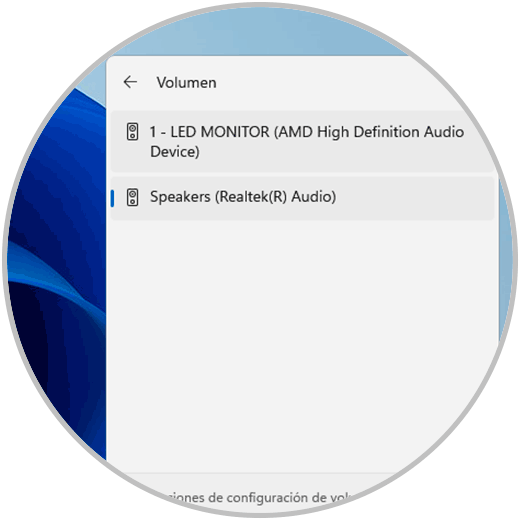
By clicking there we will see the available audio devices. Just click on the desired device to confirm this change.
2 Change Default Audio Device from Volume Mixer
It is another of the simple but functional options to establish our default audio device in Windows.
Step 1
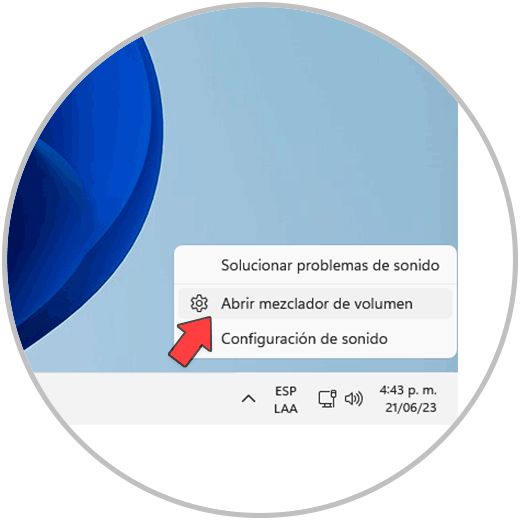
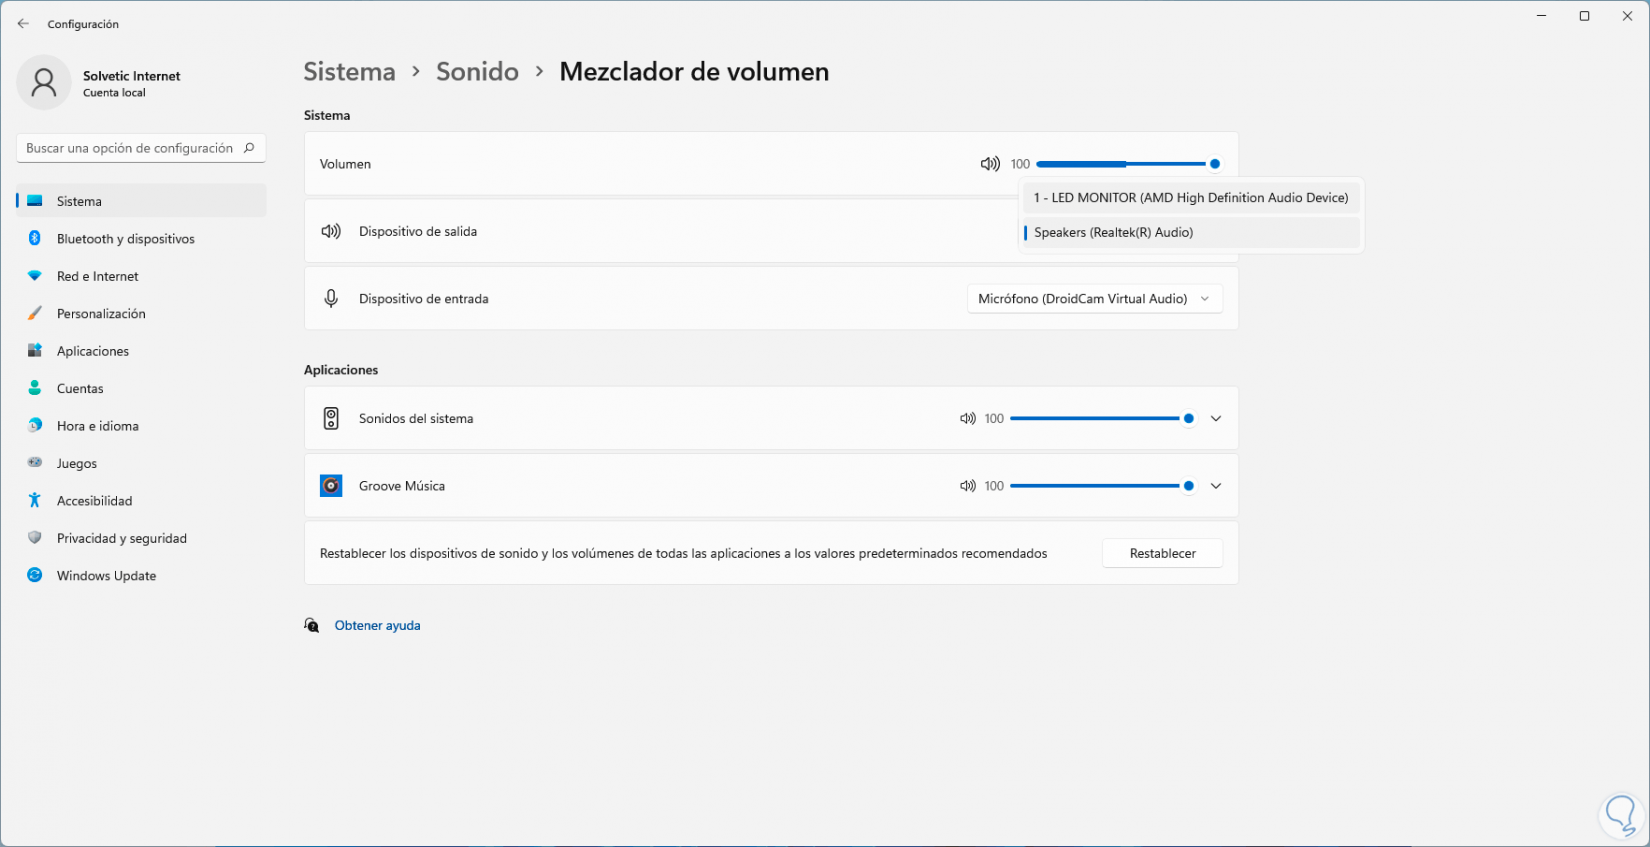
In this case we right click on the volume icon that we see in the taskbar and then click on "Open volume mixer":
Step 2
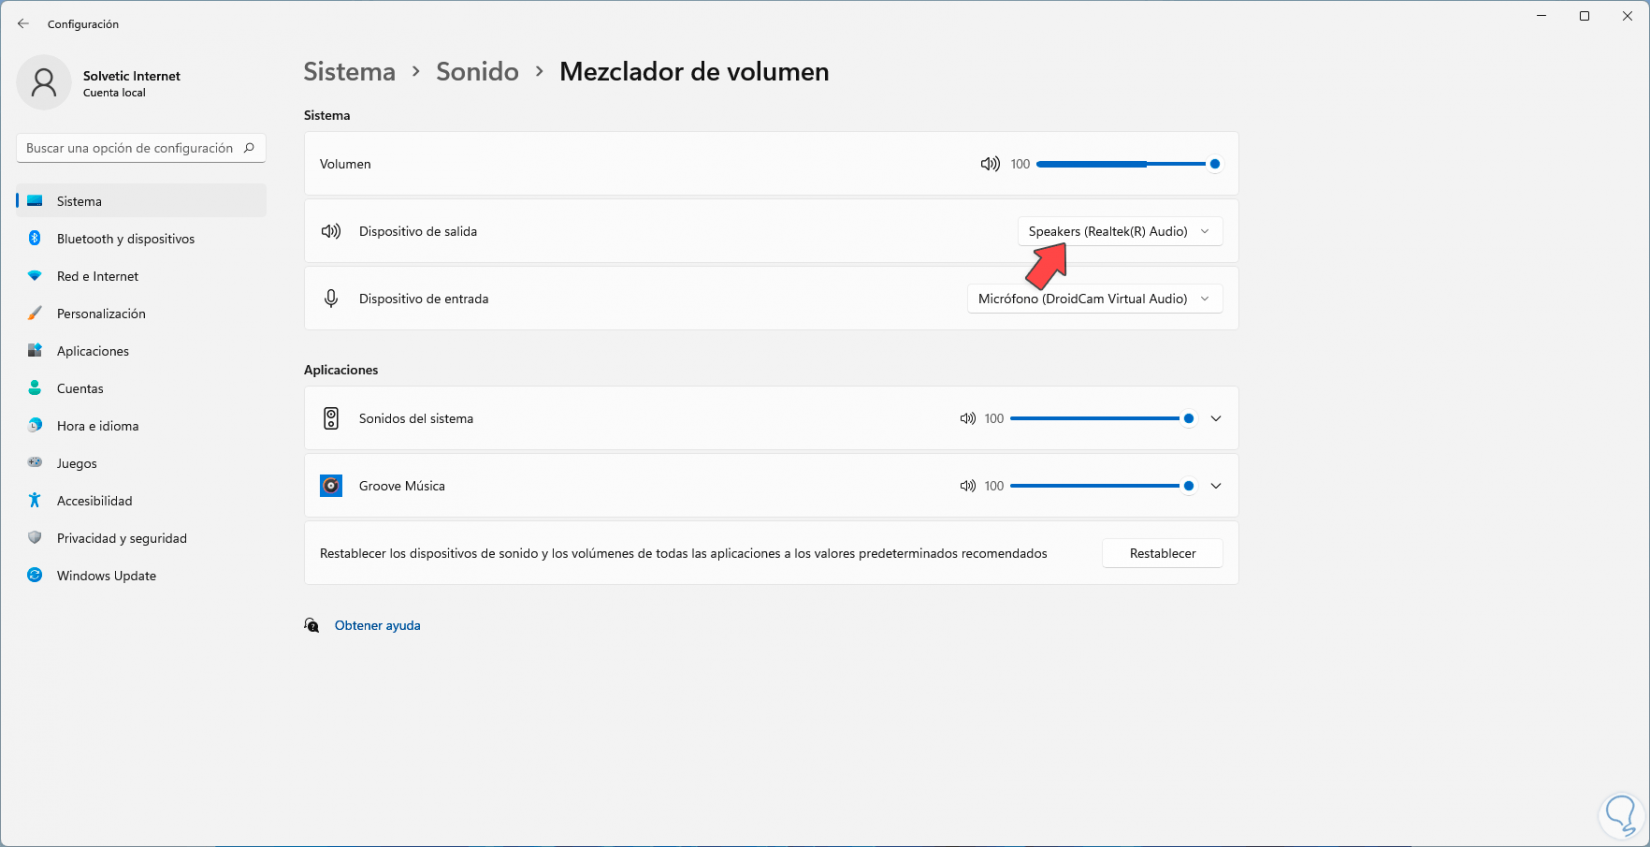
The following will open. In the "Output devices" section, click on the drop-down menu and select the new device to use:
Step 3
We click on it to make it the default.
3 Change default audio device from Control Panel
This is another of the options that Windows offers us to change the audio device for the one we consider best.
Step 1
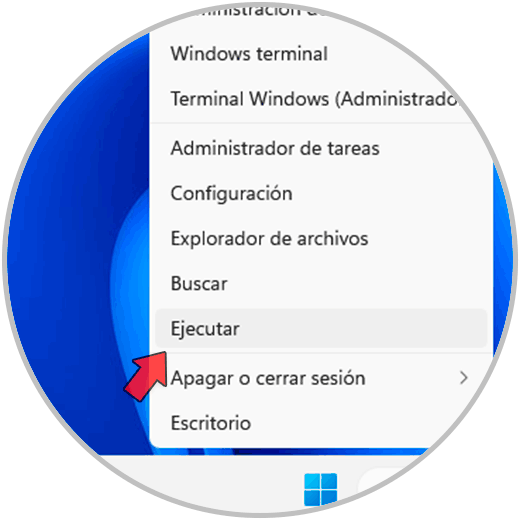
For this method we right-click on the Start menu and in the displayed list we select the "Run" option:
Step 2
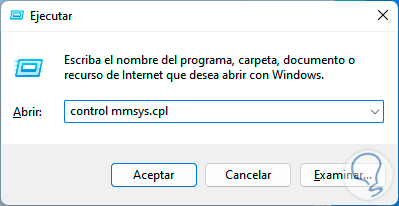
In the displayed window we will execute the following command:
control mmsys.cpl
Step 3
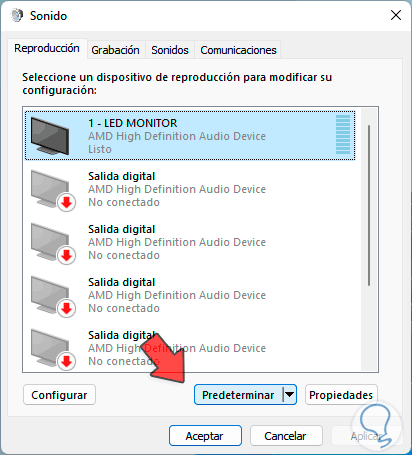
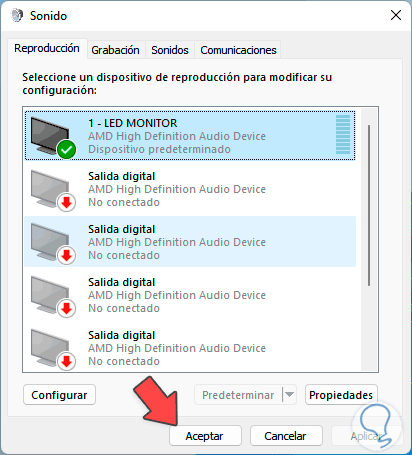
We click OK to open the following window:
Step 4
In the "Playback" tab we select the device and then we must click on the "Default" button. We can see the selected device with a check icon, we apply the changes.
4 Change Default Audio Device Using Xbox Game Bar
The Xbox game bar allows us to perform various activities in Windows such as recording, live streaming and more, therefore it allows us to define which device to use.
Step 1
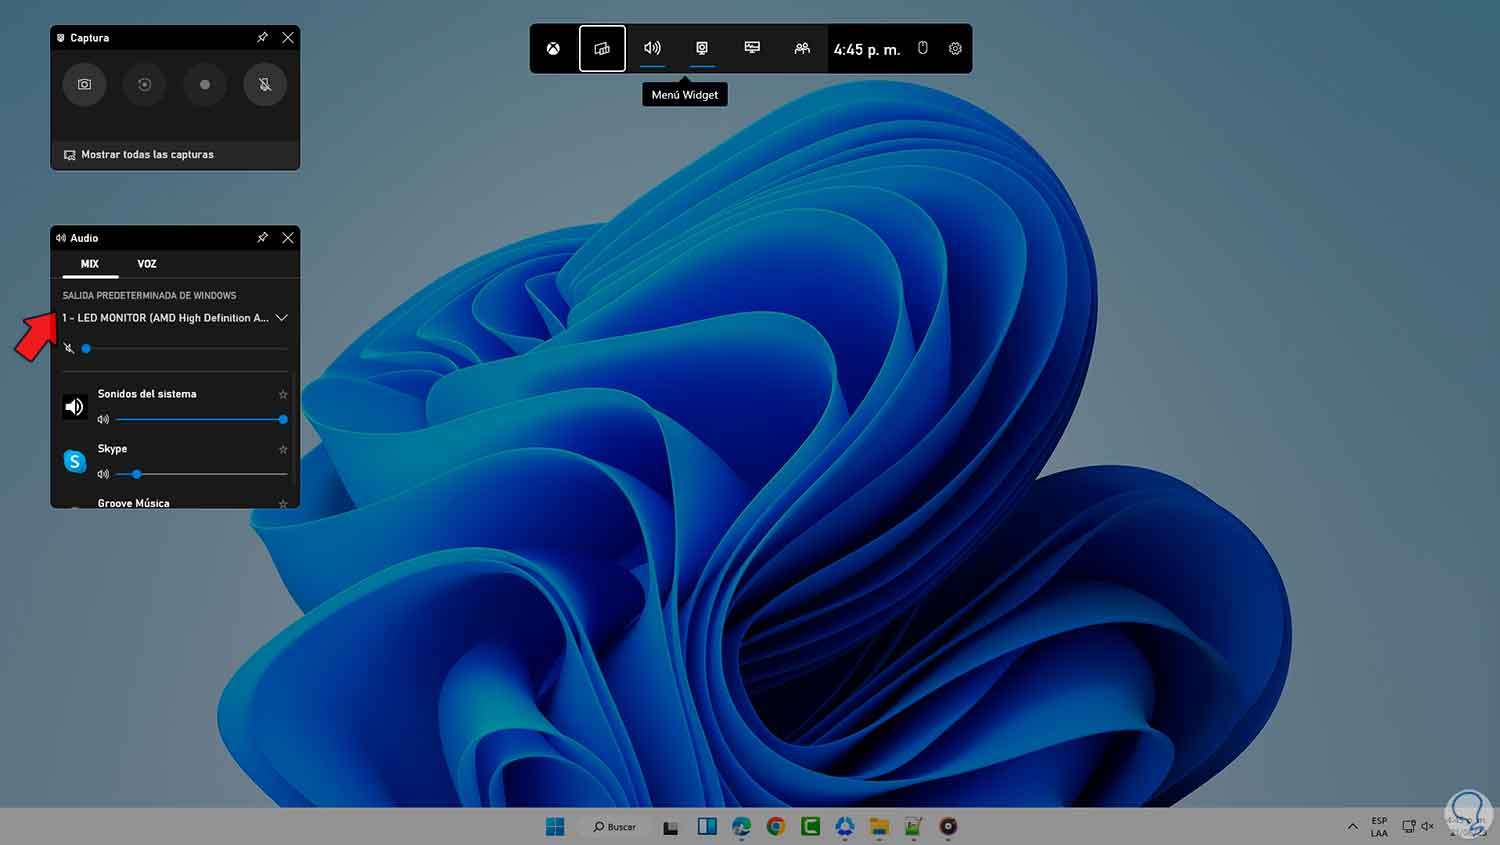
To access this bar we use the following key combination and we will see the following:
+ G
Step 2
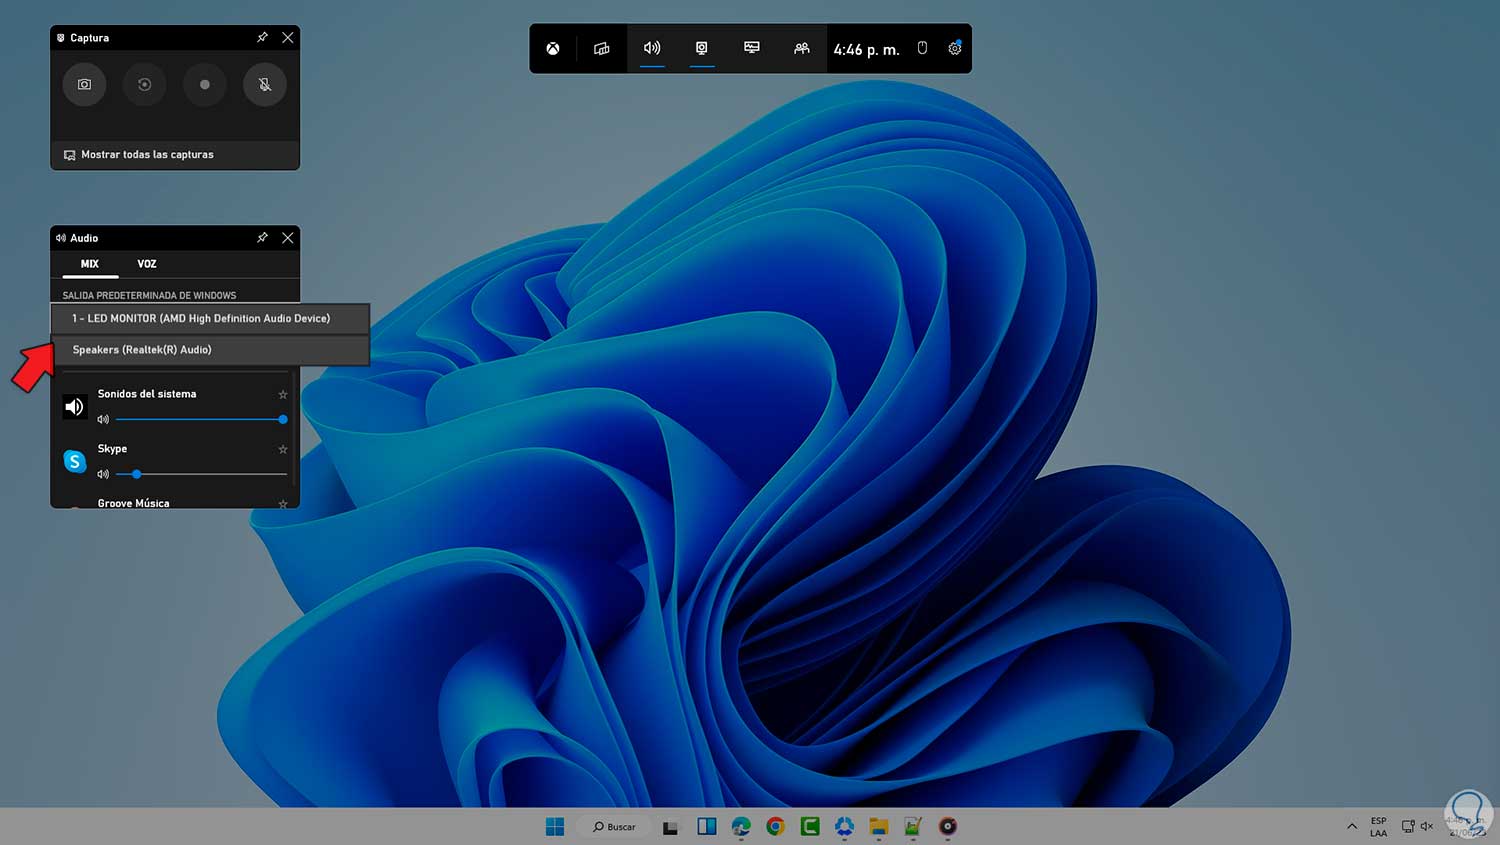
There we select the device to use in the "Windows default output" line:
Step 3
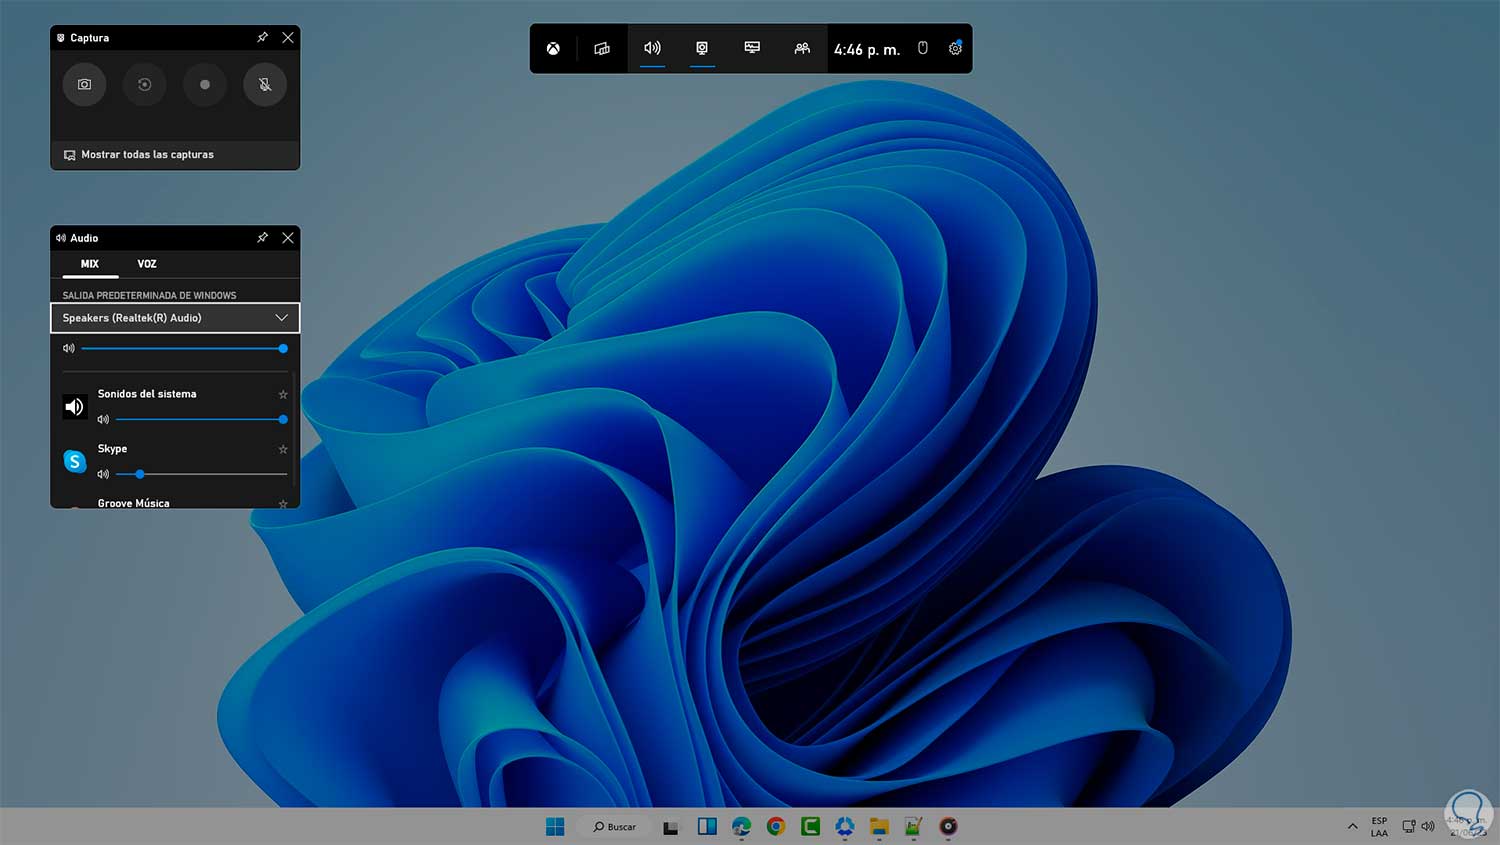
We can see that the device is changed:
5 Change default audio device from Settings
Finally, we can carry out this process directly from Configuration.
Step 1
For this we will go to the route:
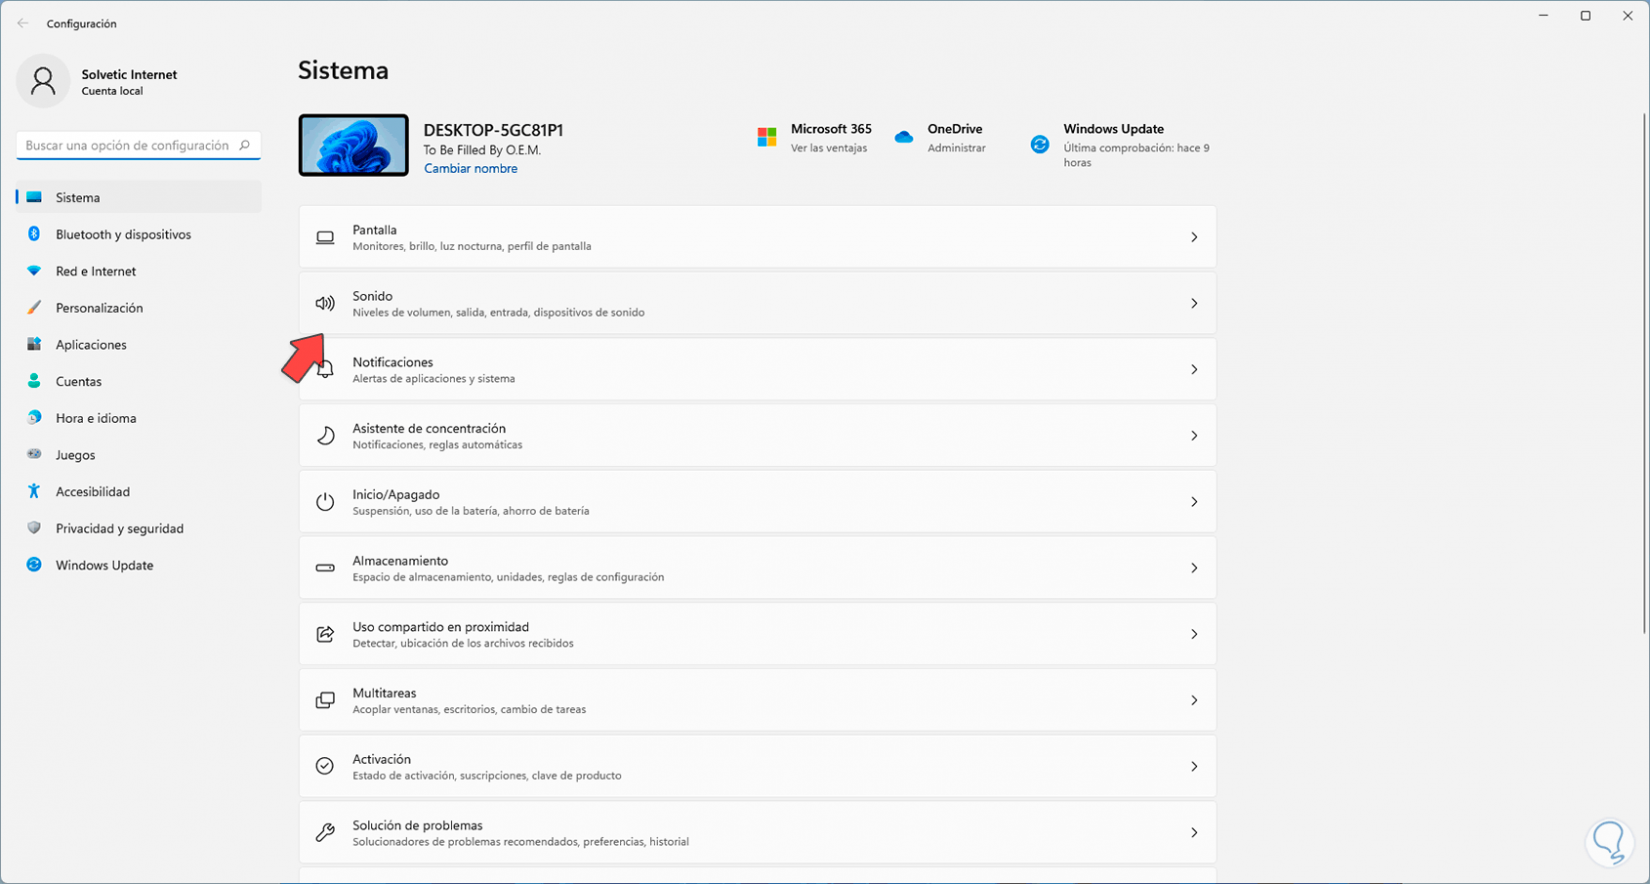
Step 2
By clicking there we will see the following:
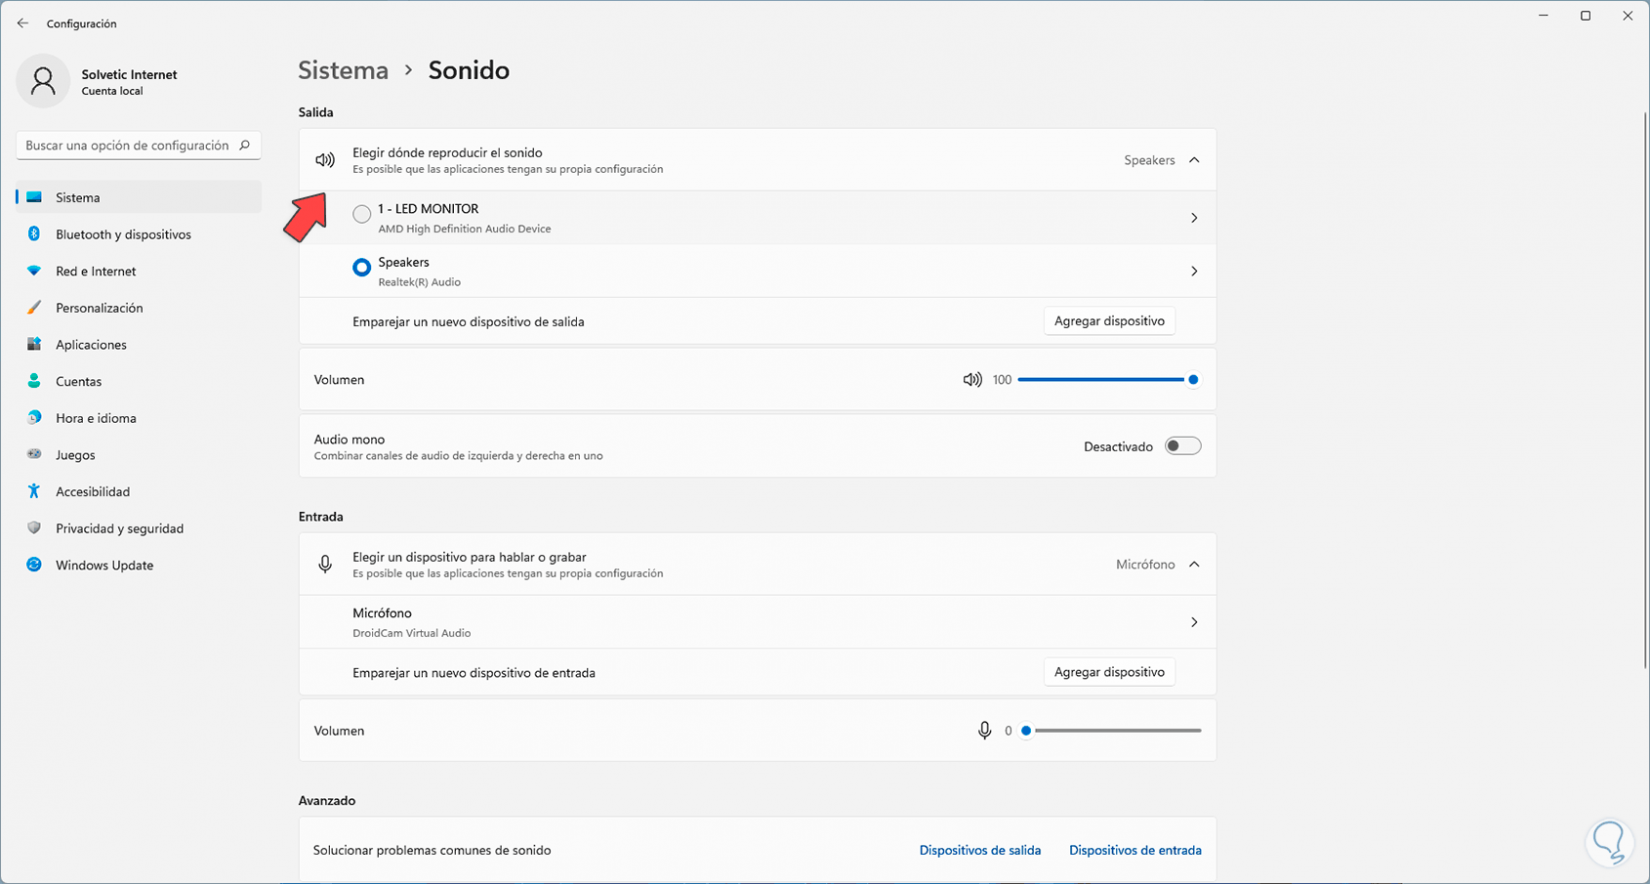
Step 3
In the section "Choose where to play the sound" we activate the box of the device to use:
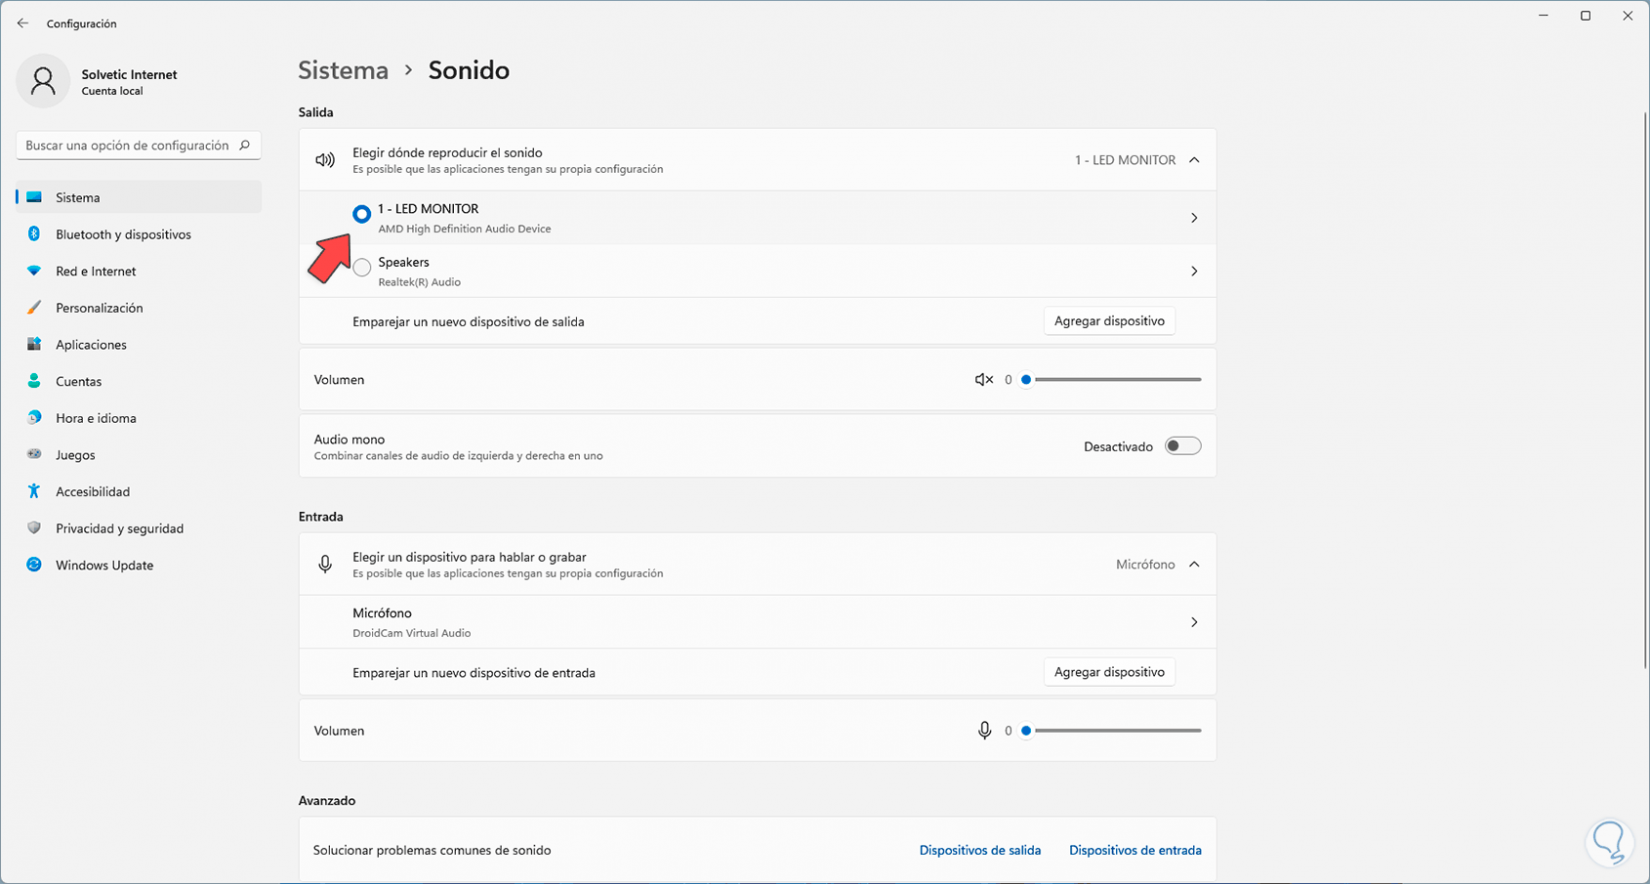
Step 4
We click on this to access the various options you have for use:
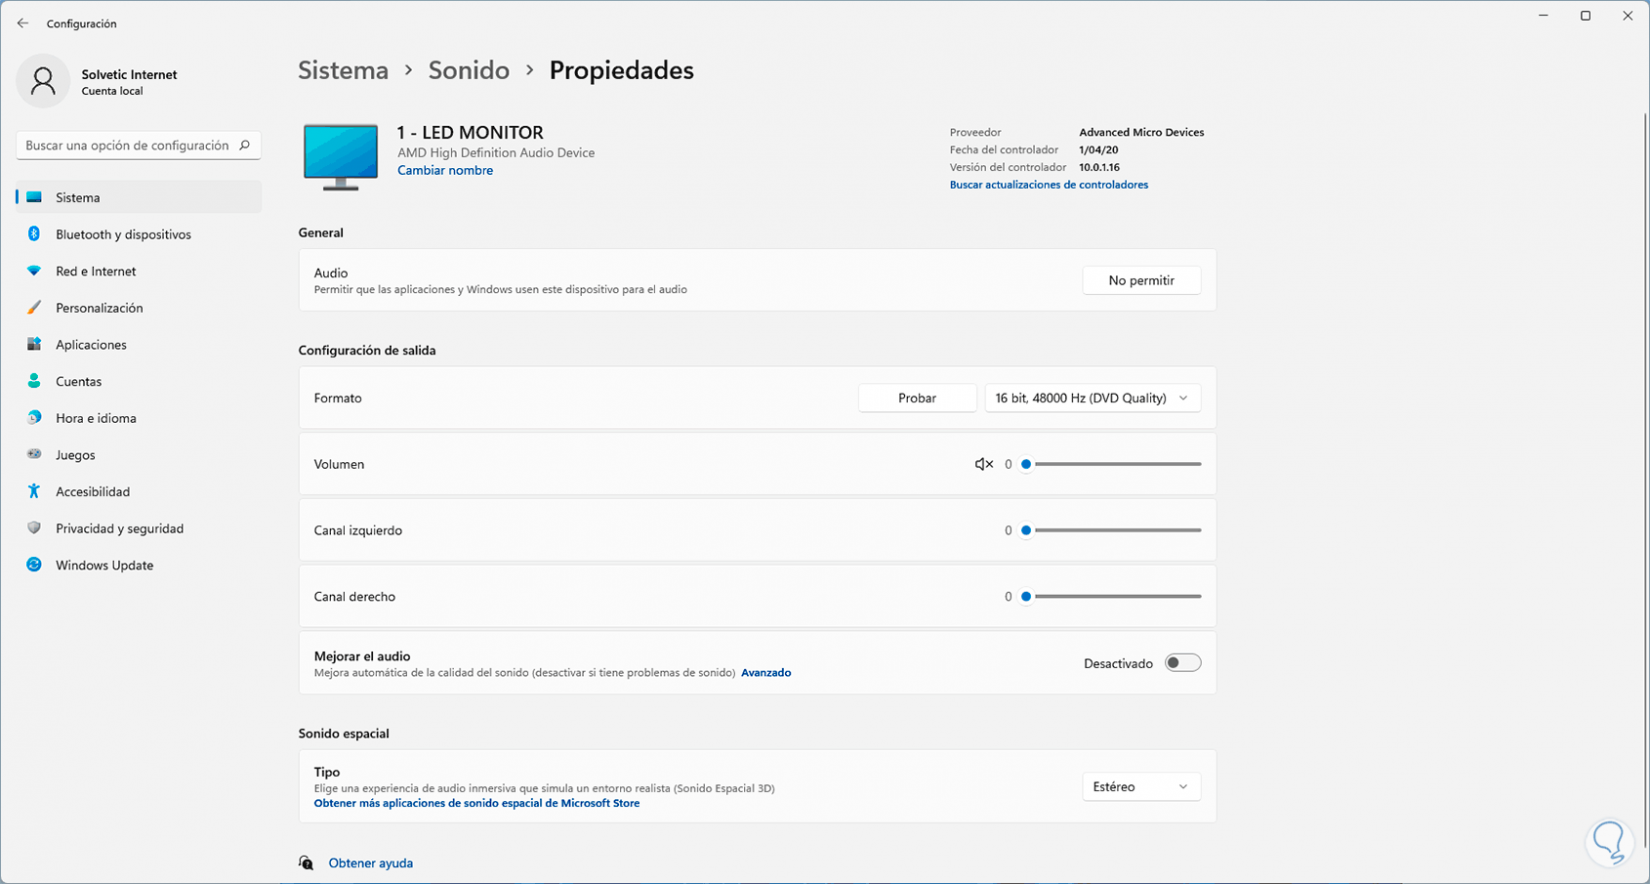
These options give us the opportunity to change the default audio device in Windows and thus have the best user experience..